DIY Loudspeakers: HOME INDEX UPDATES RESPONSE WHAT'S NEW
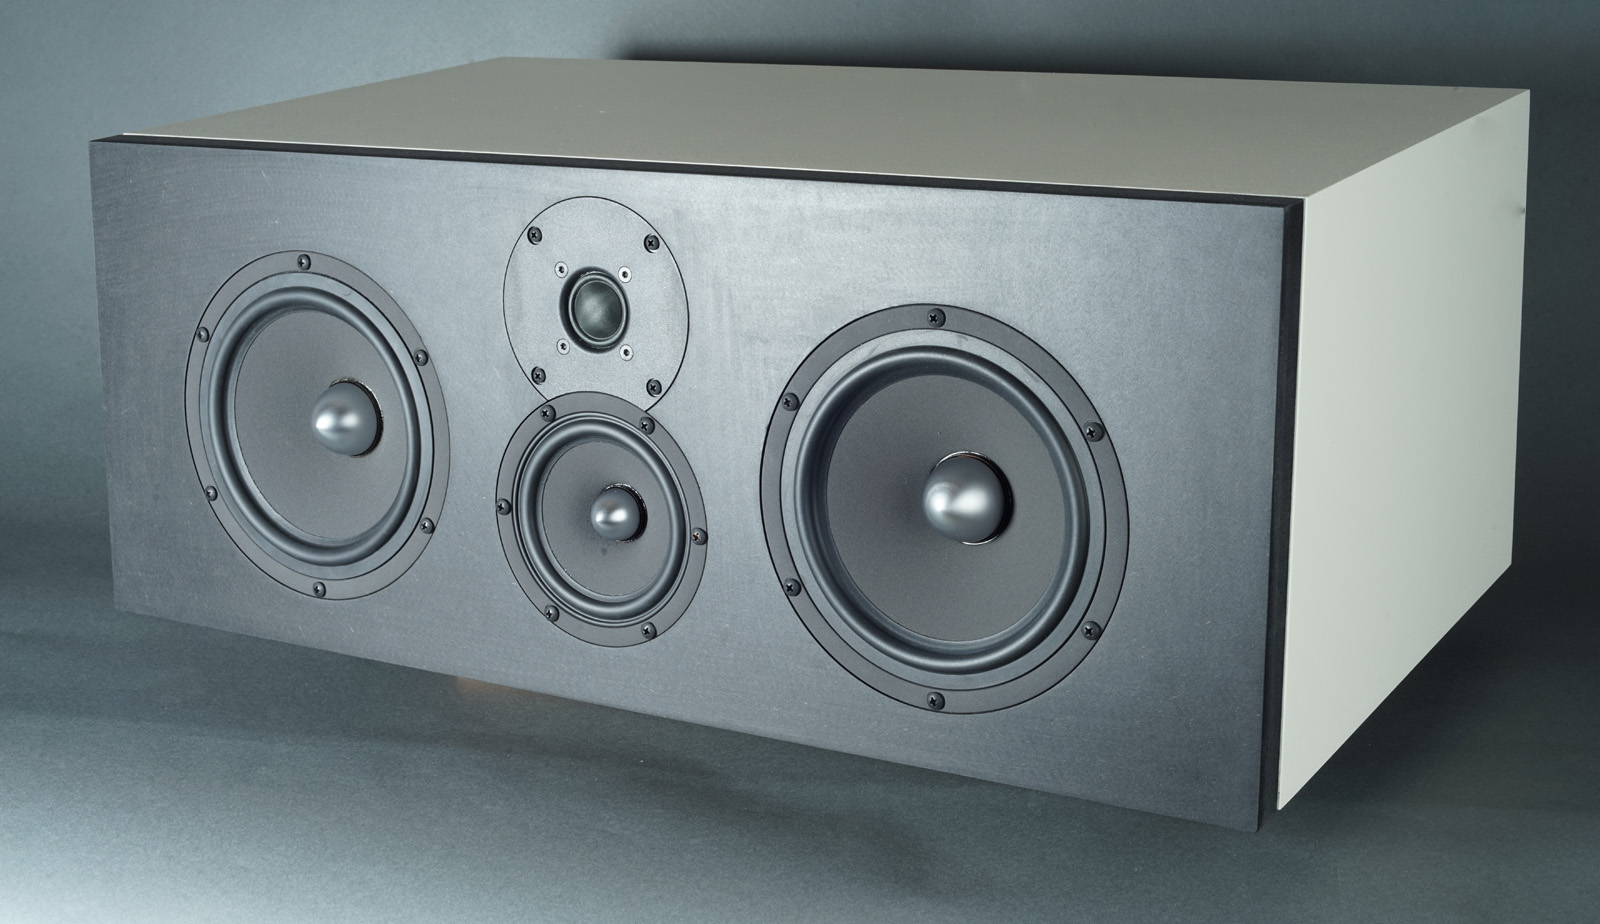
SEAS CENTER-641
PRESTIGE
SEAS CENTER-641 NEXT
Copyright 2015-22 © Troels Gravesen
Go to on this page:
DRIVERS
CROSSOVER
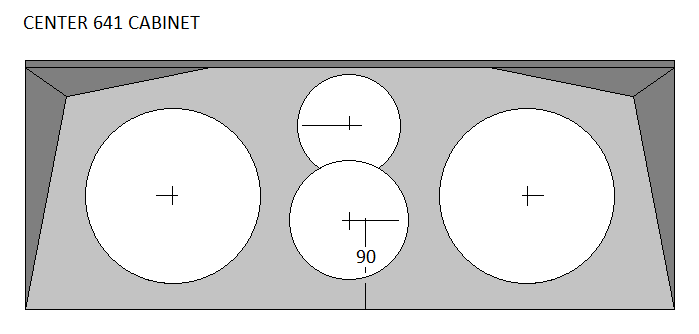
CABINET
MEASUREMENTS
SPEAKER-KIT
CROSSOVER-LAYOUT
FAQ
20-01-2021: Center 641 NEXT updated with new W18NX003 and new W12CY006 drivers. See below.
There are frequent requests for center speakers suitable for medium
sized speakers like the CNO-25, Peerless NOMEX164, all the 3-Way Classic
speakers, etc. Thus, this center speaker where you can use either
low-cost SEAS drivers from the Prestige range, or the more costly
SEAS Excel/Nextel coated range of drivers. These drivers have the same
diameter and having the drivers in stock it was obvious to make to
versions. And the crossovers are very similar by the way. Should you
ever want to up-grade the Prestige version to Excel, you only need to
change two crossover components.
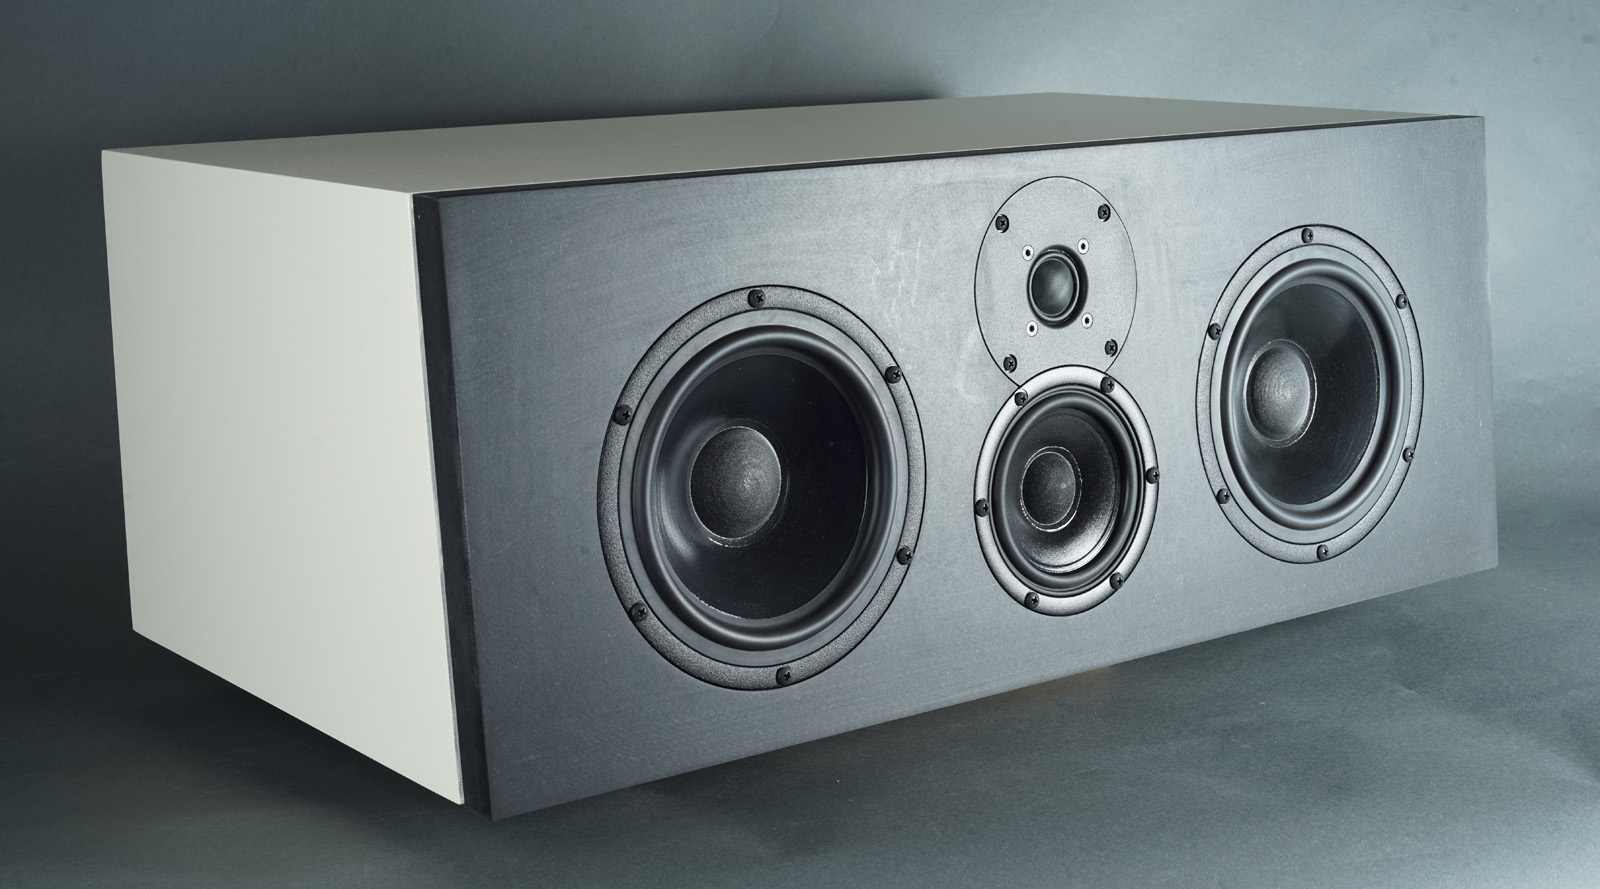
Center speakers should be 3-ways! Many center speakers are made from the
popular 2-way d'Appolito - and I've made a few myself - but from a
center speaker we need a strong midrange projection and we need an even
horizontal dispersion, something 3-ways are good at. We need everybody
in a 4 seat sofa to get the same experience. The strong midrange
projection makes understanding speech and vocals more easy and in this
respect these center speakers are no different from the Classic 3-ways
(SEAS and ScanSpeak) recently introduced. The same goes for Ekta, Ekta
Grande, SP44, SP38, all featuring 2-4 inch midrange drivers.
FAQ: Please DO NOT ask which one to
build. Yes, the Excel version is better than the Prestige version.
Little more detail, smoother sound. The issue here is whether we
would really notice much in a full 5:1 setup? Probably not, but the
choice is yours.
Would it make sense to build the Excel with the cheapest crossover?
Maybe, at least if a later capacitor upgrade was planned.
No, you cannot use any other drivers than those specified without
needing a new crossover, please read
here. And you
cannot change the front panel dimensions and drivers' placement either.
The baffle and driver's placement determines the frequency response of
the driver and the crossover is constructed accordingly.
Yes, you can make a vertical front panel and tilt the whole cabinet to
fit your listening position. If you do not have access to a table saw,
this makes cabinet construction easier. And yes, you can use Baltic
birch, MDF, hardwood, etc., to your liking. I've had a lot of questions
lately on bamboo based construction boards. I've never tried it and some
of the qualities I've seen seems to have too low density. In another
study the density was stated 0.85, which seems interesting. If you can
find high density bamboo boards, try it out and tell me what you
think.
Basic system data for both variants:
Sensitivity: 91 dB/2.8V, 1 meter.
Impedance: 4 Ohms.
Useful links (Please read before writing!):
http://www.troelsgravesen.dk/tips.htm
http://www.troelsgravesen.dk/crossovers.htm
http://www.troelsgravesen.dk/LCR-RC.htm
FAQ (Please read before writing!):
You cannot change cabinet front panel dimensions and drivers' placement
without needing a new crossover - and I cannot help.
You cannot use any other drivers with the crossover shown here.
Please read these files before e-maling:
http://www.troelsgravesen.dk/crossovers.htm
http://www.troelsgravesen.dk/choices.htm
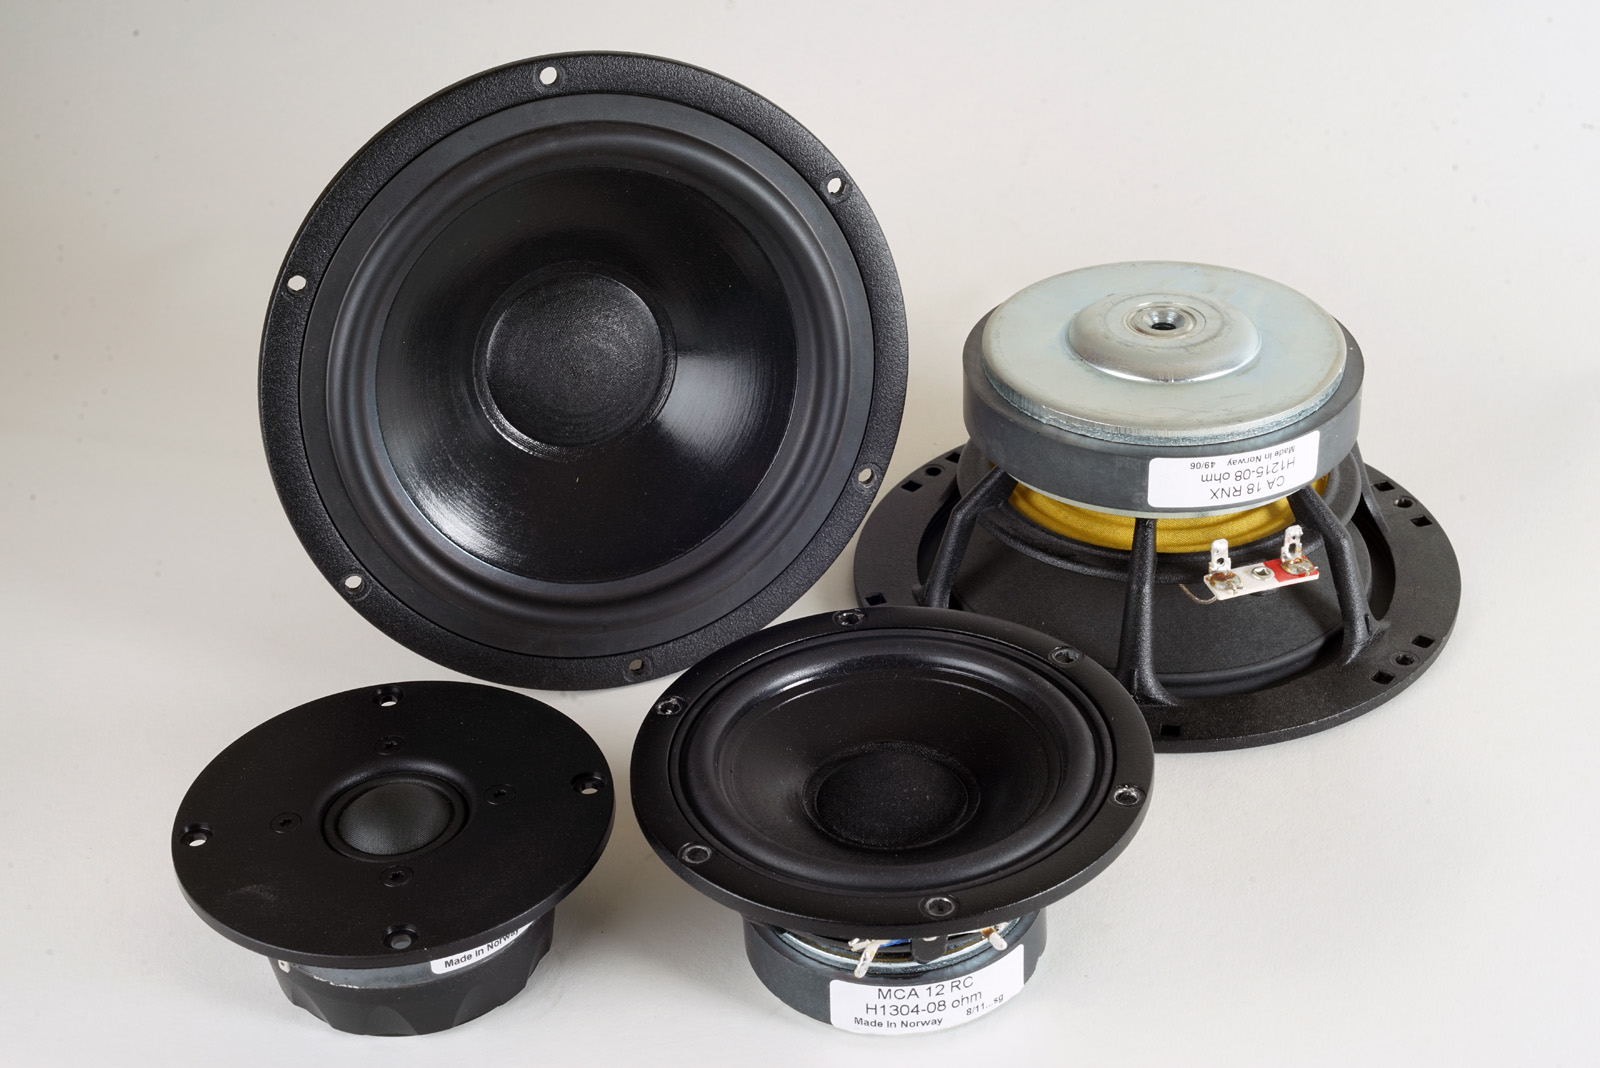
click images to view large
Download specs here: W18NX001 W12CY003 27TFFC CA18RNX MCA12RC
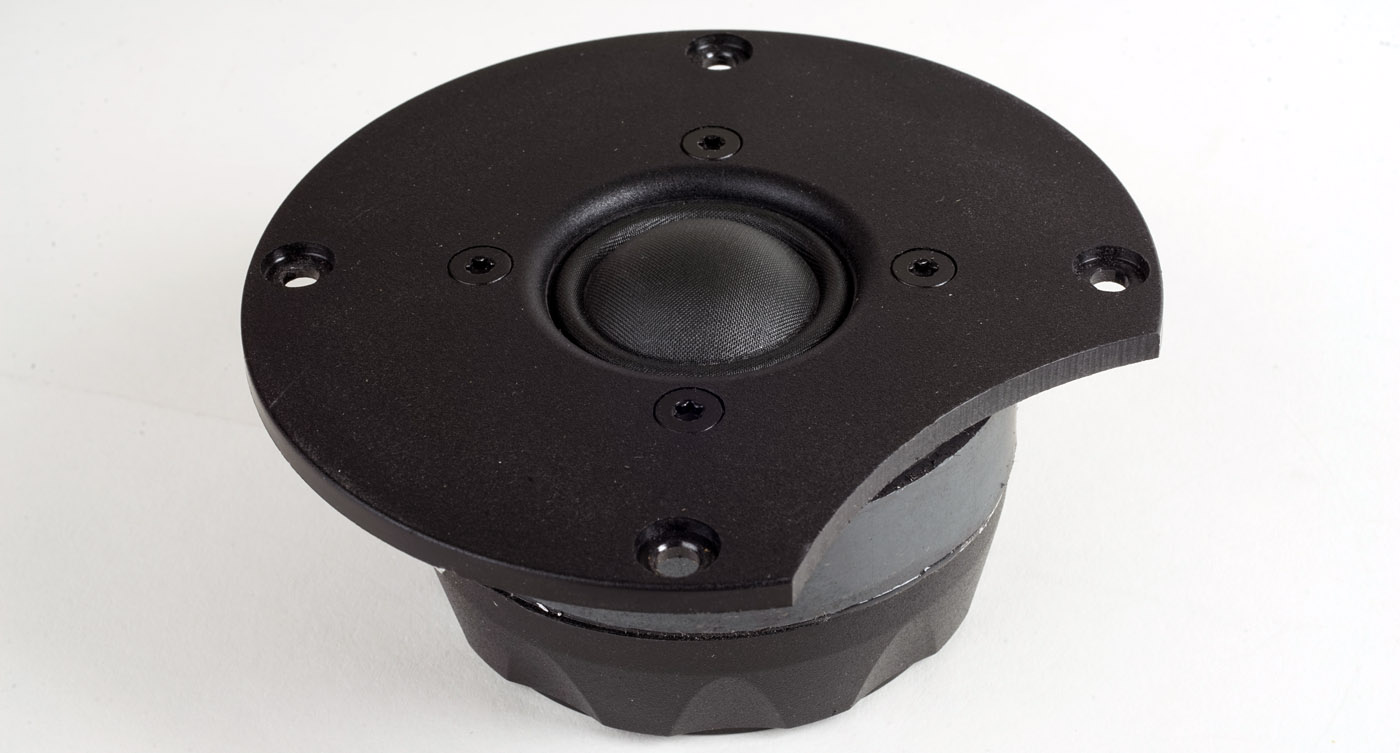
SEAS CENTER 641 NEXT is updated with new
W18NX003
and W12CY006
See
CNO-GRANDE for details on new drivers.
Also this on
W12CY006.
The updated W12CY003, now W12CY006
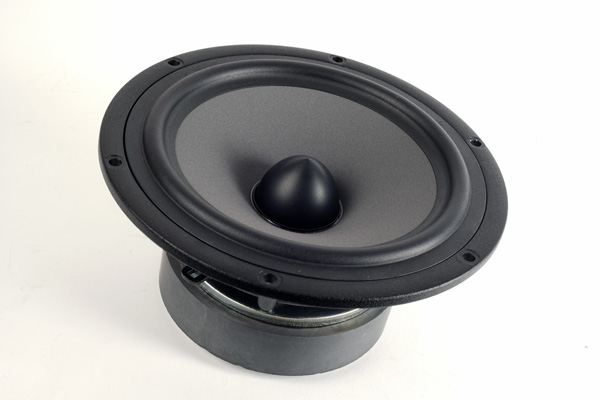
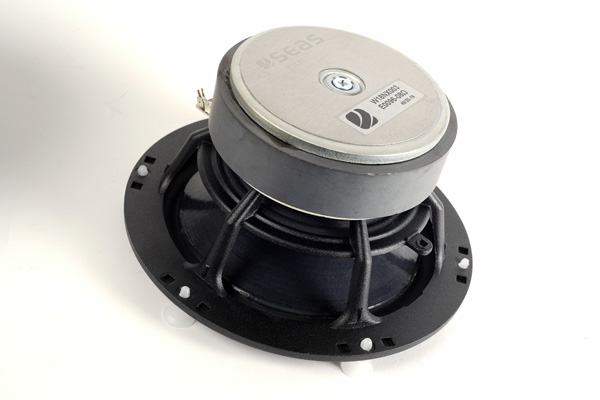
The updated W18NX001, now W18NX003.
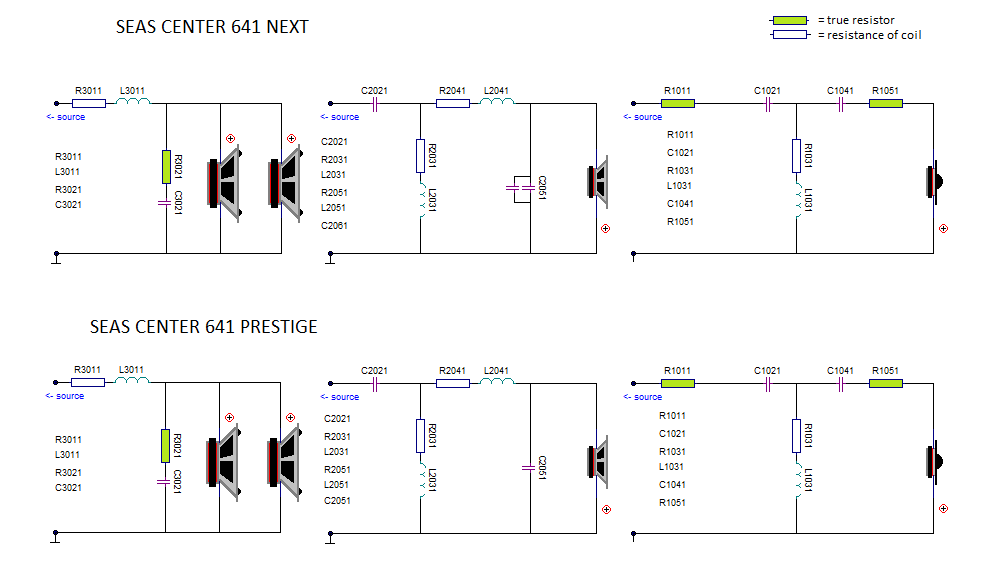
The basic topology is 2nd order between bass and mid, and 4th order
between mid and tweeter. The rationale for this is to get as good
off-axis response in upper-mid/lower treble as possible. In this
respect, LR4 is better than LR2. Search for "crossover lobing" if
interested.
The horizontal dispersion from this speaker could be further improved by
doing an LR4 crossover between bass and midrange. It was tried but
didn't pay back in terms of improved sound, on the contrary I
would say, and the increased crossover complexity made me go back to the
LR2 for this part of the crossover.
The vertical dispersion is in fact so good you could turn this speaker
upside down and use it as main speakers as well.
The two crossovers are identical except for C2051 and R1011. A later
up-grade from Prestige to Excel will be cheap - except for the drivers,
and well, also for better caps should you do a full upgrade. We
pay dearly for the best of sound.
Click images to view large

Click image to view large.
You can add mild faceting to front panel if
you like. This time I didn't.
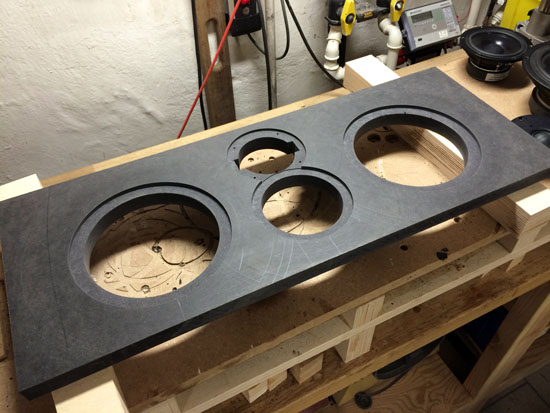
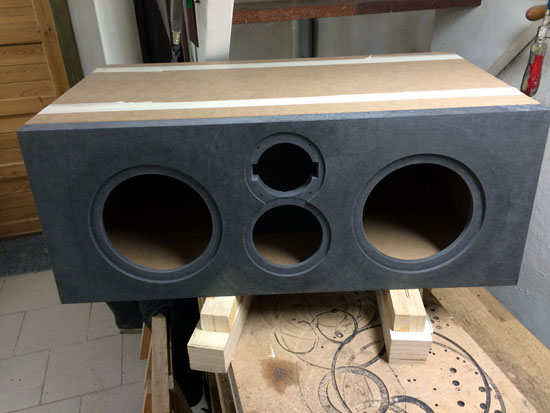
Construction images
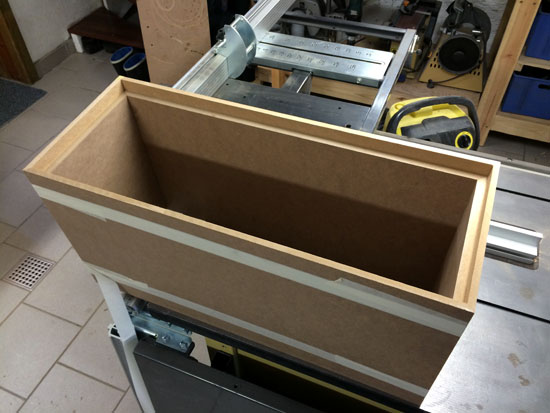
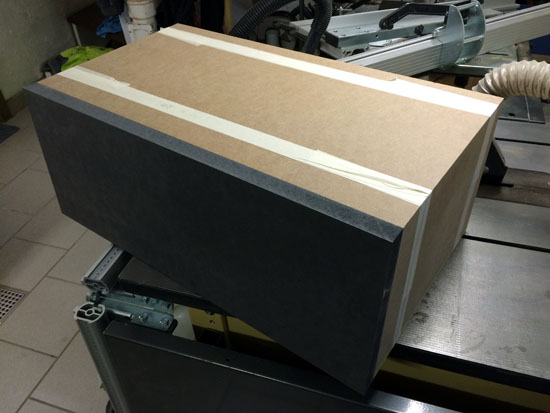
Building the cabs is pretty straight forward. Rectangular box, only the
front panel is slightly tilted (5 deg). Above fitting rear panel.
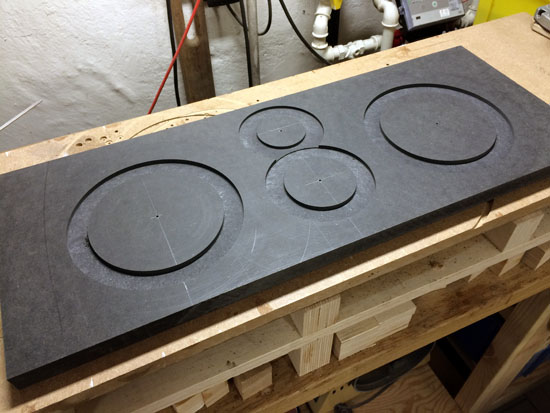
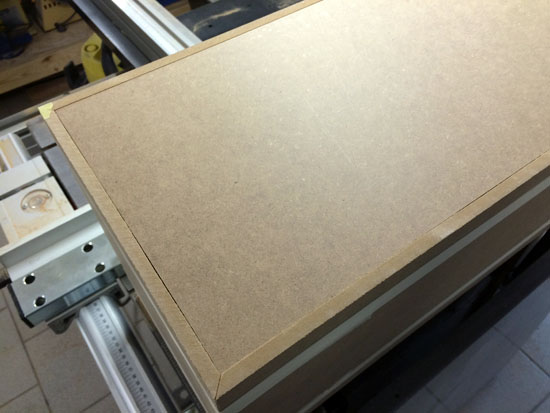
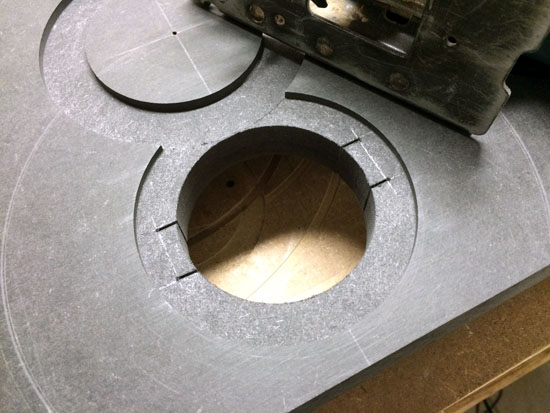
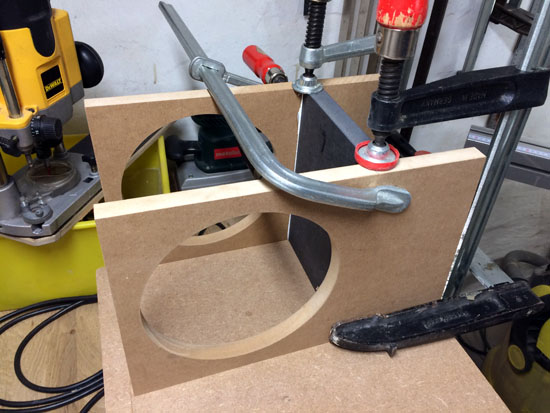
Front panel and initial driver routing.
Black MDF used for front panel.
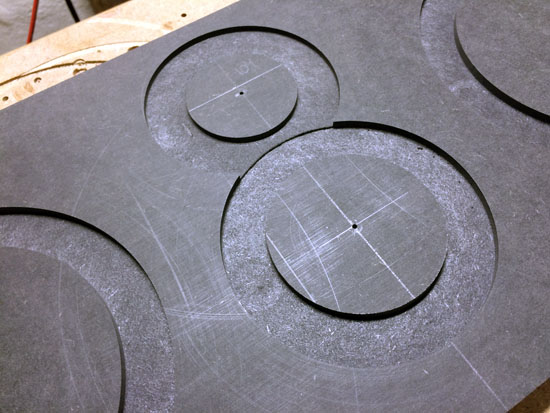
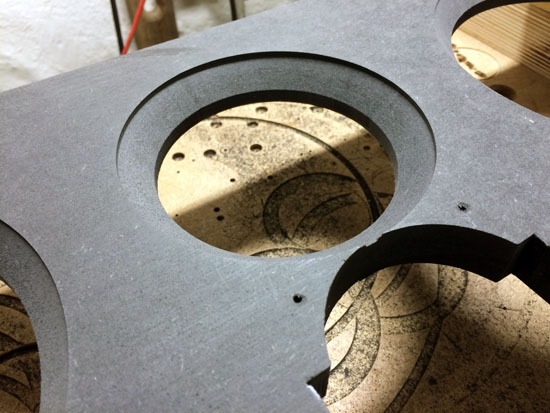
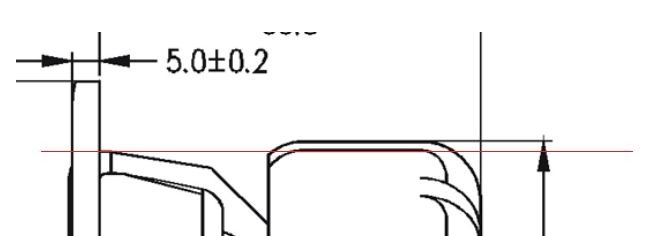
Routing for the middriver takes special precaution as we route into the
tweeter face plate. This to get the mid and tweeter as close as
possible.
To the right what happens when it turns out tweeter magnet
hole was too small! Fix center again and enlarge hole.
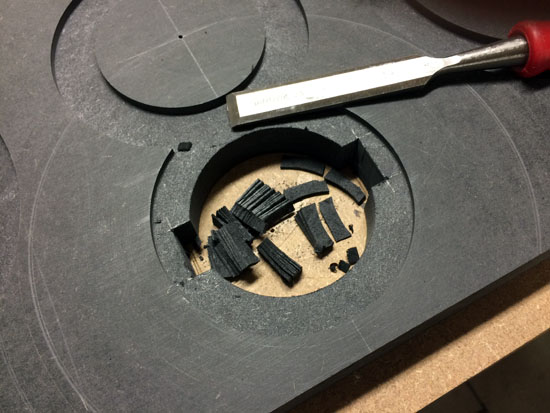
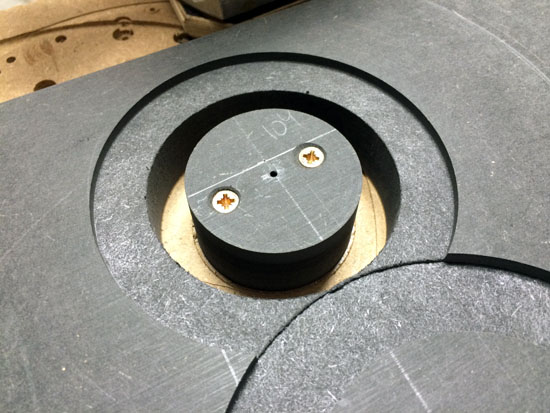
1. First we need to fully mount the tweeter. Use jigsaw and make room
for tweeter terminals.
2. Mount the tweeter with a couple of screws. Unfortunately the
faceflate of the tweeter cannot be removed as the dome diaphragm is
glued to the faceplate.So, we have to do the routing with the tweeter in
place.
3. See below. Use two 3 mm spacers between router guide and front panel
not to slide over the dome.
4. Lower router 0.1-0.2 mm at a time and make the tweeter cut-out. Move
the router slowly and if you have a router with adjustable speed, lower
speed a little not to melt the tweeter faceplate. Generally I found this
operation easy.

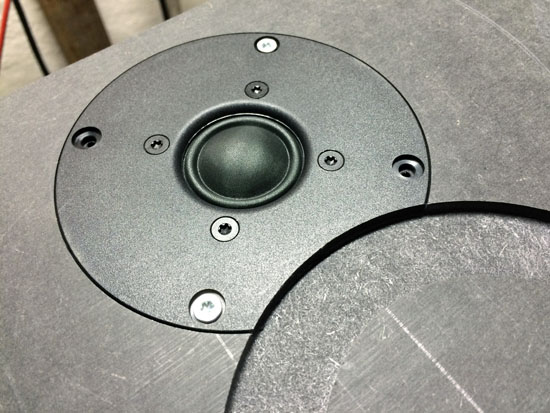
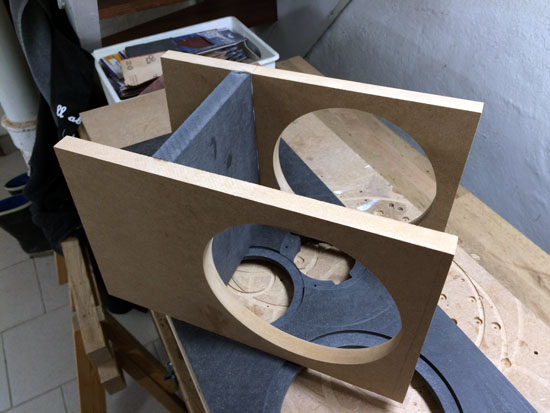
Above the finished cut-out. Remove tweeter again and finish the other
driver routings.
Click image to view large.
DO NOT forget to chamfer driver holes, in particular the midrange. I
used a 25 mm front panel and the midrange needs to breathe!
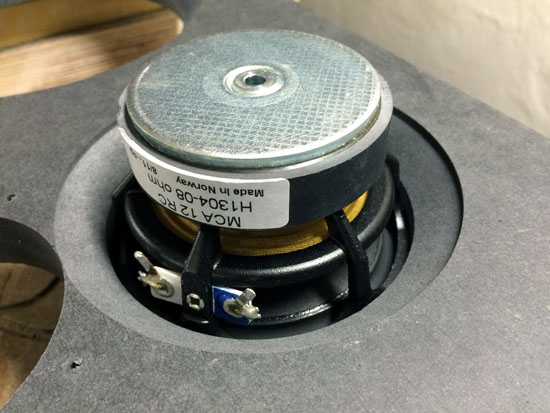
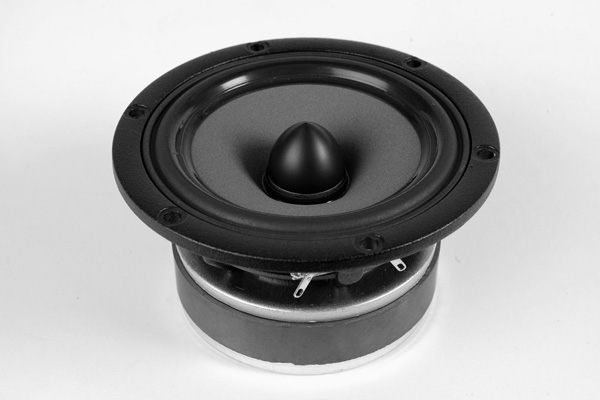
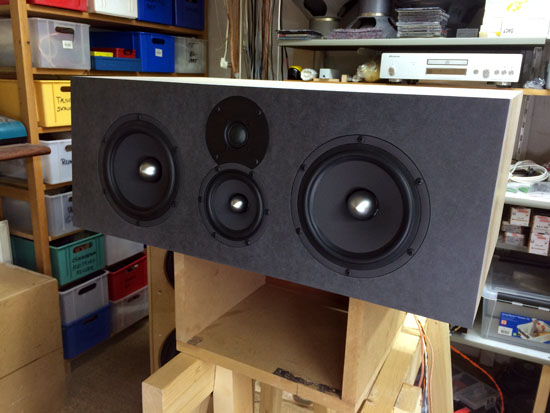
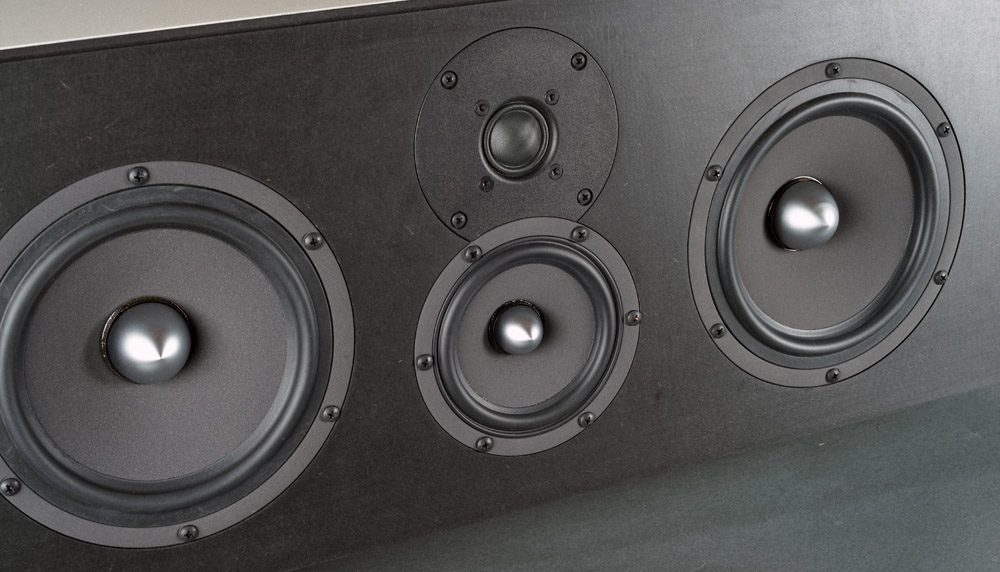
Left: This is what the mid should look like from behind. Right: Prestige
drivers in place.
The blue dot on the middriver is PLUS. Guess SEAS ran out of red paint.
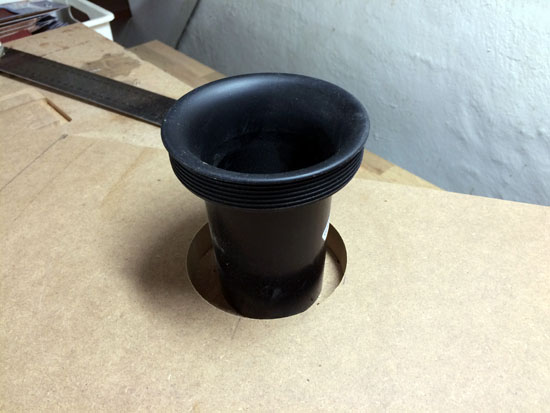
BTW:
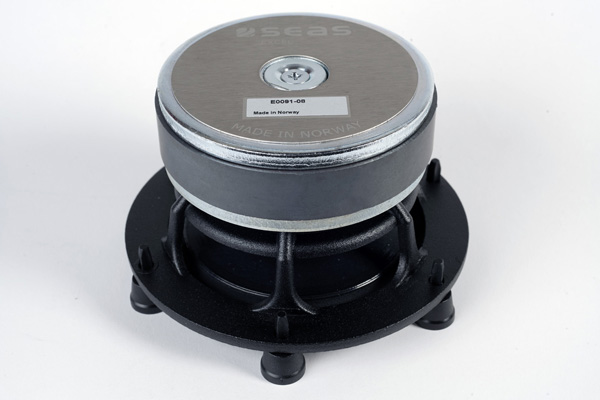
The rubber boot on the W12CY003 magnet is wider than the hole the basket
needs for mounting.
I recommend removing the rubber boot. It does no good here and only
further restricts air flow.
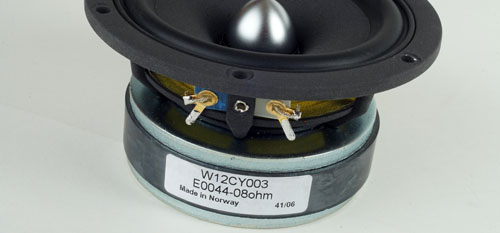
The blue terminal is PLUS.
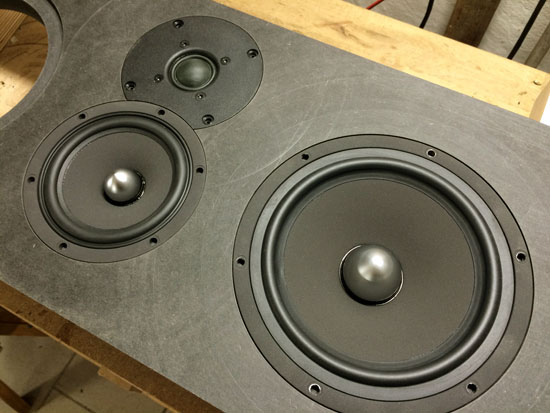
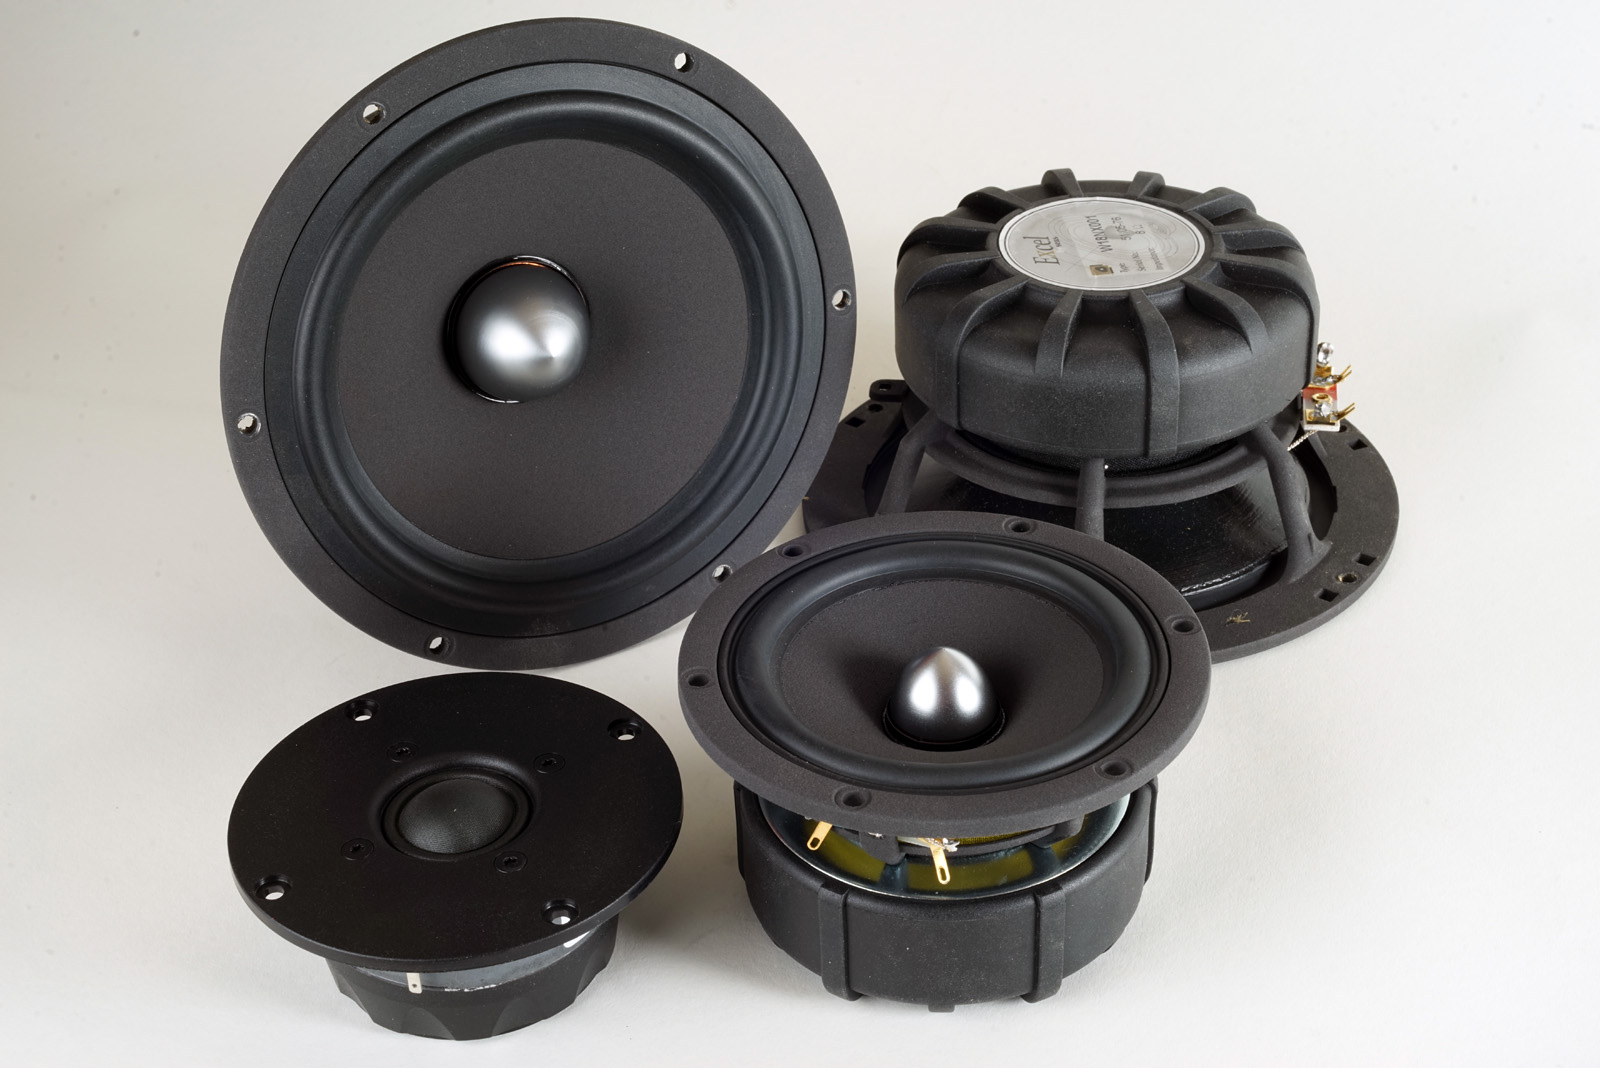
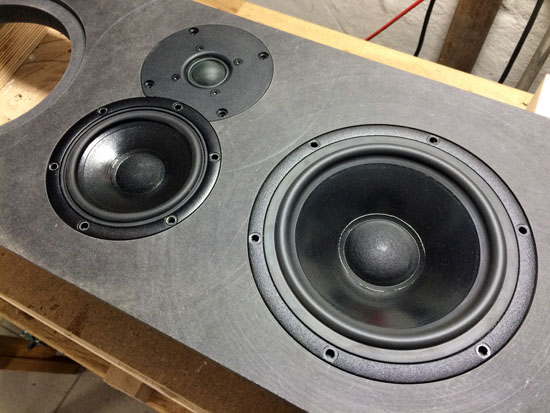
Left: Excel drives in place. Fortunately the drivers' diameter are
exactly the same going from Prestige to Excel.
Right: Cabinet parts ready for gluing.
Gluing the bracing/mid-tweeter cabinet.
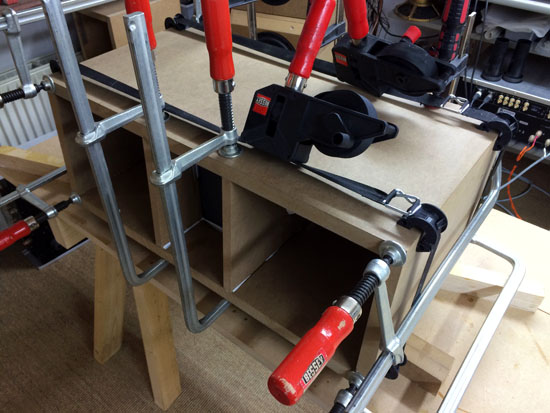
Routing for the vent and finally gluing the cabinet. Port length is 100
mm total length.
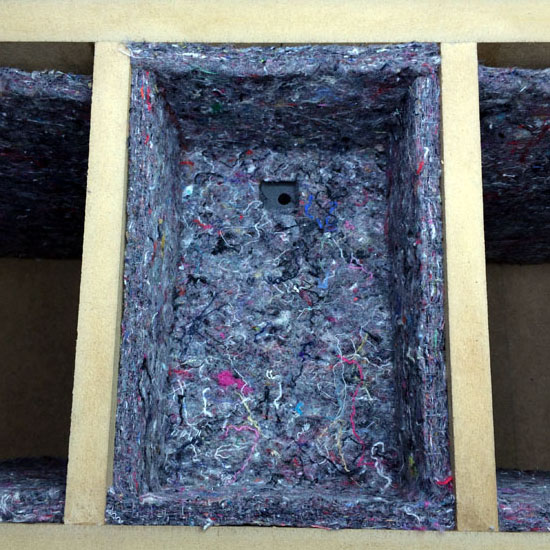
CABINET DAMPING
The Kit comes with 0.5 m^2 8 mm felt and 0.25 m^2 30 mm acoustilux.
FELT:
1. Cut two pcs 30 x 60 cm and place in bass cab like seen on photos
below. No felt on rear panel and panel towards mid.
2. Cut 1 pcs 35 x 14 cm for the mid cab. Ad felt to the side panels of
the mid cab as well.
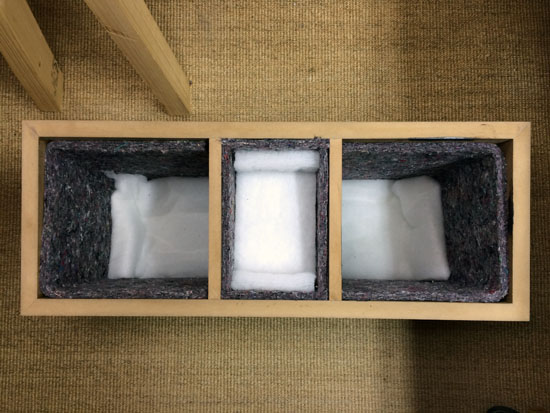
3. Cut 2 pcs 20 x 50 cm acoustilux, fold and place at bass rear panels
to cover crossovers, bass crossover in one and mid/tweeter crossover in
the other.
4. Cut 1 pcs 10 x 30 cm acoustilux and place in mid chamber as seen
below.
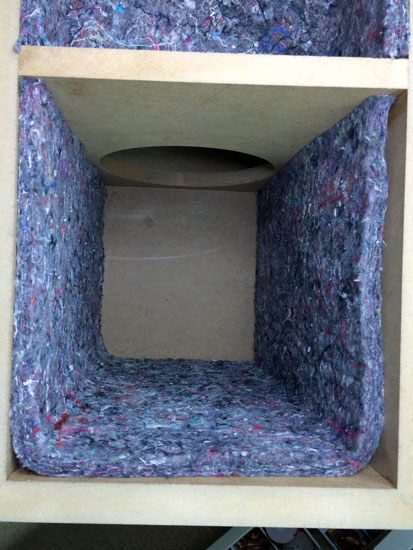
Right: Mid/tweeter chamber. Make sure to fill the wire hole with some
sealing once wires are in place.
Check tightness of midcab by stuffing the vent and pull one bass driver
while holding the other. The middriver's cone SHOULD NOT move.
Use strips of glue to fasten the felt material.

Right: Gluing the front panel.
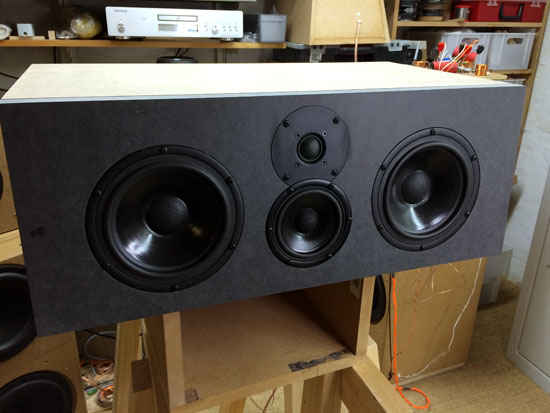
PRESTIGE and EXCEL ready for measuring data for simulation software.
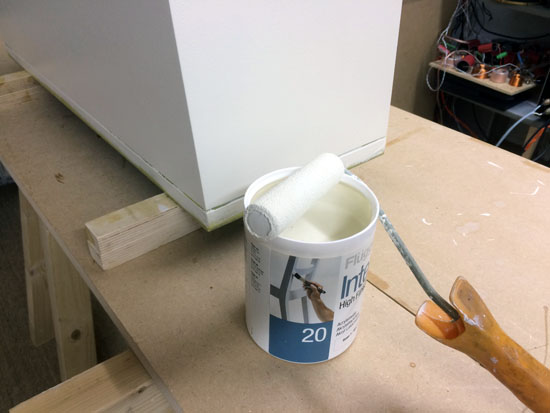
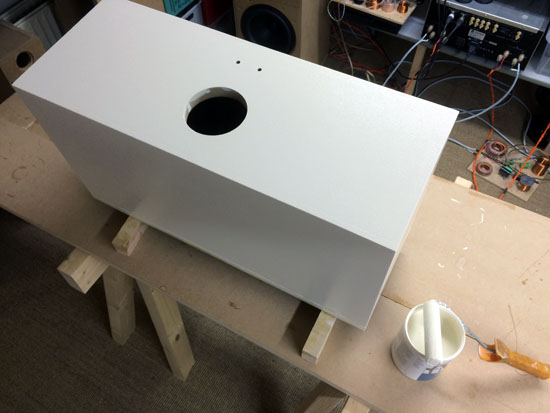
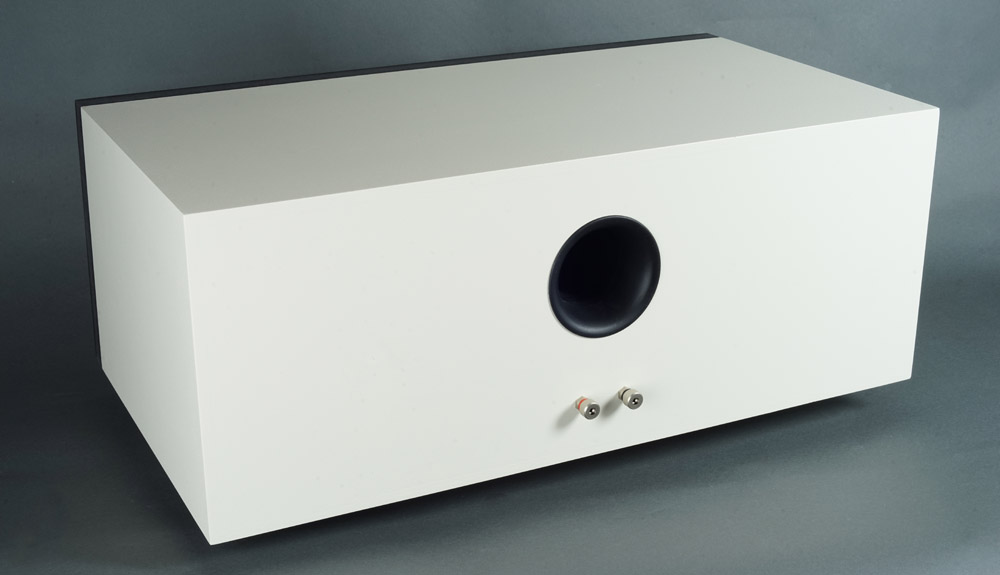
Cabinet finished with water based paint and a roller.
Measurements may give us an idea of tonal balance of a system, i.e. too much or too little energy in certain areas. Measurements may tell us about bass extension if far-field measurements are merged with near-field measurements. In addition to this ports may contribute to bass extension. Most of us diy'ers do not have access to an anechoic room for full-range measurements from 20-20000 Hz. What cannot be seen is what kind of bass performance we get in a given room. Bass performance is highly dependent on in-room placement of your speaker and the same speaker can be boomy in one place and lean in another. Actual SPL level at 1 meter distance and 2.8V input is useful for en estimate of system sensitivity and combined with the impedance profile may give an idea of how powerful an amplifier is needed to drive the speaker to adequate levels. What measurements do not tell is the very sound of the speaker unless displaying serious linear distortion. The level of transparency, the ability to resolve micro-details, the "speed" of the bass, etc., cannot be derived from these data. Distortion measurements rarely tell anything unless seriously bad and most modern drivers display low distortion within their specified operating range. Many people put way too much into these graphs and my comments here are only meant as warning against over-interpretation. There are way more to good sound than what can be extracted from a few graphs. Every graph needs interpretation in terms of what it means sonically and how it impacts our choice of mating drivers, cabinet and crossover design.
CENTER 641 PRESTIGE MEASUREMENTS
Left: SPL from drivers driven from crossover and summed response
(green).
Right: Final system impedance.
Left: Vertical dispersion measured at 0.5 m distance, from below
midrange driver to over tweeter level.
Right: Horizontal dispersion at 0, 10 and 20 deg (red-green-yellow).
Quite and even dispersion ensuring an even sound from a 4 seat sofa at
3-4 meters.
CENTER 641 NEXT MEASUREMENTS

Left: Final SPL/2.8V/1 meter from the next version. Right: SPL from
individual drivers driven from crossover.
Points of crossover is 800 and 2.7 kHz.
Left: Horizontal dispersion at 0, 10 and 20 deg.
Right: Vertical dispersion measured at 0.5 meter distance and evenly
distributed over a line from bottom of cabinet to top of cabinet.
The vertical distribution is in fact so good you could turn this speaker
upside down and use it for main speakers.
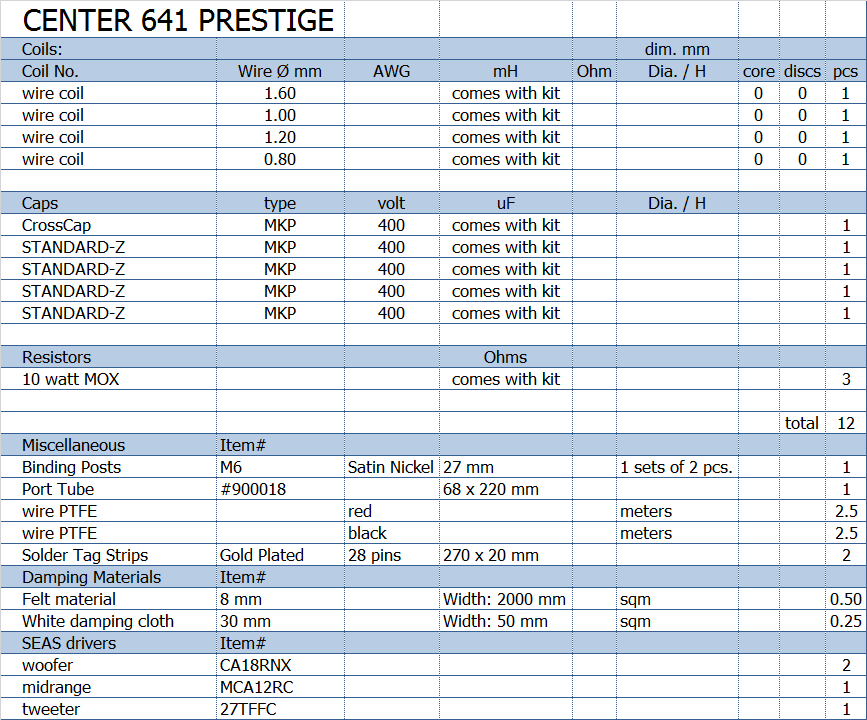
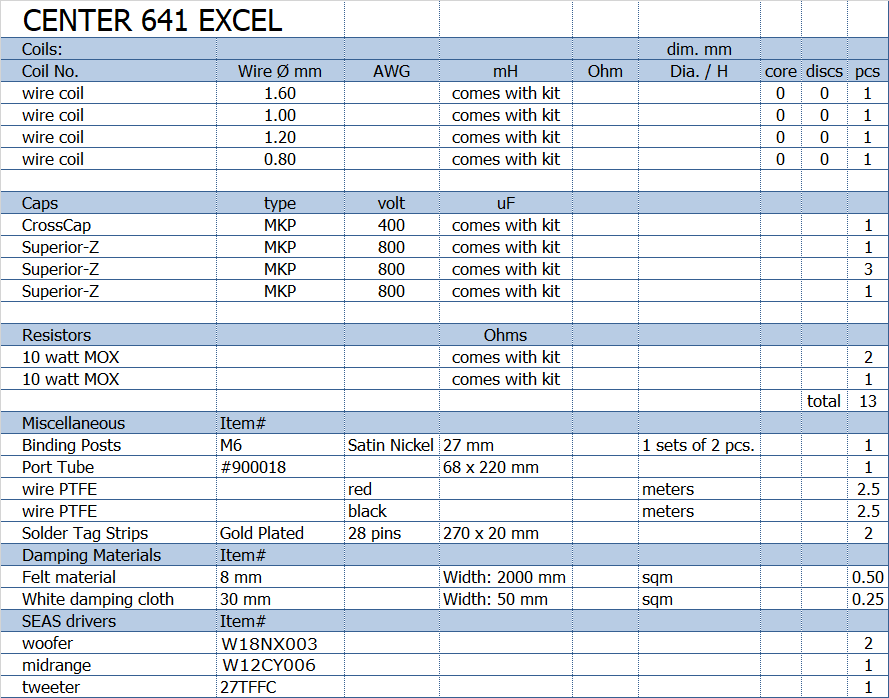
Crossover components' values to come with the kit.
Kit can be ordered plus/minus drivers.
All questions regarding purchase of kits, please mail Jantzen Audio at contact@jantzen-audio.com
All kit and component prices may be subject to change and are always to be confirmed by Jantzen Audio Denmark.
Download
CENTER-641
Prestige Version Sales Presentations:
![]()
Download CENTER-641 NEXT Version Sales Presentations:
![]()
All technical questions to troels.gravesen@hotmail.com
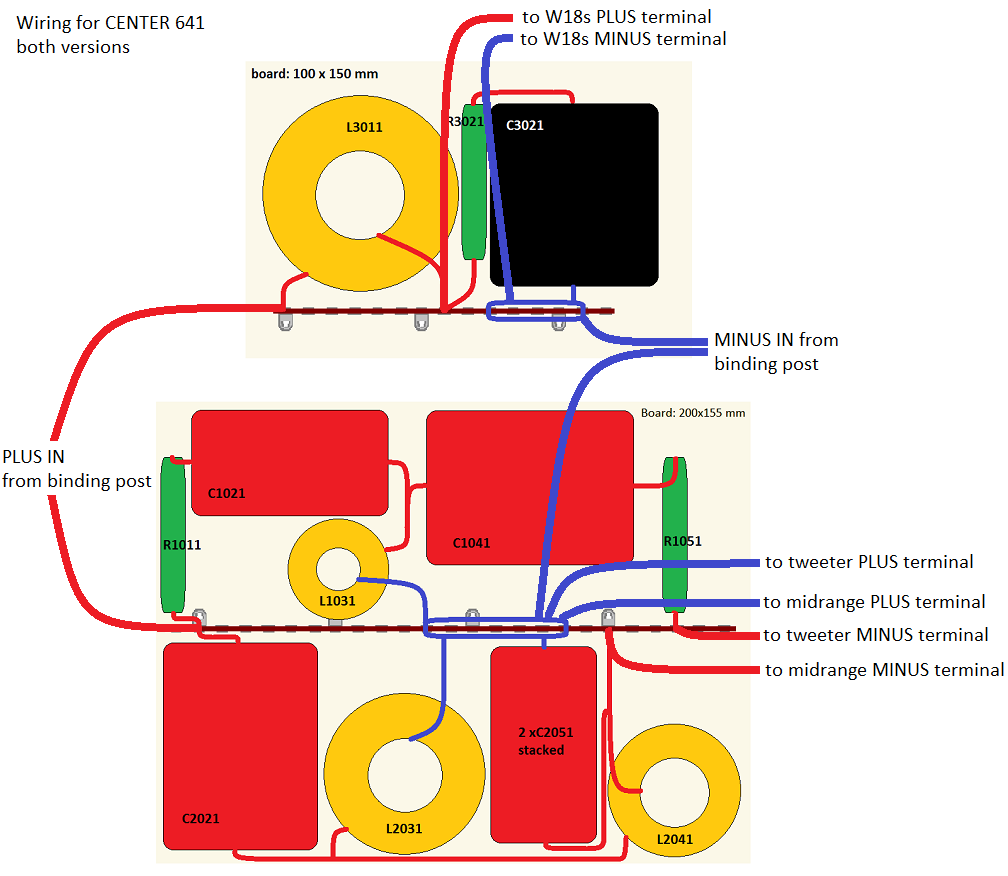
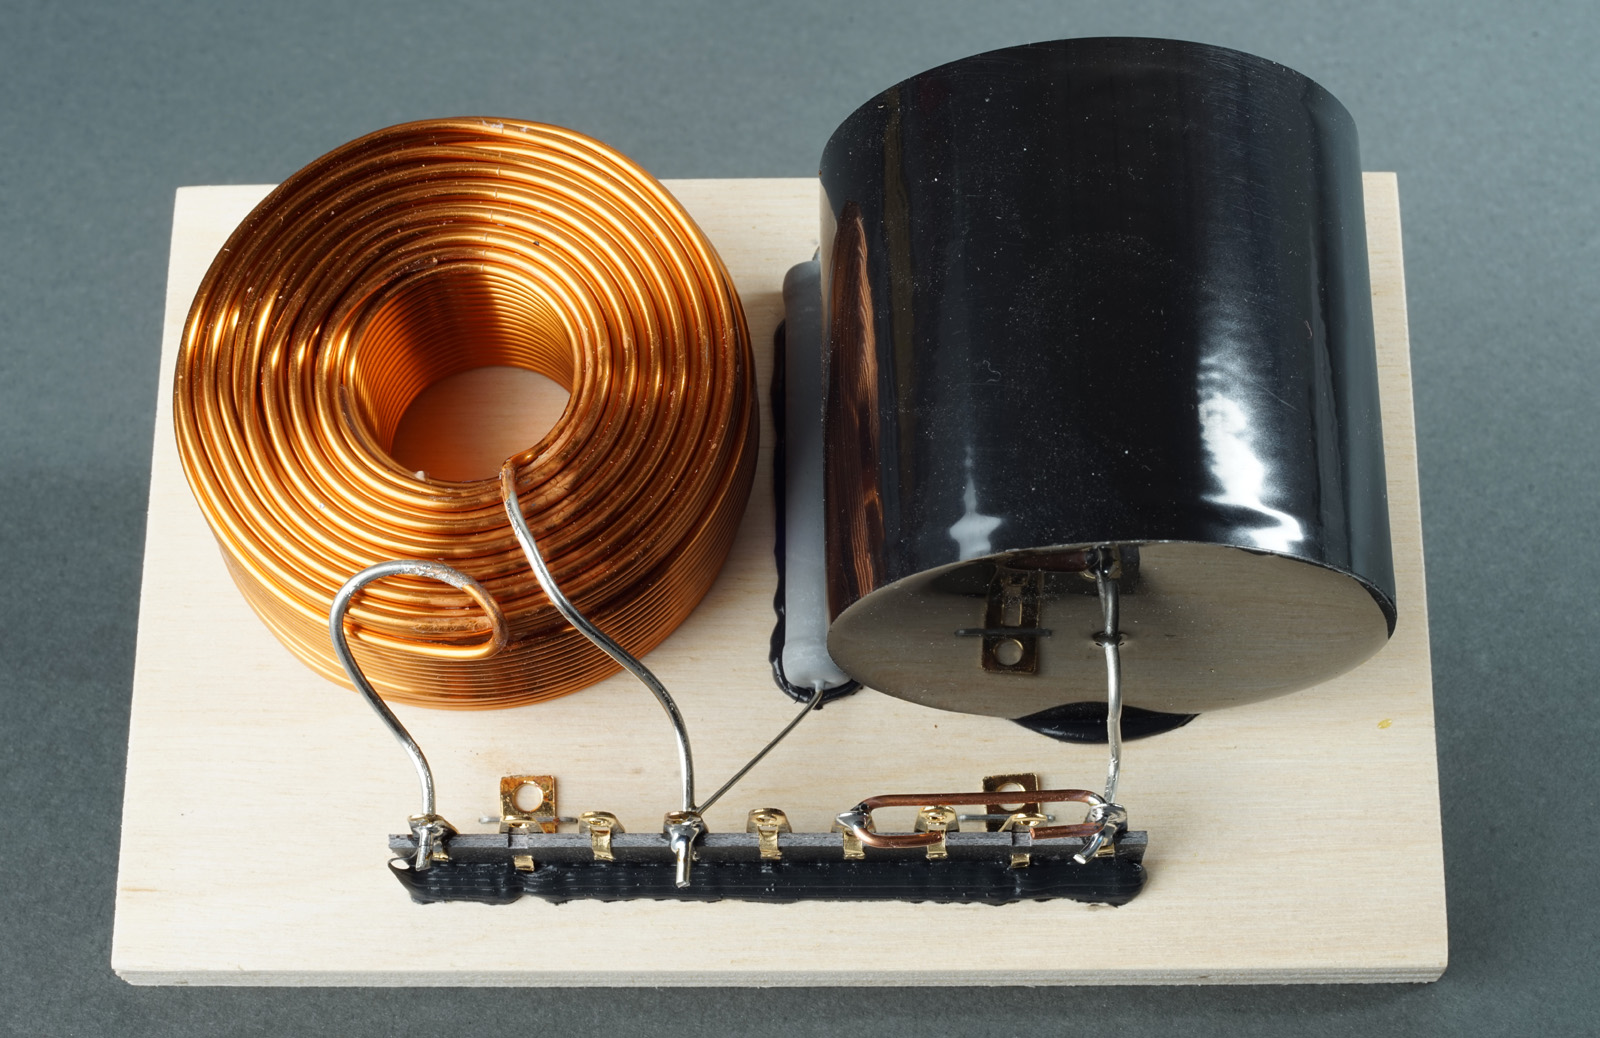
CROSSOVER-LAYOUT
BACK TO INDEX
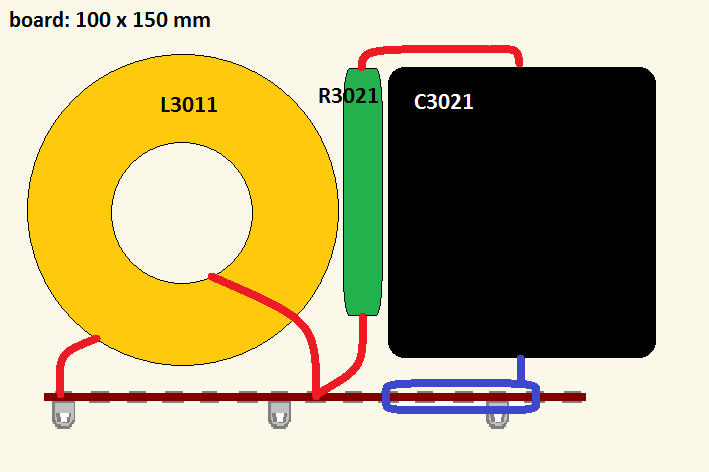
Bass section layout.
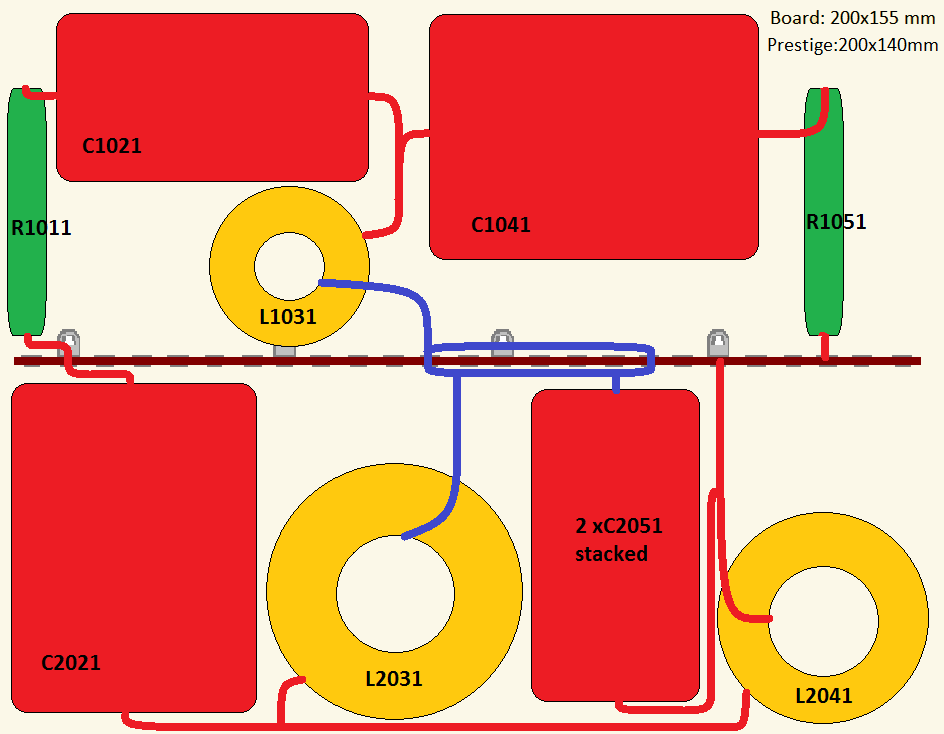
Mid-tweeter layout.
If you build the Excel version, make sure you mount the MT crossover
before gluing the front panel!
I suggest a 200 x 140 mm board for the Prestige version as this can be
mounted through 18W hole.
Make sure the mid-tweter section is tight!
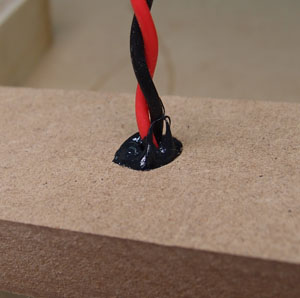
Pull wires through hole and seal with silicone glue.
![]()
SEAS CENTER-641 Prestige crossover: Click
images to view large.
As can be seen, lots of space on the MT section for the Excel version's
larger caps.
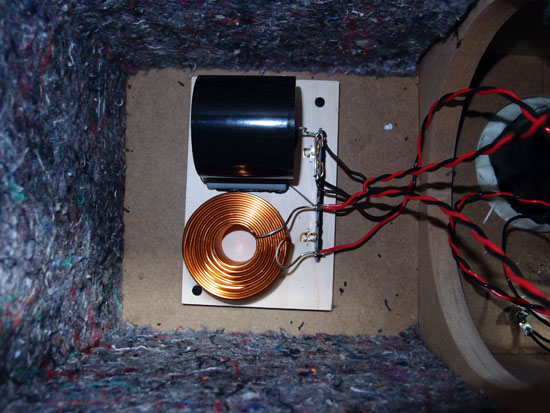

Prestige crossovers mounted in cabinet.
SEAS Center 641 Prestige
SEAS Center 641 Excel. With the new drivers,
black phase plugs.