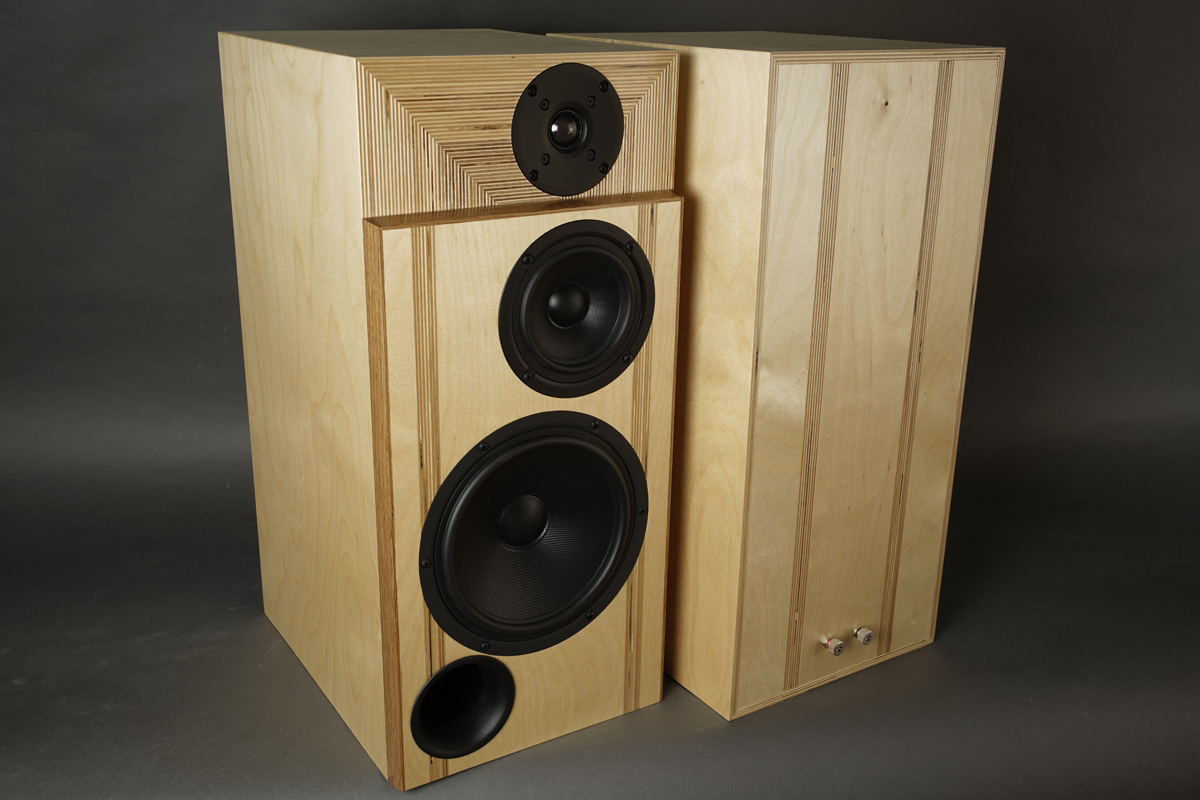
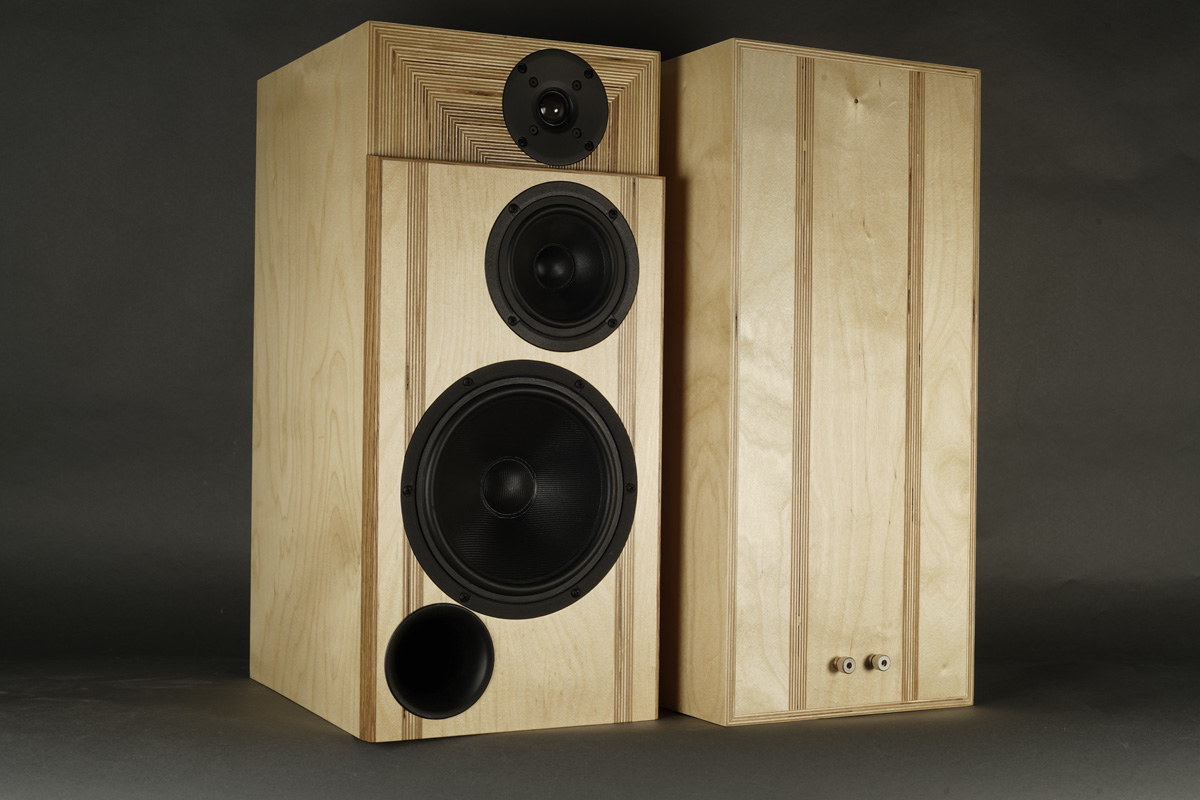
ScanSpeak
Discovery-3WC-mkII
Copyright 2021 © Troels Gravesen
Go to on this page:
DRIVERS
CROSSOVER
CABINET
WORKSHOP PICS
MEASUREMENTS
SPEAKER-KIT
CROSSOVER LAYOUT
The
Discovery-3-Way-Classic
all started with the
10F/8414-G10 driver, and testing it for a small computer full-range speaker. It ended up in the classic 3-way as midrange driver. The
10F didn't work too low and had a high high-pass filter handing over
most of the midrange to the 22W bass driver.
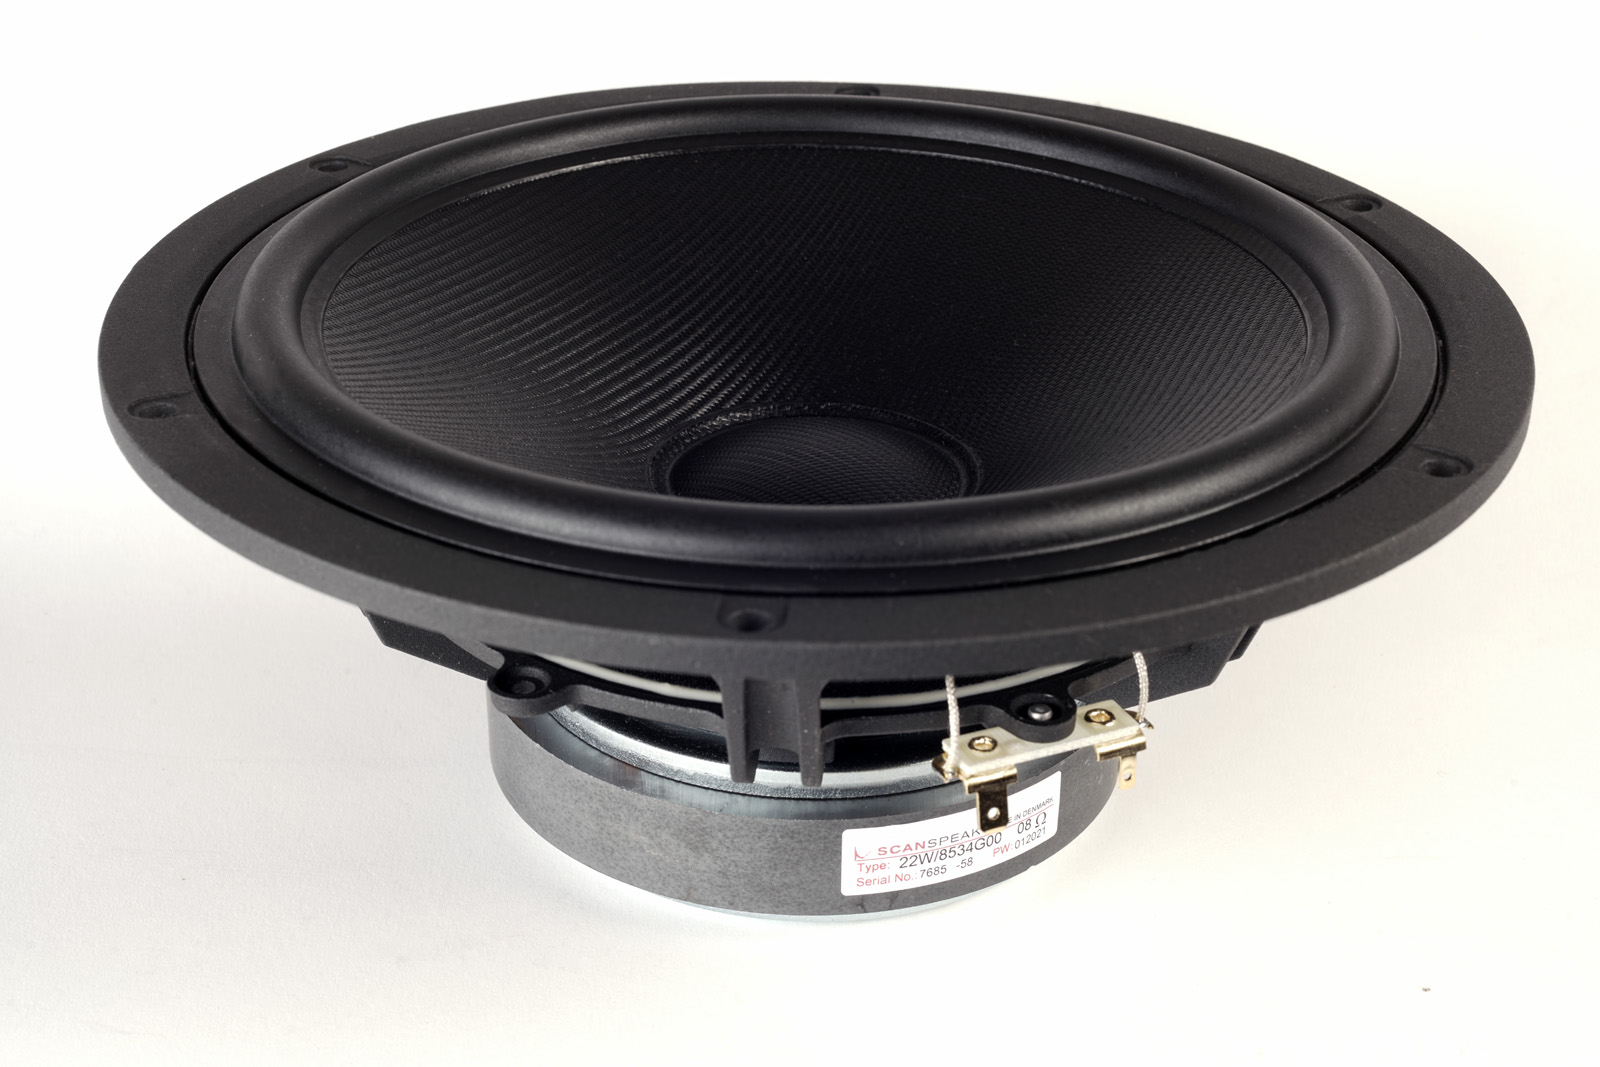
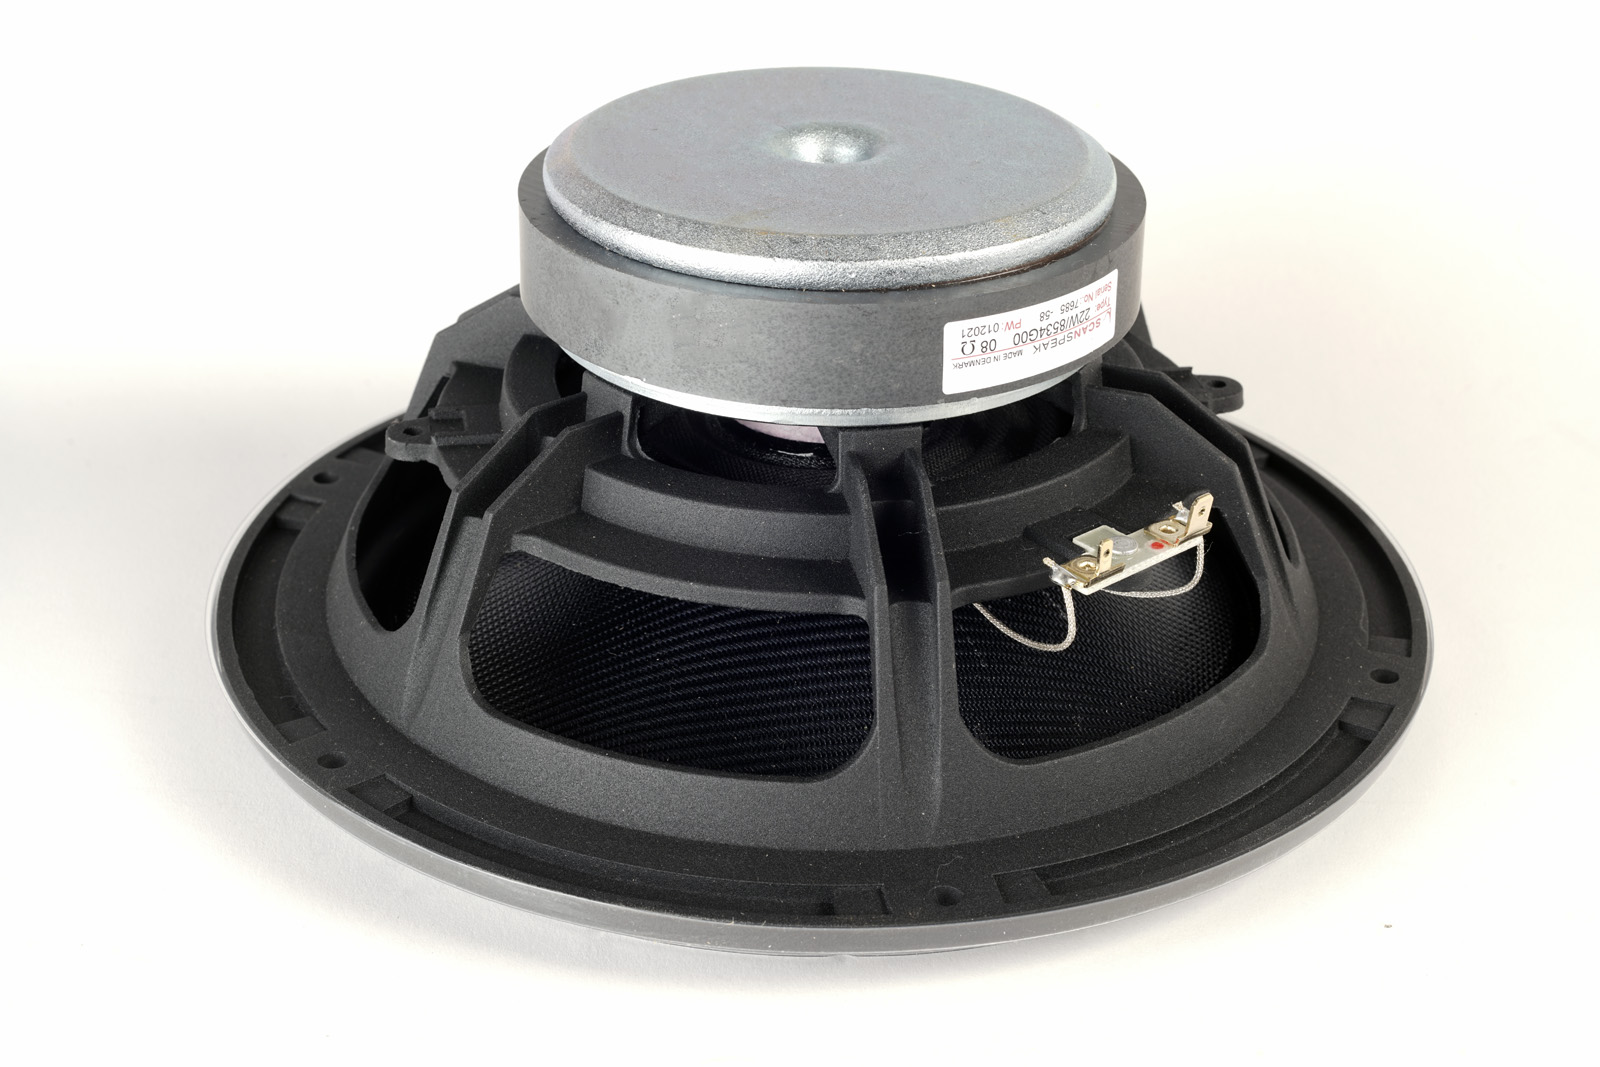
For this speaker I again chose the 22W/8534G00 for bass rather than the
22W/4534G00, which would have given 2-3 dB higher sensitivity,
but not more efficiency. In the end it's a matter of how much
power the speaker draws from your amplifier and the 8 Ohm version makes
a more tube friendly speaker, should you prefer this. Overall it
displays an easy load being an 8 Ohm speaker with a minimum of 5 Ohms
around 100 Hz. My 32 wpc
EAR-861 has no trouble running this speaker to significant levels.
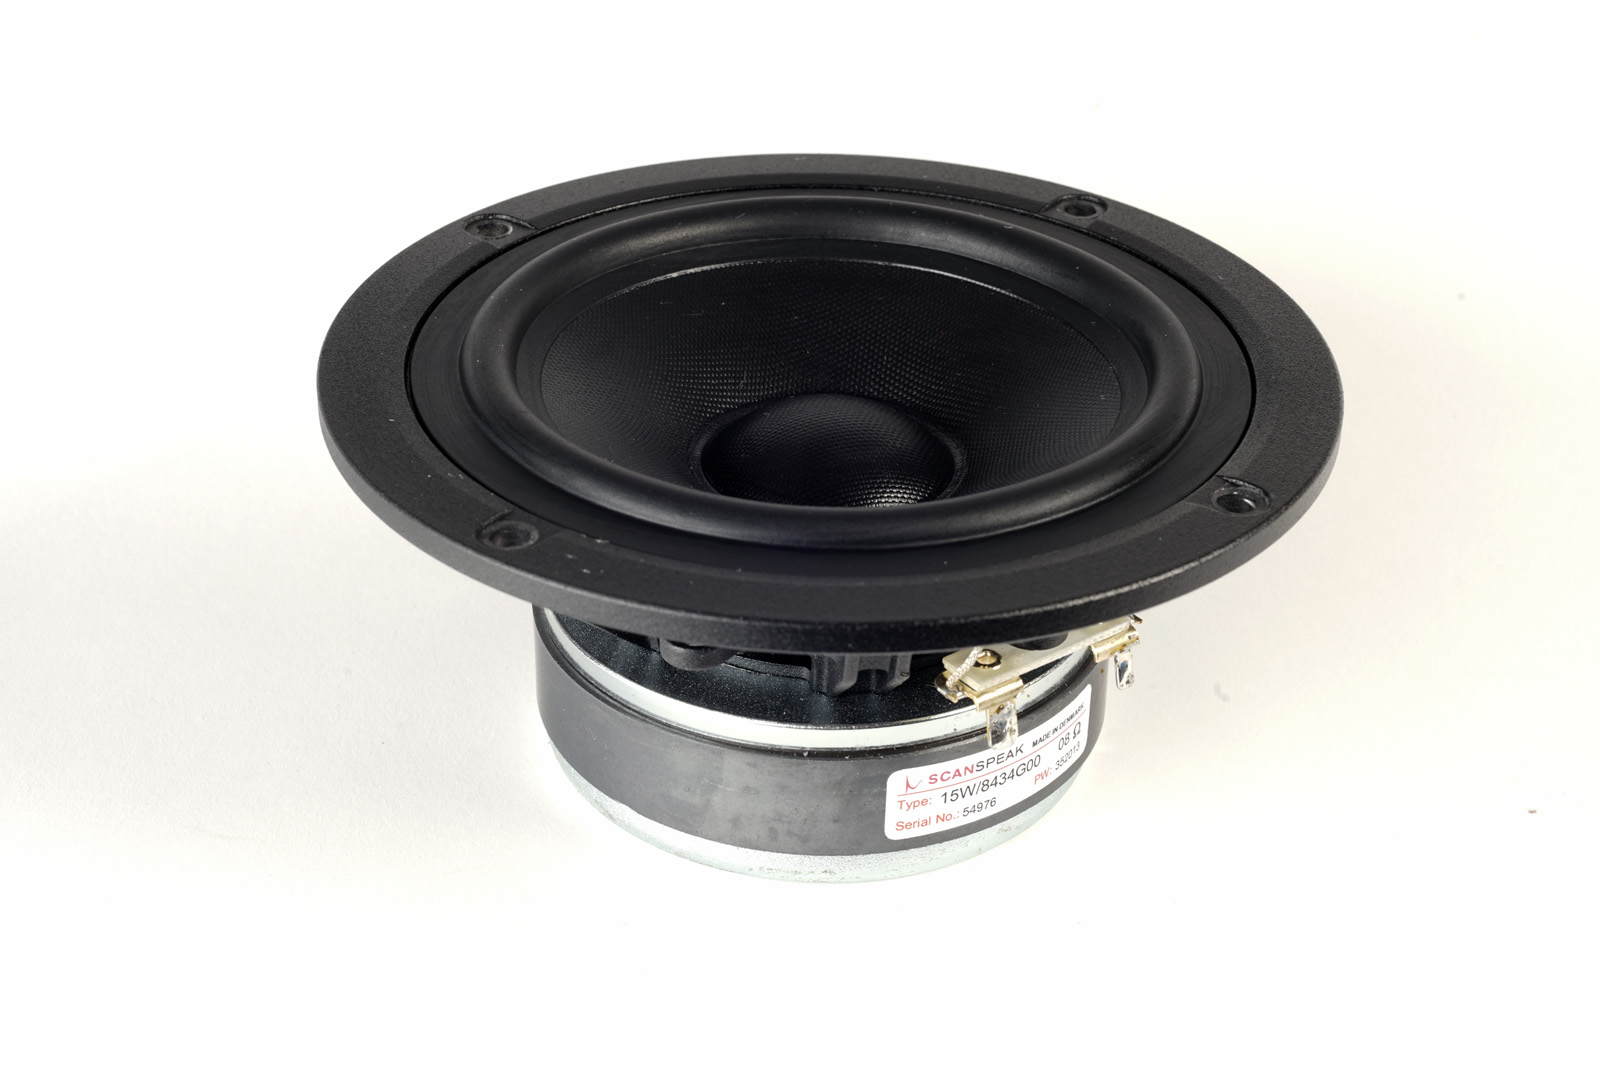
In this updated version I use a 15W/8434G00 driver with lower
high-pass filter, relieving the bass driver of upper-midrange and also
having a ruler flat midrange frequency response.
Having used the D2608/913000 tweeter in my
Discovery-861,
Ekta mkII,
Discovery CENTER and
Faital 3WC with very good results, I found no reason to
look any further. This tweeter is a steal for the money.
The cabinet is very much like the other 8+4+1 classics I've made, but
I've tried to make it even easier to build.

The sound? You know I hate it! Please read:
http://www.troelsgravesen.dk/choices.htm
The thing I can say is that had I built this speaker 15 years ago when I
started my website, there wouldn't have been as many speakers as there
is today.
Some 3-way classics wouldn't have been made and some floor-standers too.
Actually I wouldn't have been able to build it 15 years ago. The
Discovery drivers were not there, the Silver-Z and Alumen-Z were not
there - and I would have been short of 15 years of speaker building. The
choice of the 15W for midrange proved to be right. The fullness of
Ingram Washington's voice combined with the crisp presence is there -
and a seamless transition to treble range. No upper mid harshness
from any rubber resonances, etc. I guess the unusual crossover topology
is part of it, but can't claim for sure.
The dynamics of Vestbo Trio is there as much as an 8" allows and I'd
say there's a speaker for every occasion and we don't always need an 18"
bass driver to fully enjoy music*.
I am eagerly awaiting the Budapest concert by Keith Jarrett on vinyl and I can't
help thinking of his 2018 stroke leaving him - most likely - unable to
ever perform in public again. Until then the Still Live was on the spinner
for the 1000th time I enjoyed it equally well on the Discovery 3-way. I'm happy I once drove 1000 km to Aachen i
Germany to hear the trio.
I have also re-visited my Chick Corea collection.
So sad he passed away a few days ago. Pleased I went to hear him here in
Aarhus last year, giving a solo concert and what became almost a master
class, inviting pianists from the audience to come and play with him.
Great evening.
No, I can't tell you what they sound like, but if you're in for a modest
stand-mount and have some 30 good watts, give it a try. It runs
beautifully from my 32 wpc EAR-861. And would it be crazy to combine the
speaker with my Ortofon Anna D cartridge, costing almost 10 times as
much as the kit here? I can assure it isn't.
Well behaving drivers may very well provide the same sonic pleasure as
drivers costing 10 times as much. They may not have the dynamic headroom
of more expensive drivers, but size can compensate for that. The less
cones move, the less distortion.
Adding the Stevie Ray Vaughan, Tin Pan Alley, 45 rpm, to the turntable
actually came out much better than anticipated. This record really
excels on 18" bass driver systems, but the Discovery 22W did an
excellent job of the bass.
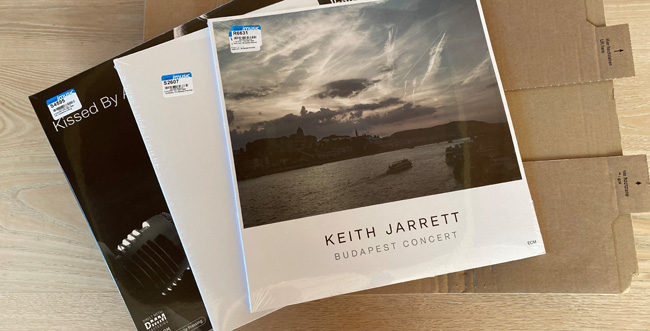
2nd March 2021. Finally the Budapest concert
arrived!
*I have a friend with a Rega P3, Ortofon 2M Black, clone tube phono stage, Rotel integrated and my Nomex 164-mkII speakers, and he likes it a lot - and he asks me: Where would you go to significantly improve the sound without investing serious money? I honestly can't tell. Maybe the new Ortofon 2M LVB would be one way without spending a lot of money. The Rega arm is really not that bad, it just miss VTA and Azimuth adjustments . The Repa P3 with a fresh rubber is really not that bad. The tube phono stage I made him is very much like my EAR-868 MM phono stage. The Rotel? Well, maybe, but what? The Rotel is doing really well and wouldn't we spend 2+kEUR to gain some significantly improved transparency, etc.? Why change if we like what we have? Go buy some records instead.
Basics:
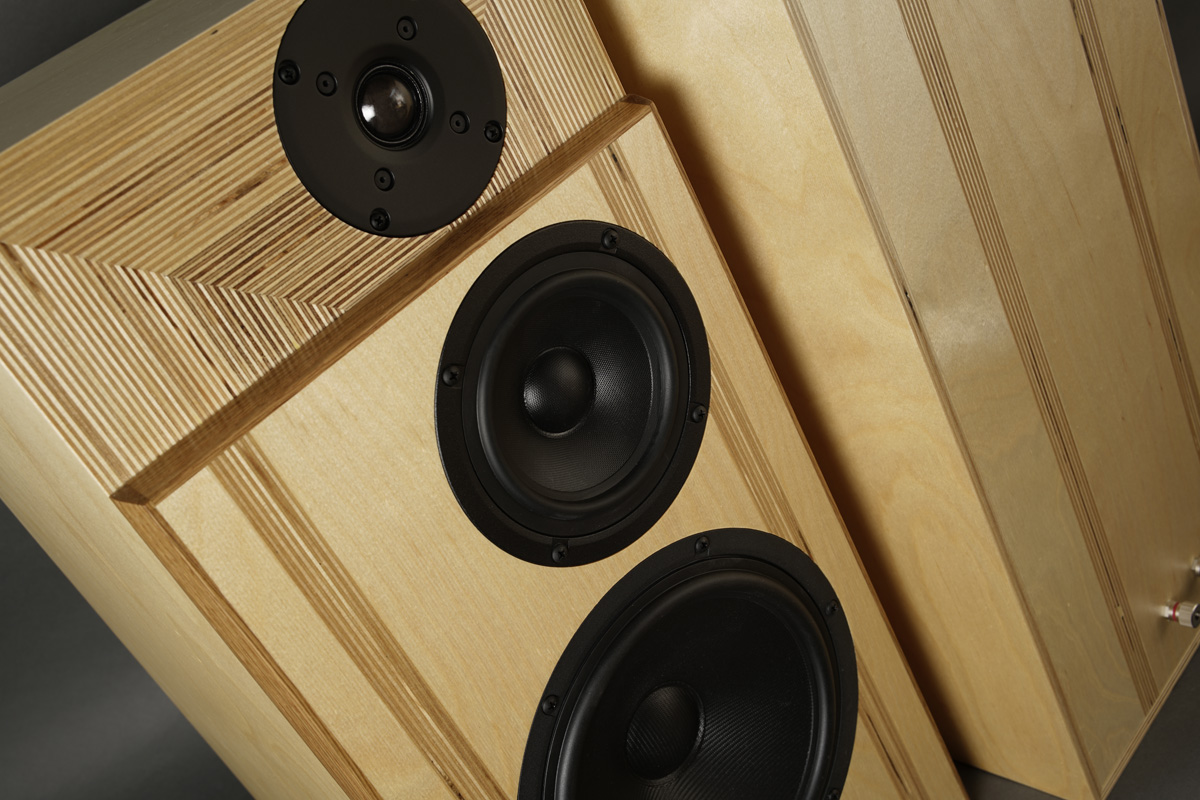
3-driver speaker.
Dimensions: 28 x 36 x 61 cm, WxDxH.
System sensitivity: 88 dB/2.8V/1 meter.
Impedance: 5-8 Ohms.
Power requirement: 20+ watts/channel.
Power handling: 100 watts.
Please
also read:
http://www.troelsgravesen.dk/power-handling.htm,
and remember any burned driver is a misused driver.
Useful links (Please read before writing!):
http://www.troelsgravesen.dk/tips.htm
http://www.troelsgravesen.dk/crossovers.htm
http://www.troelsgravesen.dk/LCR-RC.htm
FAQ (Please read before writing!):
You cannot change cabinet front panel dimensions and drivers' placement
without needing a new crossover - and I cannot help.
You cannot use any other drivers with the crossover shown here.
Please read these files before e-maling:
http://www.troelsgravesen.dk/crossovers.htm
http://www.troelsgravesen.dk/choices.htm
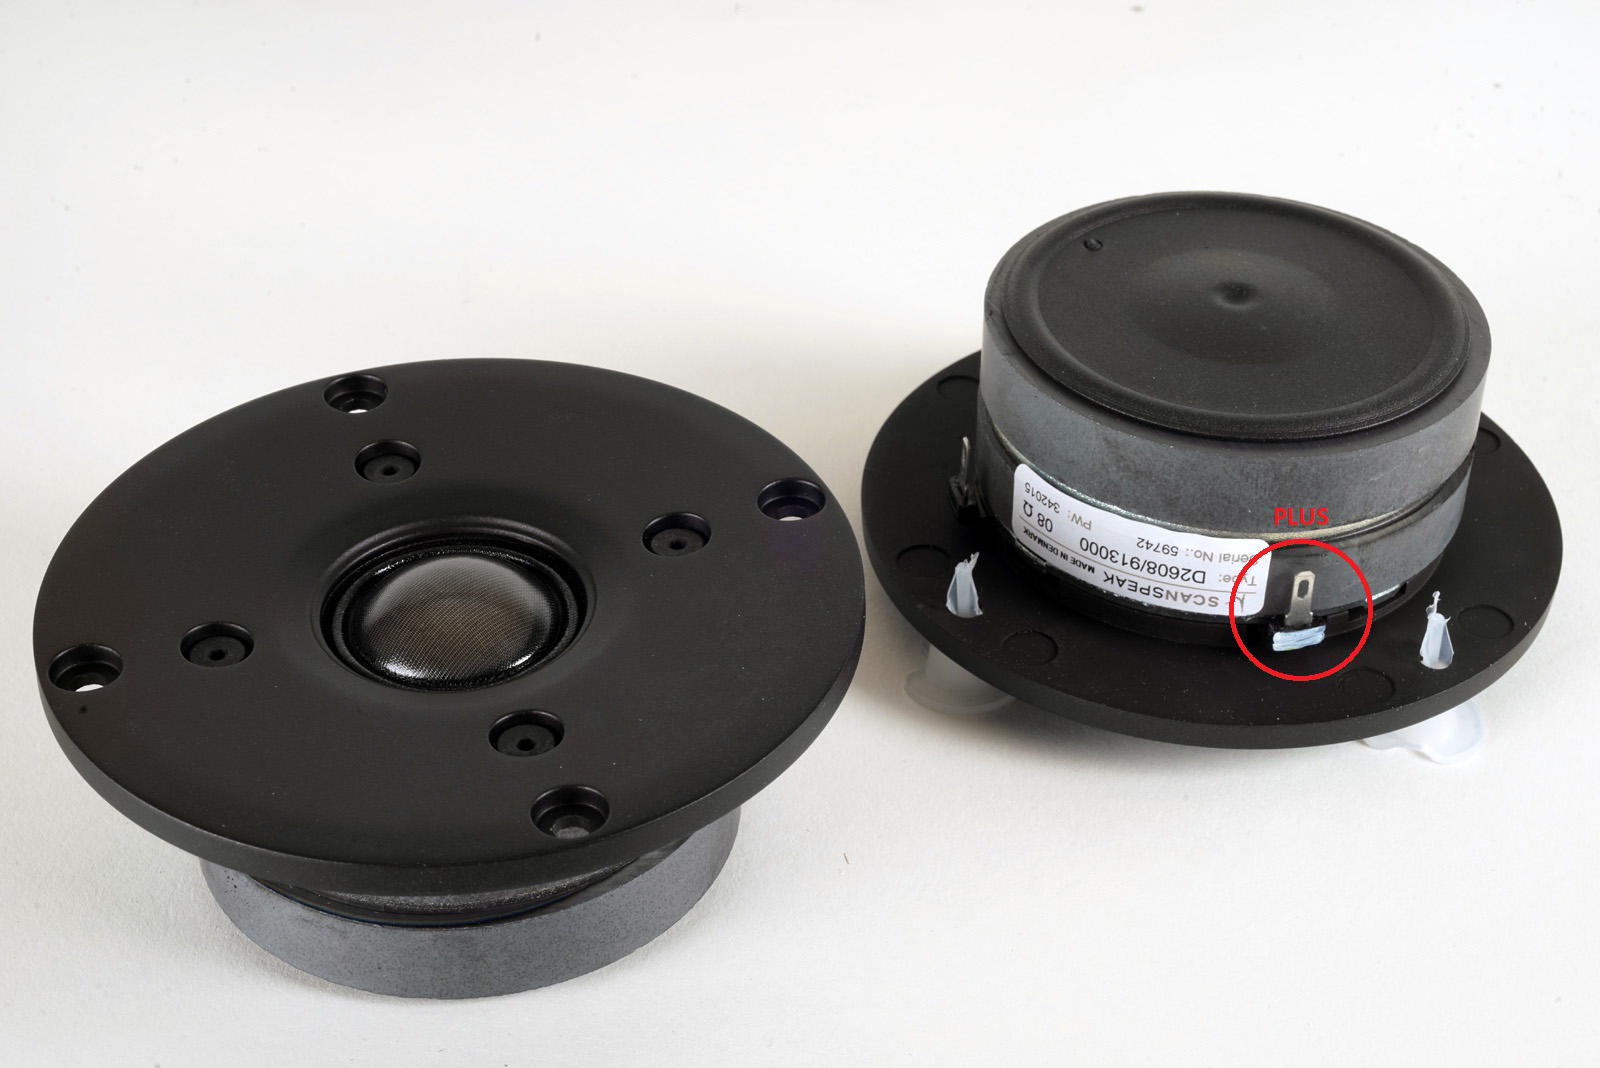
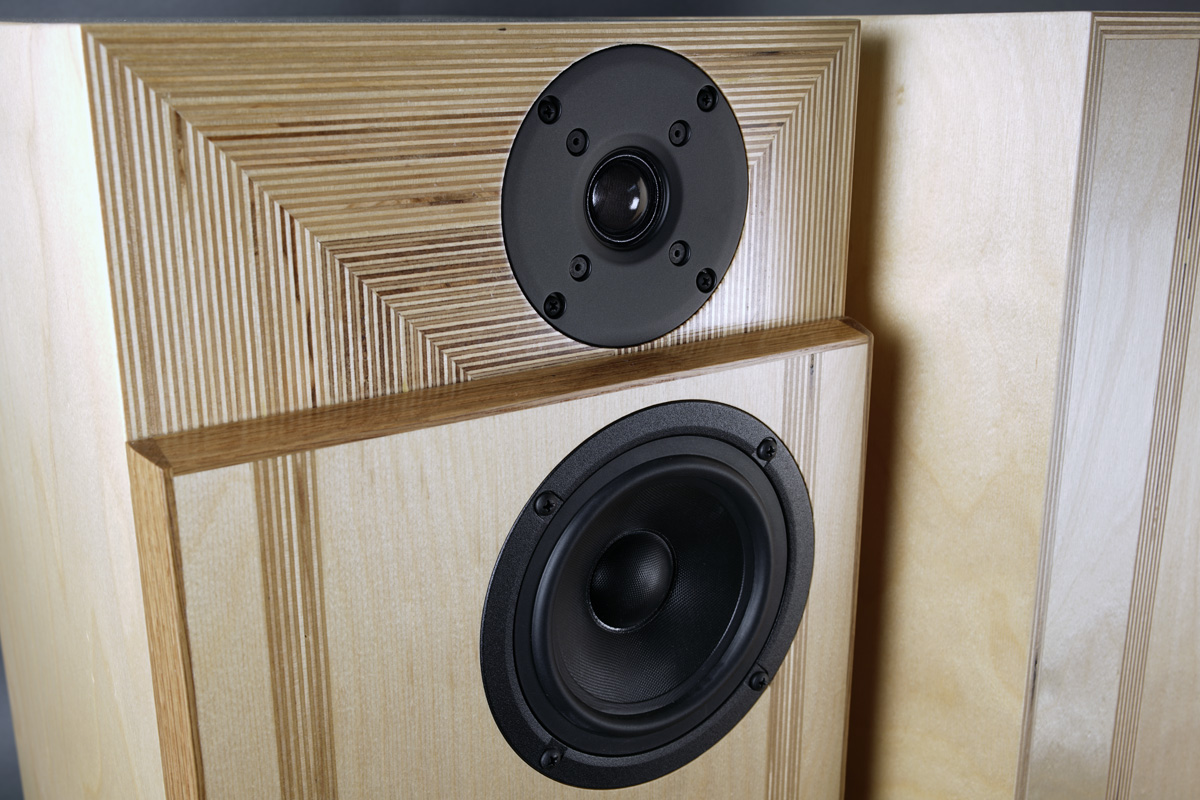
You get an awful lot for the money here. Alu face plate, double magnet,
metal back plate - and good performance as well.
Read test
here - and compare to the D3004/660000.

Click images to view large
Download specs here: D2608/913000 15W/8434G00 22W/8534G00

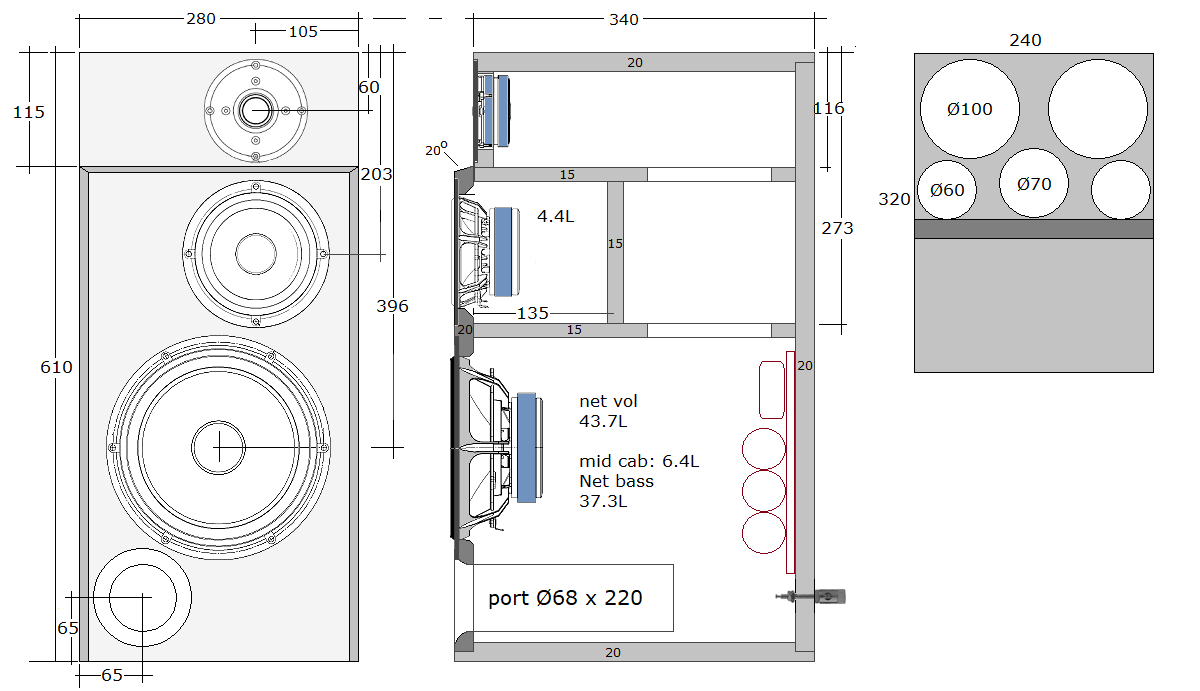
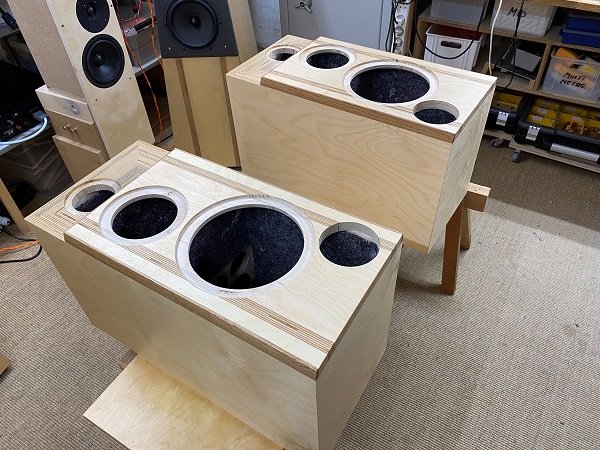
Cabinets were made from 15 and 20 mm Baltic birch. Chamfering of front
panel sides is optional. 15 mm was used for all internal panels. And
yes, you can place the port to the front or rear to your liking. You can
also make a slot port, 24 cm width, 1.5 cm height and same depth.
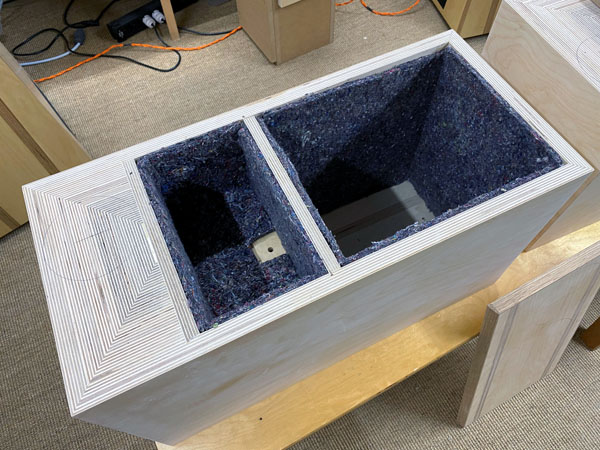
Cabinet damping:
8 mm felt on all internal panels, except front and the
rear panel where the crossover is placed.
Fold a piece of 25 x 50 acoustilux and place behind tweeter.
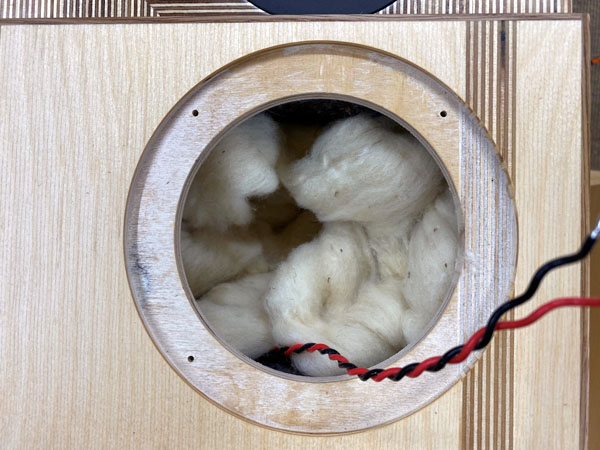
Roll a piece of 25 x 50 cm acoustilux and place in cavity behind
midrange driver.
Add 50 grams of sheeps wool to the midrange cabinet.
After mounting the crossover, fold
a piece of 25 x 60 cm acoustilux and place over the crossover/rear
panel.
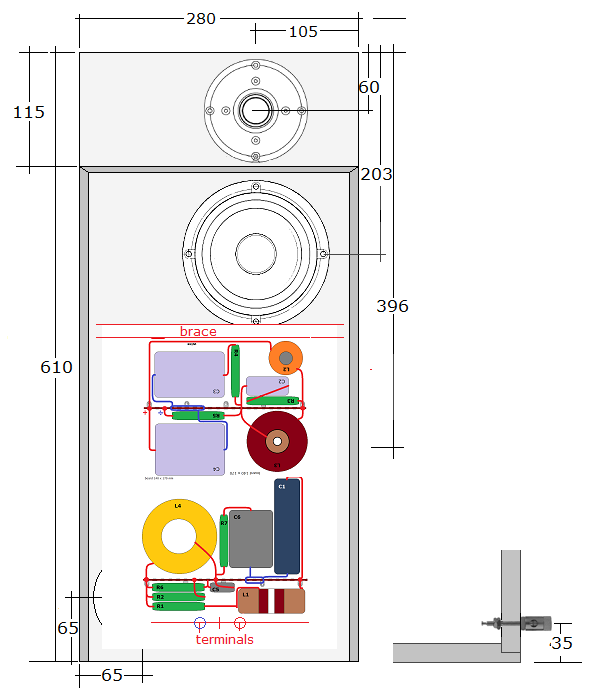
Place the binding posts some 35 mm from the bottom and you will have
space for the crossover boards on rear panel.
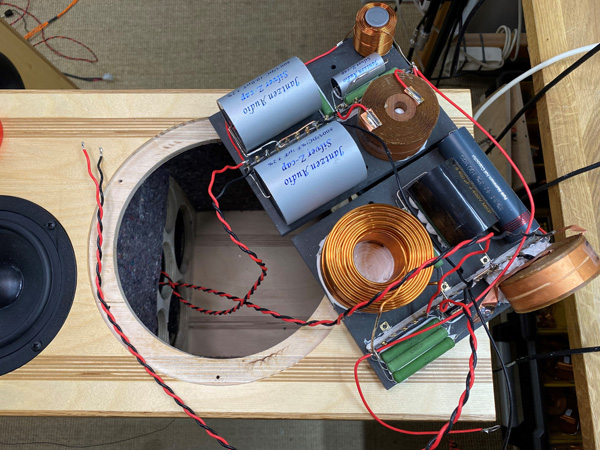
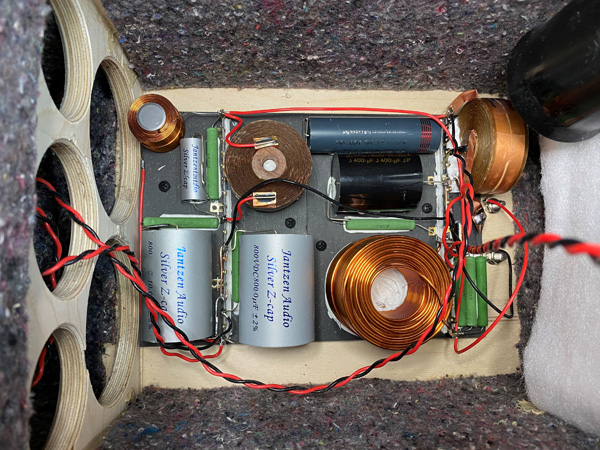
I suggest the shown placement and orientation of boards in order to have
the four coils as far apart as possible.
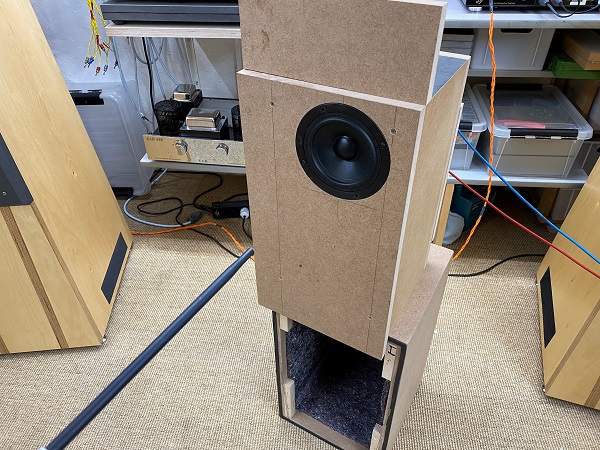
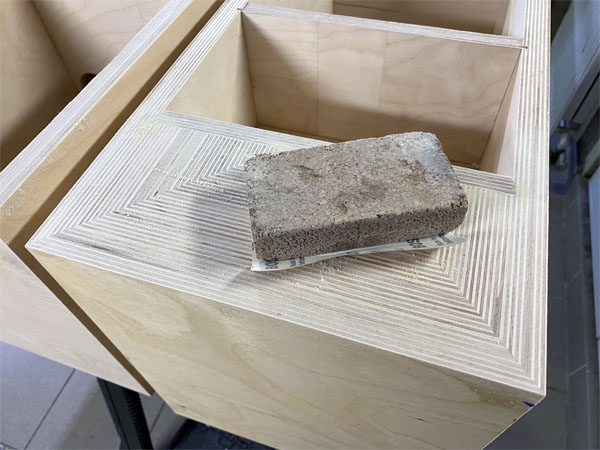
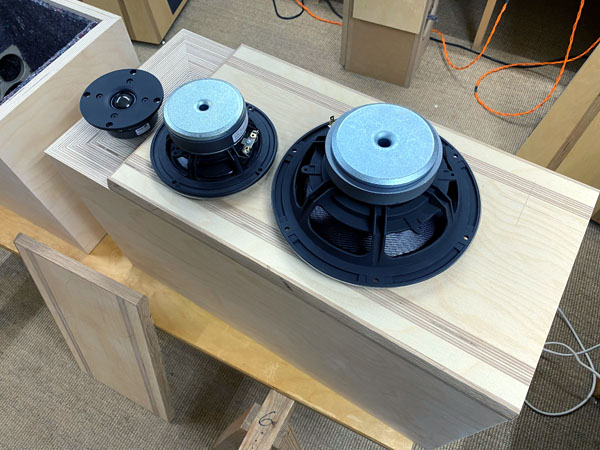
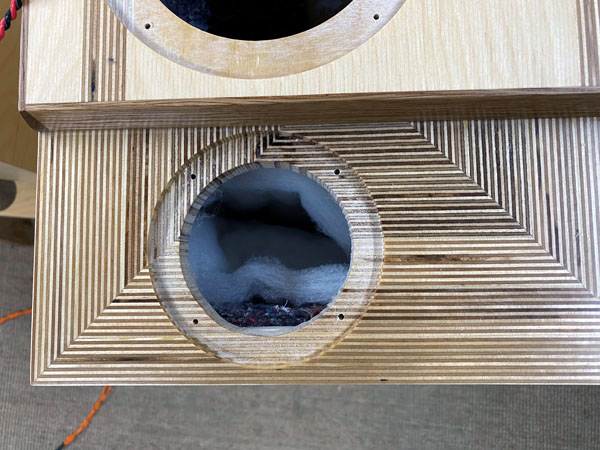
I knew the W22 and D2608 performances from previous speakers, but wanted
to make sure the W15 did alright - and to make frd and zrd files for
preliminary simulation, hence the mockup above. And it did very well as can be seen
below.
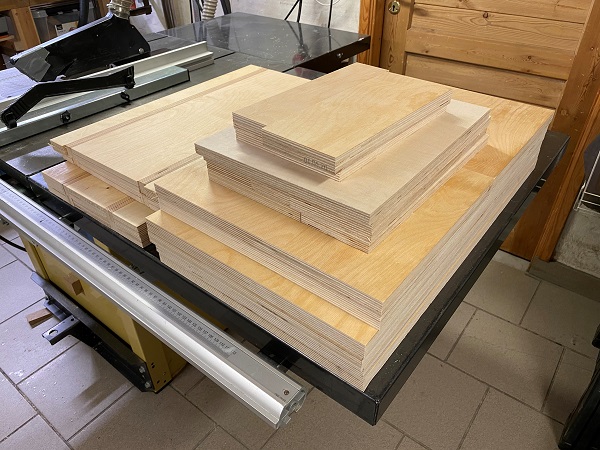
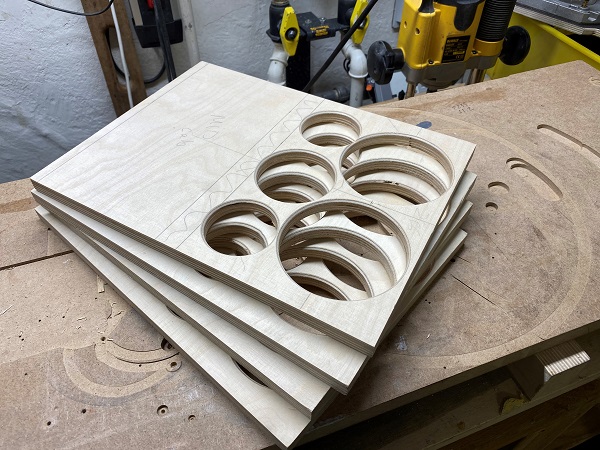
To the right the complete pile of panels in the rough for the cabinets.
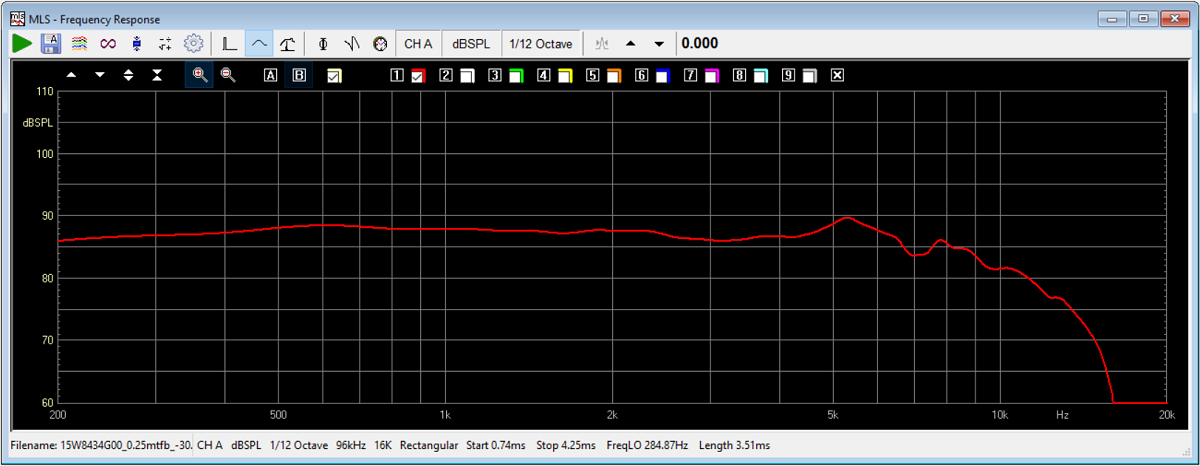
Frequency response of 15W/8434G00 on mockup front panel.

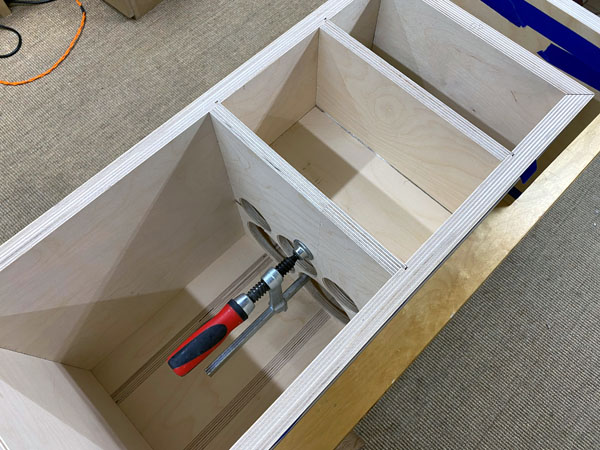
Preparing the braces in advance.
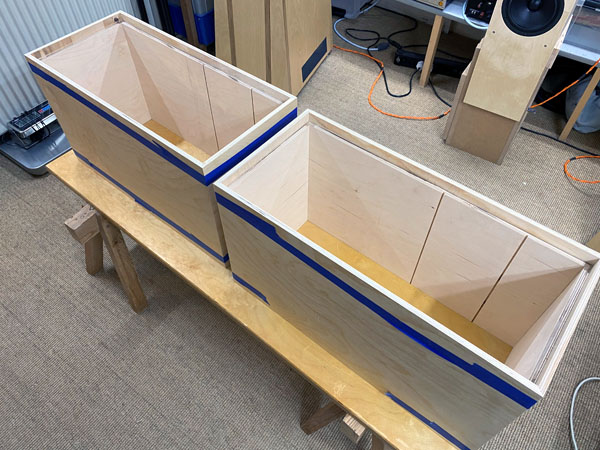

Ready for making the rear panels. The rear panel and bracings/mid
cabinet are all glued in one take.
I start by gluing the mid cab rear panel. This makes the bracings into a
solid structure that helps a lot when gluing it all together.
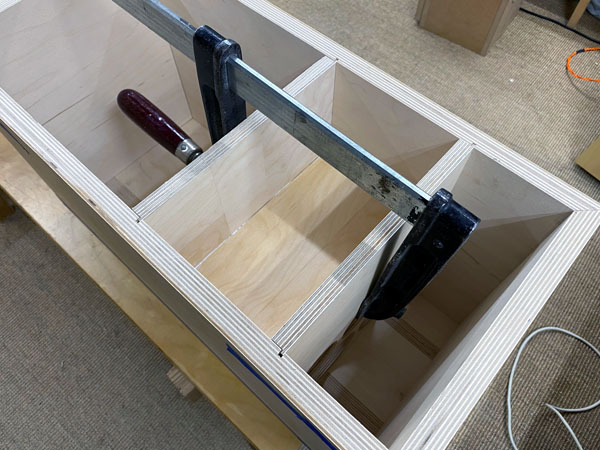
Gluing the mid cab rear panel.
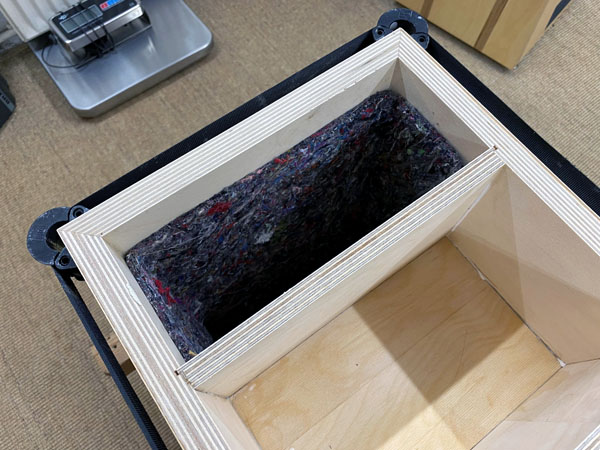
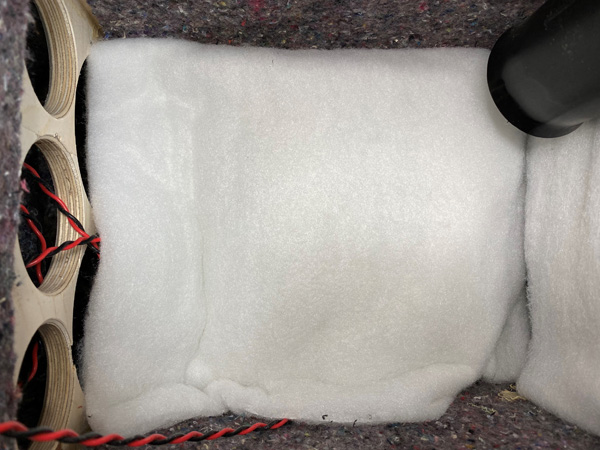
Before making the tweeter panel, it's a really good idea to add felt
damping to the upper part of the cabinet.
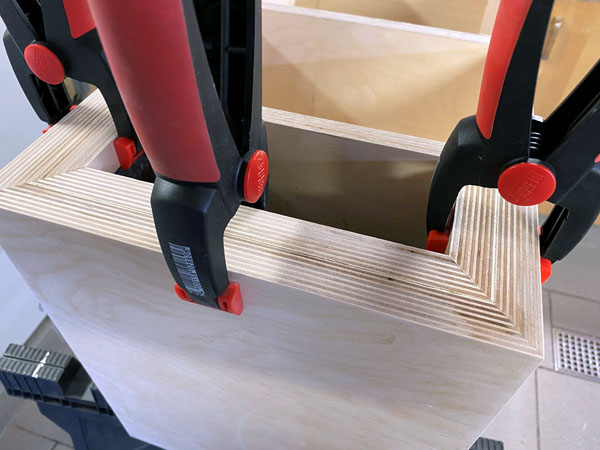
Finishing the tweeter panel.
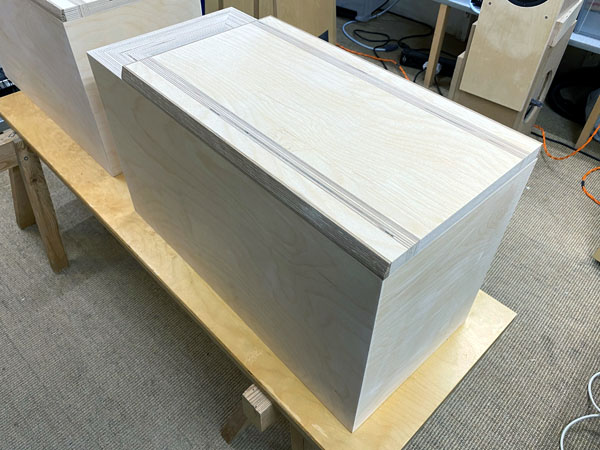
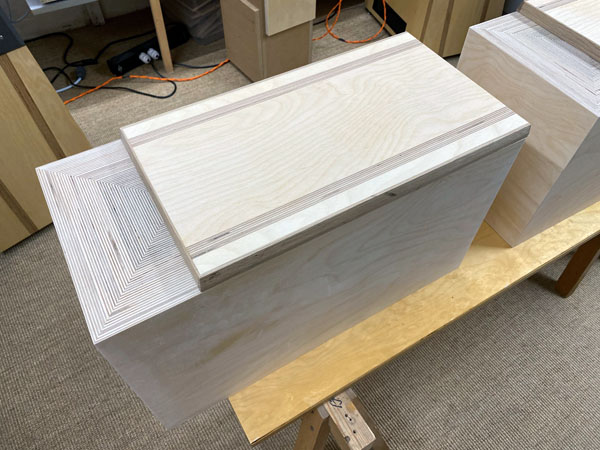
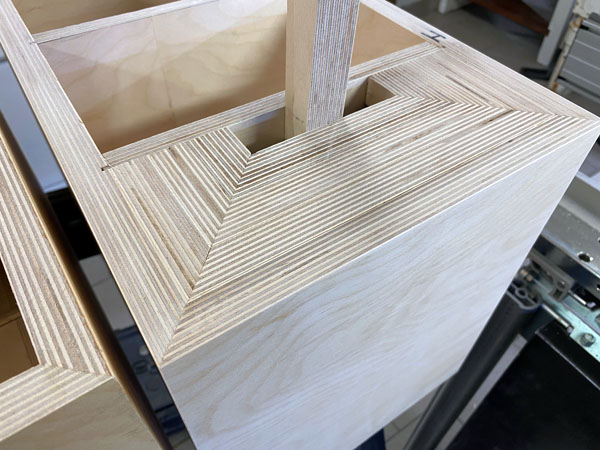
Finishing the front panels. I use oak fillets on sides and top. Top was
chamfered 10 deg. and sides 15 deg.
Chamfering is optional and you can do more or less depending on your
fillet dimensions.
Before gluing the front panel - add felt material to all internal panels
except rear panel, where we want the crossover.
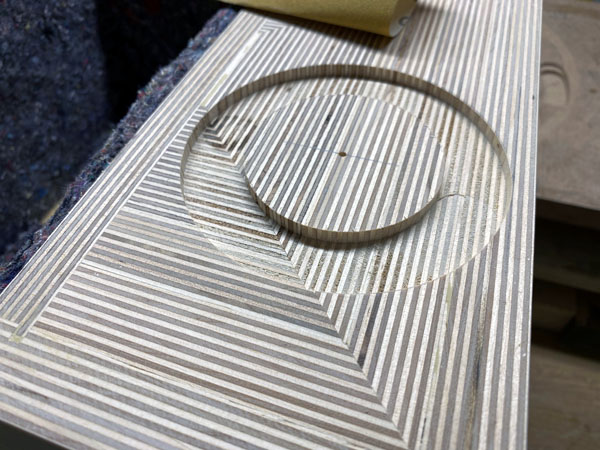
Starting with the tweeter rebate, slow and easy not to rip the laminate.
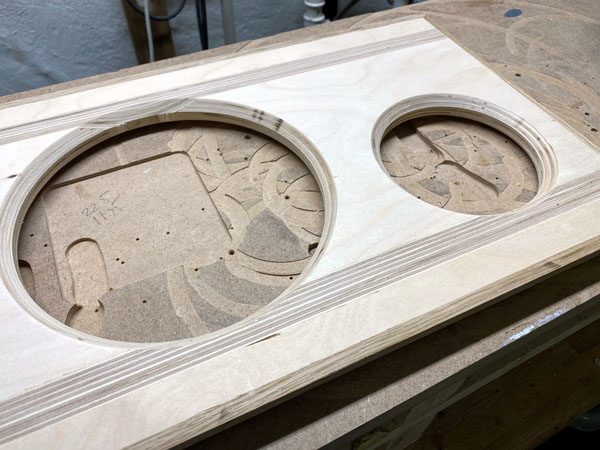
Chamfer mid and bass holes some 6-7 mm 45 deg.
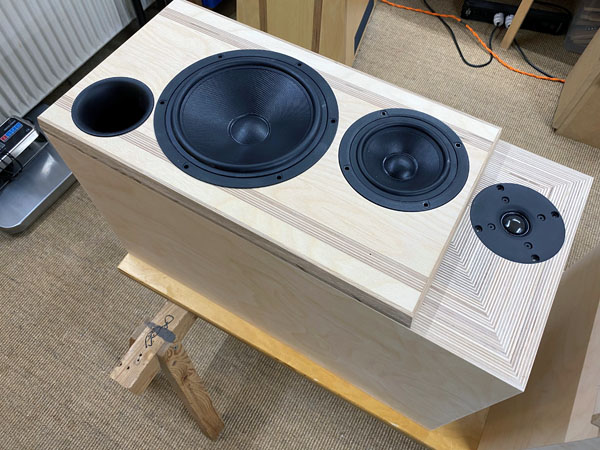
Left: Testing driver rebates. Right: First coat of
lacquer.
Actually I added the lacquer to the top of the bass-mid panel and
tweeter panel before I glued the front panel in place.
Not easy to add lacquer into corners with a roller, at least not nice.
Fold a piece of 25 x 50 cm acoustilux and place behind tweeter.
Add 75 grams of sheeps wool to midrange cabinet.
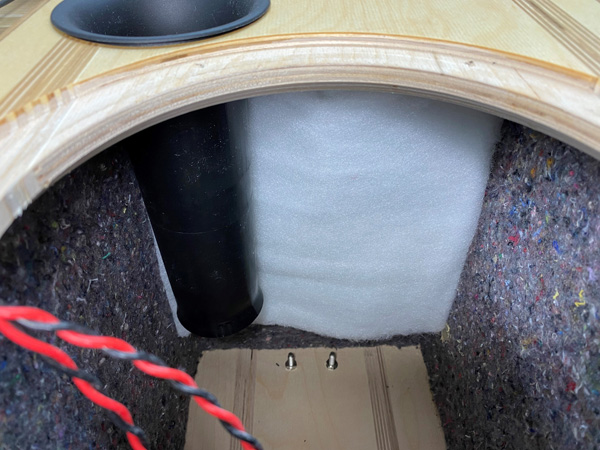
Fold a piece of 25 x 50 cm acoustilux and place at bottom of cabinet.
Prepare the crossover with wires and solder the wires for midrange and
tweeter.
Mount the crossover on real wall.
Fold a piece of 50 x 50 cm acoustilux and place on rear panel covering
the crossover board.
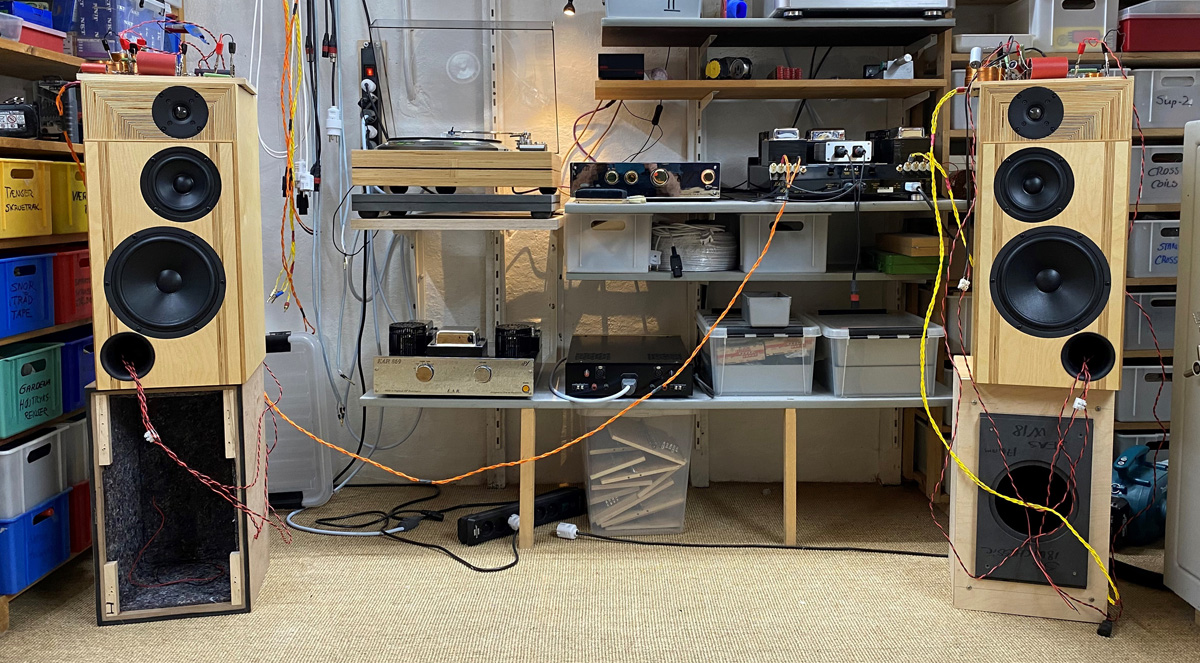
First time workshop set-up. Testing one of the many different crossovers
simulated.
A few comments on
MEASUREMENTS before you start interpreting the readings below.
First of all, if we think measurements will
tell us how a speaker sounds, we're wrong. The perception of sound is
way too subjective to be reflected in any measurements we can perform. A
loudspeaker system is meant to give us a satisfying idea of an acoustic
event and for some people a pair of 5 USD ear-plugs are enough, others
spend 200 kUSD on a truly full-range pair of speakers - and the latter
may not be happier than the former.
Measurements may give us an idea of tonal balance of a system, i.e. too
much or too little energy in certain areas, although dispersion
characteristics play a vital role here. A two-way 7+1 and a three-way
7+4+1 may display similar horizontal dispersion, yet sound very
different. Measurements may tell us about bass extension if far-field
measurements are merged with near-field measurements. In addition to
this, ports may contribute to bass extension. Most of we diy'ers do not
have access to an anechoic room for full-range measurements from
20-20000 Hz.
What cannot be seen is what kind of bass performance we get in a given
room. Bass performance is highly dependent on in-room placement of your
speaker and the same speaker can be boomy in one place and lean in
another. Actual SPL level at 1 meter distance and 2.8V input is useful
for en estimate of system sensitivity and combined with the impedance
profile may give an idea of how powerful an amplifier is needed to drive
the speaker to adequate levels.
What measurements do not tell is the very sound of the speaker unless
displaying serious linear distortion. The level of transparency, the
ability to resolve micro-details, the "speed" of the bass, etc., cannot
be derived from these data. Distortion measurements rarely tell much
unless seriously bad, and most modern drivers display low distortion
within their specified operating range.
Many people put way too much into these graphs and my comments here are
only meant as warning against over-interpretation. There are more to
good sound than what can be extracted from a few graphs. Every graph
needs interpretation in terms of what it means sonically and how it
impacts our choice of mating drivers, cabinet and crossover design.
What measurements certainly do not tell is the sonic signature of the
speaker, because speaker cones made from polypropylene, aluminum,
Kevlar, paper, glass fiber, carbon fiber, magnesium, ceramics or even
diamonds all have their way of adding spices to the stew. Nor do
measurements tell what impact the quality of the crossover components
add to the sound, from state of the art components to the cheapest of
coils and caps, they all measure the same if values are correct, yet
sound very different.
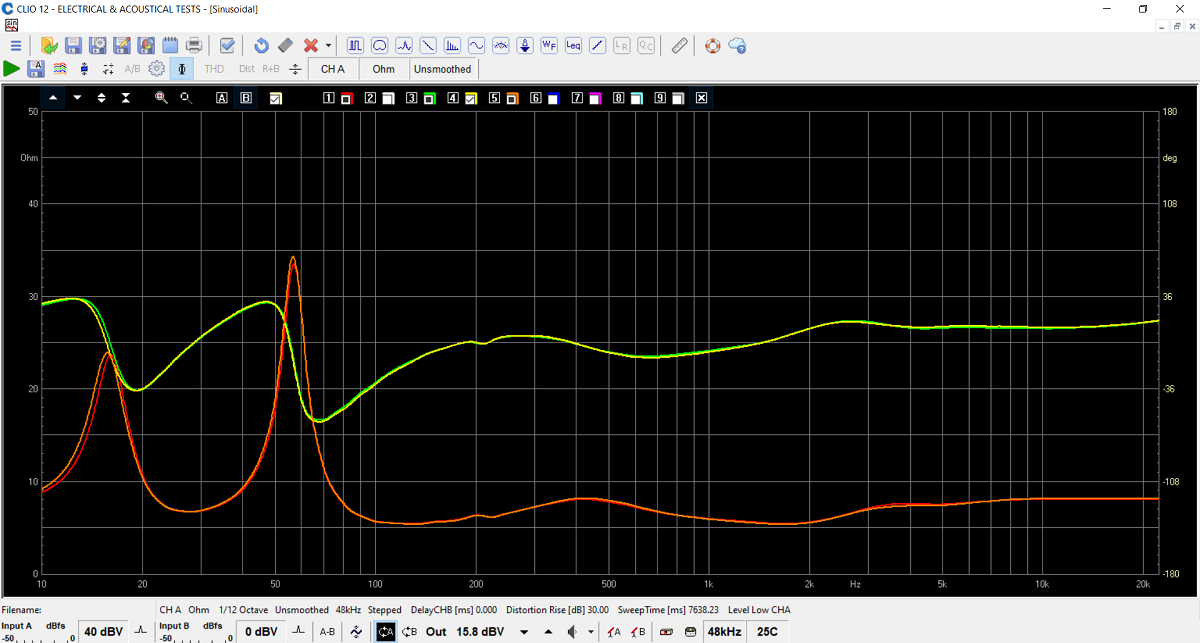
Final system impedance from left and right speaker. Yellow and green =
electrical phase.
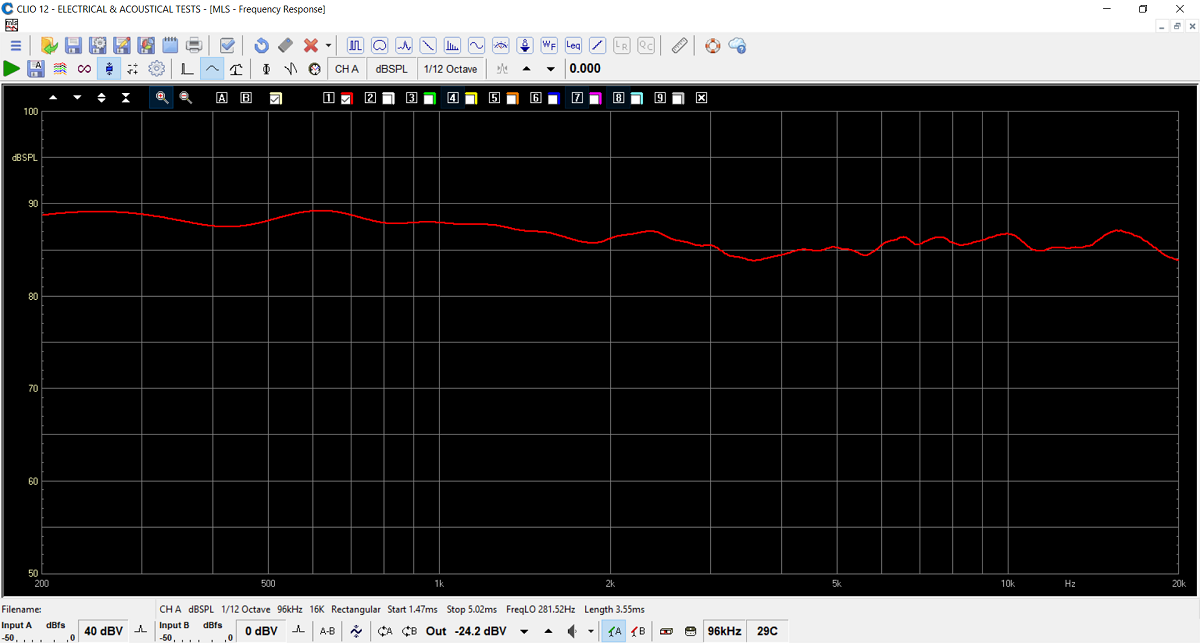
Frequency response @ 0.5 m distance, normalised for 1 meter, 2.8V.
Final system sensitivity = 88 dB.
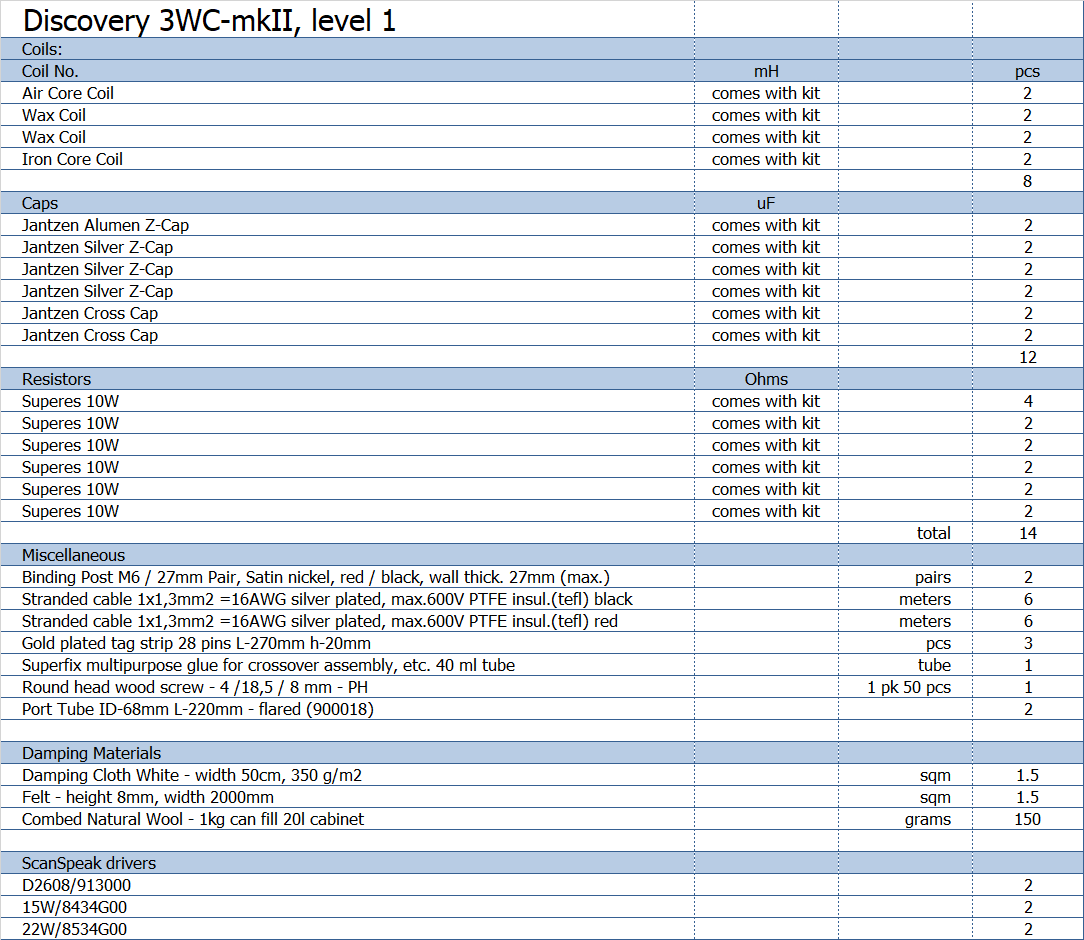
Above the level 1 kit. Alumen-Z for tweeter and Silver-Z for midrange.
In level 2, WAX coils are replaced by air-core coils and we have
Superior-Z for C1 and all midrange capacitors are STANDARD-Z.
All kit and component prices may be subject to change and are always to be confirmed by Jantzen Audio Denmark.
Download Kit Sale Presentations:
![]()
All technical questions to troels.gravesen@hotmail.com
All questions regarding purchase of kits, please mail Jantzen Audio at contact@jantzen-audio.com
CROSSOVER-LAYOUT
BACK TO INDEX
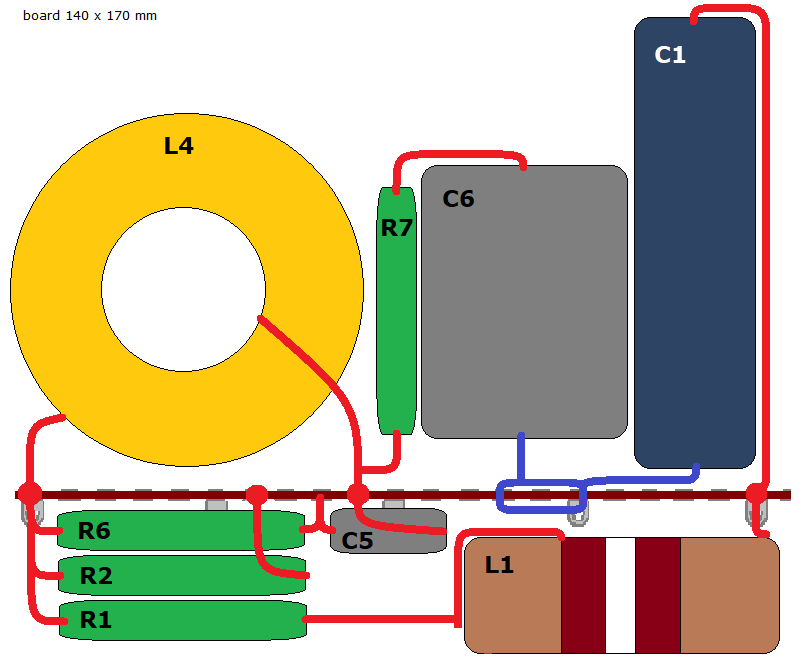
Above the layout for bass and tweeter
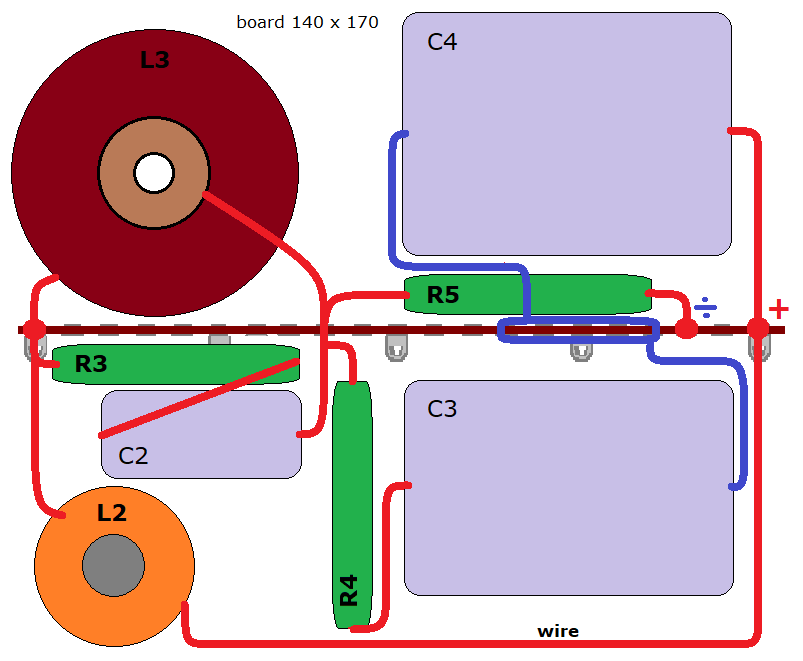
Above the layout for midrange
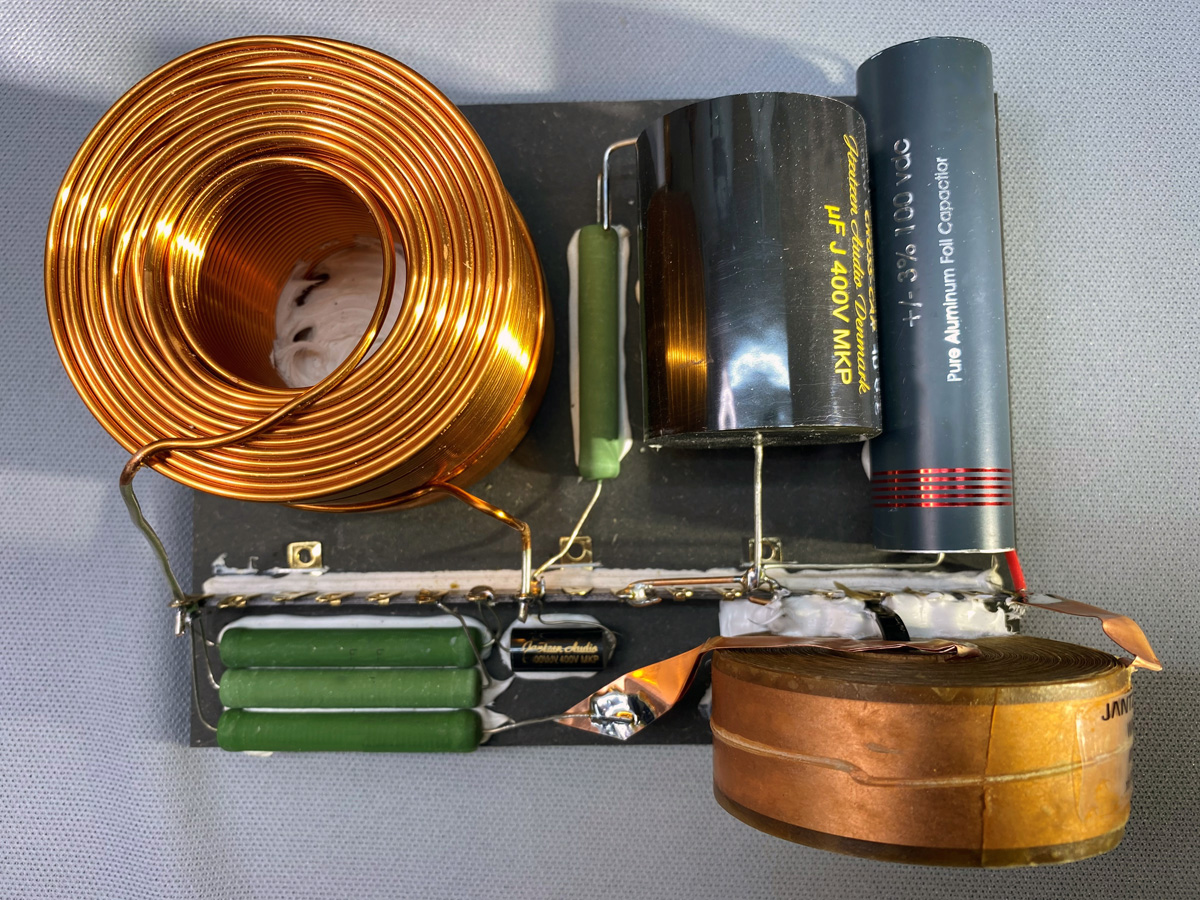
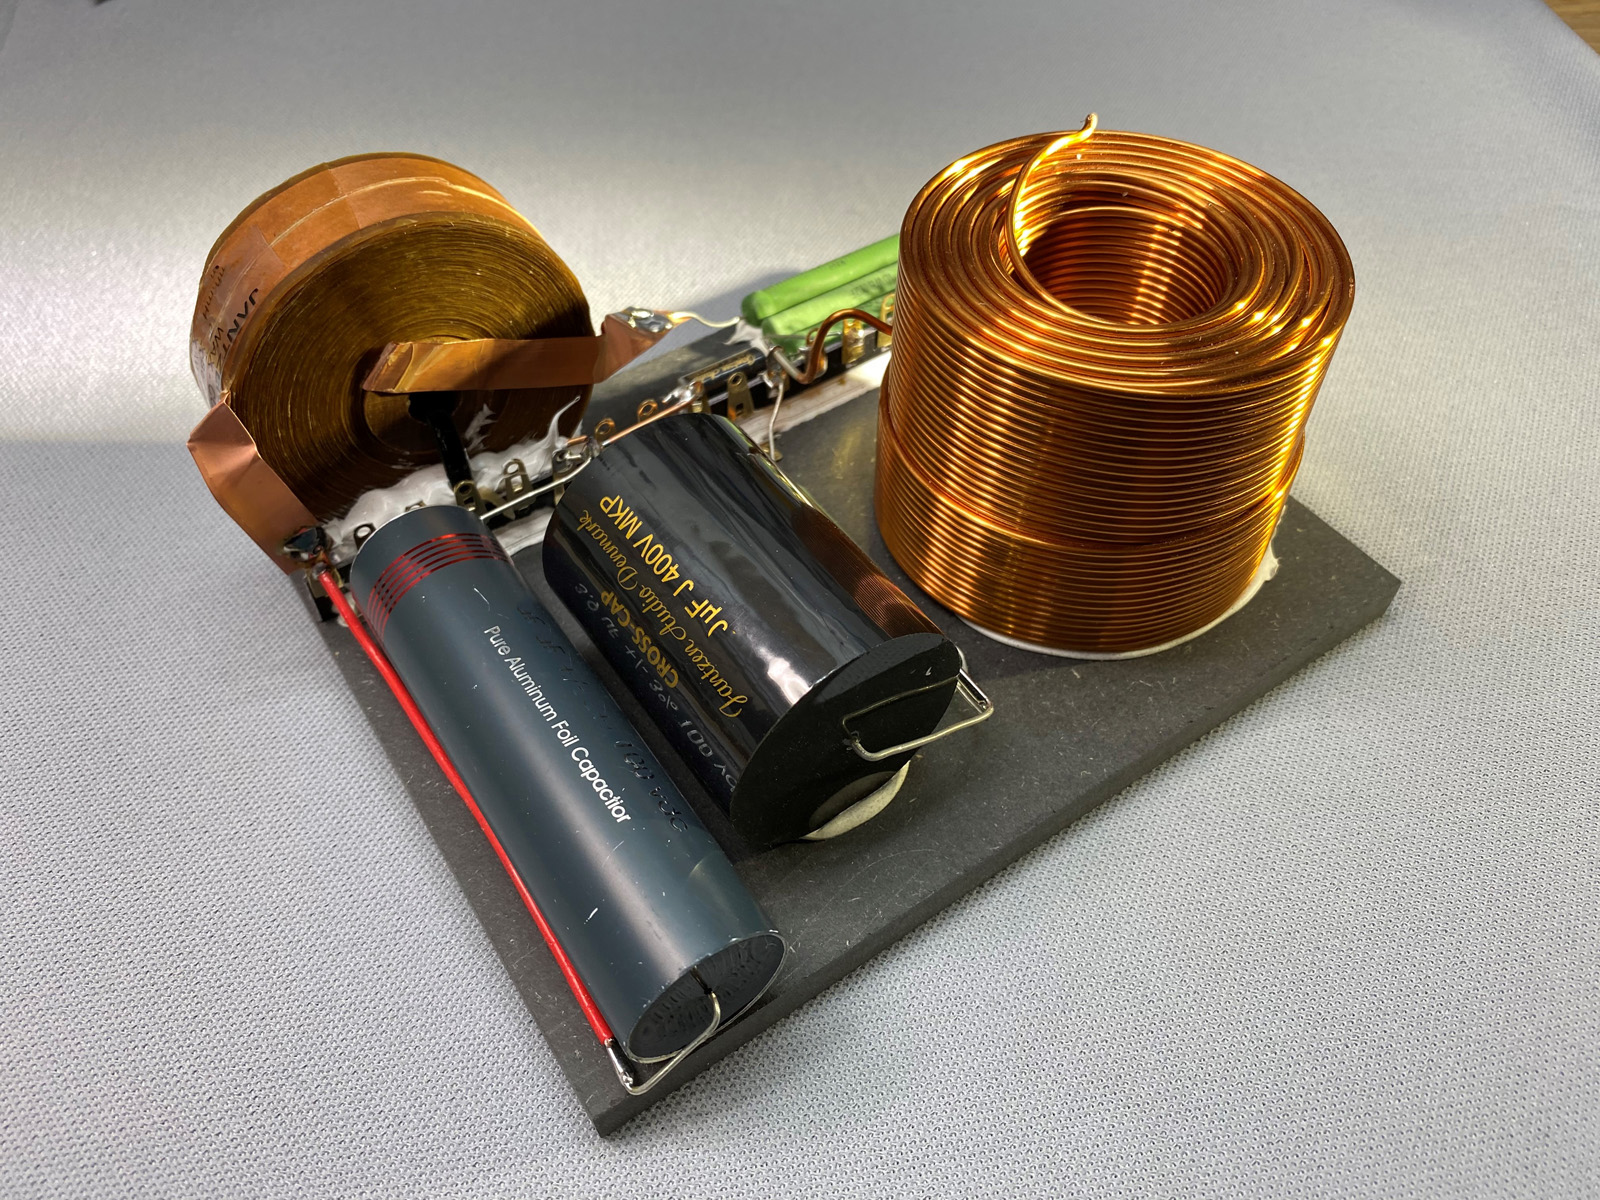
Midrange crossover.

Midrange crossover, click images to view large.
Bass and tweeter crossover.
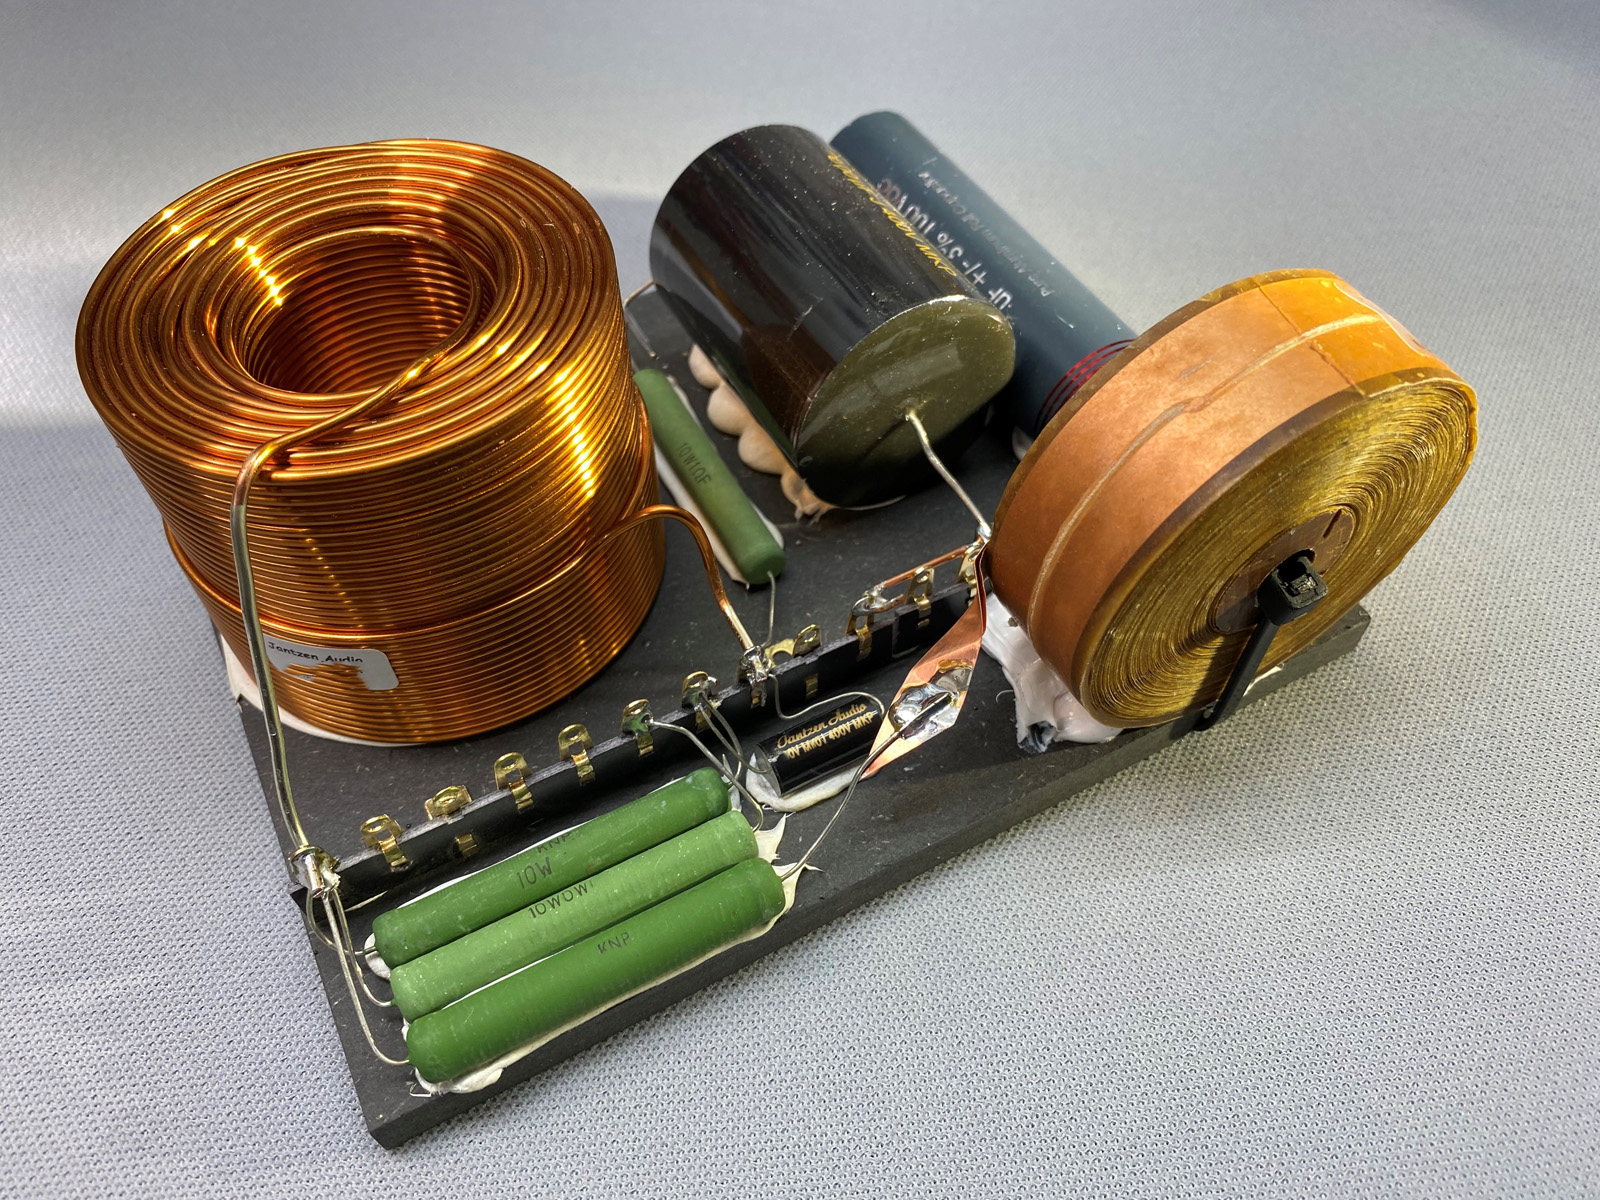
Bass and tweeter crossover, click images to view large.
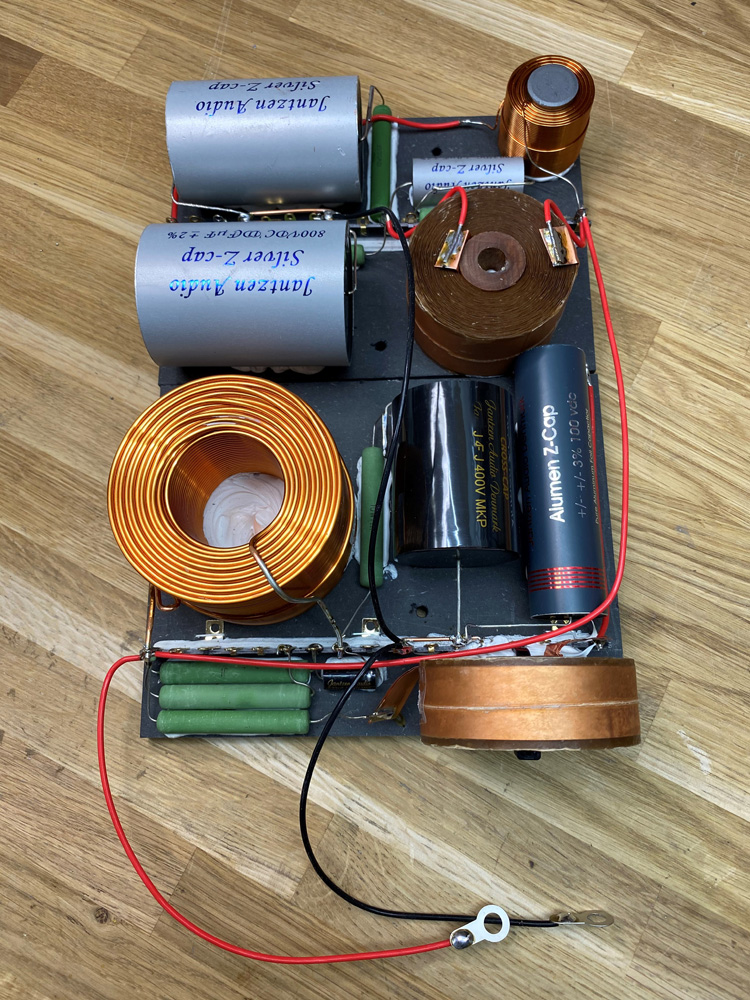
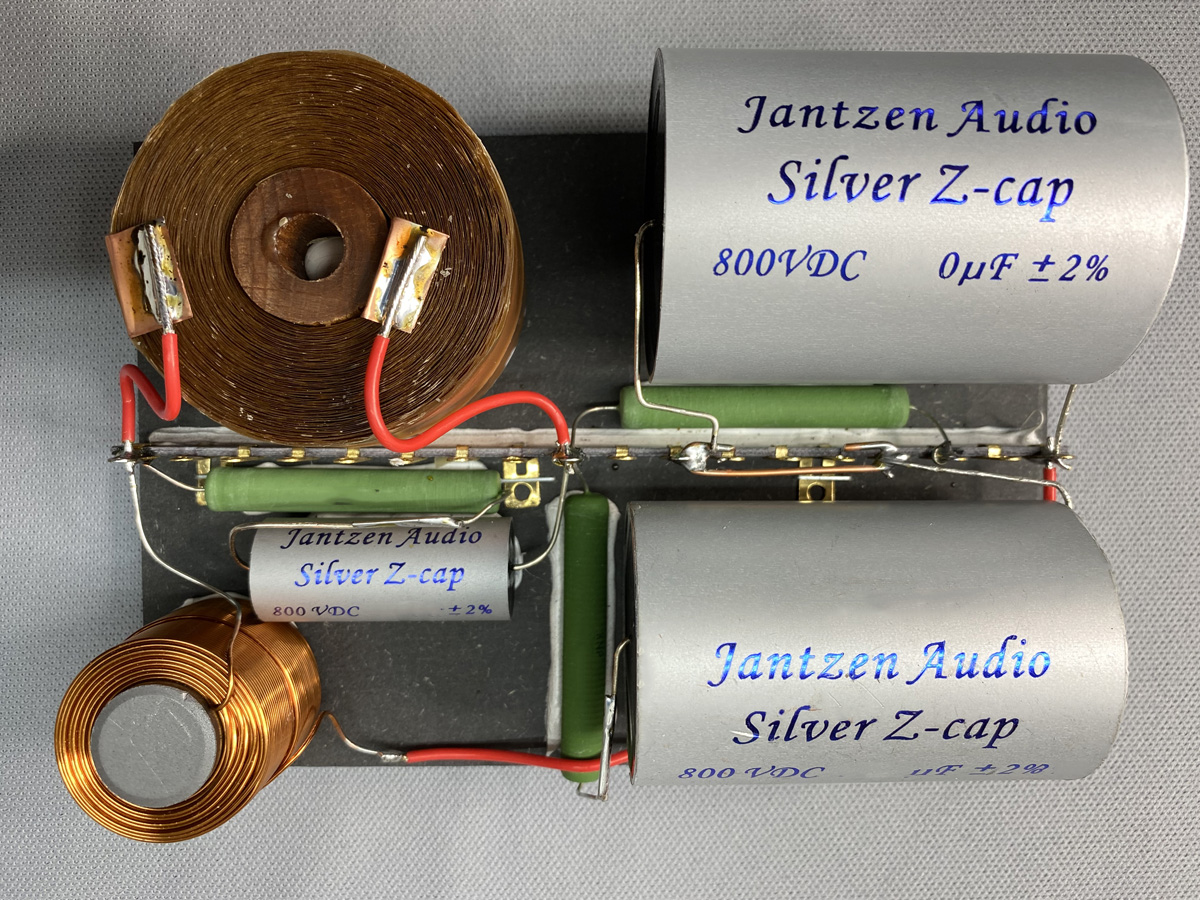
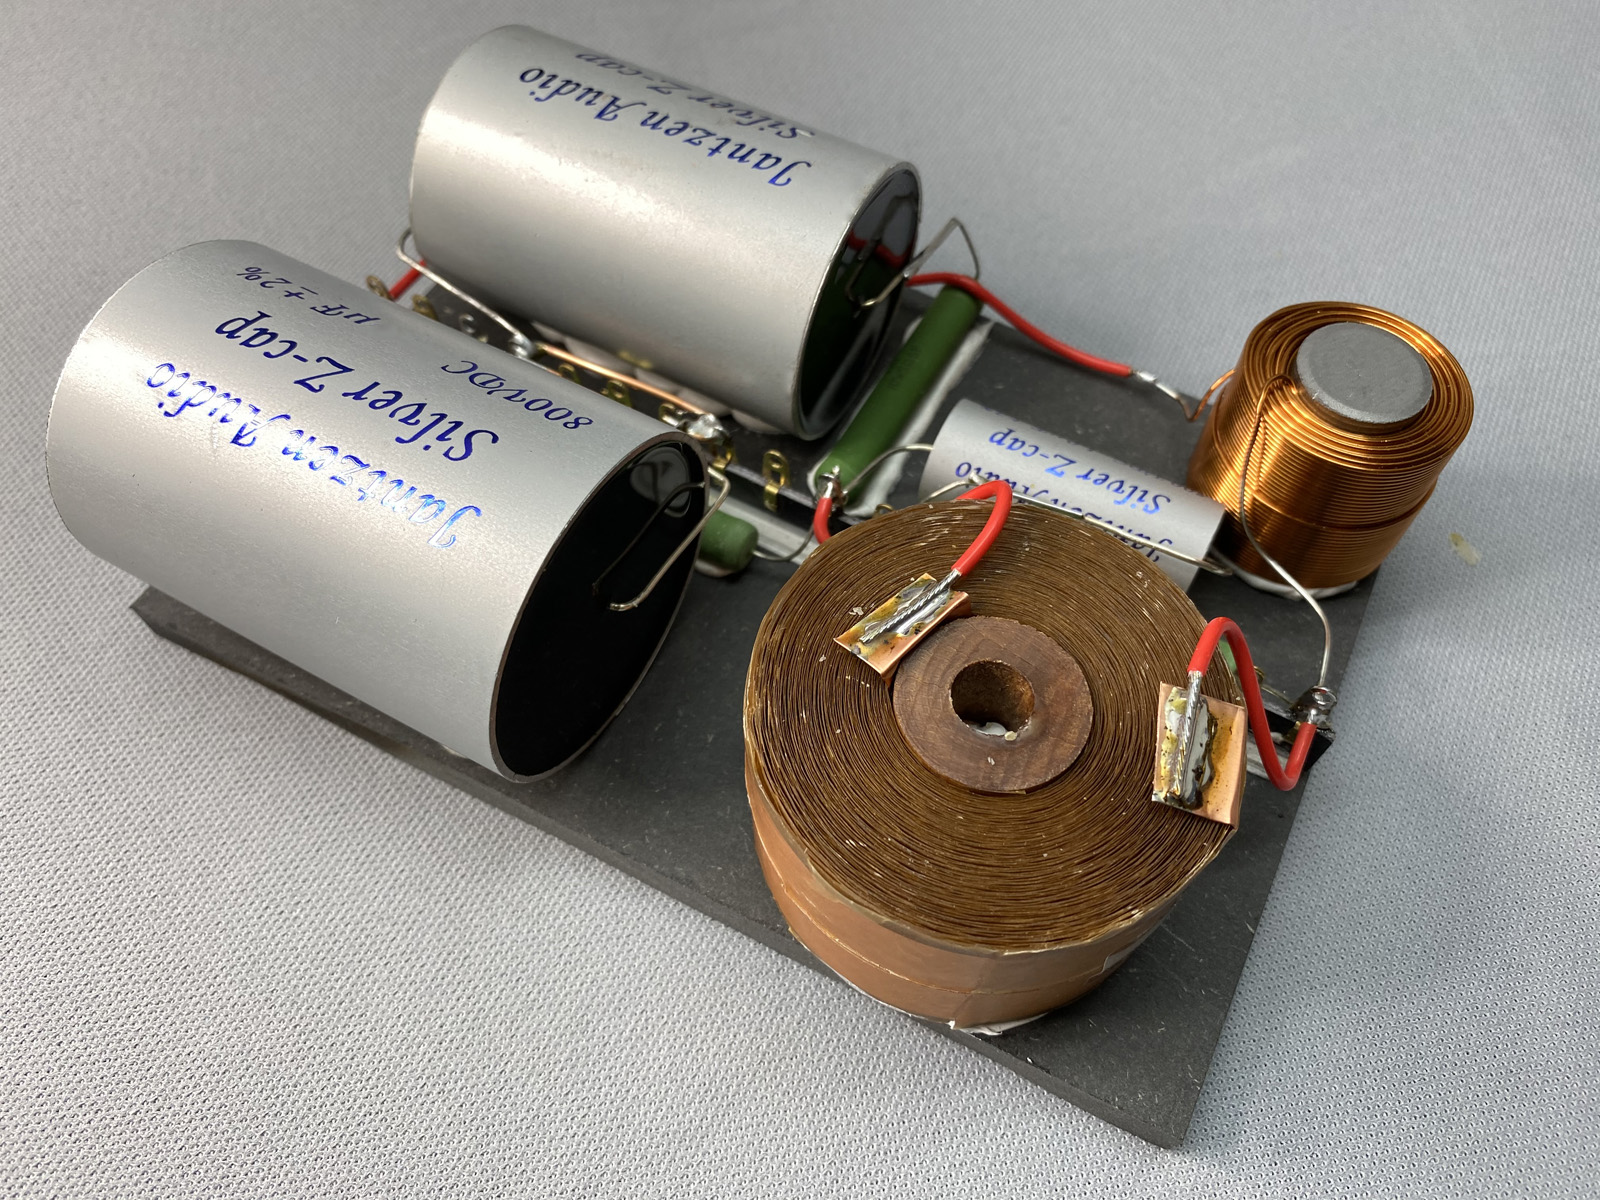
The crossover with the wires for terminals.
SPEAKER WIRING
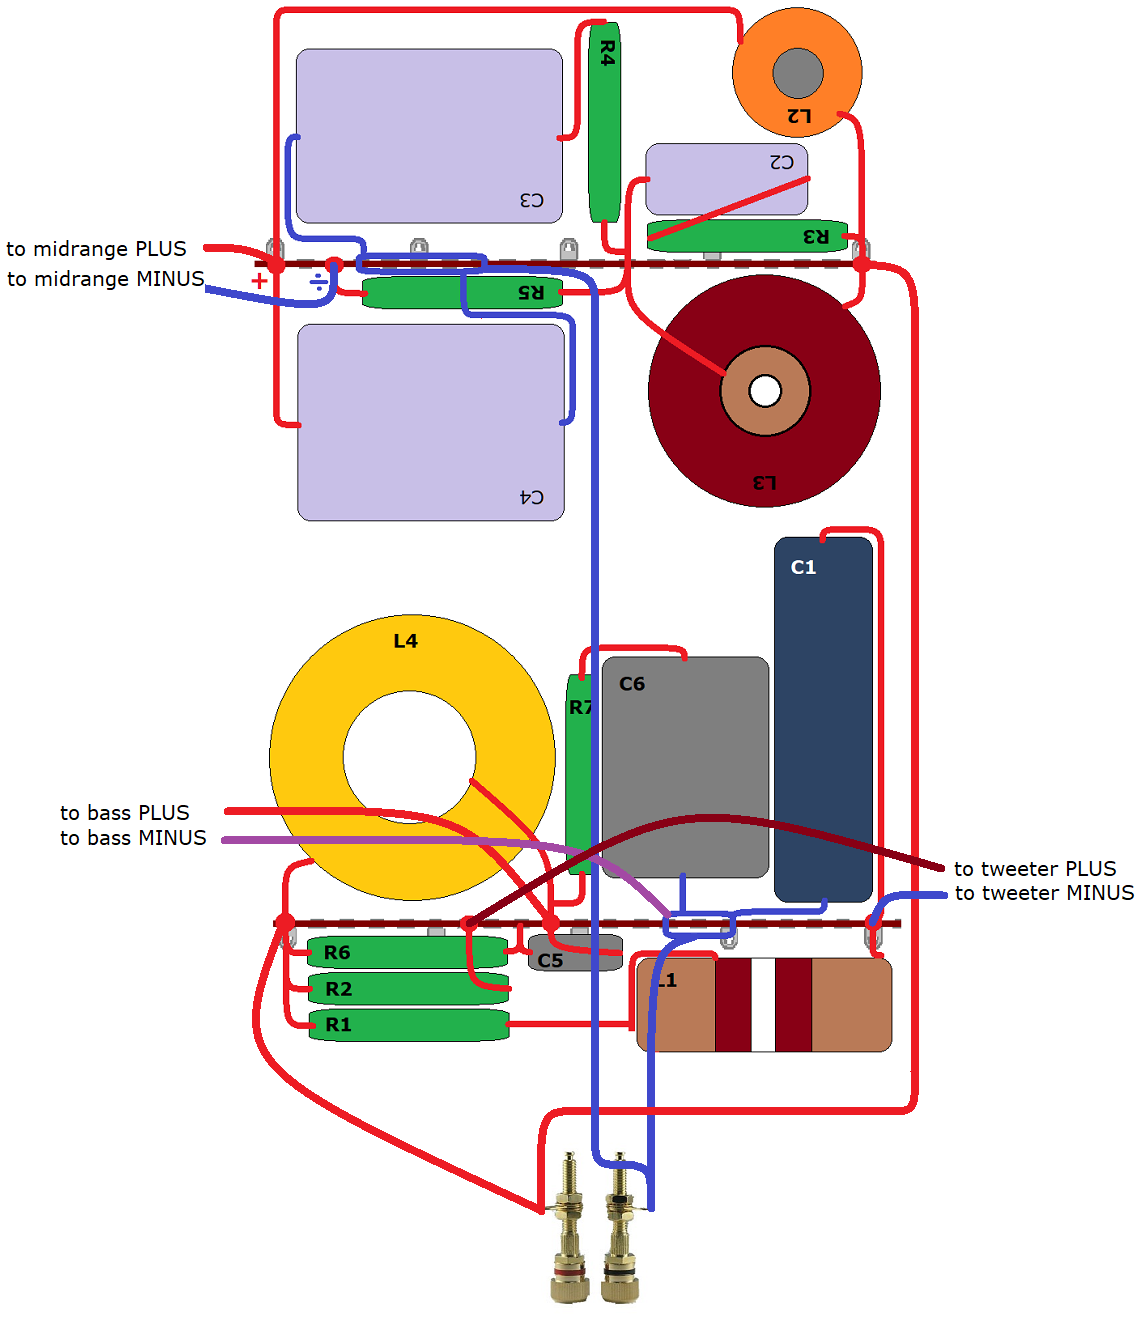
Wiring of speaker - almost as I did it. It can be done in many ways.
The IN wires for the midrange section can come from the terminals as
seen here, or from + and - IN on the bass-tweeter board. Doesn't matter.
I had to use different colours for the crossing wires, so trust the
drawing and connect the drivers correctly. I have mails from people not
aware of the fact that drivers have something called polarity.