Ekta 25
Copyright 2019 © Troels Gravesen
Go to on this page:
DRIVERS
CROSSOVER
CABINET
MEASUREMENTS
SPEAKER-KIT
CROSSOVER LAYOUT
My
STUDIO-101 mkII is a keeper! If it must be small and not cost a
fortune, this speaker does it. With the updated 18W/8542-00 driver, now
18W/8542-10, we have the tools together with the 9130 tweeter to make
extraordinary quality for a modest investment.
Finishing the Studio 101 mkII, a 2½-way was an obvious thing to do to
get more of the same goodies. More bass, more power handling, more of
everything.
Although the Ekta speakers were built around the sliced paper drivers, I
decided to call this speaker Ekta-25 despite featuring drivers from the
Classic and Discovery range. And as said many times before, the
D2608/913000 tweeter deserves better placement than the Discovery
series. It's a top notch tweeter and the 18W/8542-10 has become my "if
you can't afford the Ellipticor 18WE" driver.
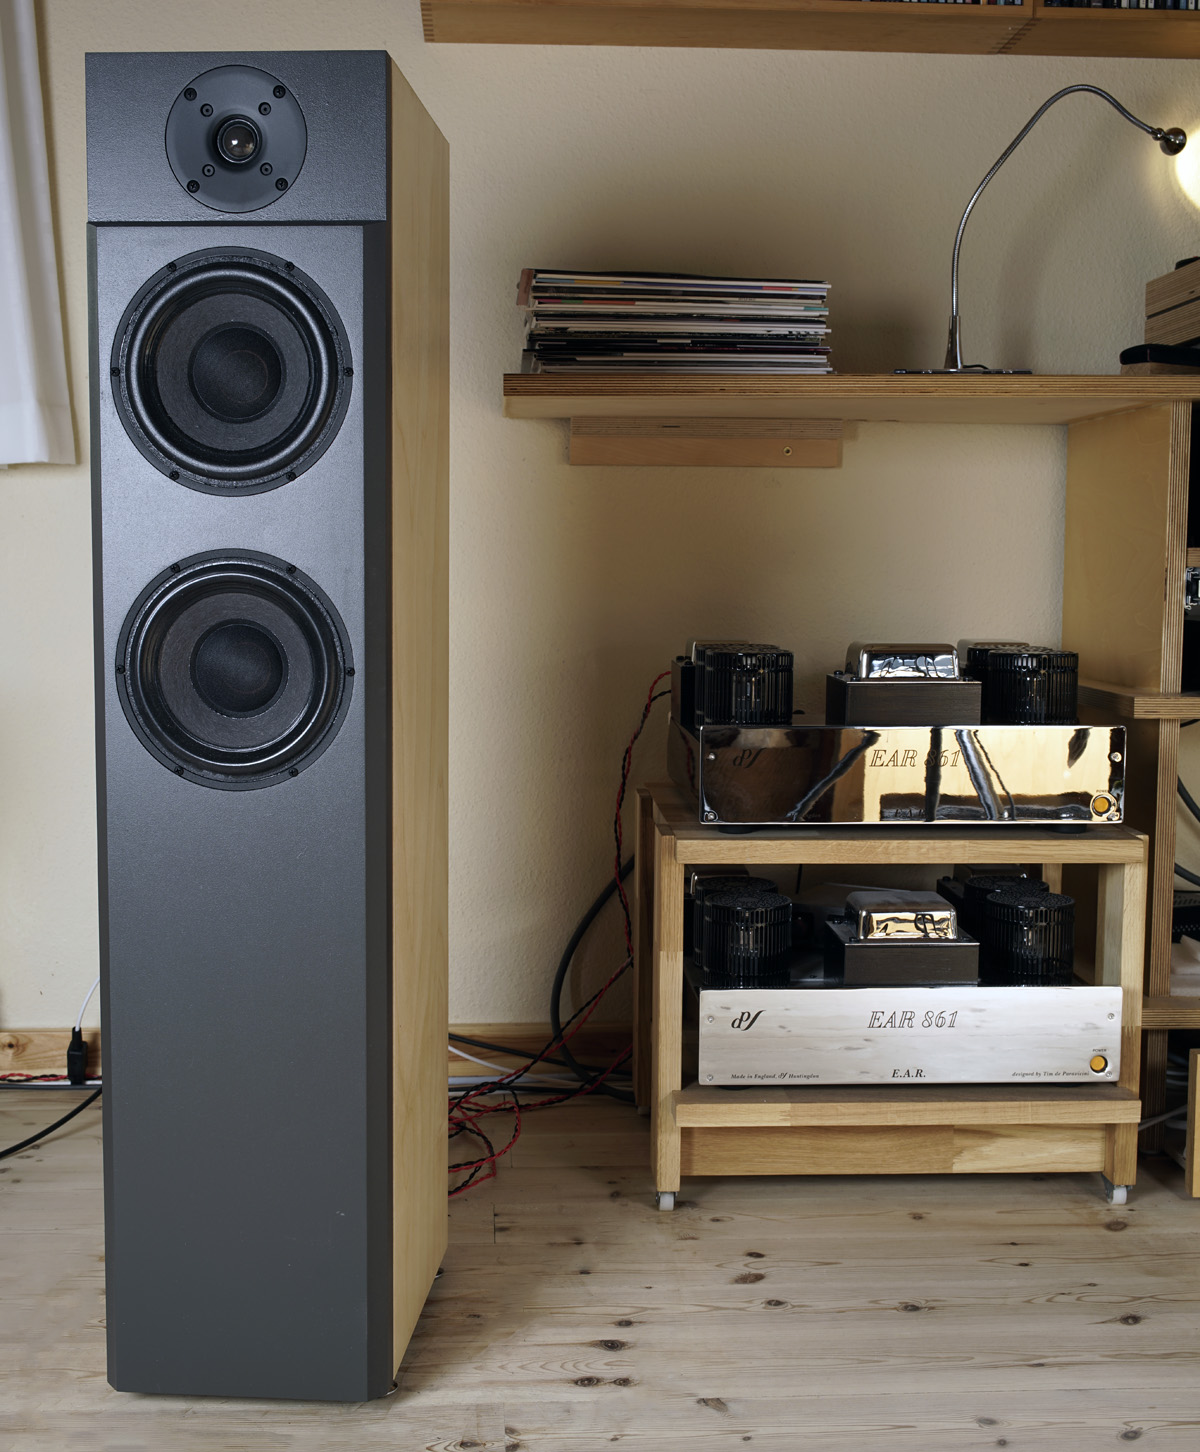
Setting up the Ekta-25 I experienced a vivid and dynamic presentation, yet delicate and smooth in upper-mid and treble. The two 18W drivers can throw quite some bass having a combined area similar to a ~9" driver. Giving the ~91 dB sensitivity also an easy load for my 32 watt tube amp. I'm more than pleased!
Basics:
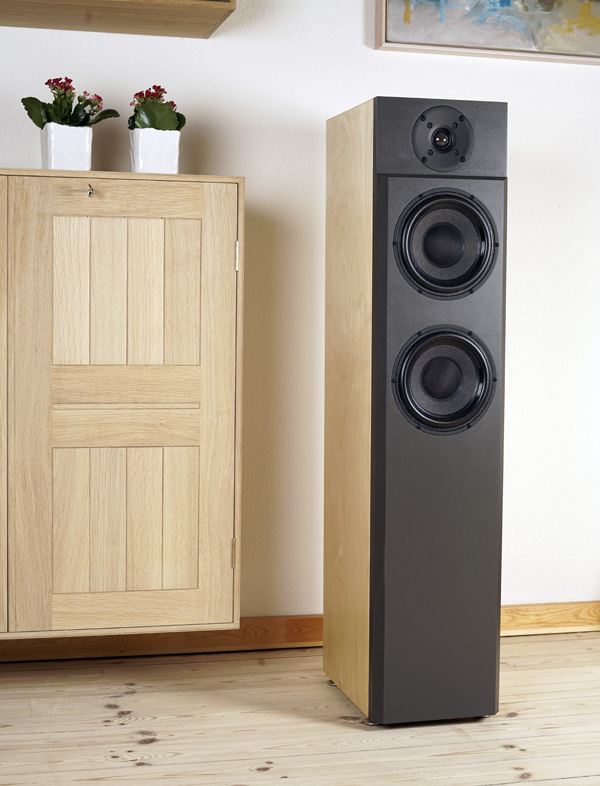
2½-way, 3-driver speaker.
Dimensions: 22 x 32 x 100 cm, WxDxH (without feet).
System sensitivity: 91 dB/2.8V/1 meter.
Impedance: 4 Ohms
Point of crossover: 2500 Hz, LR2 crossover.
Power requirement: 20+ watts/channel.
Power handling: 160 watts. Please also read:
http://www.troelsgravesen.dk/power-handling.htm, and remember any
burned driver is a misused driver.
Useful links (Please
follow all links before e-mailing!):
http://www.troelsgravesen.dk/tips.htm
http://www.troelsgravesen.dk/tips.htm#CONSTRUCTION_OF_CROSSOVERS
http://www.troelsgravesen.dk/crossovers.htm
http://www.troelsgravesen.dk/LCR-RC.htm
http://www.troelsgravesen.dk/Inverted-Polarity.htm
http://www.troelsgravesen.dk/choices.htm
http://www.troelsgravesen.dk/power-handling.htm

Click images to view large.
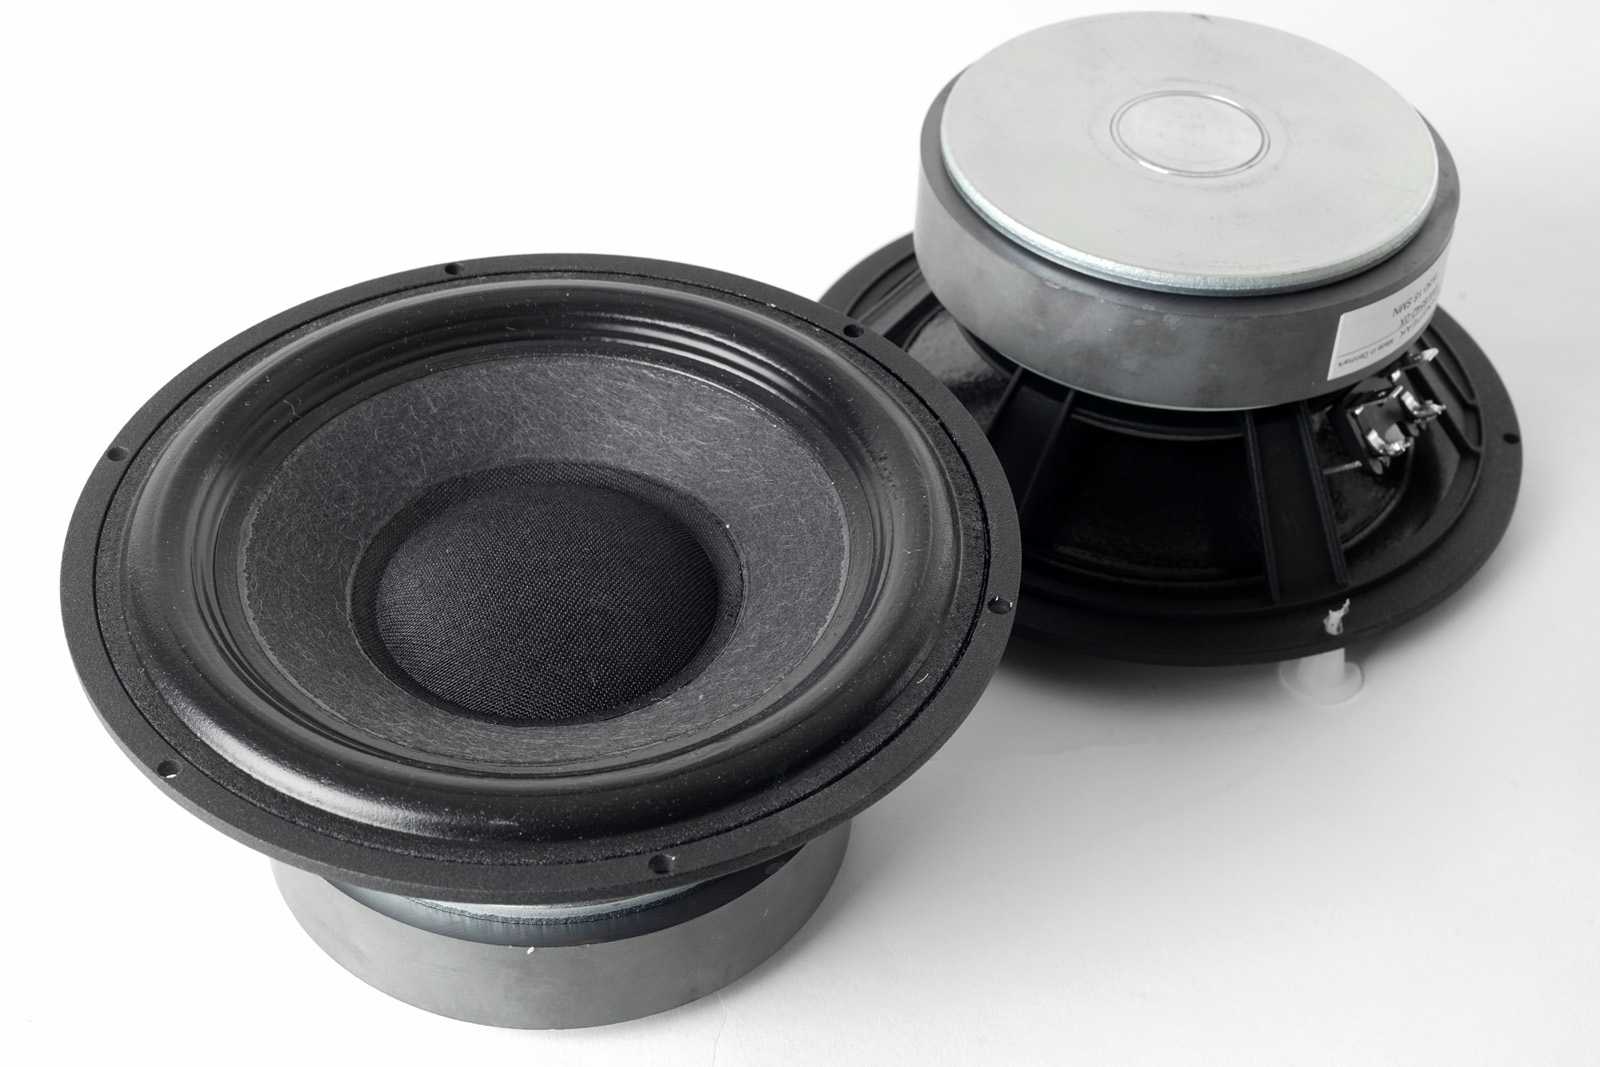
Download specs: D2608/913000 (grey terminal = plus) 18W/8542-10
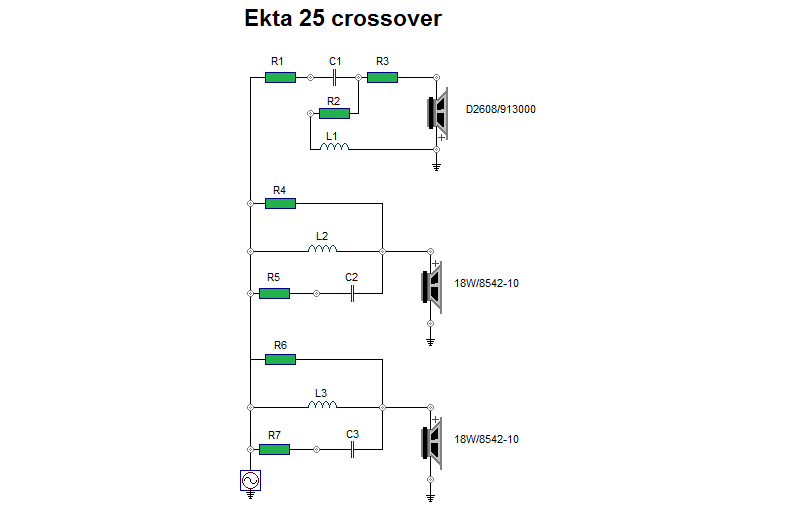
Like the Studio-101 mkII, this filter features an LR2 filter and the 18W driver coils need a by-pass resistor plus an RC circuit across the coils to perform a perfect 2nd order roll-off. The tweeter a little easier as a standard topology makes a perfect LR2 profile all the way from 800 to 20000 Hz.
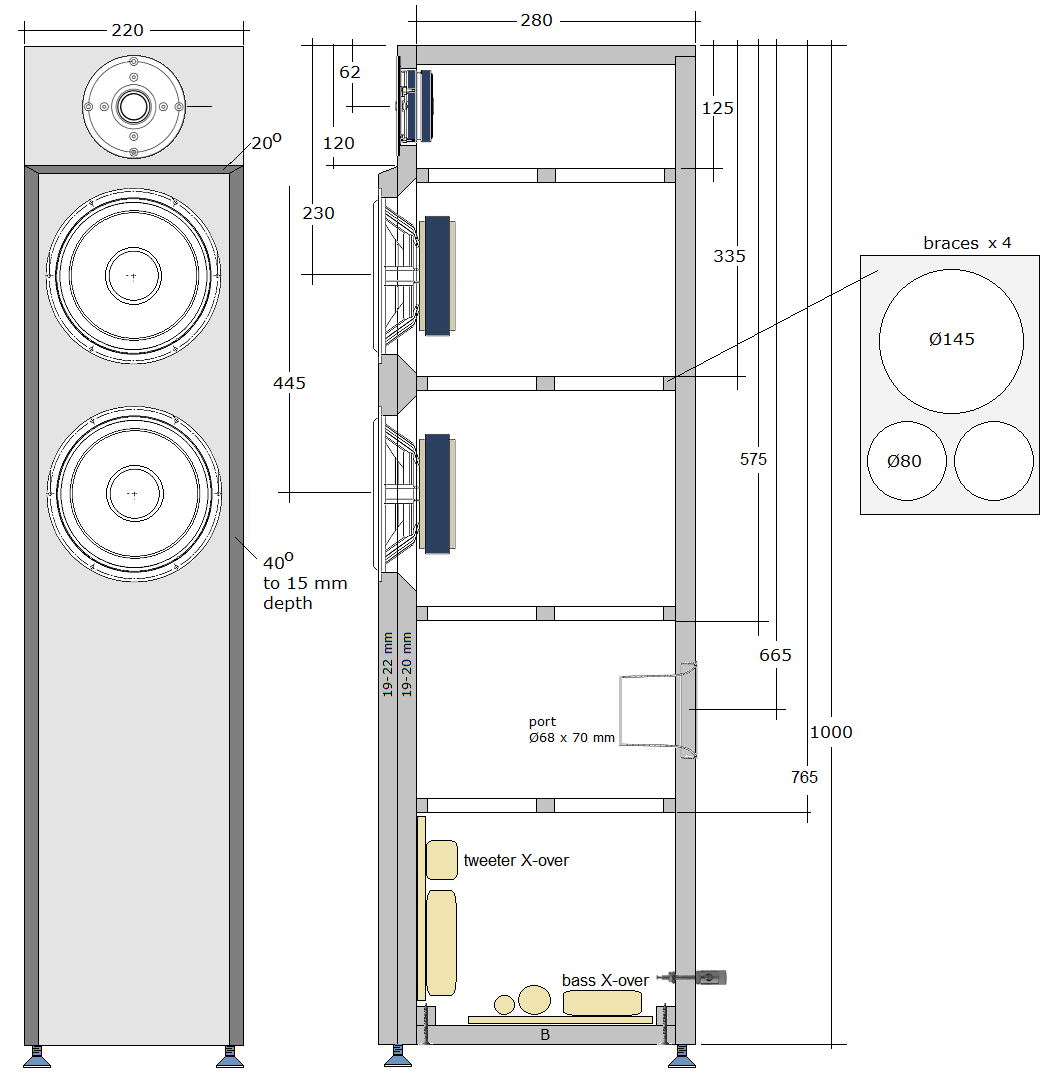
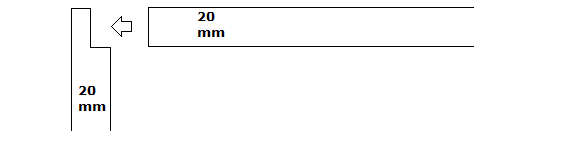
Cabinets were made from 20 mm Baltic birch and front panels from 19 mm HDF. You can use 19 mm MDF throughout. And you can make the front panel like the Ekta mkII if you like the look of Baltic birch.
I suggest you add bitumen pads to your purchase (~5 pcs 4 mm 50 x 50 cm sheets). All internal panels are damped with 8 mm felt material acoustilux added according to recommendations below. I strongly suggest making the bottom panel detachable and place the crossover here far away from the driver magnets.
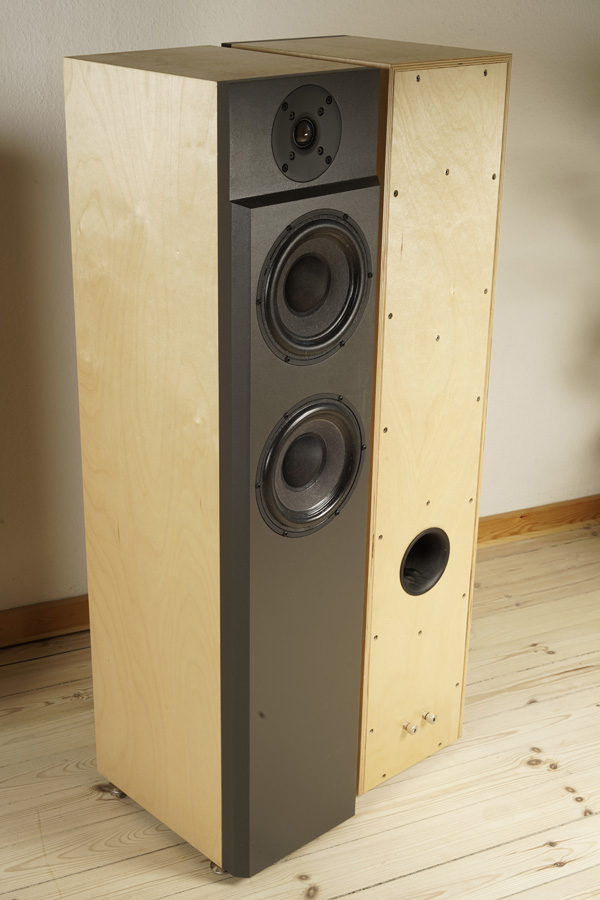
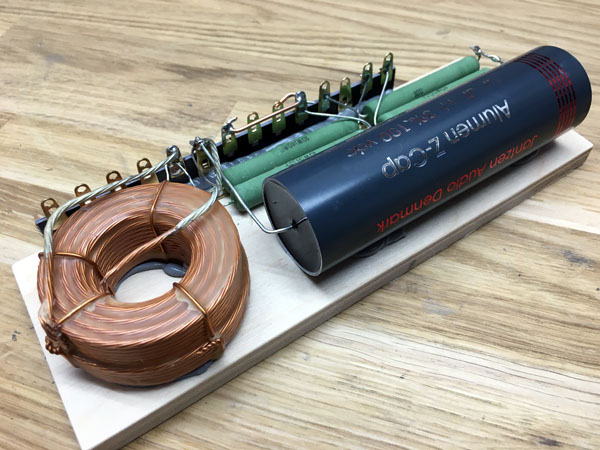
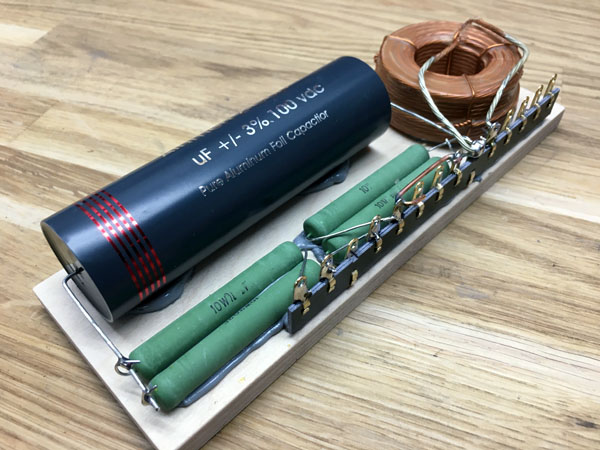
Workshop images
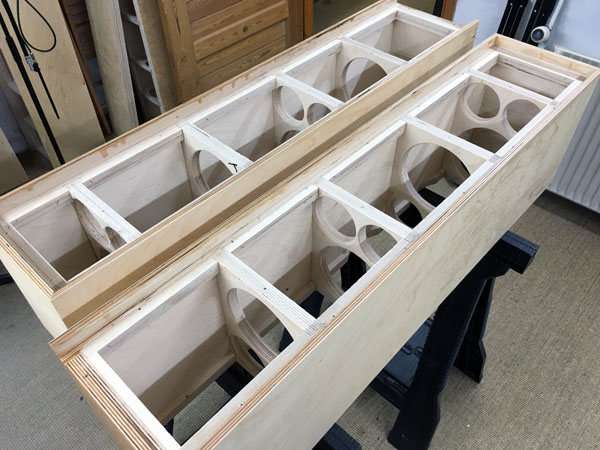
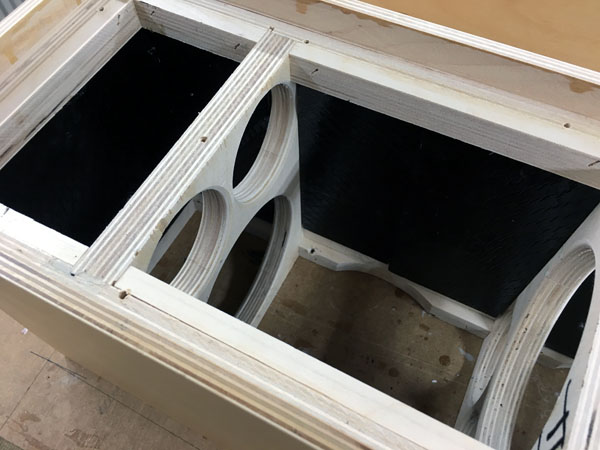
There are many ways to construct a simple
floor-stander like this and as I wanted to use the cabinets for more
constructions, I had the rear panel rebated and attached by screws.
Above to the left bitumen pads on internal panels.
The bitumen pads are optional and must be
added to your order.
Whenever I show images having rebated panels, I have the question if the
panels are laminated. They are not. This is how it goes.
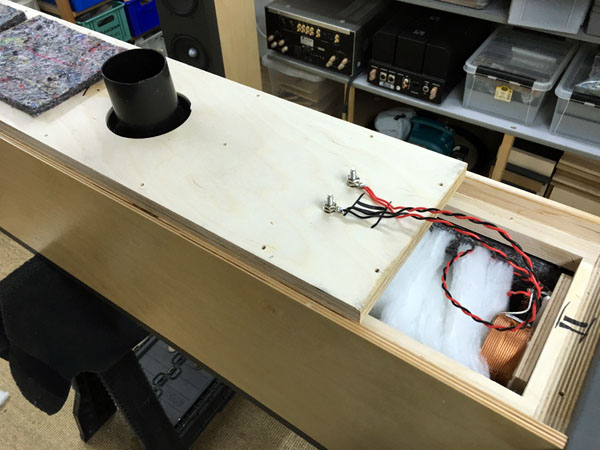
Rear panel with terminals and port. Ports
usually leak midrange, so keep it to the rear.

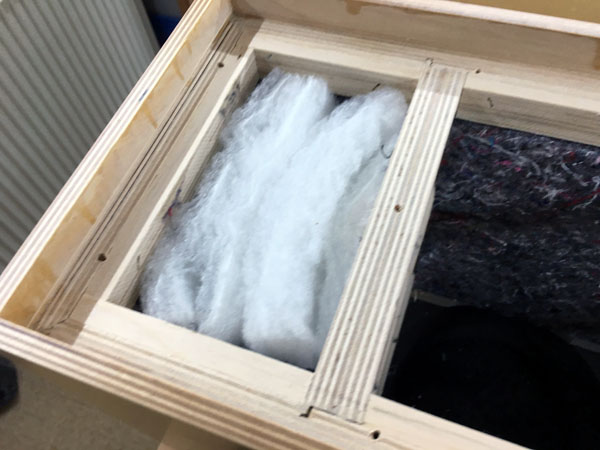
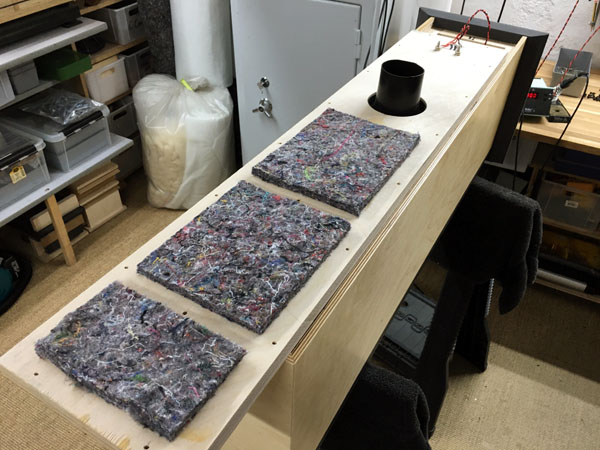
All internal panels damped with 8 mm felt
material. Towards the top, place four layers of 30 mm Acoustilux.
(disregard the fillets and rubber strips, I use these cabs for several
constructions)
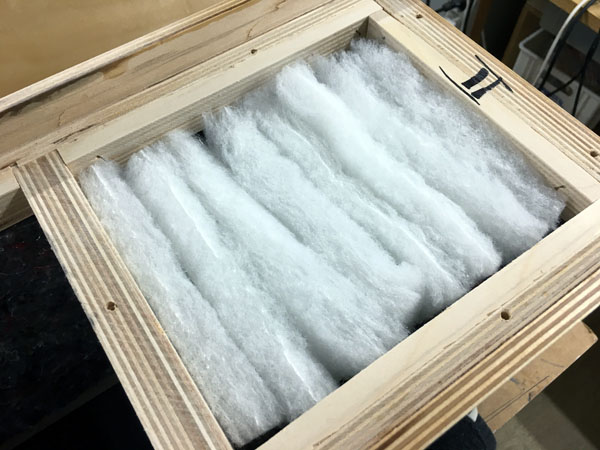
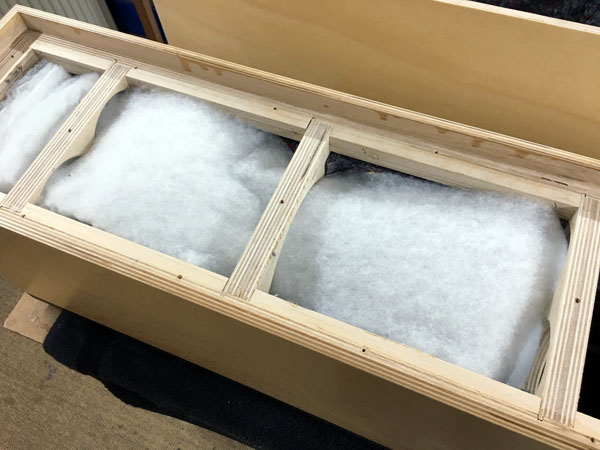
Left: Bottom of cabinet, place 8 layers of 30
mm Acoustilux. On rear panel behind bass drivers, place two layers of 30
mm Acoustilux.
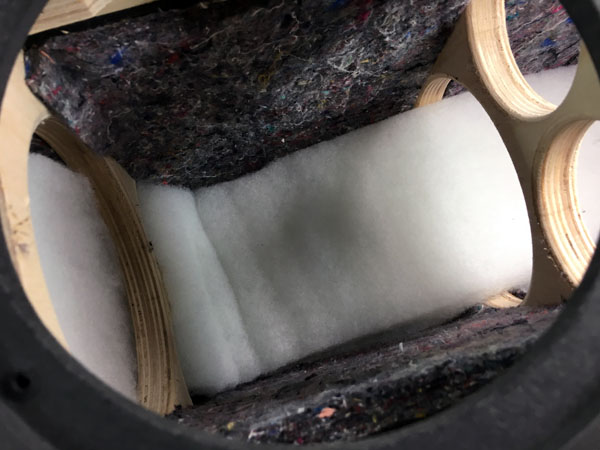
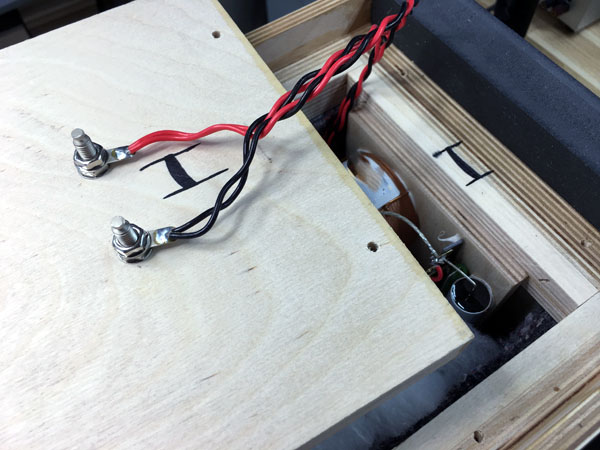
Rear panel behind bass drivers seen from front. Wires from binding posts
to crossover.
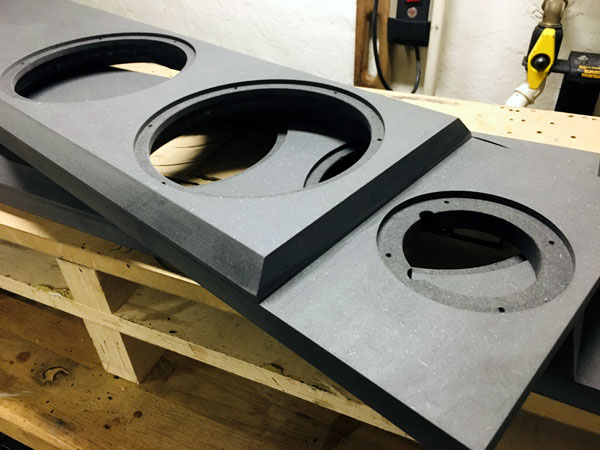
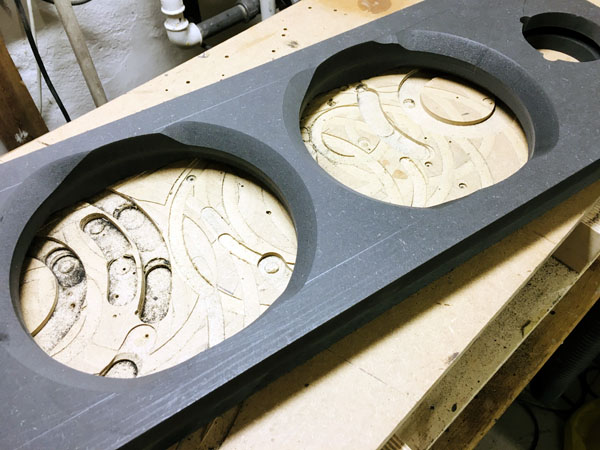
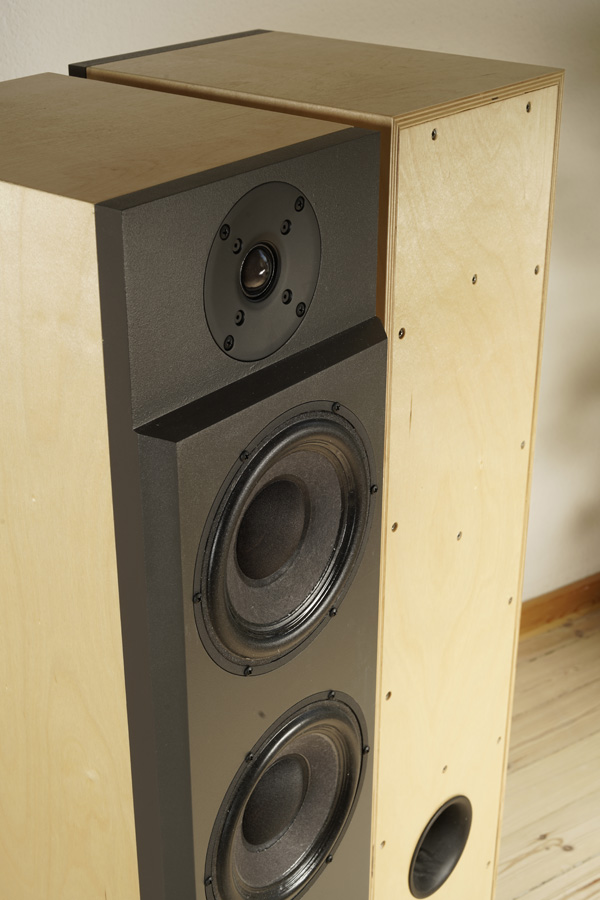
Routing the front panels. Right: Outer panel from back side.
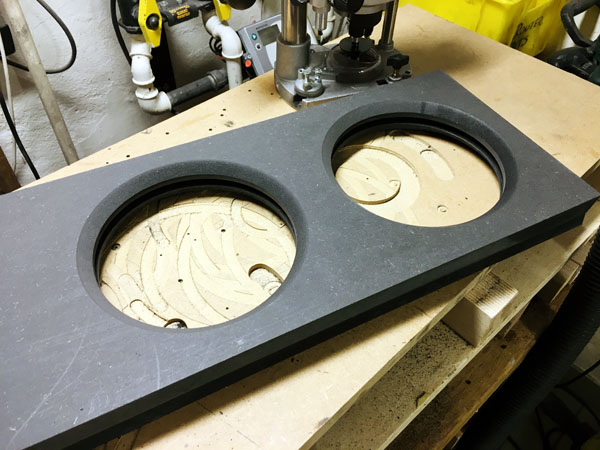

Left: Inner panel from back side. Right: Final assemble from back side.
Read
here on the importance of chamfering drivers holes.
A few comments on
MEASUREMENTS before you start interpreting the readings below.
First of all, if we think measurements will
tell us how a speaker sounds, we're wrong. The perception of sound is
way too subjective to be reflected in any measurements we can perform. A
loudspeaker system is meant to give us a satisfying idea of an acoustic
event and for some people a pair of 5 USD ear-plugs are enough, others
spend 200 kUSD on a truly full-range pair of speakers - and the latter
may not be happier than the former.
Measurements may give us an idea of tonal balance of a system, i.e. too
much or too little energy in certain areas, although dispersion
characteristics play a vital role here. A two-way 7+1 and a three-way
7+4+1 may display similar horizontal dispersion, yet sound very
different. Measurements may tell us about bass extension if far-field
measurements are merged with near-field measurements. In addition to
this, ports may contribute to bass extension. Most of we diy'ers do not
have access to an anechoic room for full-range measurements from
20-20000 Hz.
What cannot be seen is what kind of bass performance we get in a given
room. Bass performance is highly dependent on in-room placement of your
speaker and the same speaker can be boomy in one place and lean in
another. Actual SPL level at 1 meter distance and 2.8V input is useful
for en estimate of system sensitivity and combined with the impedance
profile may give an idea of how powerful an amplifier is needed to drive
the speaker to adequate levels.
What measurements do not tell is the very sound of the speaker unless
displaying serious linear distortion. The level of transparency, the
ability to resolve micro-details, the "speed" of the bass, etc., cannot
be derived from these data. Distortion measurements rarely tell much
unless seriously bad, and most modern drivers display low distortion
within their specified operating range.
Many people put way too much into these graphs and my comments here are
only meant as warning against over-interpretation. There are more to
good sound than what can be extracted from a few graphs. Every graph
needs interpretation in terms of what it means sonically and how it
impacts our choice of mating drivers, cabinet and crossover design.
What measurements certainly do not tell is the sonic signature of the
speaker, because speaker cones made from polypropylene, aluminum,
Kevlar, paper, glass fiber, carbon fiber, magnesium, ceramics or even
diamonds all have their way of adding spices to the stew. Nor do
measurements tell what impact the quality of the crossover components
add to the sound, from state of the art components to the cheapest of
coils and caps, they all measure the same if values are correct, yet
sound very different.
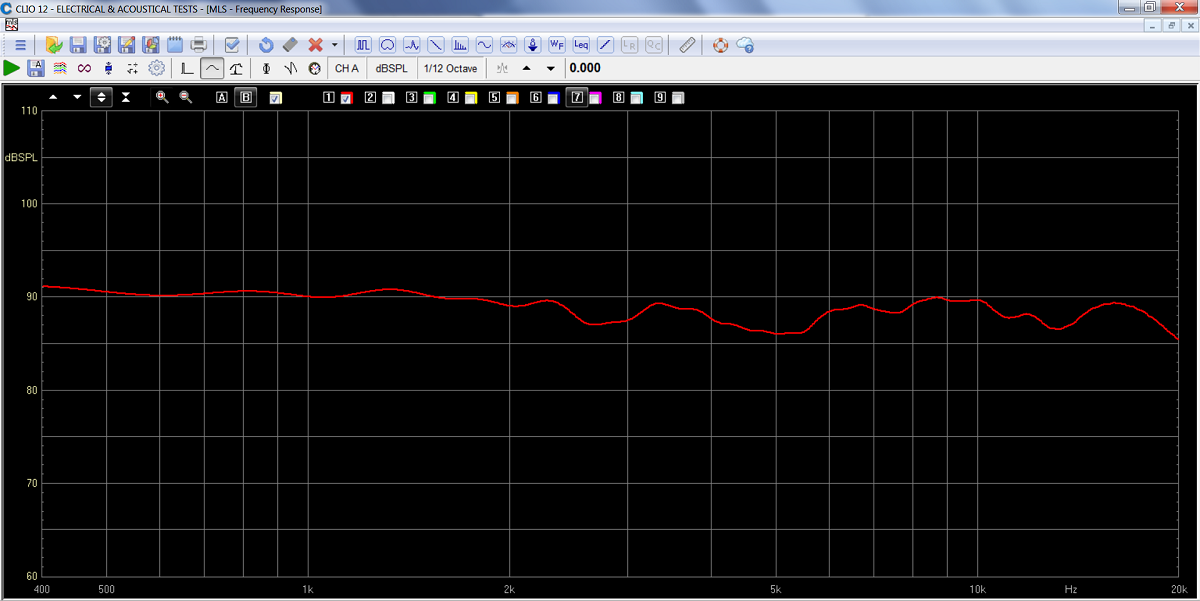
Final SPL at 1 meter, 2.8 volt, displaying some 90-91 dB sensitivity.
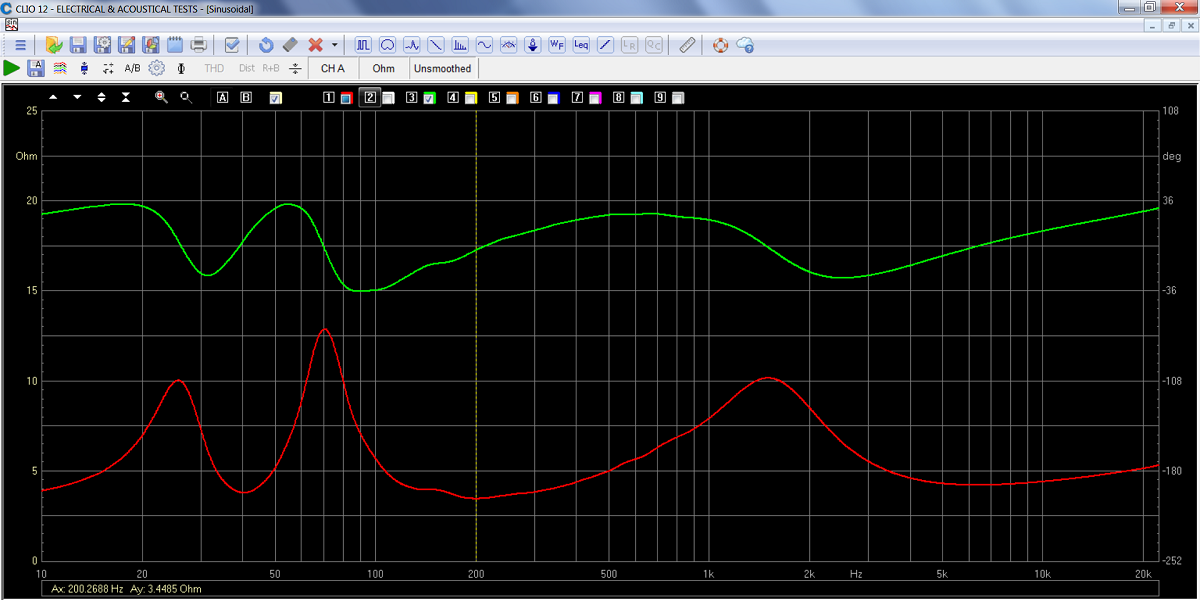
Final system impedance showing minimum 3.5 Ohms @ 200 Hz. Generally an
easy load on your amplifier.
What also can be seen in the port-tuning of 40 Hz.
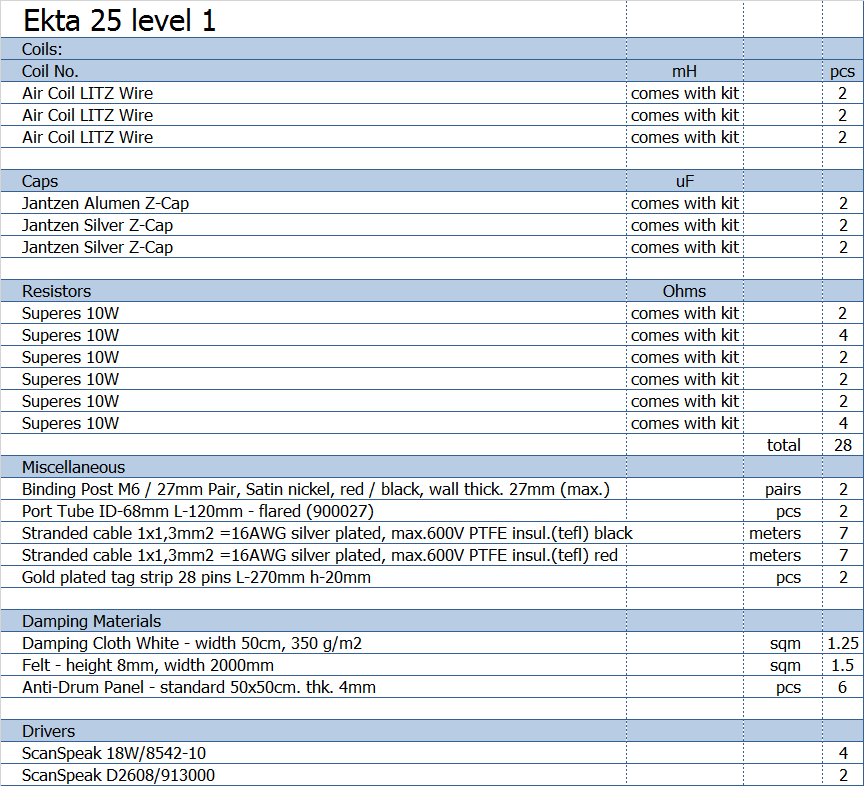
Above level 1 kit with Alumen-Z or tweeter.
Cut port to 70 mm total length.
The bitumen pads are optional and must be added to your order.
The bitumen pads are optional and must be
added to your order.
All kit and component prices may be subject to change and are always to be confirmed by Jantzen Audio Denmark.
Download Kit Sale Presentations:

All technical questions to troels.gravesen@hotmail.com
All questions regarding purchase of kits, please mail Jantzen Audio at contact@jantzen-audio.com
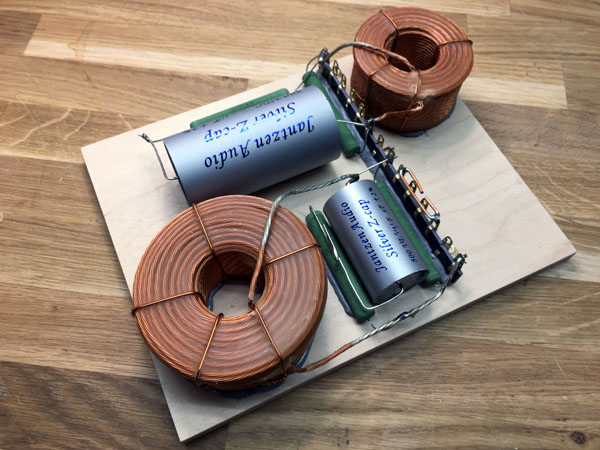
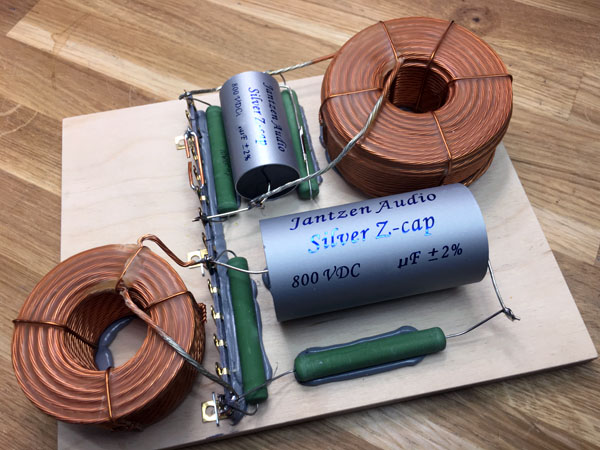
CROSSOVER-LAYOUT
BACK TO INDEX
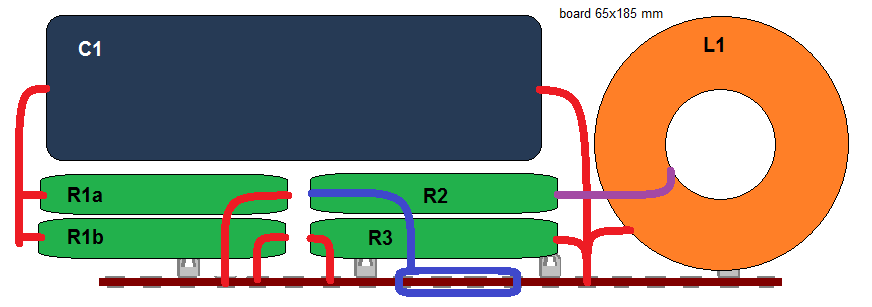
Tweeter layout. Use half solder tag
strip/crossover.
Connect + IN to either R1a or R1b depending on your preferred treble
level.
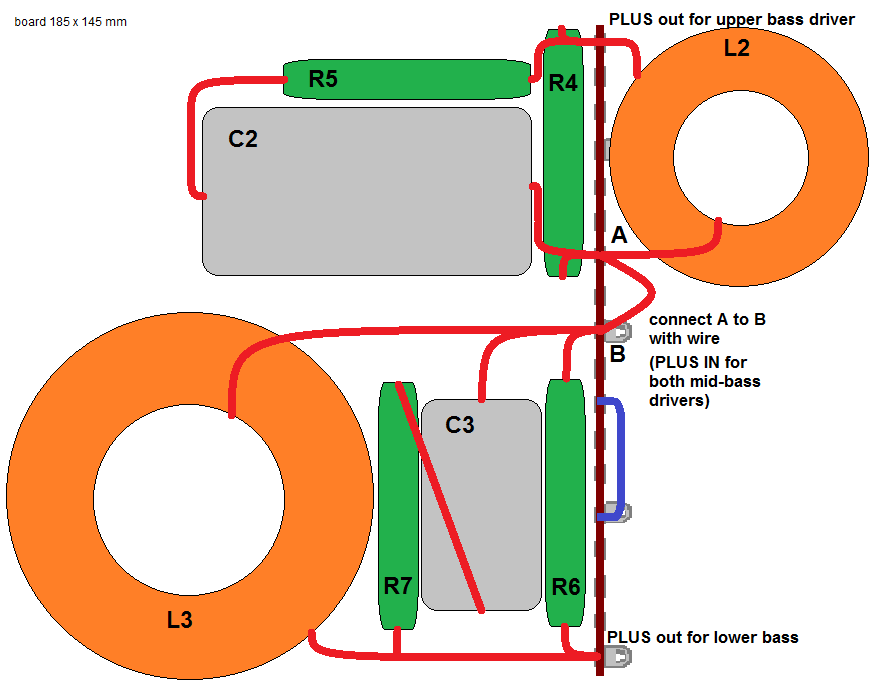
Midbass crossover layout. Use half solder tag
strip.
Crossover for tweeter.
Crossover for mid-bass drivers.
WIRING
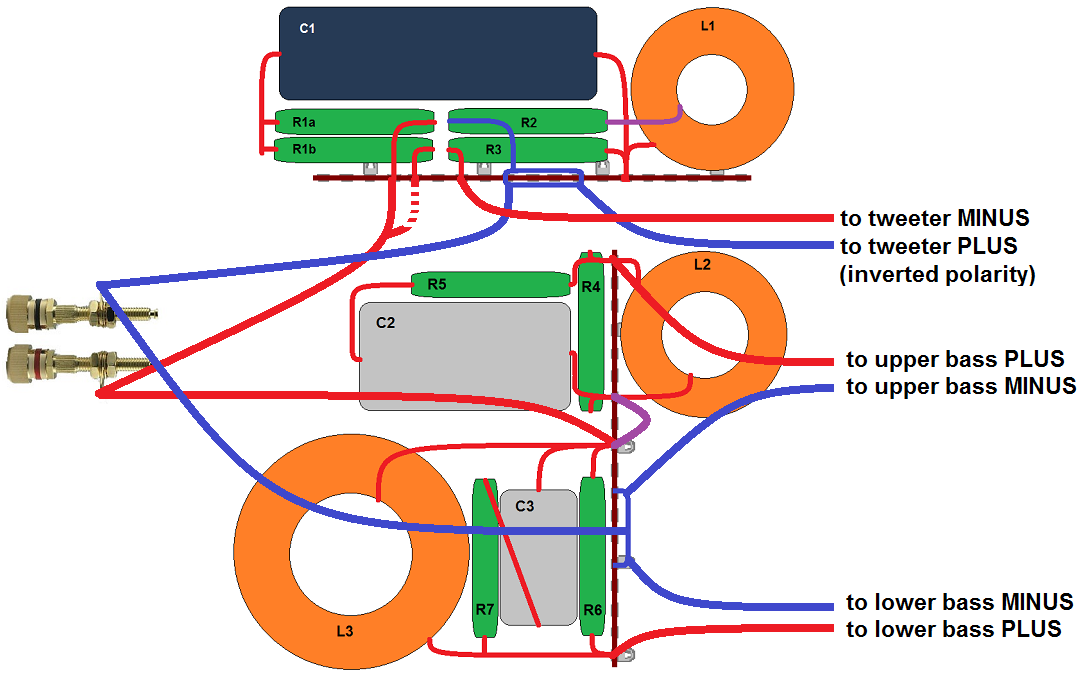
Speaker wiring. Connect input wire to R1a or R1b depending on your
preferred tweeter level.
R1a gives the highest level. My default is R1b, but some like it hot.