Ellam FLEX cabs
Copyright 2022 © Troels Gravesen
GO TO ELLAM FLEX 3-WAY CABINET BACK TO INTRO PAGE BACK TO ELLAM FLEX
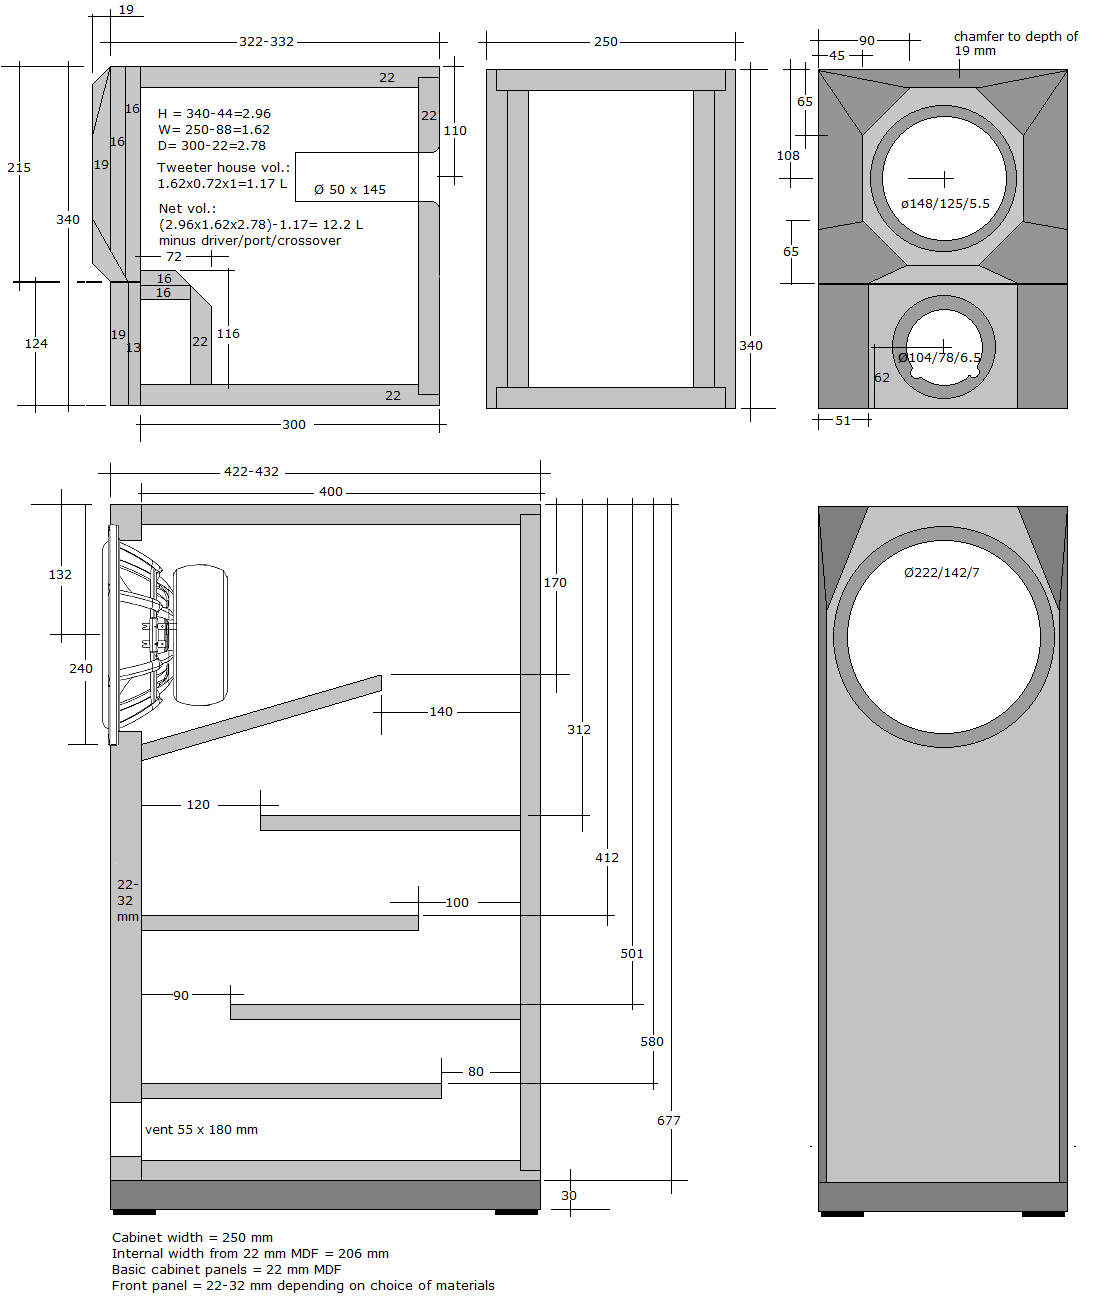
Ellam FLEX front panels
Cabinet front panels
are made from 16 and 19 mm black MDF, cabinets from 21 mm Baltic birch.
Baltic birch thickness may vary a little from batch to batch. If Baltic
birch is not available, I suggest 22 mm standard MDF. All internal
panels for the bass TL are 16 mm MDF.
Basic front panels are laminated from 2 x 16
mm MDF and the outer mid panel from 19 mm MDF. I suggest using 22-25 mm
MDF for basic panel and 19 mm for the outer mid panel.
Generally panel thickness may vary +/- 1 mm
without impacting performance, all depends on what panels we're talking
about. Due to the intrinsic bracing of a TL, the panels used here are
not critical. But first the 2-way cabinet.

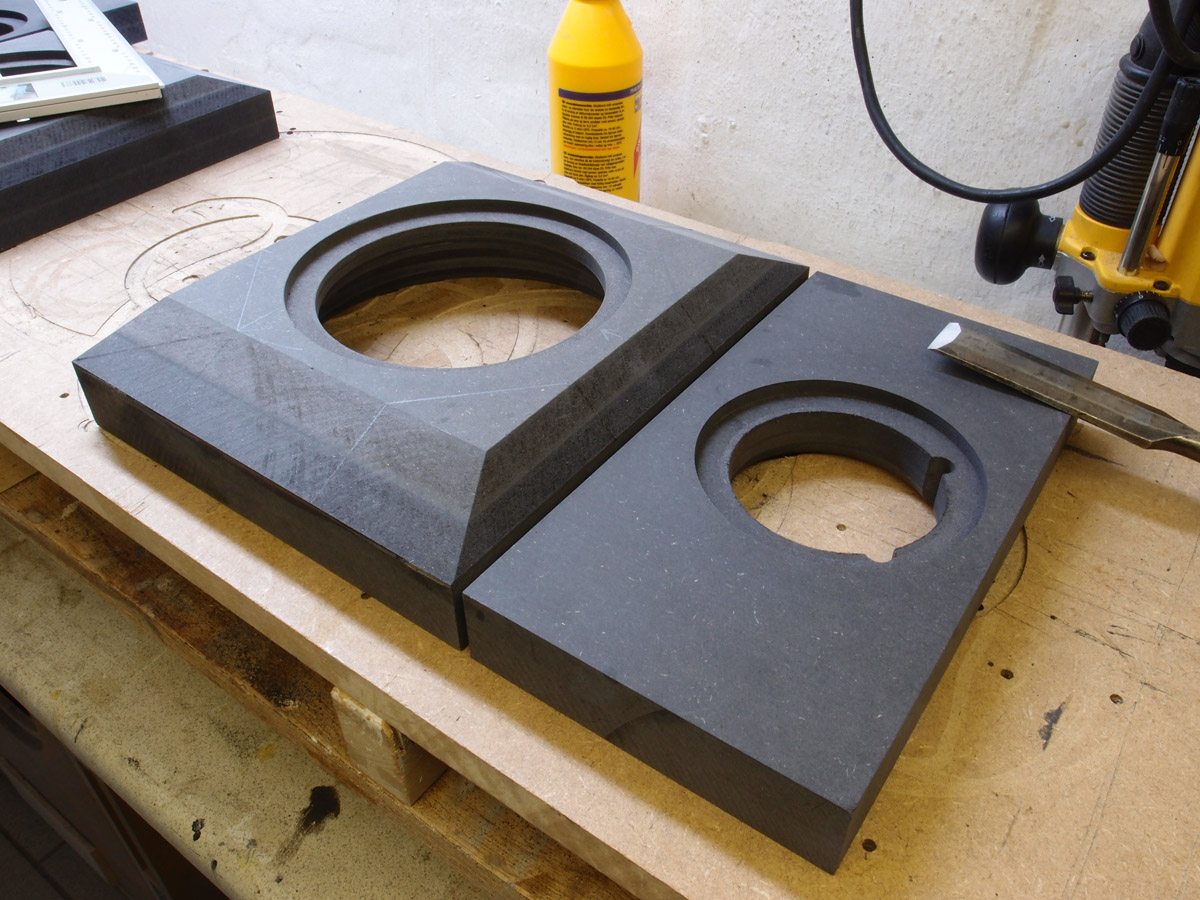
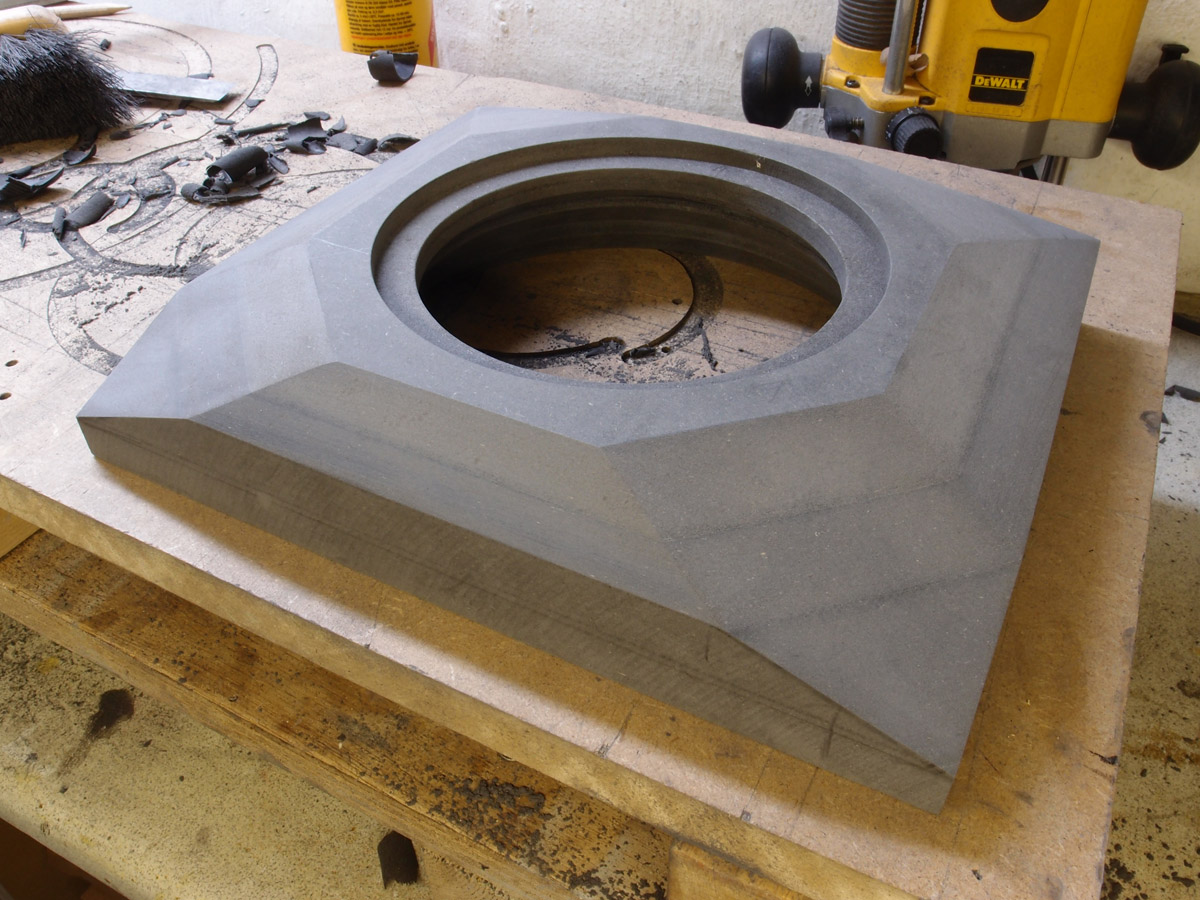
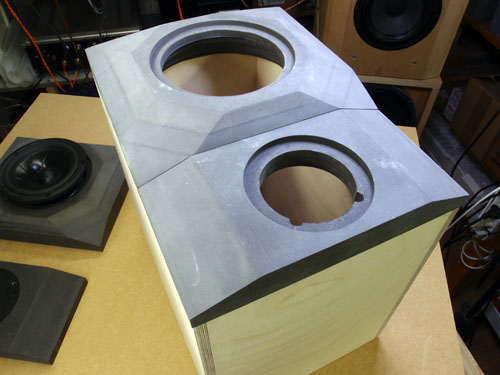
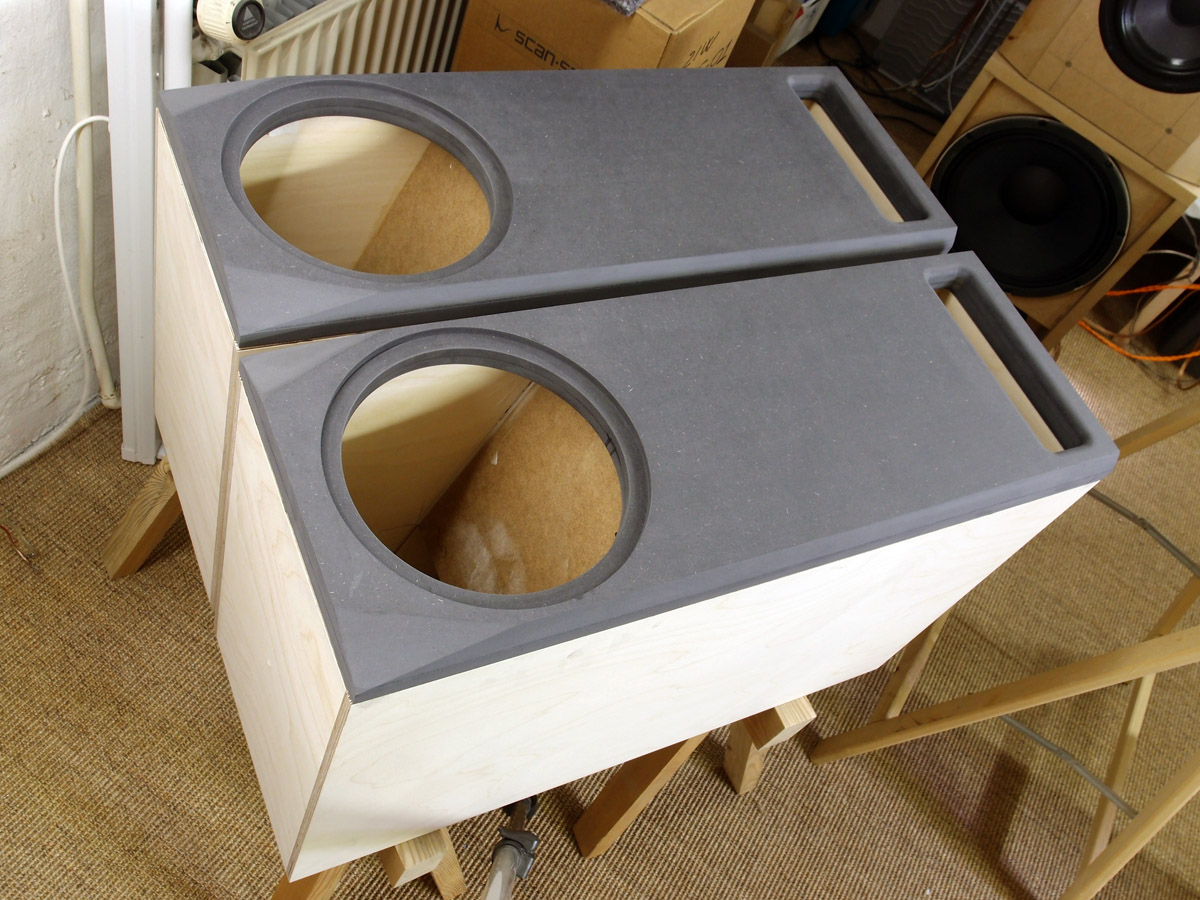
Left: Outer mid front panel (made in one
piece here for the sake of easy routing). Made from 19 mm black MDF
Right: Rear side of same. Mild chamfering to fit inner front panel
chamfering.
At this stage I cut all front panels to 252 mm width allowing final
trimming to fit cabinets.
We never know if final cabs are going to be 249.5 or 250.5 mm wide and a
too wide or too narrow front panel doesn't look good.

Left: Inner mid-tweeter front panel before
separating the tweeter panel. Made from 2 x 16 mm black MDF.
Right: Same seen from rear. Be generous on midbass driver hole
chamfering.
It is of vital importance the midbass cab breathe freely! Rounding of
the tweeter hole edge is just to make it look good.
Left: Outer mid front panel from rear with
driver in place. Right: Same with inner front panel in place.
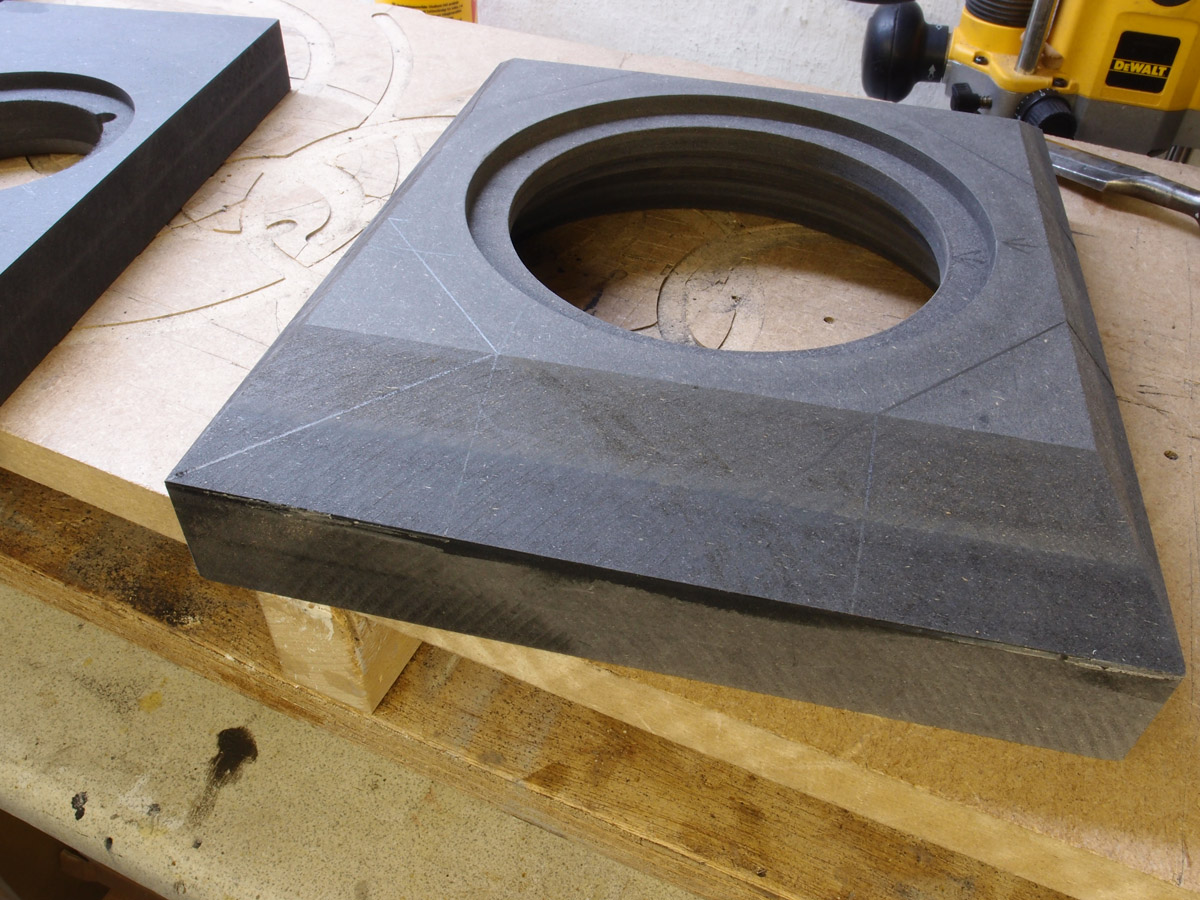
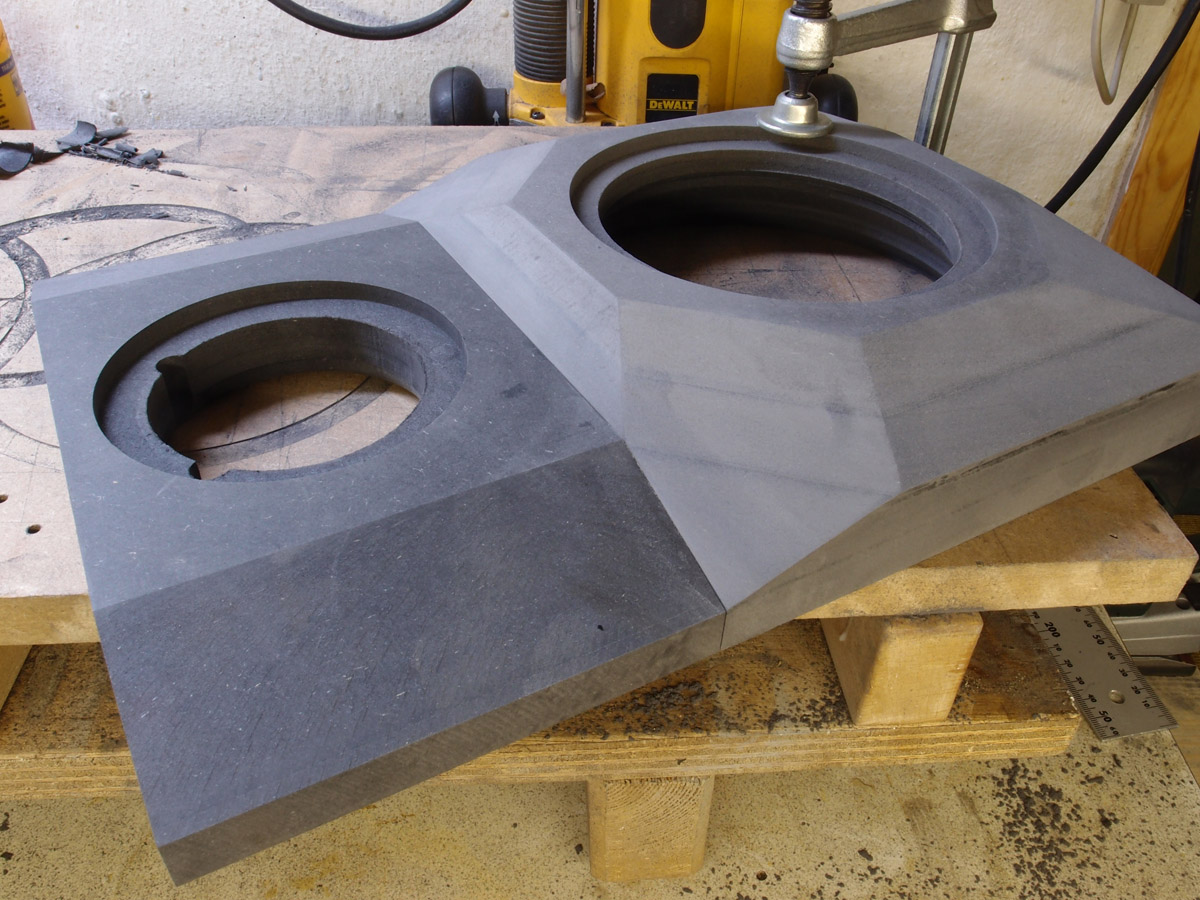
Left: MT panel cut in two and mid outer panel chamfered 45 deg at top
and bottom to a depth of 19 mm. Side chamfering is 25o in
case you use a table saw. Right: Mark corner faceting as seen on photo.
Fairly easy towards the top, a little more tricky towards bottom. View
below.

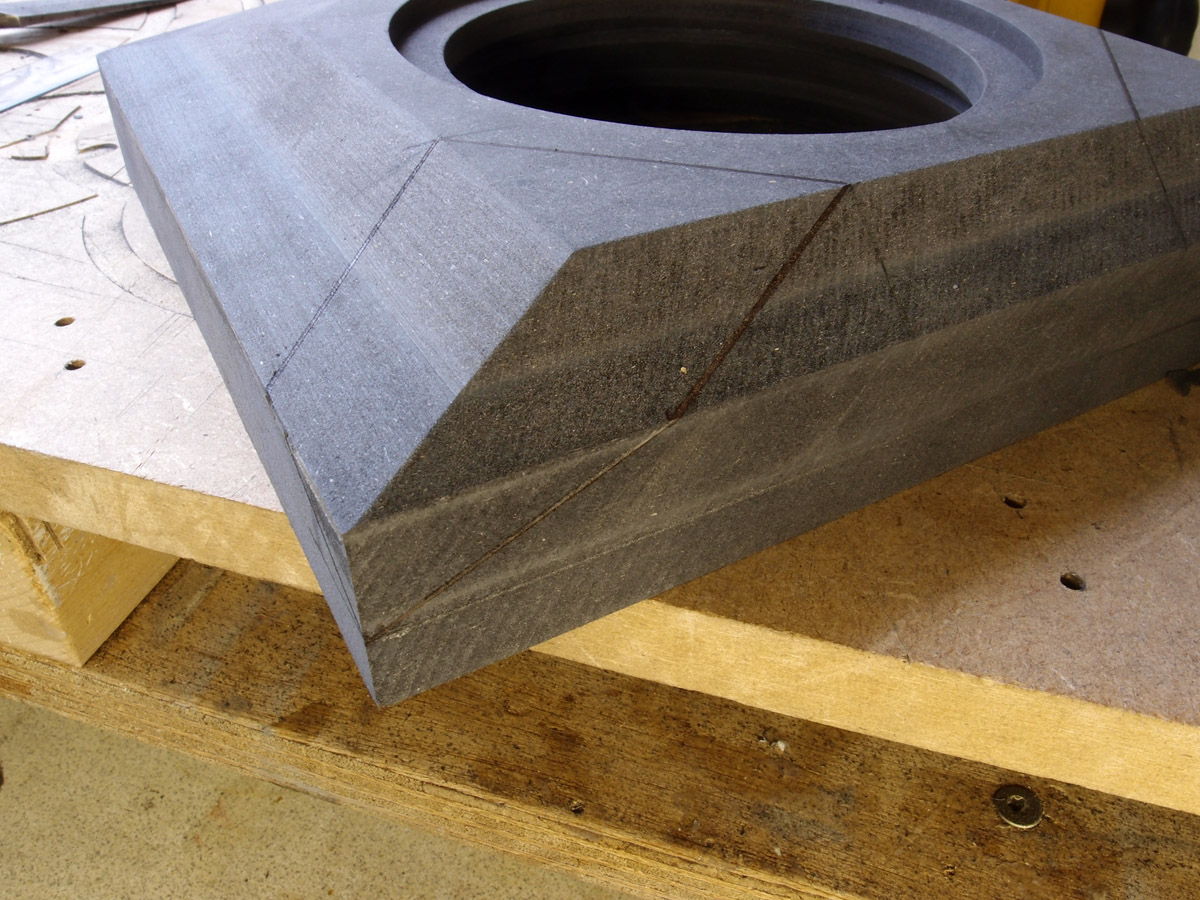
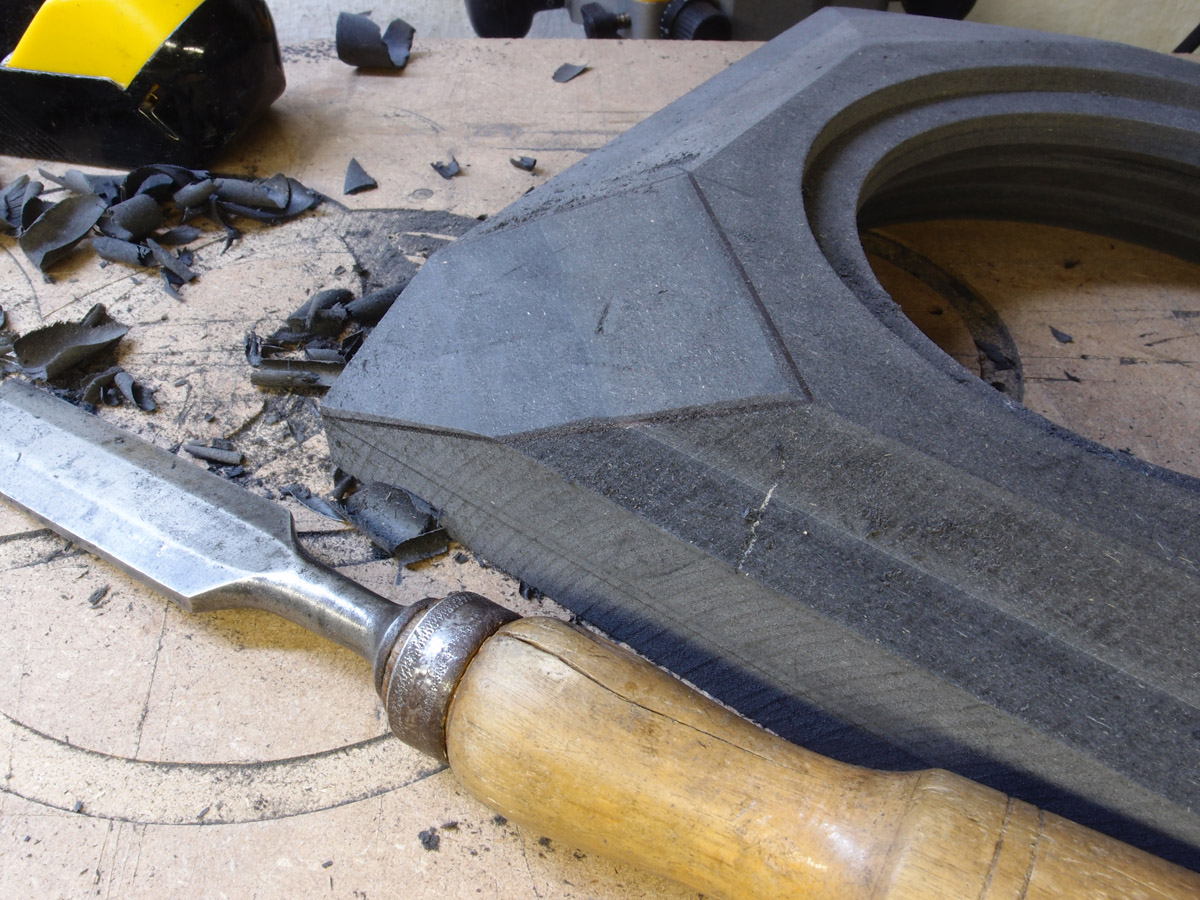
Left: Chamfer corners by chisel and
finish with grade 120 sandpaper on a wooden block.
Right: Mark lower part to a depth of 38 mm and repeat procedure.
Do not chamfer tweeter panel before you have
done the mid panel lower chamfering! When this is done and you have the
result as to the right above, mark cutting angle on tweeter panel and
adjust table saw to the right angle (approx. 19 deg) and cutting depth
(19 mm).
The finished panels except for cutting tweeter panel height. Wait until
you have the cabinets done and know the exact height of combined front
panels.
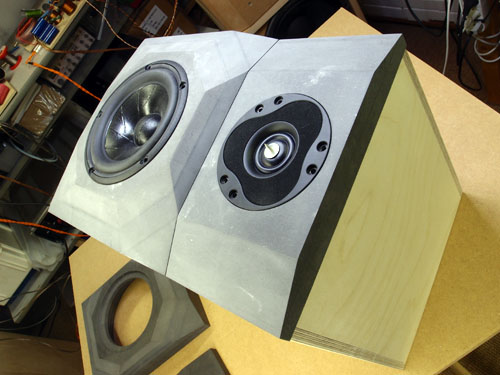
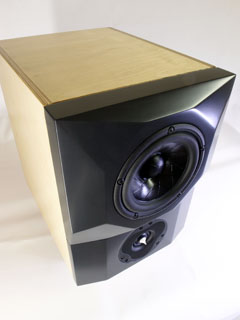
The Ellam FLEX cabinets
My cabinets follow the drawings quite faithfully.
I decided to let the Baltic birch shine through, hence the joints as
seen above in replacement of my usual 45 deg corner joints.
Another good thing about this is that it makes assembly very easy.
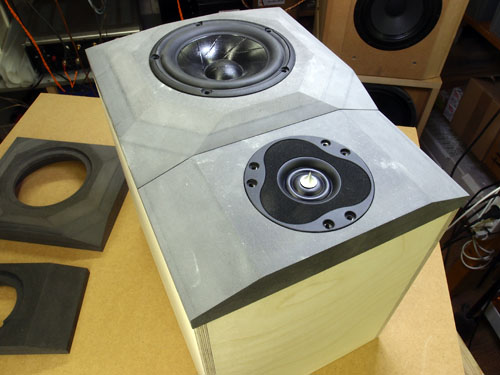
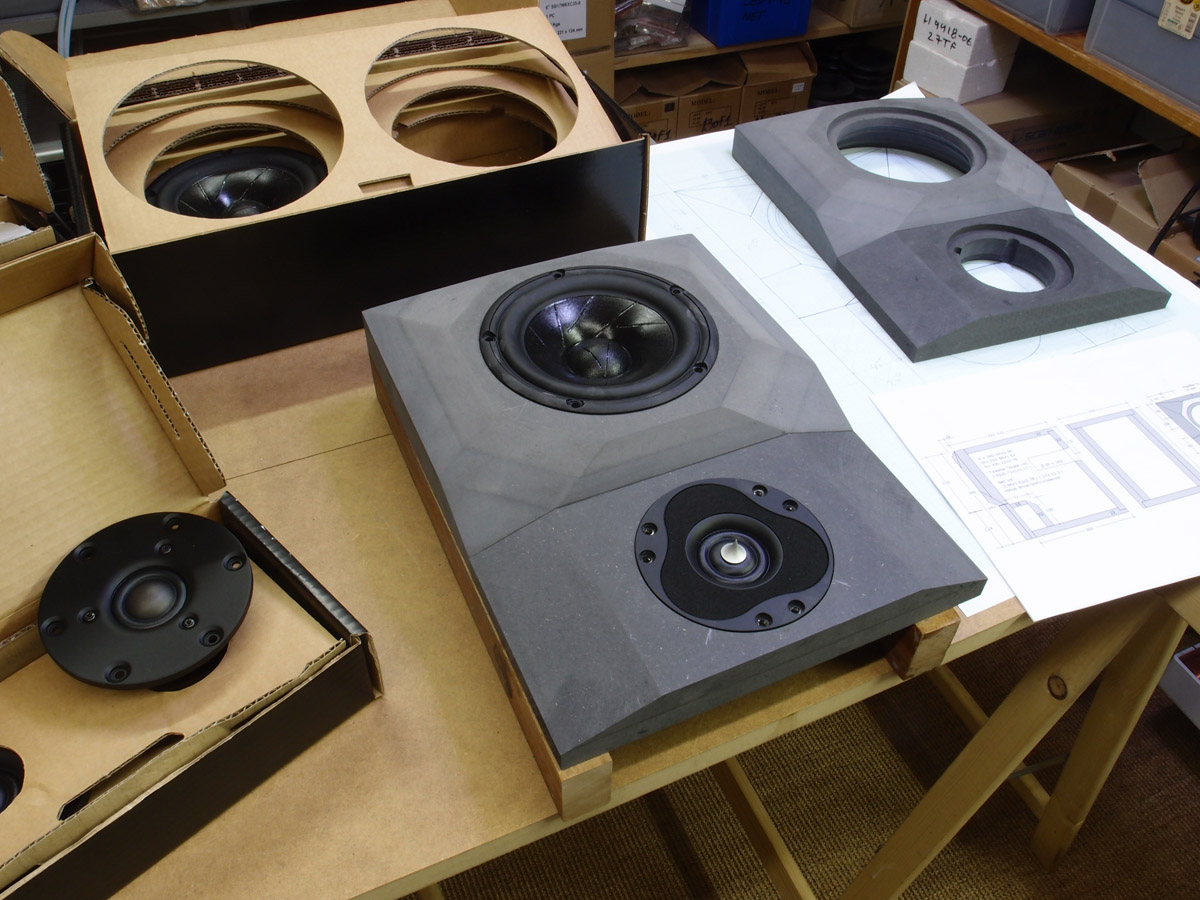
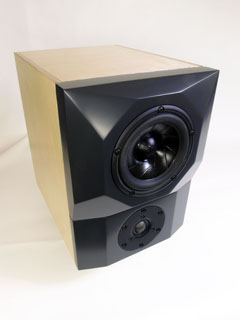
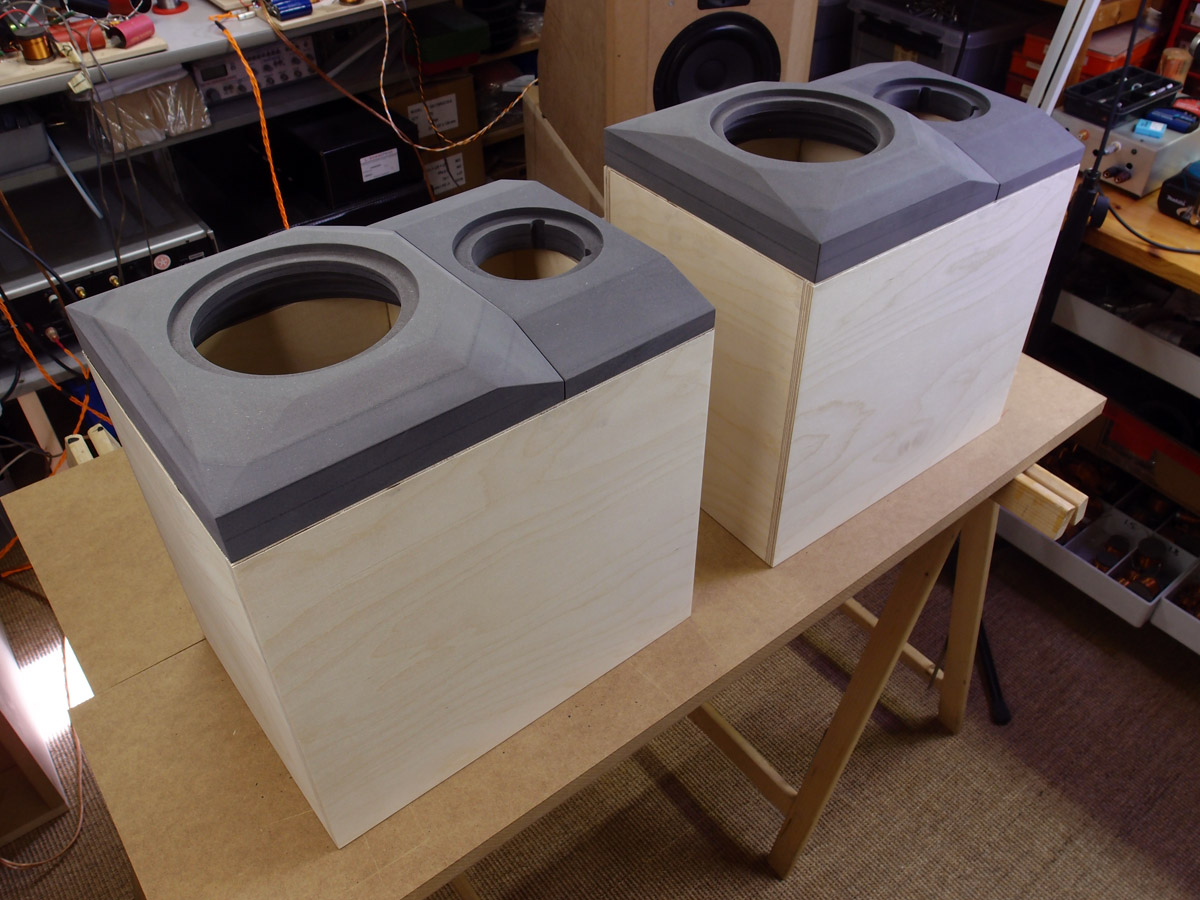
Testing front panels on MT cabinets - and I
like what I see.
We can never really tell what the finished speaker is going to look like
before fully assembled.
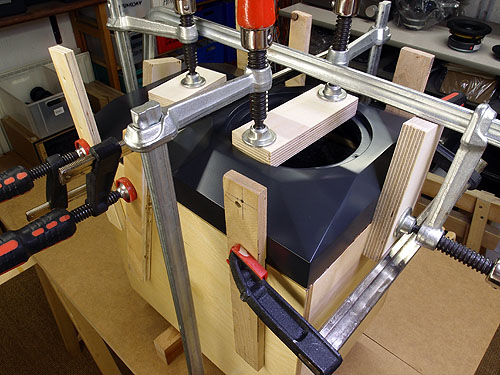
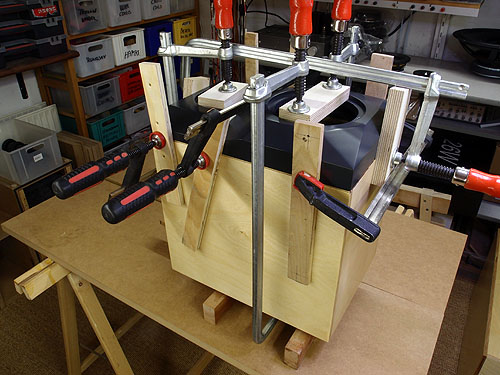
Place fillets along sides and top-bottom to
properly align front panel sections. I made two blocks of plywood
fitting into drivers' rebates for the clamps pressing the front panels
against cabinet. Do NOT apply clamps to spray painted panels.
I added two strips of 0.5 mm teflon between tweeter and mid panel to
keep these in proper alignment. For gluing the front panels I used
Superfix, but normal PVA glue will do fine.
DAMPING OF ELLAM FLEX
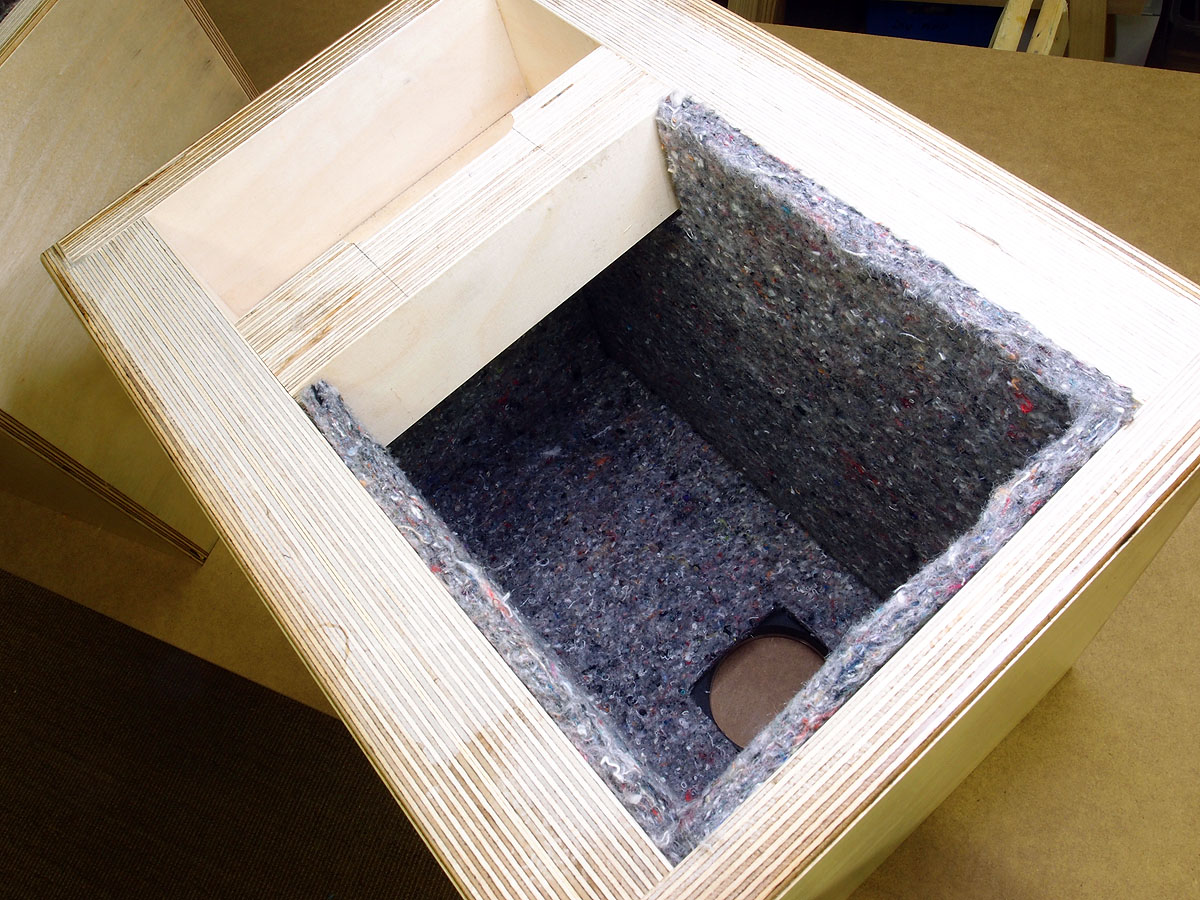
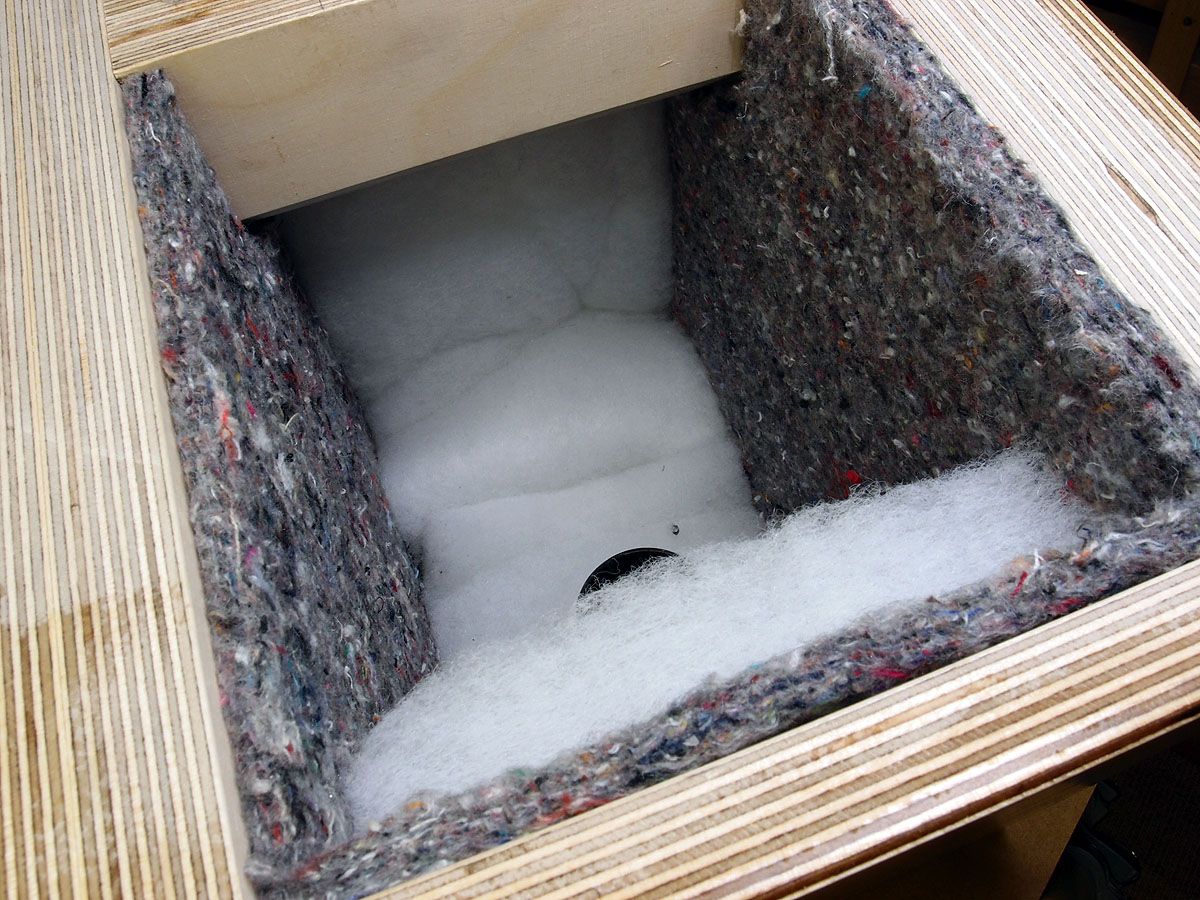
Click image to view large
Start adding 8 mm felt sheets to all internal
panels. Fold a 15 x 50 cm sheet of 30 mm acoustilux and add to bottom of
cabinet. Add 30 mm acoustilux to rear and top panel as seen on photo.
That's all.
For the Ellam FLEX I suggest mounting the crossovers before adding felt
sheets. Place the bass section on one side and tweeter section on top
panel. I'm not showing this as these Ellam FLEX will soon turn into
Ellam FLEX 3W, where the crossovers will be placed in the rear housing
as seen on drawing below.
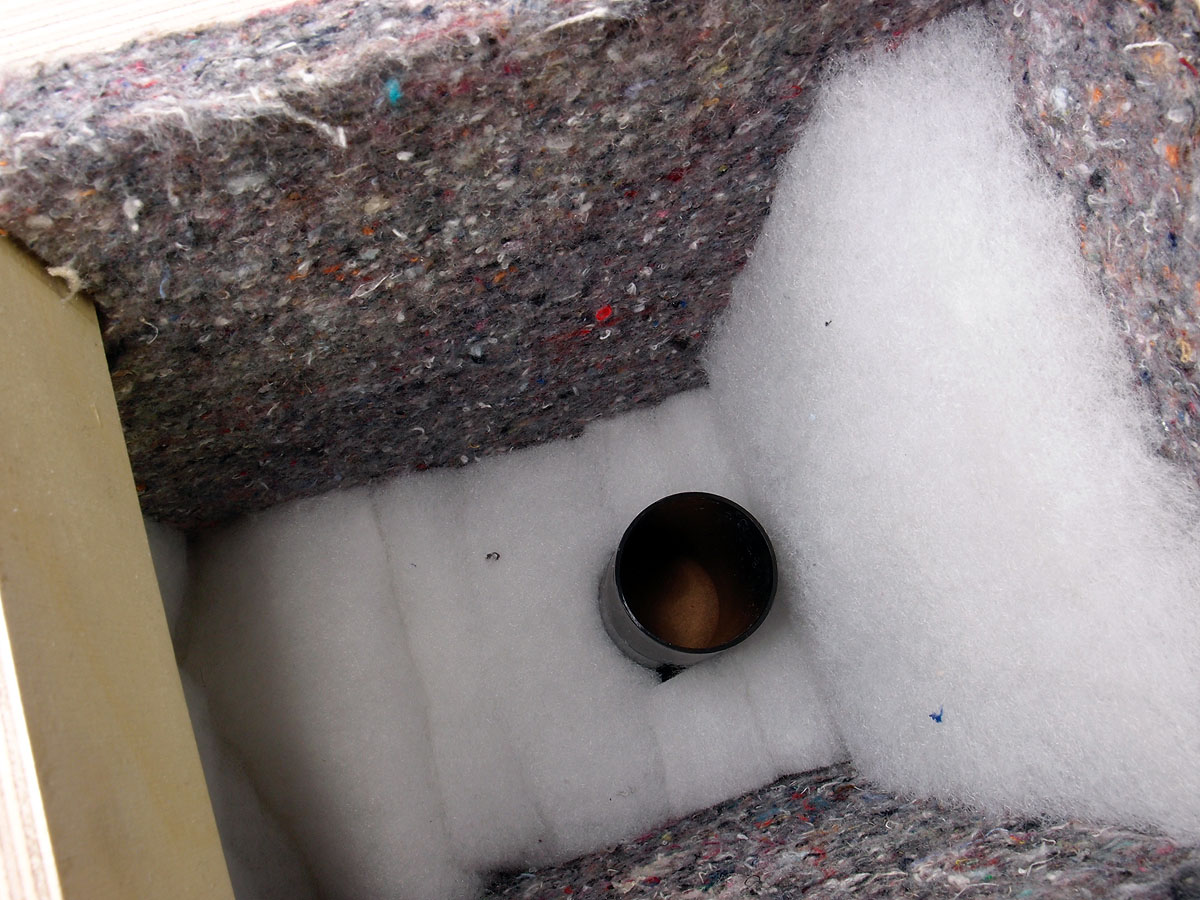
Using the Ellam FLEX cabinet for the three-way, stuff the port with a
piece of 135 x 150 mm acoustilux to make an aperiodic tuning.
THUS, Ellam FLEX finished!
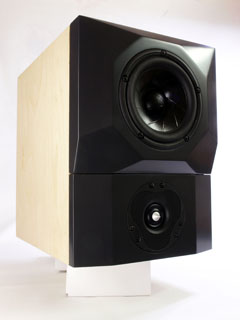
I did not mount binding posts as these cabs will soon be added rear box for the Ellam FLEX 3W speaker construction.
The Ellam FLEX 3W bass cabinets
BACK TO
INDEX
Click image to view large
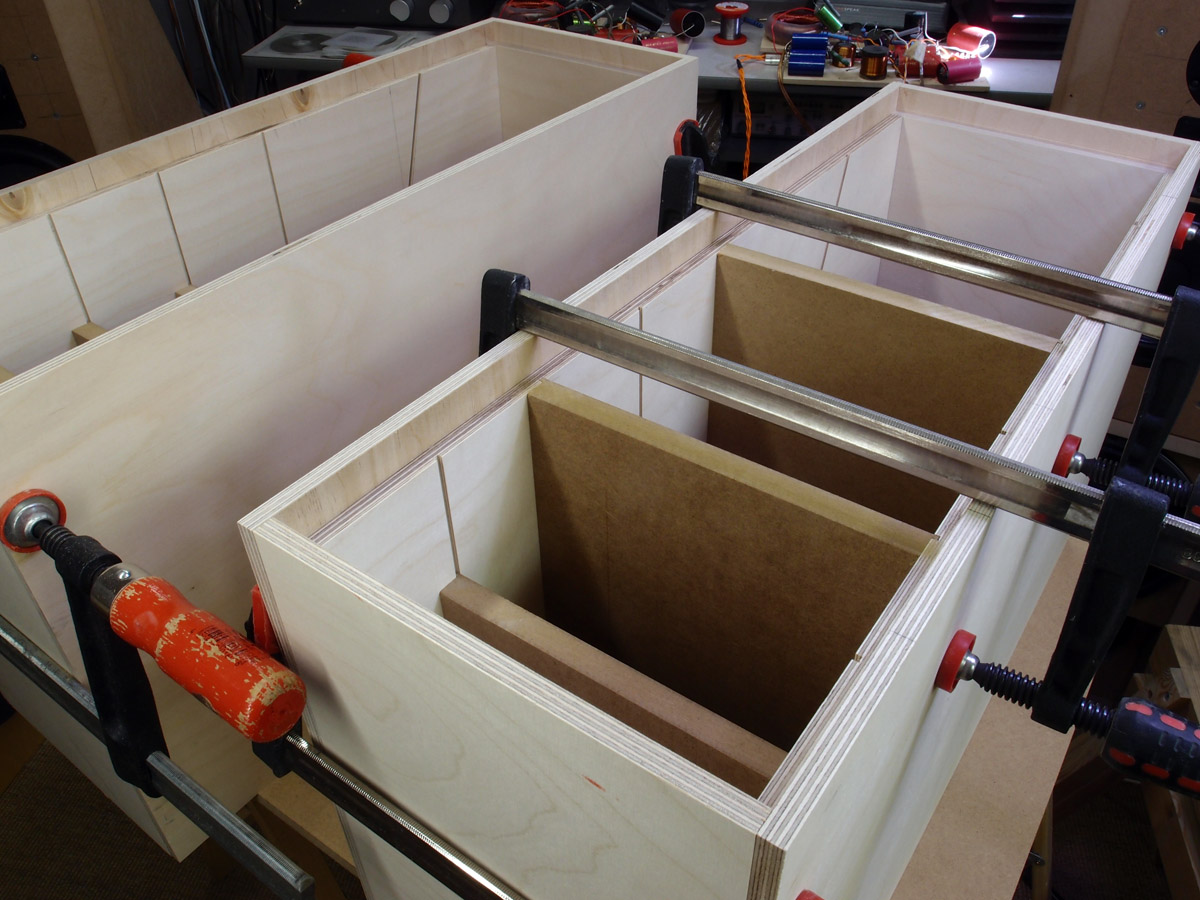
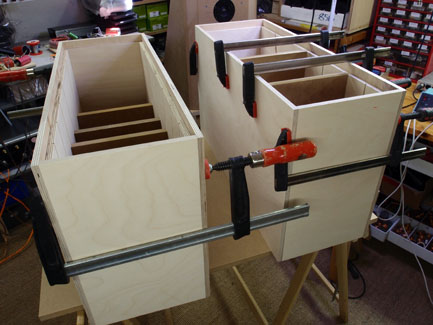
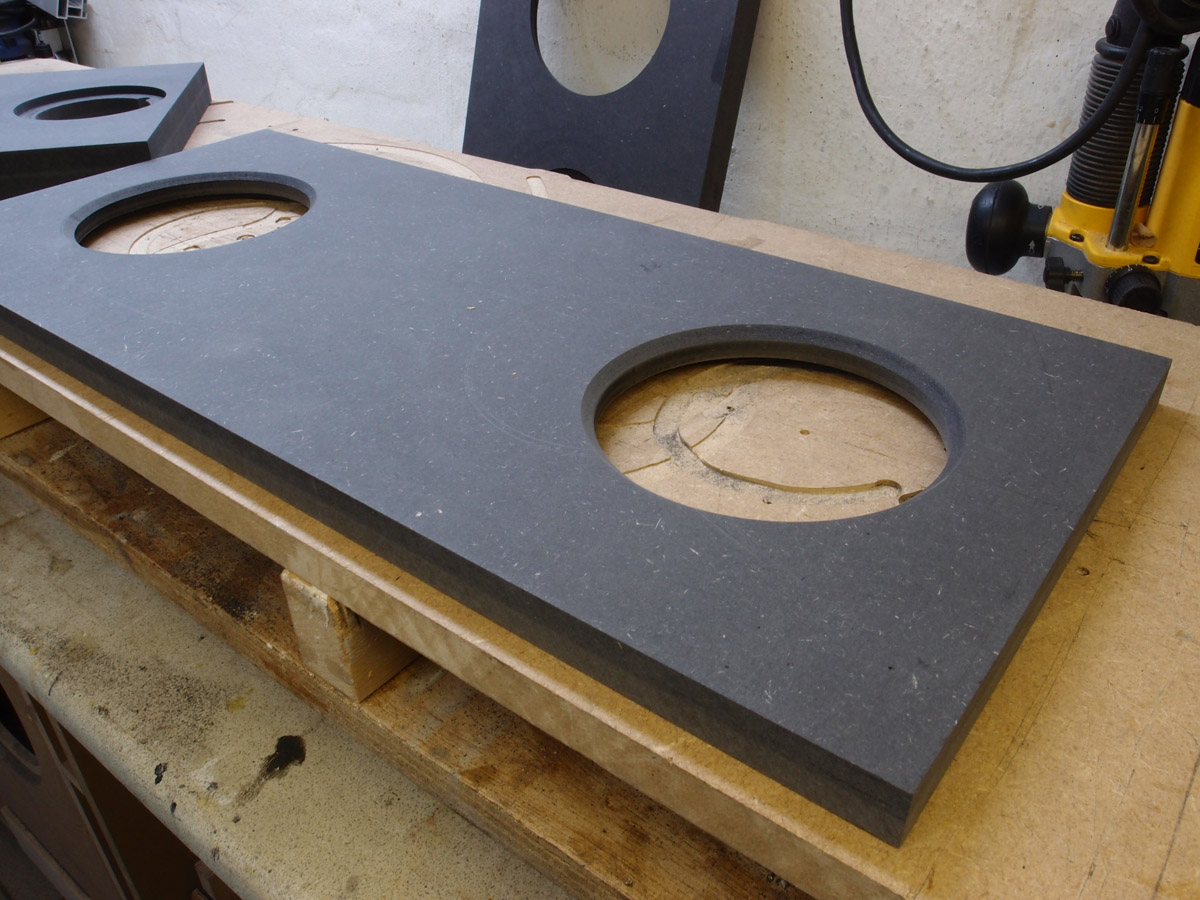
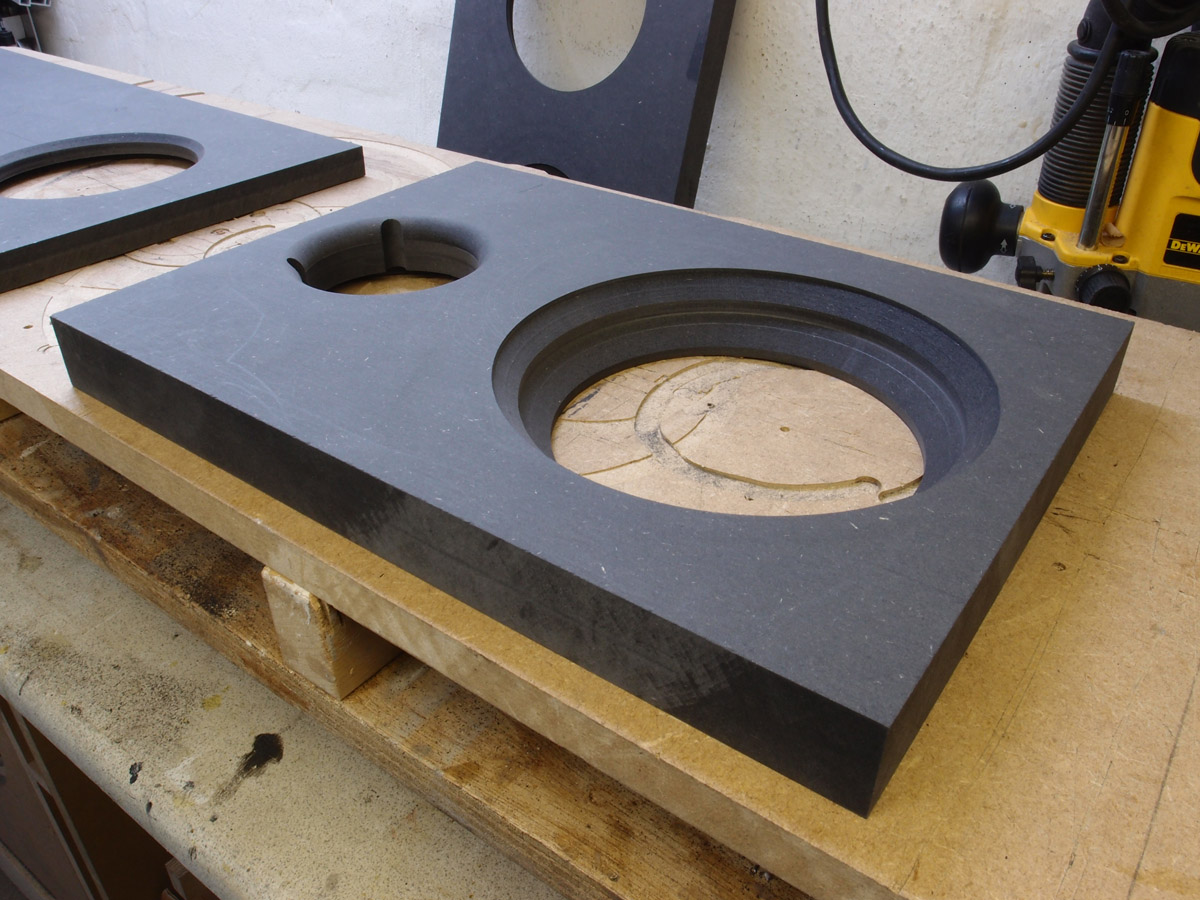
The bass transmission line caps were made at
the same time as the mid-tweeter caps.
Click left image to view large.

First time impression of Ellam Flex 3W. Nice
little speakers, a mini-Jenzen!
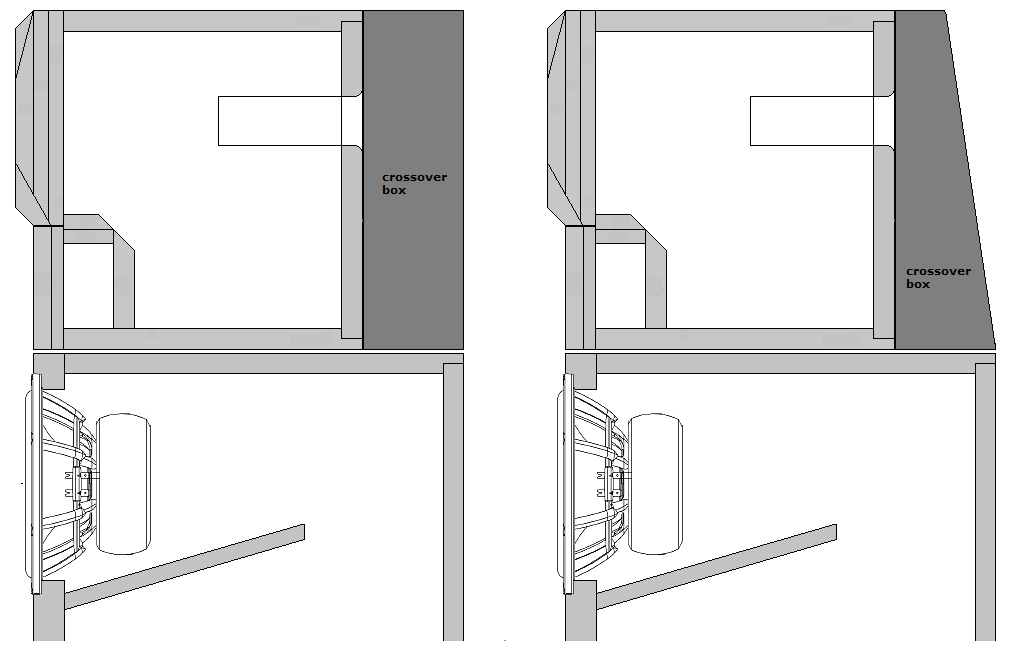
The space behind MT cabinet can be used for
the crossover.
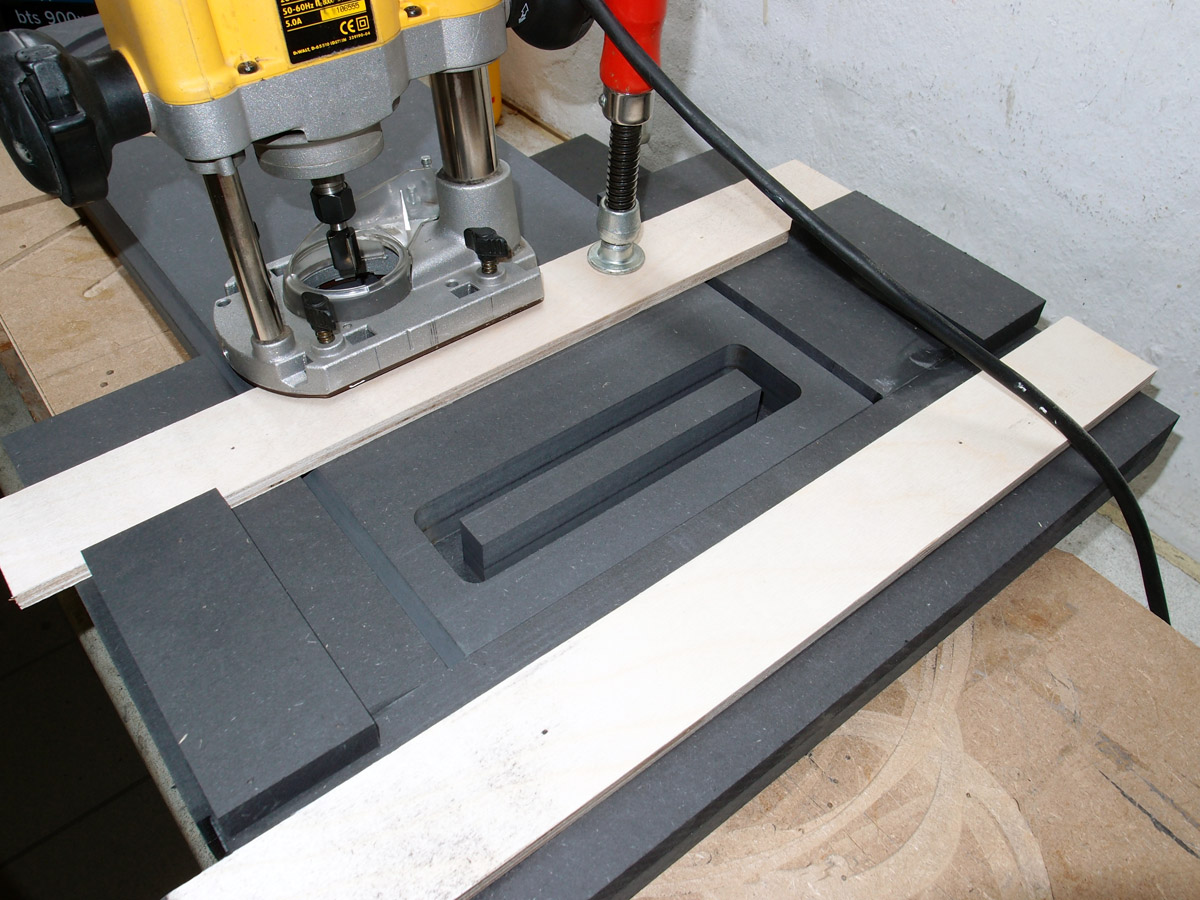
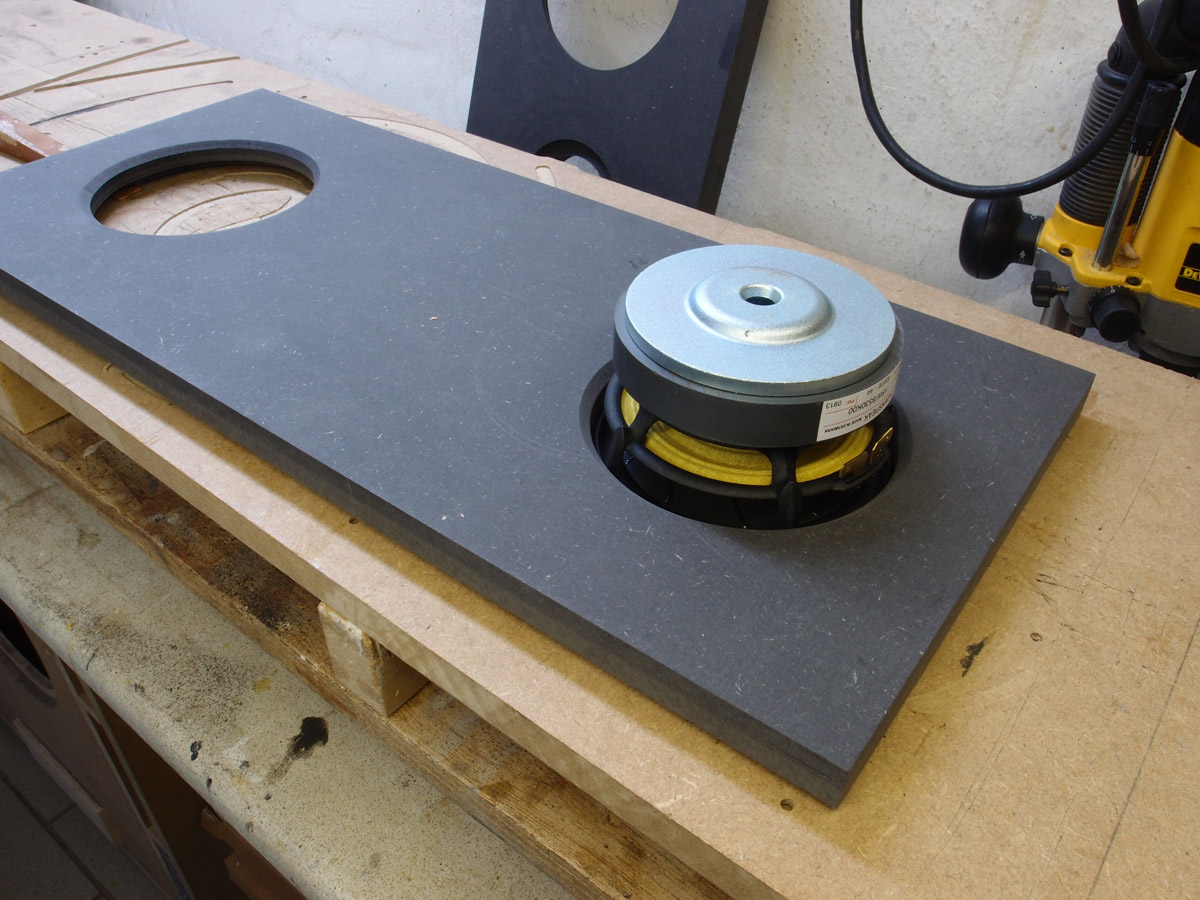
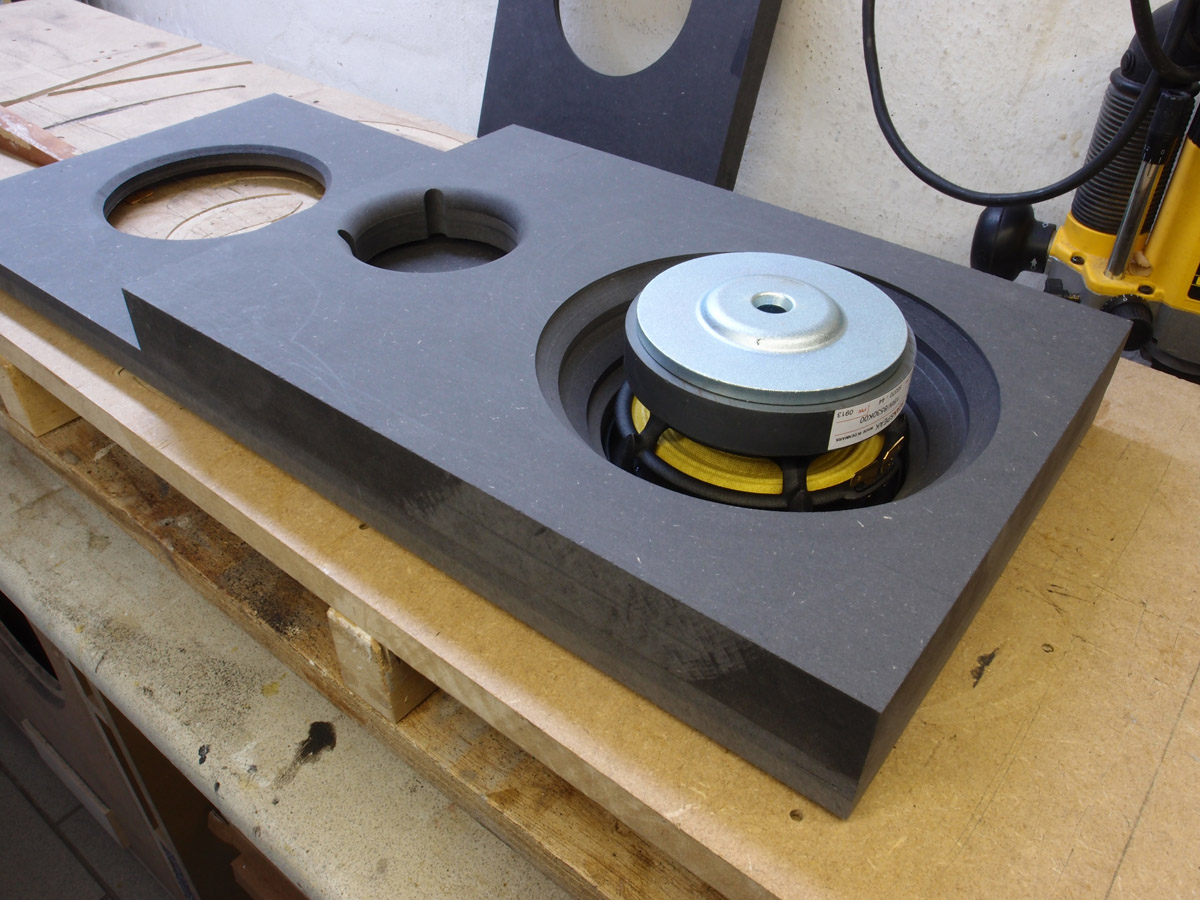
Left: Routing for the TL vent. Right: Bass
front panels sanded and ready for paint.

Left: Mid-tweeter panels sanded and ready for
paint. Right: MT cabinet rear extension to hold crossover boards.
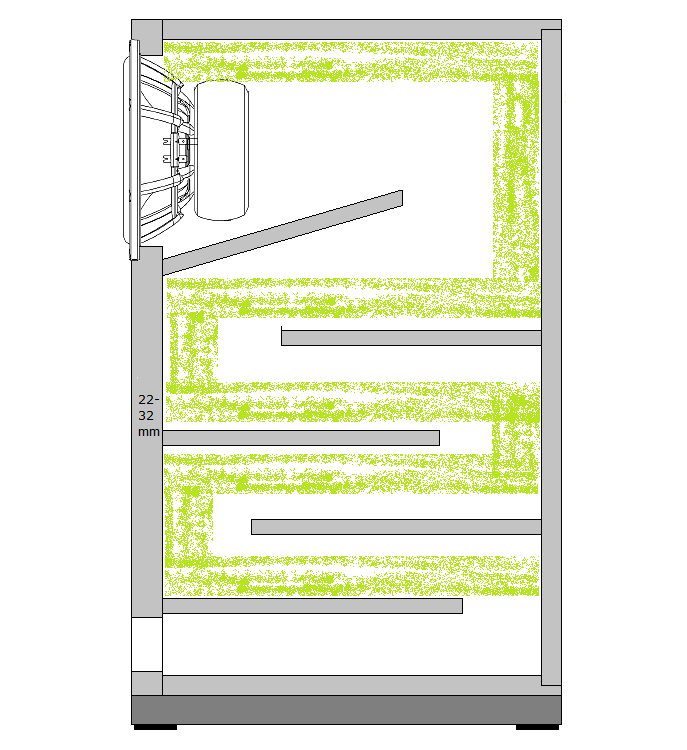
Damping of bass transmission line


Damping of the transmission line cabinet is
simple:
1. Add felt to sides and bottom of cavity behind driver.
2. Cut the acoustilux sheet in two (2 x 25 cm width) at 2 meter length
and pull it through the transmission line as seen on drawing below.
Obviously you do this before gluing the front panel!
That's it!
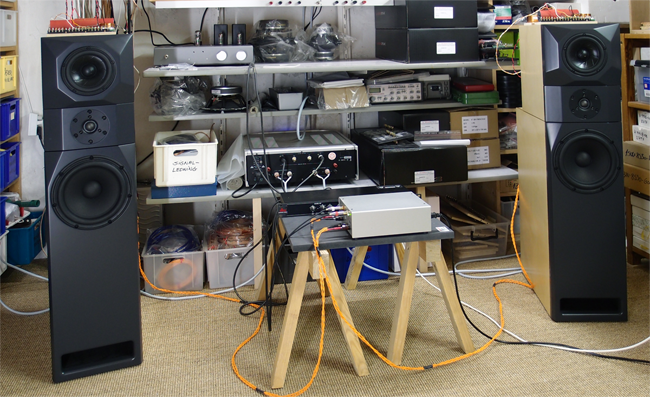
First time workshop set-up with electronic
crossover.