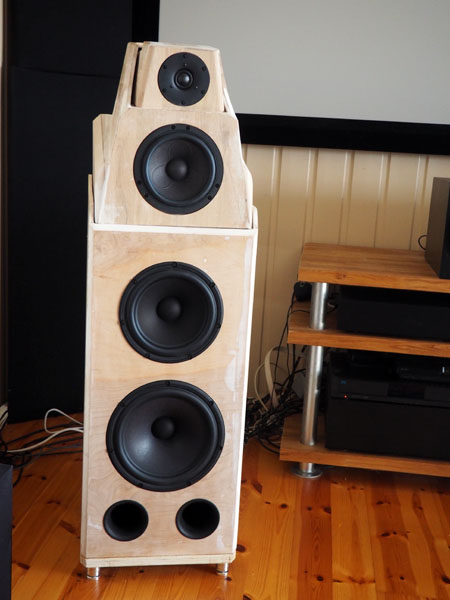
Illuminator-4, built by Morten
Copyright 2017 © Troels Gravesen
Hei!
Mine Iluminator-4 lyder helt FANTASTISK :) :) :) :)
Nå skjønner jeg bedre hvorfor du ikke beskriver hvordan dine høyttalere
høres ut. Man må høre de selv! Jeg har spillet på de noen dager nå. De
fungerer veldig godt med mine Hypex NC400. Jeg skal nok senere få de
biampet, men virker som den har god kontroll med alle elementene.
Spesifikasjon på NC400 sier 400Watt/4Ohm. Jeg har separat strømforsyning
pr. kanal.
Jeg har aldri hørt en høyttaler som ikke har kompromisset på detaljer/åpenhet/perspektiv
vs. bass. Illuminatoren spiller som de beste monitor høyttalere jeg har
hørt i diskant/mellomtone, samtidig som du får stram og fyldig bass OG
de er musikalske. Noen høyttalere spiller teknisk korrekt, men mangler
noe. Jeg tror din kombinasjon av elementer og delefilter er en svært god
match. Du hører ikke 4 elementer, kun musikk.
Jeg har satt opp høyttalerne med litt "toe in". Ca. 8cm forskjell i
front og bak. Jeg sitter nærmere enn deg (ca 3m ?) . Har ca. 1,7m
avstand mellom høyttalere og sitter ca 2 meter fra. Selve rommet er
3,2x5,6. Selv om det ikke er optimalt må høyttalerne stå på
3,2-veggen. De står ca. 70cm ut fra bakvegg og 40-50 cm fra side vegg.
Morten.
ENGLISH
Before starting this
build, I spent some months looking at the Troels website. Mostly trying
to tell myself it is crazy to spend so much money on a kit that I was
not sure I could build. Sometimes you just need to take a leap of faith.
Looking at all of the builders experiences, I was not worried about the
quality of design, but wether I could make the speakers myself. I have
some previous experience with building square speaker boxes, but never
anything as advanced as this.
For anyone else thinking or planning
to build these I have some comments that might help:
* It will take a lot of time to build these unless you are really
experienced. Don't try to hurry the build to get to the finished result.
Enjoy building it. I spend a long time .
* Spend a lot of time looking at the Troels website on his other builds
as well. Also any woodworking skills needed can be found demonstrated on
Youtube.
* I spent some money on a good router, but most cuts was done with a
cheap table saw (Bosch PTS-10). Having an accurate table saw would have
been better.
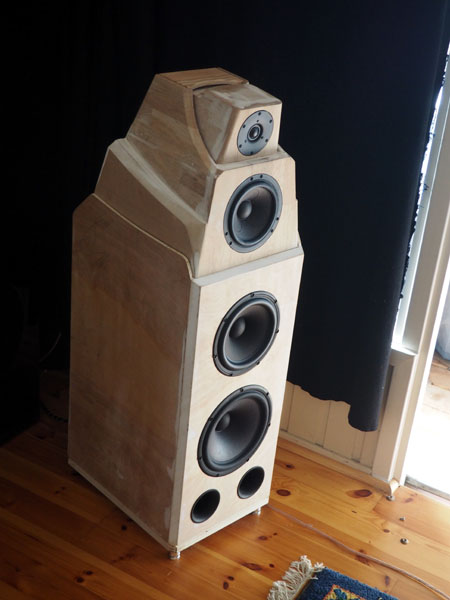
* Doing curves and not angles is time consuming. Since the curves need
to be exactly the same, I made templates and use a "follower" bit.
Really happy about that.
* For some curves (tweeter/mid-range), I just use a table mounted sander
on free hand. Sand until you are happy with curve.
* Check you electronics component carefully. There are many different
components. I had some wrong component values, but it was quickly fixed
by Janzen Audio. They provided great service!
* I could not find suitable plywood (only soft stuff) where I live. I
ended up using oak kitchen bench tops for top cabinet. It was a really
poor choice. Oak is a living material. It moves when drying making joins
crack :(
* Remember that the top cabinet is tilted when deciding on
start/end-point of curves. My curves looked way to flat when top cabinet
was on a table. Just luck that it ended up like I wanted (once I put
them on top off bass cabinet and tilted them).
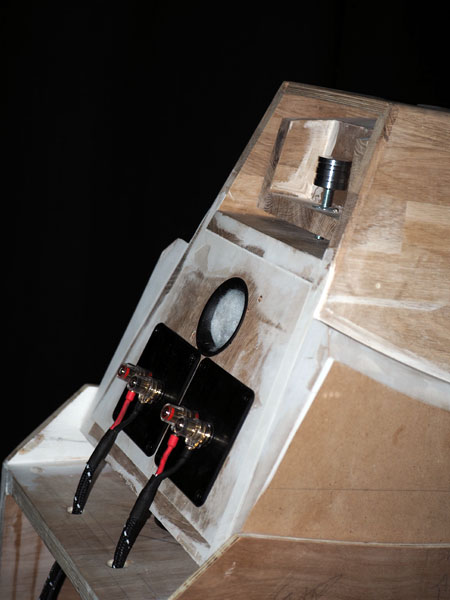
* Test your crossover filters before mounting. Two reasons: Enjoy
listing to the best crossover you will ever hear (so clean) and if
something is not right after final assembly, it is likely in speaker
mounting (not in solder of crossover).
* Oak and Plywood had structure that comes out when primer and color
coat bonds. My primer was super flat with no cracks, but after spraying
black I got some texture :(
* Don't test final speaker with tiny amplifier. I tested with the same
amplifier I tested cross-over. Sound was terrible. Scared me half to
death after spending winter/spring building them.
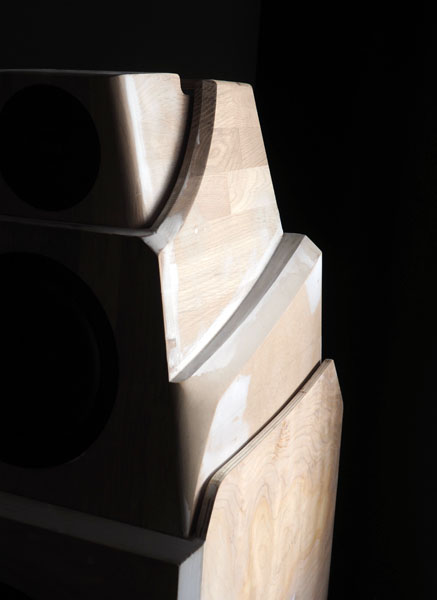
Color is VW Golf Indium Grey car
paint. Expensive stuff :( Troels design is similar to Wilson
Alexias, but I wanted them to look slightly differently. My inspiration
for both design and color choices is coming from black swans. The red
piece on the top of the speaker is the swans beacon. The curves on the
side is the neck of the swan. The thin red line at the bottom of speaker
represents the feet.
The short history of black swans is
that before Australia was discovered, it was believed that all swans
were white. But to everyones surprise Australia contained black swans.
Human learning is limited by what we see and have experience with.
Troels' speaker designs are truly black swans. The commercially designed
speakers are "white swans". Until you actually experience a black swan
,it is impossible to know what you are missing out on.
How does my Black swans sound? Like
Troels' says, it is impossible to describe the sound without using lots
empty words. I think the best description I can give is that the speaker
disappears completely and all you hear is music. And you want to keep
listening for a long time until wife/family complains that you have been
away for hours :D
The final bonus is the feeling you get
when looking at the speakers and knowing that you were able to build
with your own two hands! So WHAT ARE YOU waiting for? Go and order
the kit you want instead of just looking at pictures of the speakers you
can build ;)

.jpg)
.jpg)
.jpg)
.jpg)
.jpg)