The
Loudspeaker-3
Copyright 2021 © Troels Gravesen
Go to on this page:
DRIVERS
CROSSOVER
WORKSHOP PICS
CABINET HYPEX
MEASUREMENTS
SPEAKER-KIT
CROSSOVER LAYOUT
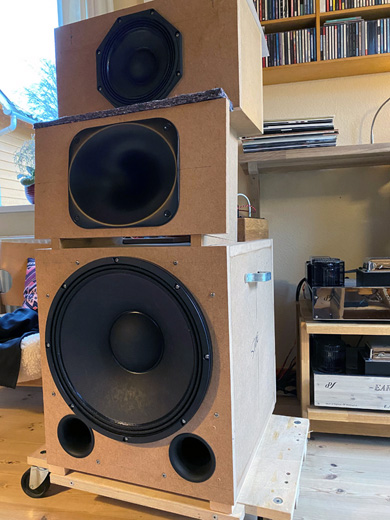
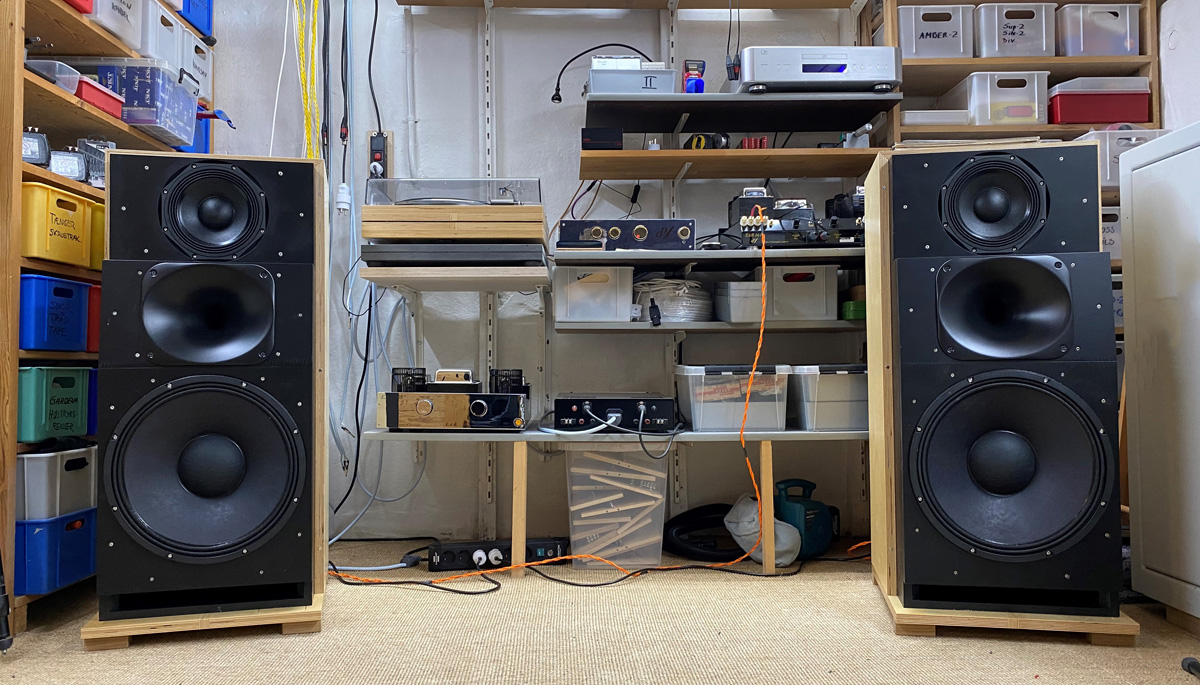
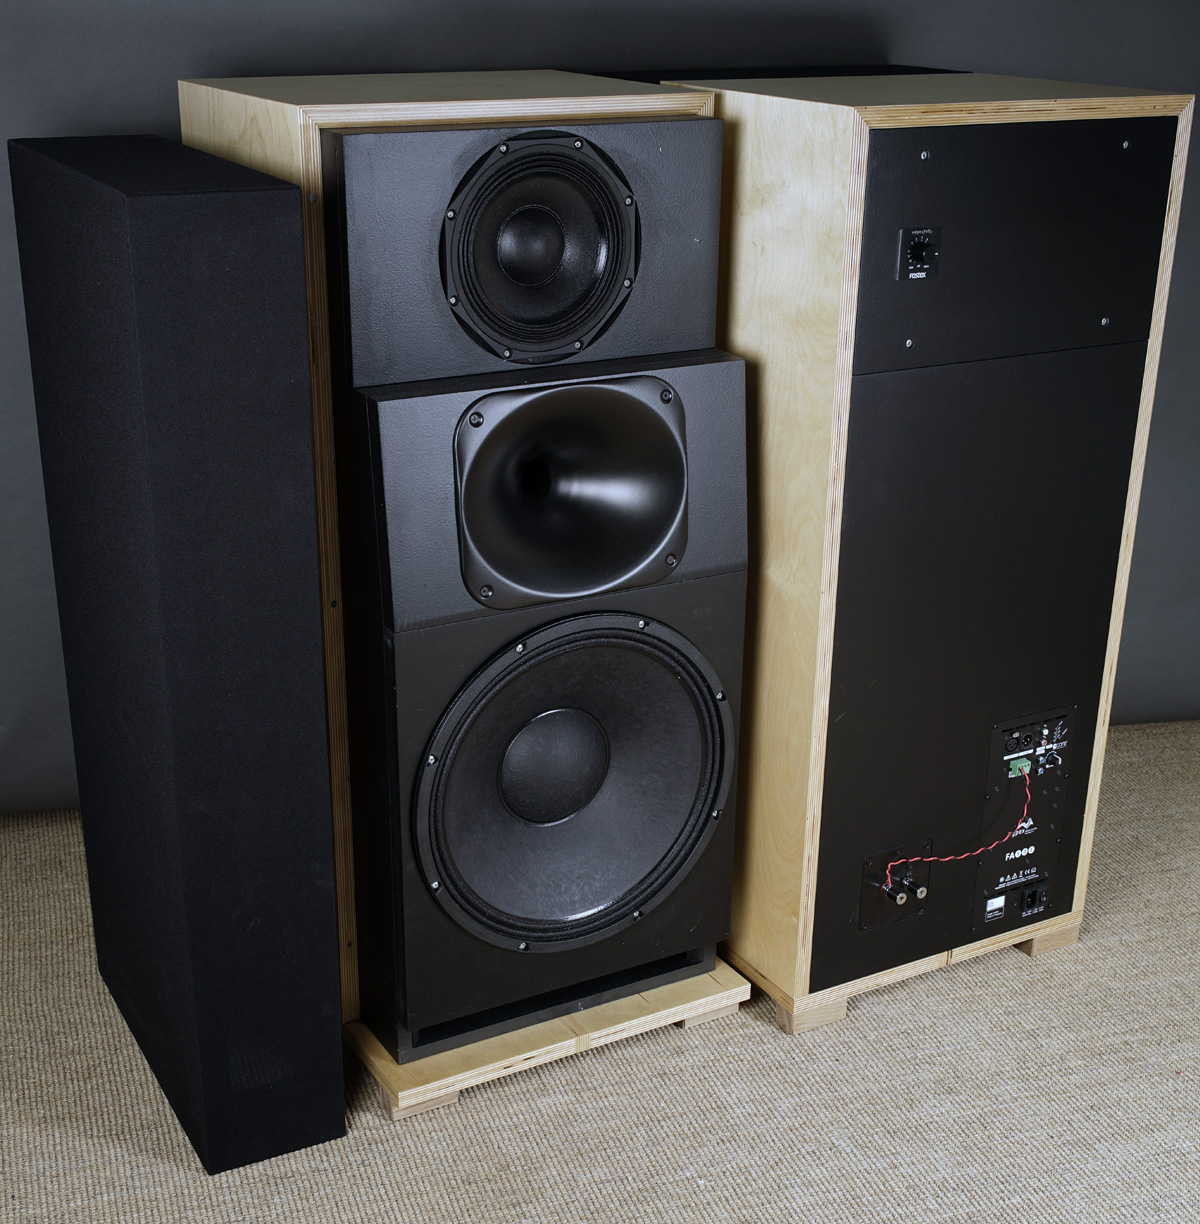
For lack of better names, The Loudspeaker III is a
scaled down version of my
The Loudspeaker. It is significantly smaller, 225 gross litre, and "only" featuring a 15"
bass driver. The midrange driver is also reduced to an 8" driver, but
the compression driver and horn is the same. If it works, don't change!
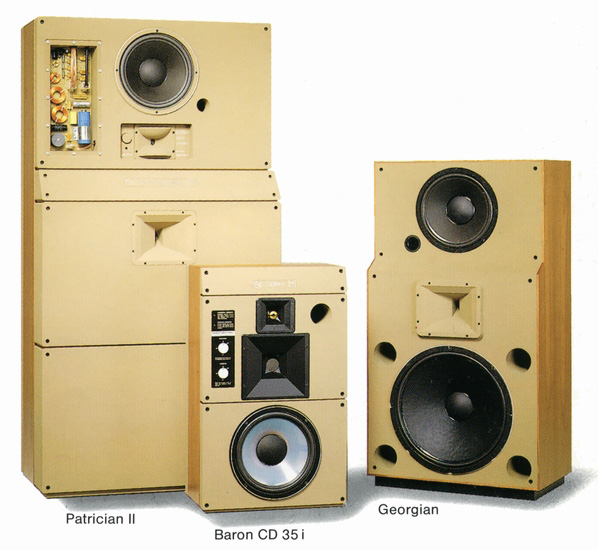
The inspiration for placing the midrange driver on top came from vintage
Electro-Voice
Georgian.
By chance I came across this vintage speaker and thought it was a
brilliant way of time-alignment of midrange and horn.
A 15" bass driver that goes deep from a smaller cabinets means we have
to sacrifice something. Efficiency. Not a lot, but to get a decent
low-end extension from a 15", we're talking 92 dB/1V/1m. Cabinet is 45
(W) x 50 (D) x 100 (H) cm, 225 litre gross volume, some 60 litres
less that
The Loudspeaker II.
Having the bass powered by a Hypex plate-amp/DSP, you can run the MT section from as little as a 15
watt amp. And from the Hypex module you can tune the bass to almost any
room condition.
I have also chosen a design that allows a front grill, as I really think all speakers should have a front grill, despite its mostly negative impact on frequency response, in particular treble response. But here we have a horn that due to its directional properties and placement is not impacted at all.
The 18 SOUND NSD1095N-8 compression driver fitted with the XT1086 horn is capable of output up to 25 kHz, albeit some unevenness from around 16 kHz to 25 kHz. Enough for me. Se measurement below of four NSD1095N-8 drivers. I've now had six of these drivers/horns, and they all perform exactly the same. Quite remarkable. But also good because equalising these drivers to exactly the response I want takes precision components. In particular C1 is important but also R2/C2/L2 plays a vital role in making a very smooth response in the 1500-10000 Hz range, so much needed.
My choice of bass driver was partly determined by its very favourable
price point, 198 EUR/each, and partly from having a fairly light-weight
cone and a not too low Qt allowing decent bass from a not too big
cabinet. With some equalisation from the Hypex' DSP, 125 litre volume and an assumed in-room placement, we should have
-3 dB @ 30 Hz. Also more than good enough for me.
I was also considering the Ciare NDH-15-4S and 18
SOUND 15NLW9500, but with a 379 EUR price tag for the latter, exactly twice the price of
the 15W700. The 15LW1500 @ 223 EUR/ea was another possibility. What we
get from more expensive drivers is more power handling, but we really do
not need 1000 watt bass drivers for living room application. With a 3"
voice coil and 450 watts continuous load the 15W700
can make our ears bleed all the same.
From my workshop setup I knew I had something in store and moving the
speakers to our living room and, not least, installing the Hypex for the
bass, this speaker has a transparency or par or better than any other speaker I
have made. Period! A bold statement, but hanging a front grill cloth to
cover up the speaker and inviting a trusted friend made him look in
disbelief and speechless; he was stunned. Sometimes - and this is not
something than can be modeled and predicted - the combination of drivers
and crossover design can make something we hadn't seen coming. It all
boils down to trying out various combinations of drivers, cabinet
designs and not least many crossover designs.
It is the closest I have come to my QUAD 2812 speakers in terms of a
coherent and utterly transparent soundstage - plus the dynamics the
QUADs are short of. Some of this derived from the lower placement of the
horn that very much resembles my QUAD setup.
Click images to view large.

Some fresh vinyl together with the standard range of recordings were
used for fine-tuning the system.
To the left, Nina Simone:
An excellent recording from 1957 (yes). Then Ludovico Einaudi: I started
buying his CD Una Mattina (not available on vinyl) due his
contribution to the movie The Intouchables, a movie I just
love. I like the CD better than this LP I have to say. Ingram Washington: A
must-have vocal recording. In front: Vestbo Trio, Danish musicians who
made a recording at British Grove Studios, London. A nothing less than
magnificent recording - and great music too - on some ugly pink vinyl!
Crisp, fabulous presence , dynamic recording. Youtube here:
https://www.youtube.com/watch?v=ma839O1m8Rg.
I can't say I enjoyed these recordings more on any other speaker I have
made.
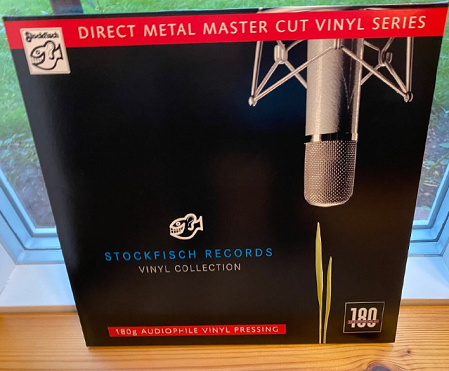
The Stockfisch LP came in later and well, everything about this
LP is just perfect. The performances, the recordings, the
mixing, the cutting, the vinyl quality, etc. The music? My God, this is
a boring LP. Sooo smooooth... and utterly boring. Please don't
email to tell me I'm wrong. I deeply respect any taste in music.
Basics:
3-driver speaker.
Dimensions: 45 x 50 x 100 cm, WxDxH.
System sensitivity: 92 dB/2.8V/1 meter.
Impedance: 8 Ohms for MT section, minimum 6.3 Ohms @ 1250 Hz.
Power requirement: 15+ watts/channel for MT section.
Power handling: A lot! Please
also read:
http://www.troelsgravesen.dk/power-handling.htm,
and remember any burned driver is a misused driver.
Useful links (Please read before writing!):
http://www.troelsgravesen.dk/tips.htm
http://www.troelsgravesen.dk/crossovers.htm
http://www.troelsgravesen.dk/LCR-RC.htm
FAQ (Please read before writing!):
You cannot change cabinet front panel dimensions and drivers' placement
without needing a new crossover - and I cannot help.
You cannot use any other drivers with the crossover shown here.
Please read these files before e-maling:
http://www.troelsgravesen.dk/crossovers.htm
http://www.troelsgravesen.dk/choices.htm
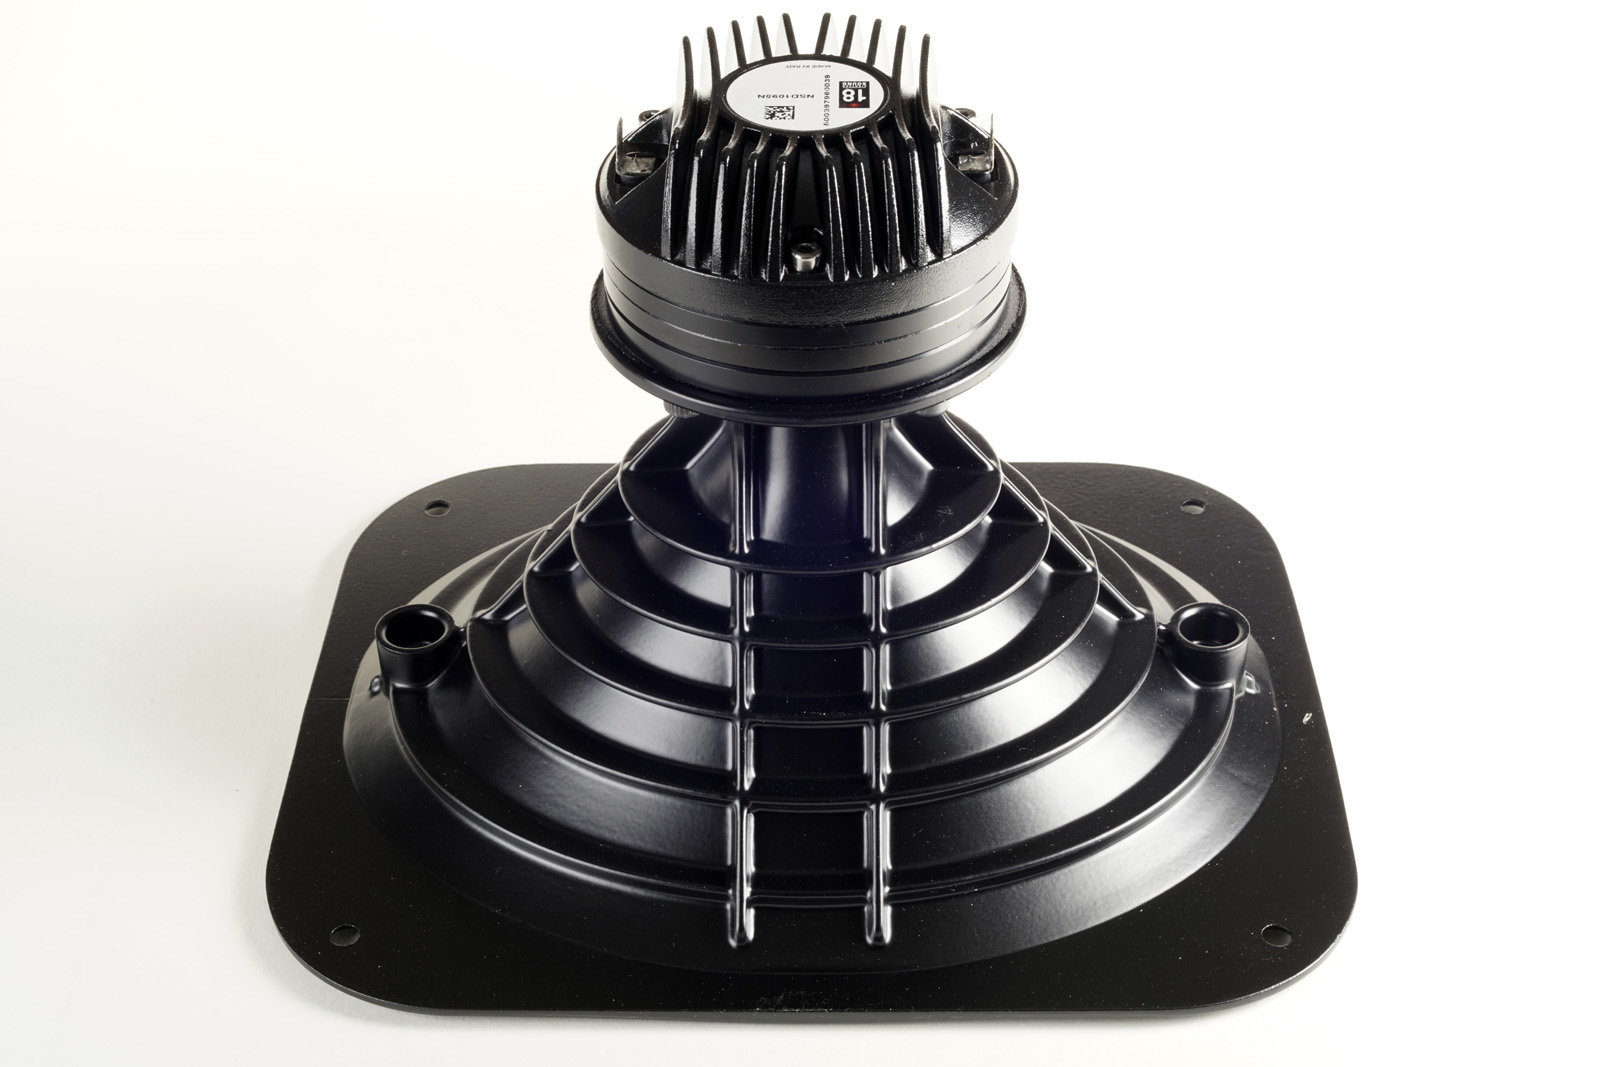
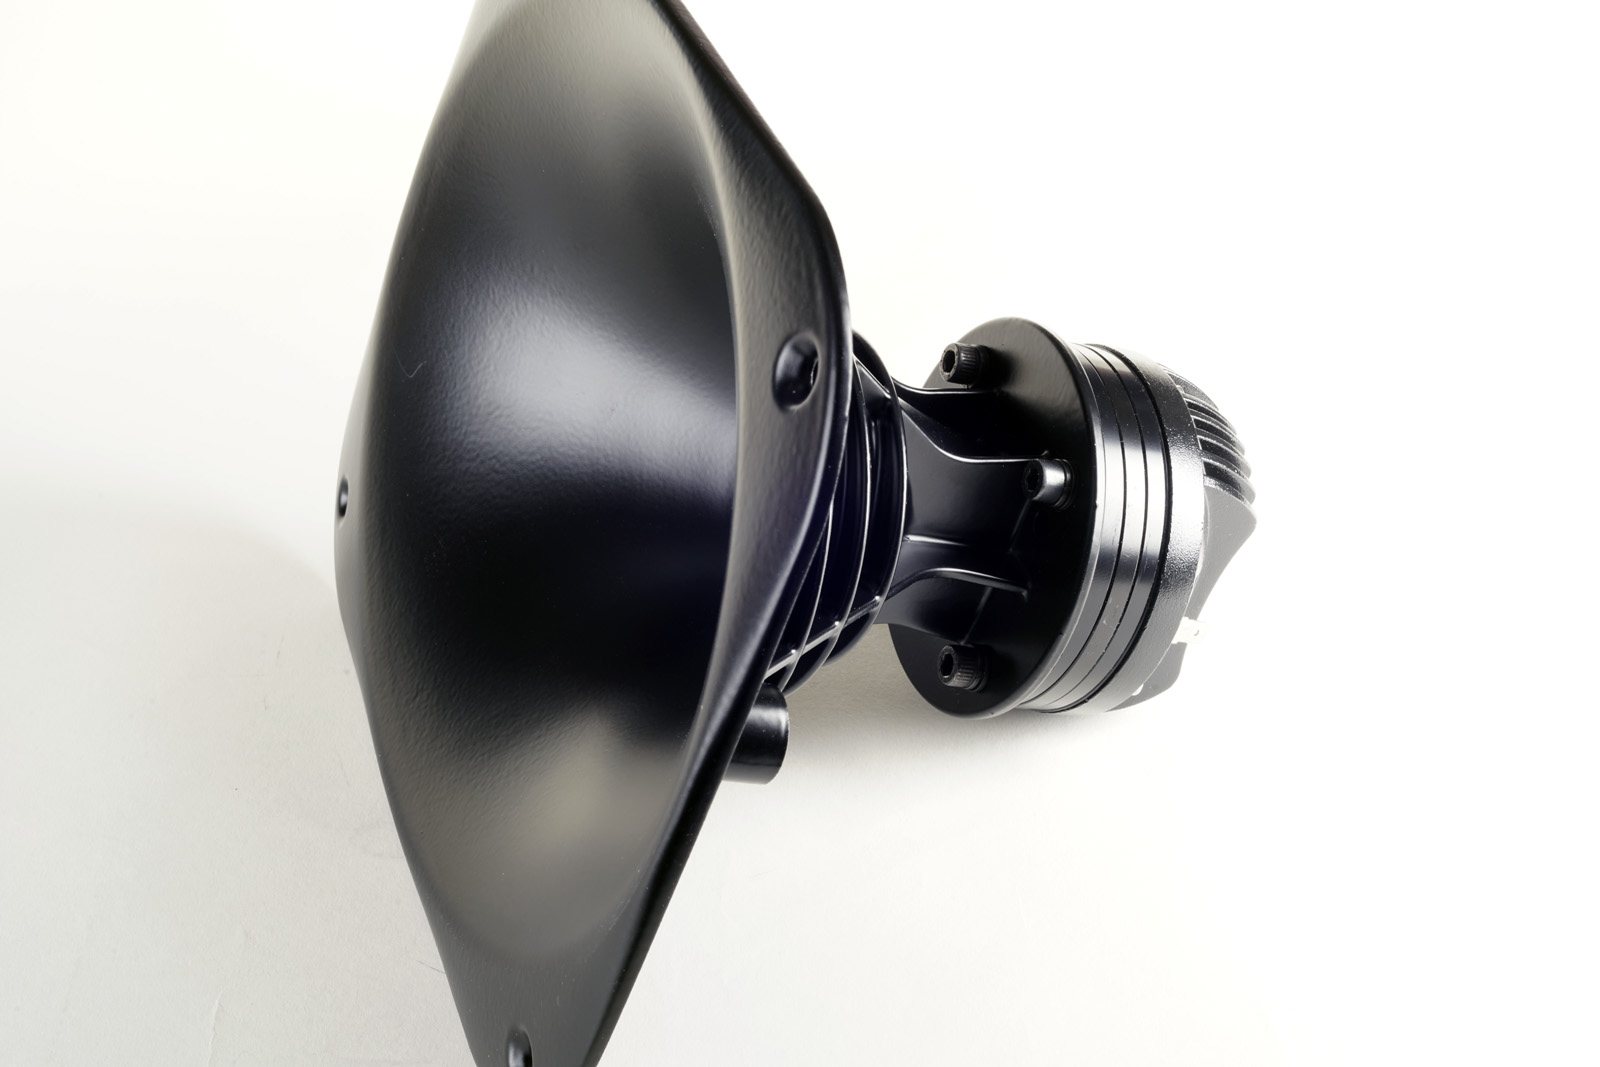
18 SOUND NSD1095N-8 (8 Ohms) compression driver and XT1086 horn.
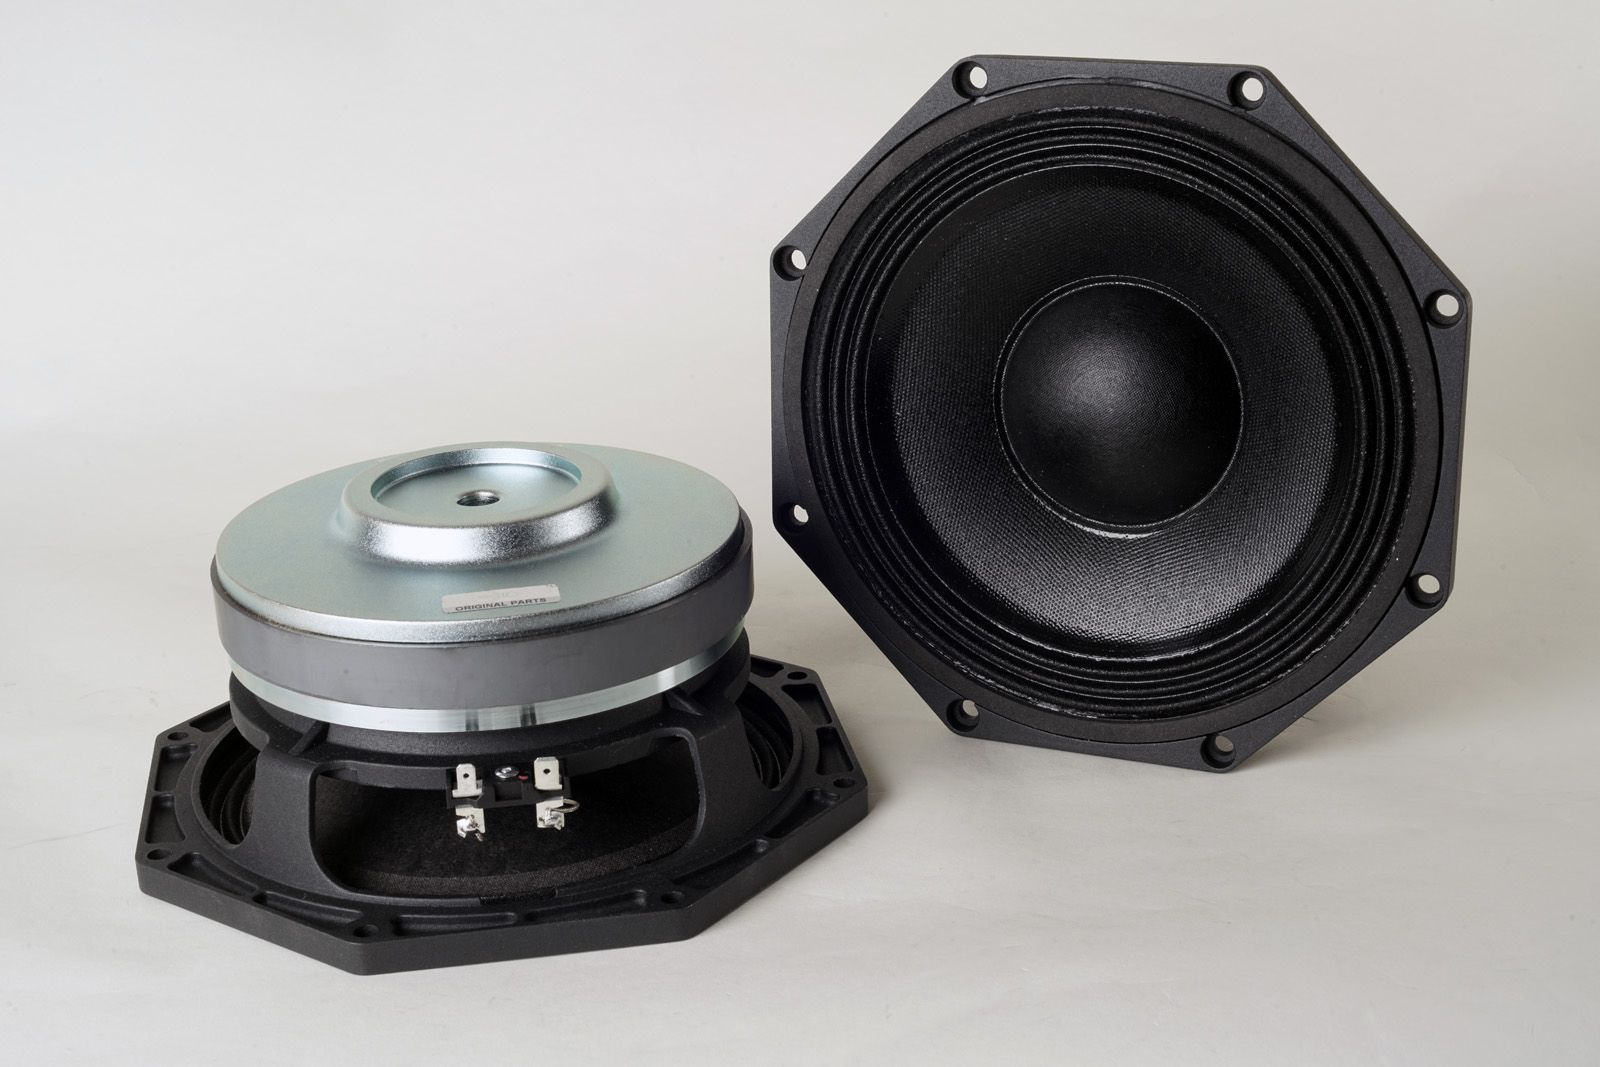
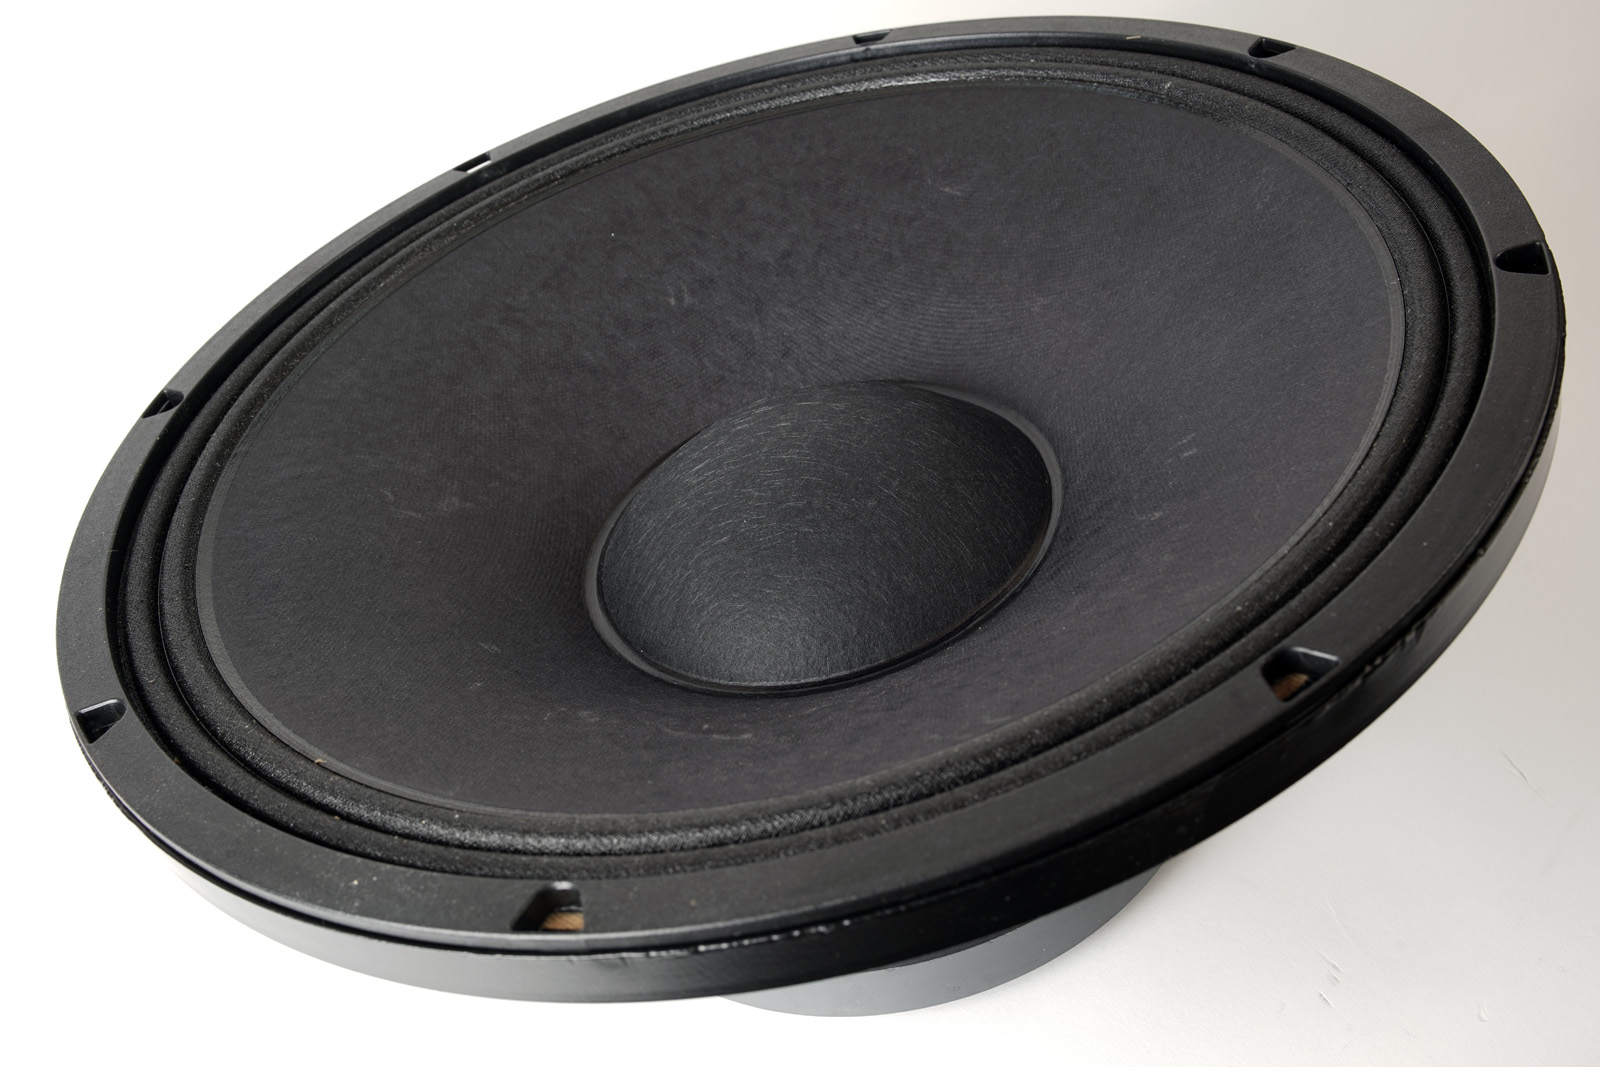
Faital 8PR210-16 (16 Ohms).
Click images to view large
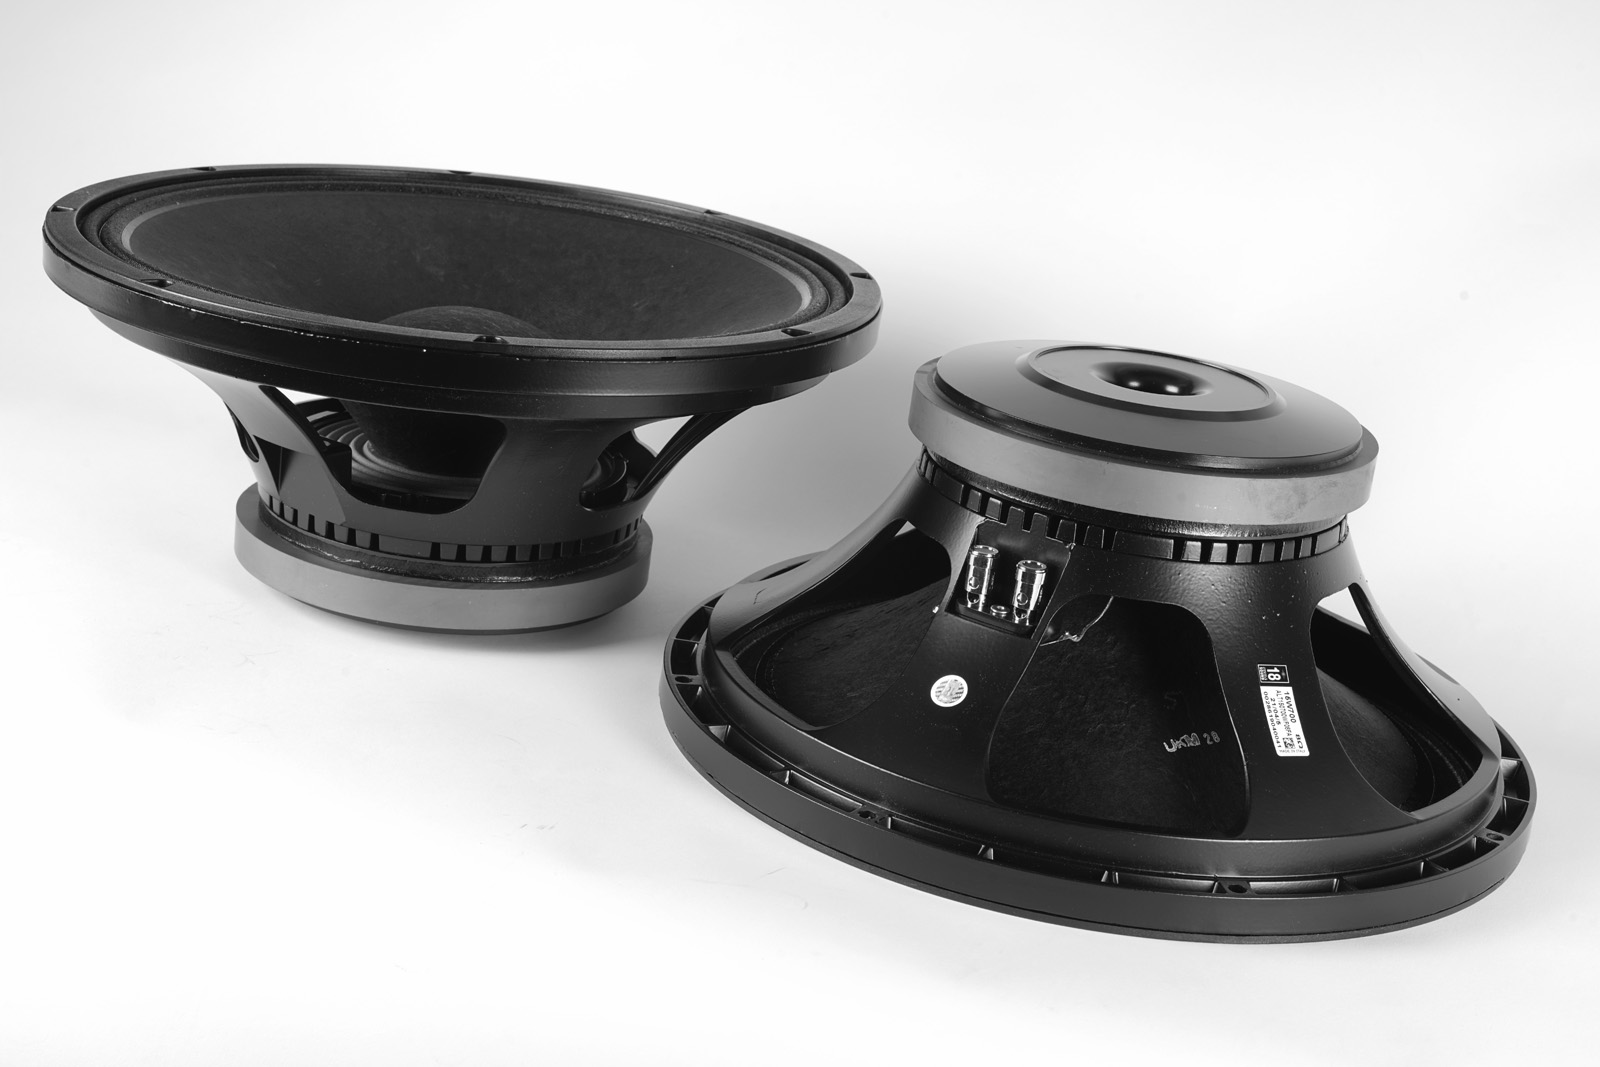
18 SOUND 15W700 (8 Ohms) 15" bass
driver.
Download specs:
18 SOUND
15W700-8 (8 Ohm)
Faital 8PR210-16 (16 Ohm)
18 SOUND
NSD1095N-8 (8 Ohm)
18 SOUND
XT1086 horn
Read test of Faital 8PR210-16 here.
All drivers is/will be available from LEAN/UK.
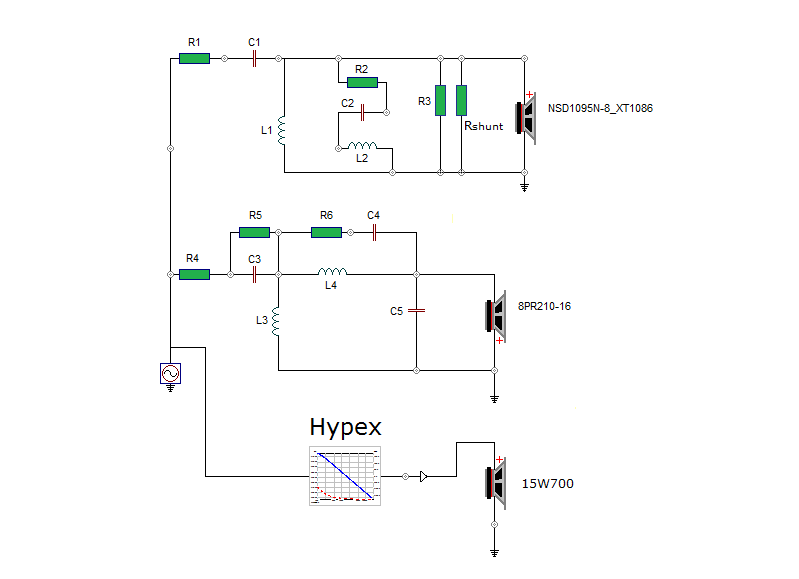
Due to the Hypex plate-amp/DSP, the bass crossover can be
spared as the low-pass function and equalisation is done the Hypex' DSP.
This also means we have no need for the impedance correcting circuit.
Overall very simple circuitry and we can spend our money on the very
best of caps for the horn - and it pays off.
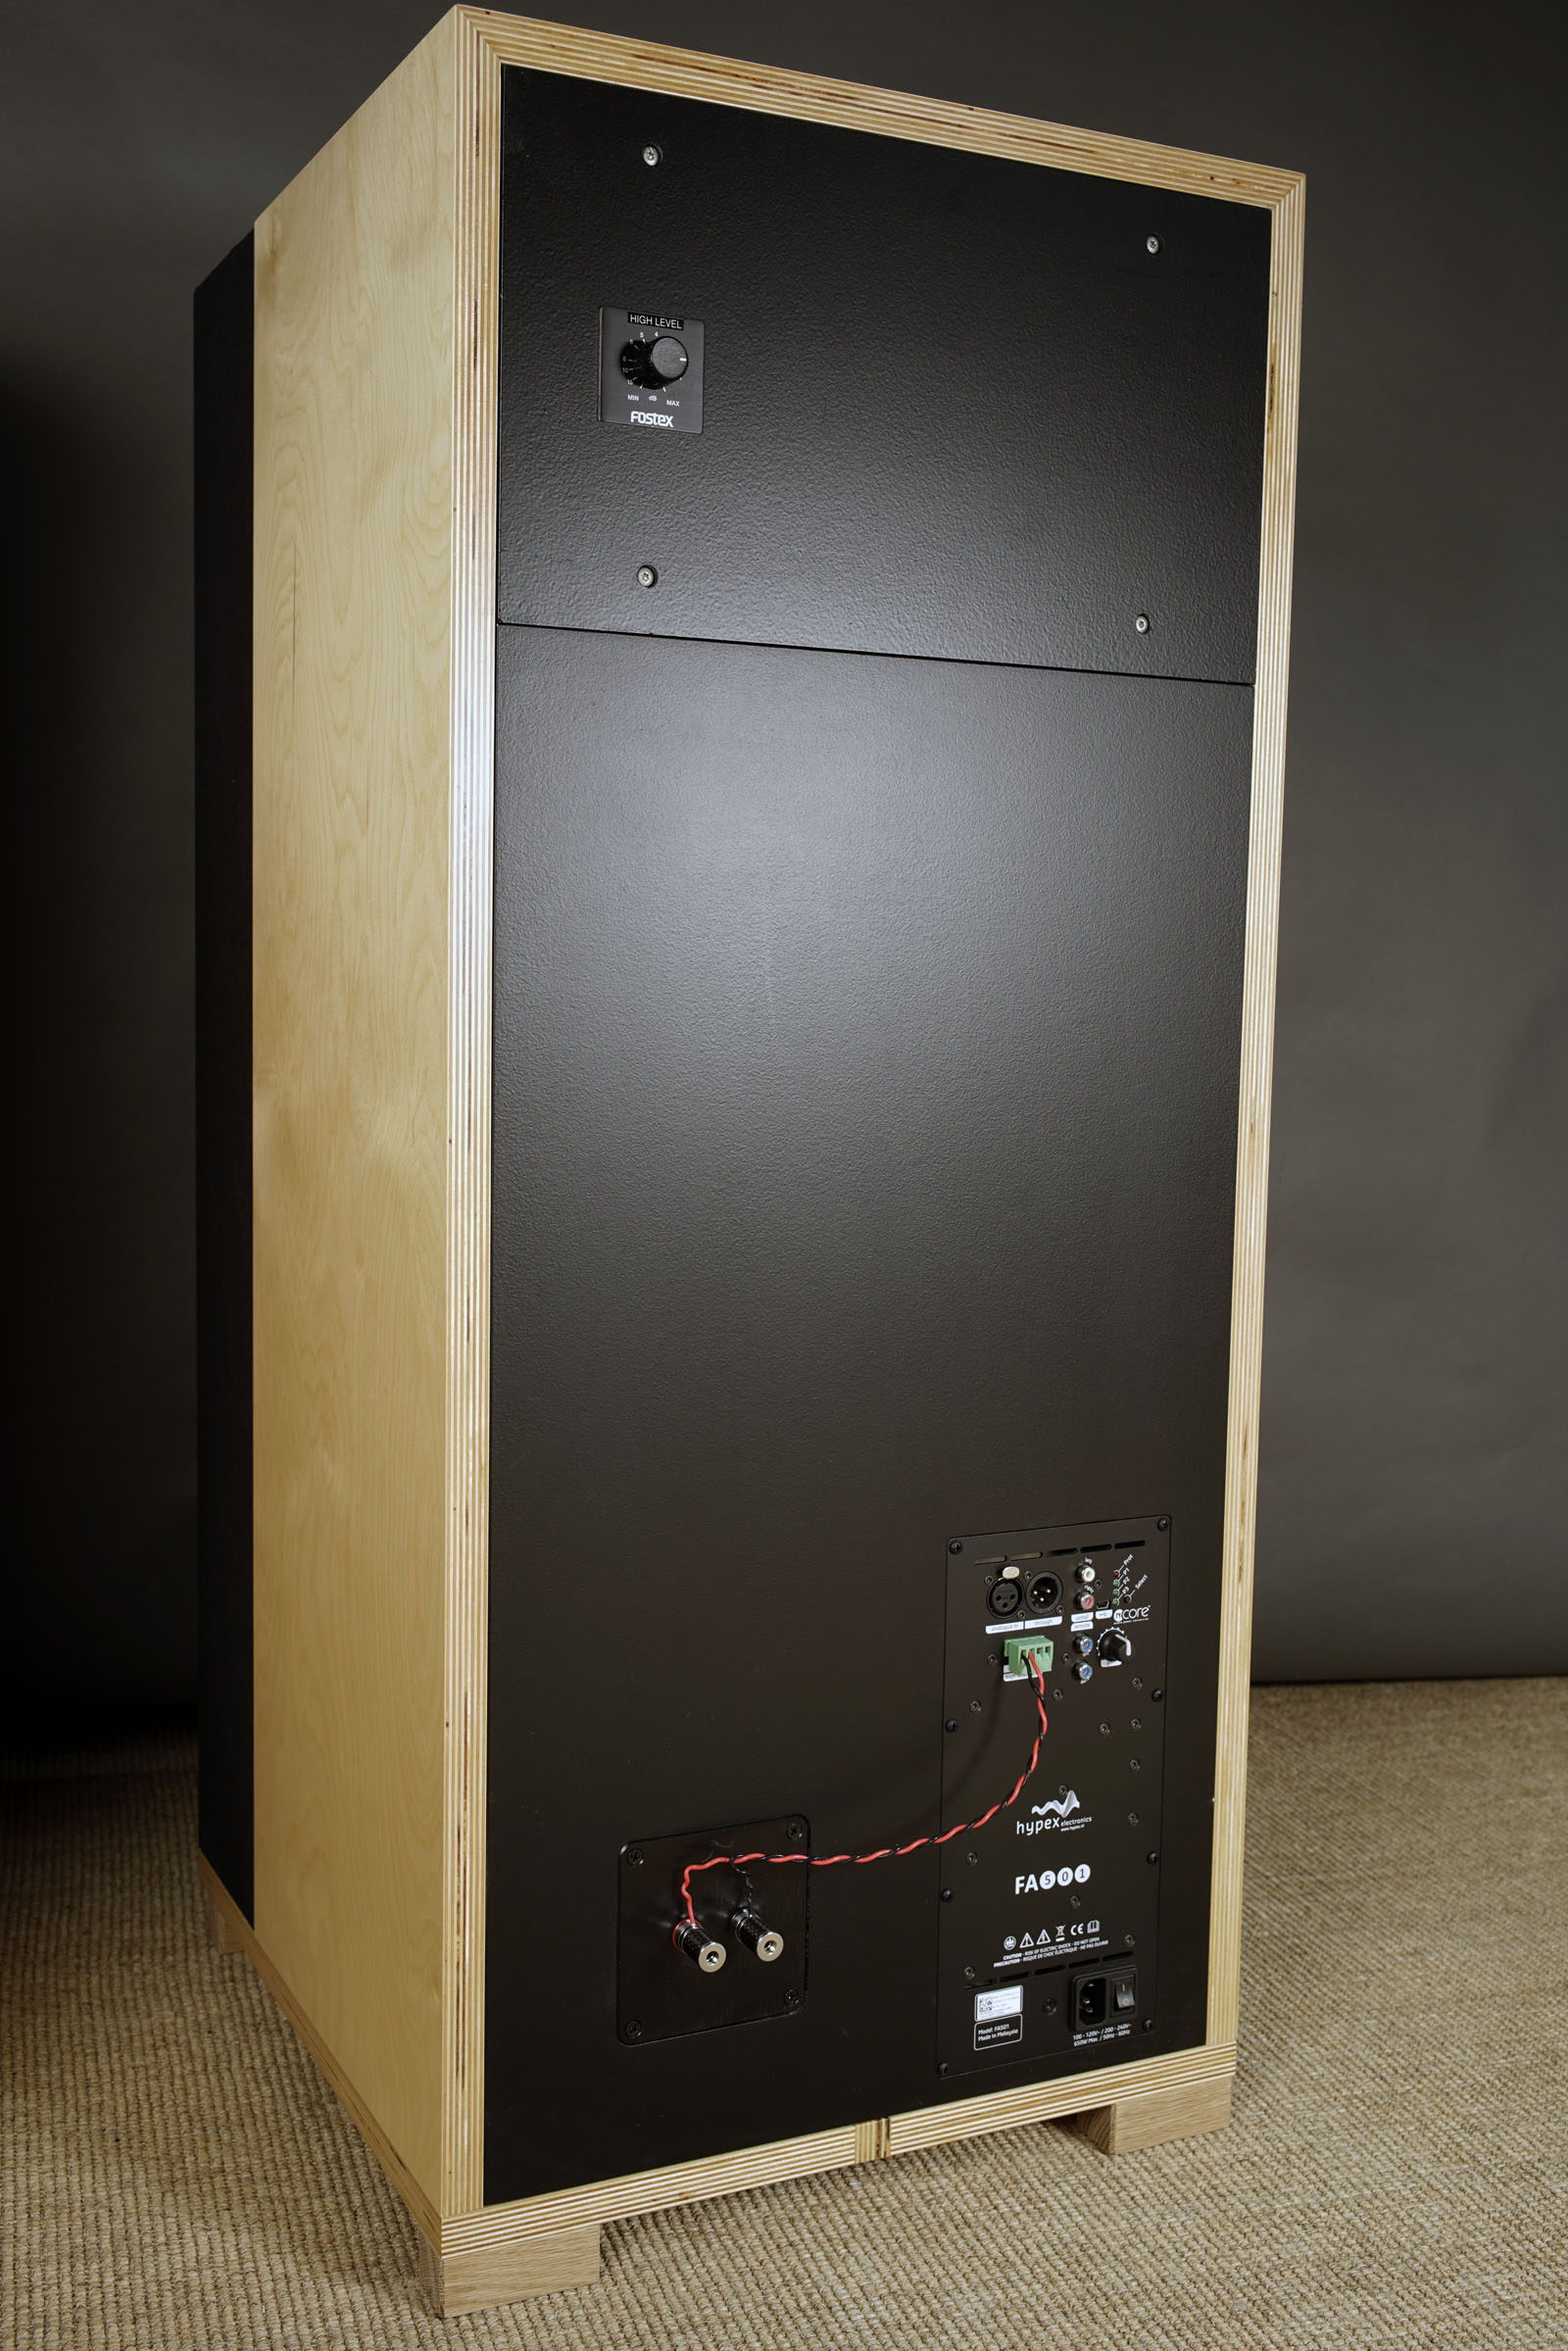
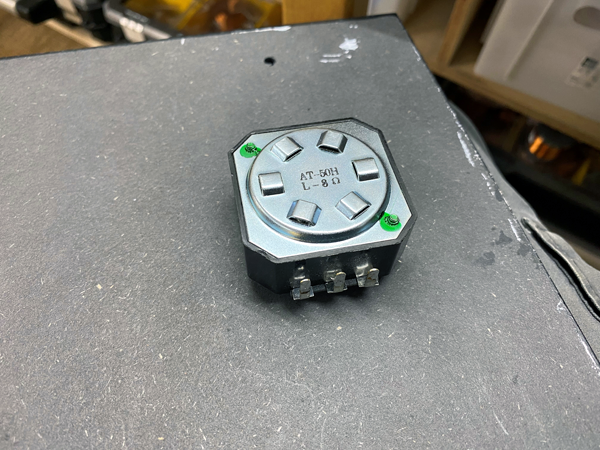
I strongly recommend the Fostex attenuator for the horn. It does not
degrade the sound - not at all. I bought mine on
eBay from Germany. Google "Fostex R 80 B" and you should find
suppliers from
Madisound in the US to
Hifisound in Germany. Lots of them for sale on eBay from Japan.
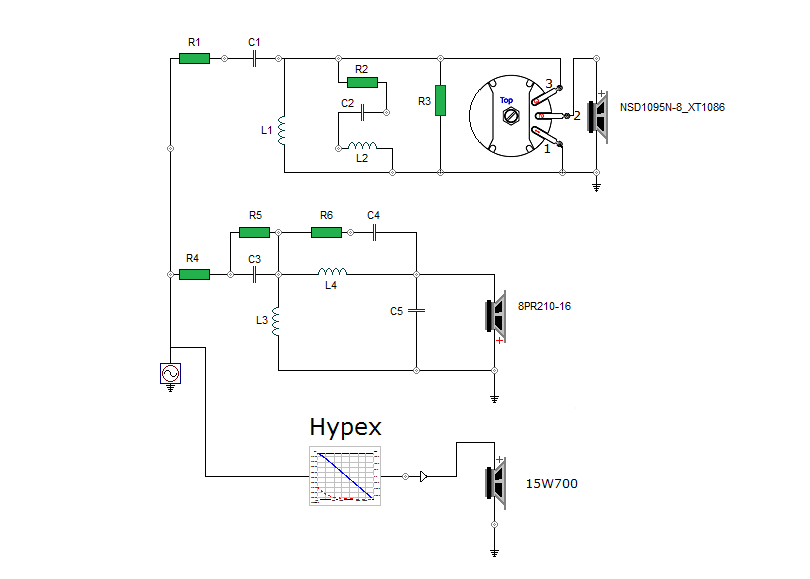
If you use the attenuator, omit R-shunt. This
will increase treble level by approx. 1 dB and give the attenuator a
better starting point.
I use the attenuator set to -1dB making the same treble level as with
Rshunt connected.
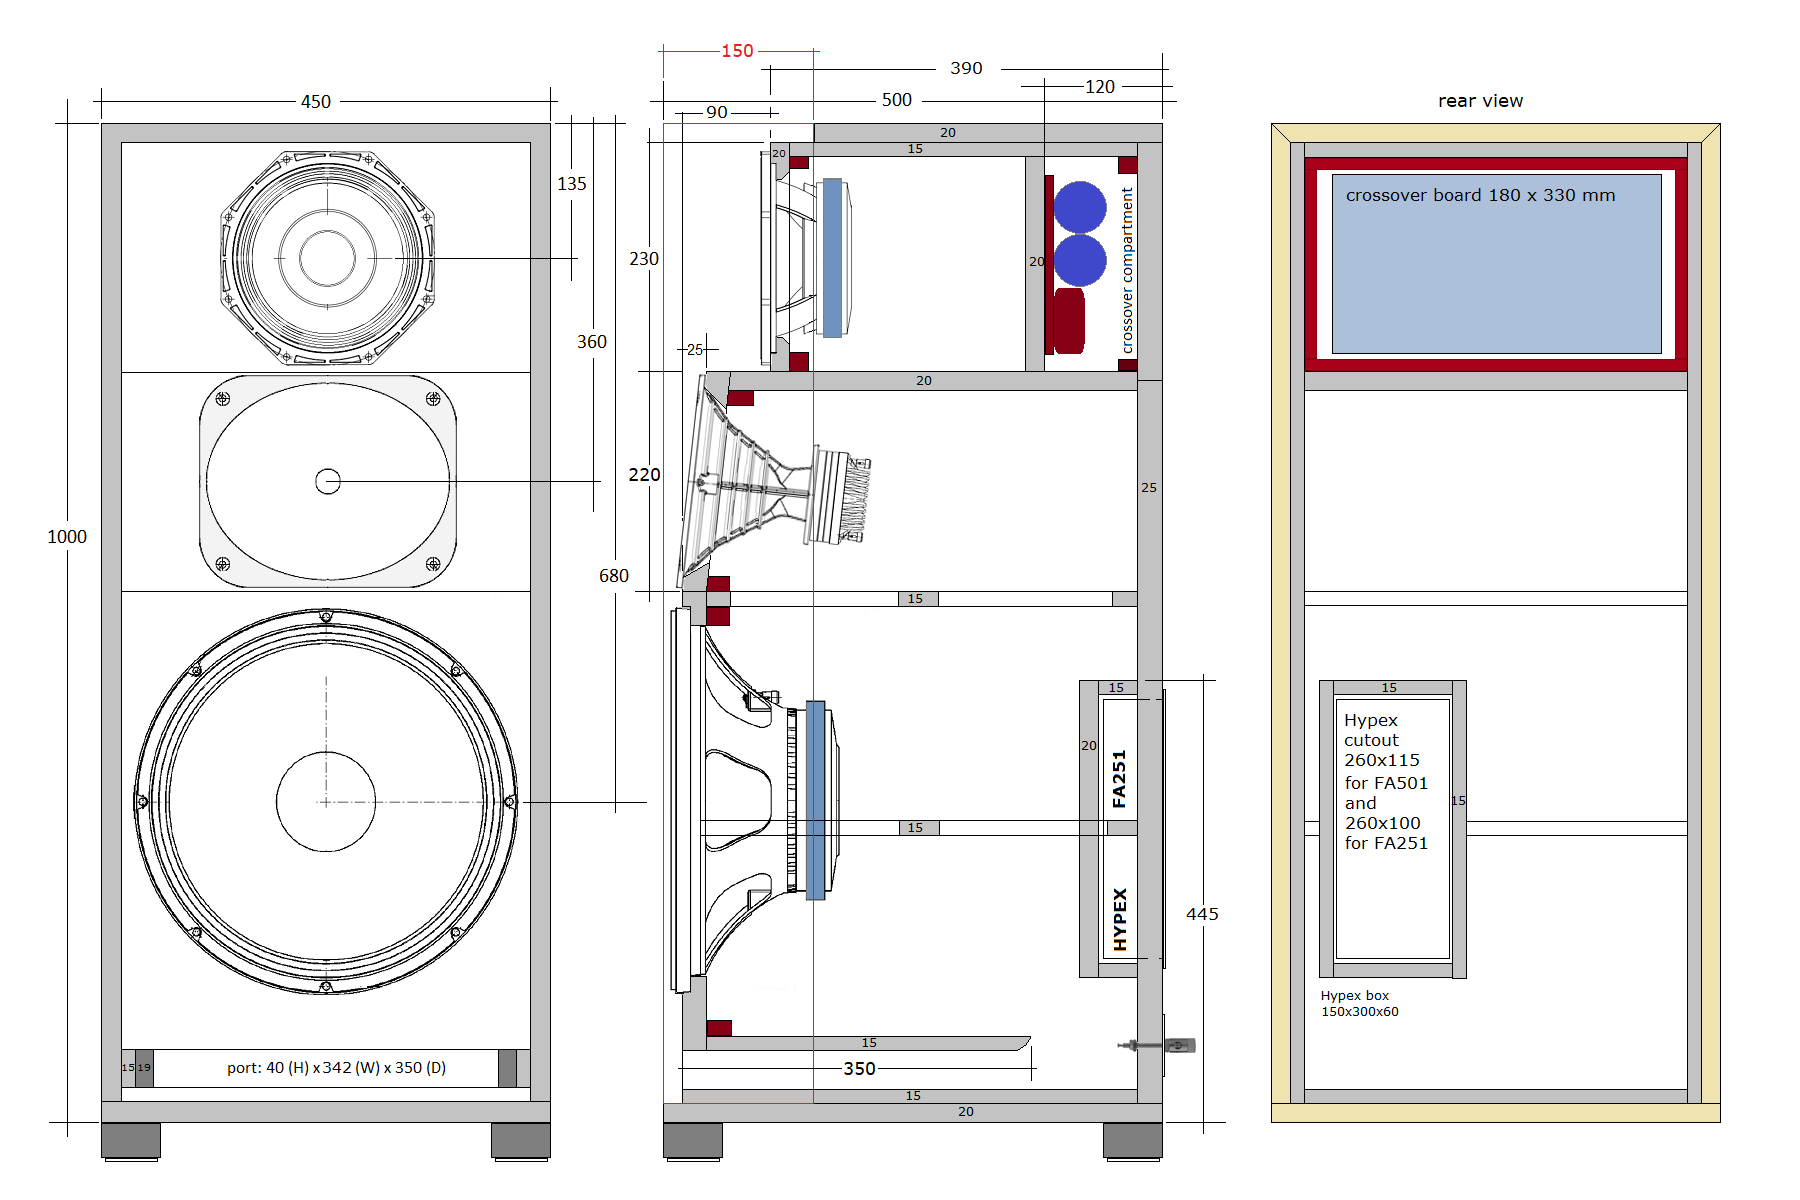
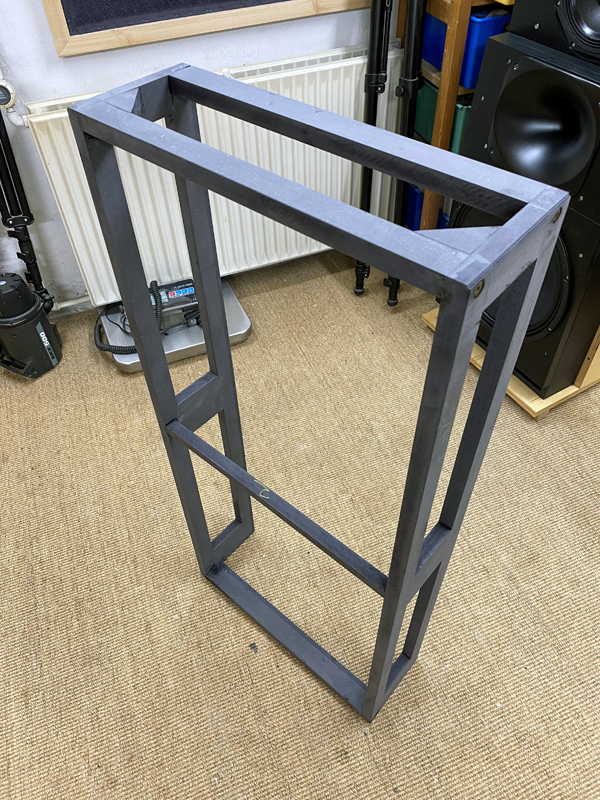
The basic (inner) cabinet was made from 15, 20 and 25 mm black MDF. 15 mm
for sides, port, bottom and top. 25 mm for rear and front panels. 20 mm
for midrange front. Bracing was made from 15 mm black MDF.
The outer cabinet was made from 20 mm Baltic birch. Front grill frame
was made from 19 mm fillets.
You can make the cabinet 45 cm wide from one layer and skip the Baltic
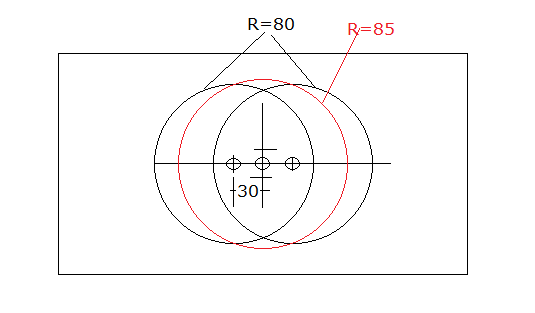
birch cladding I used. Whatever you do, do not change the 90 mm
distance between bass front panel and midrange panel with midrange
driver not flush-mounted. This is the most important structural
characteristic.
I strongly advise the front grill as it helps us so much listening
rather than seeing. Not easy, but a great thing.
Illustrated by the red lines in the drawing.
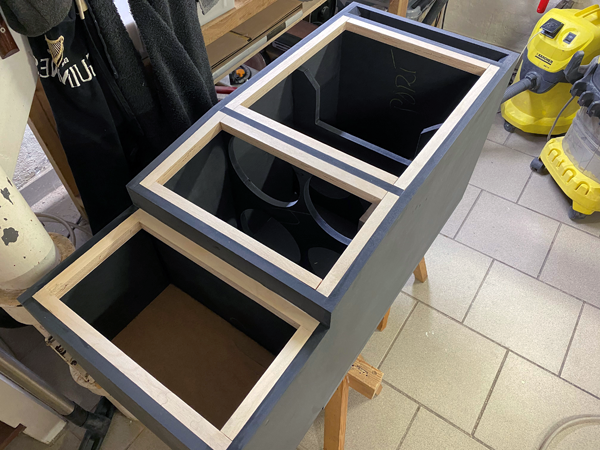
So, let's start looking at the inner cabinet:
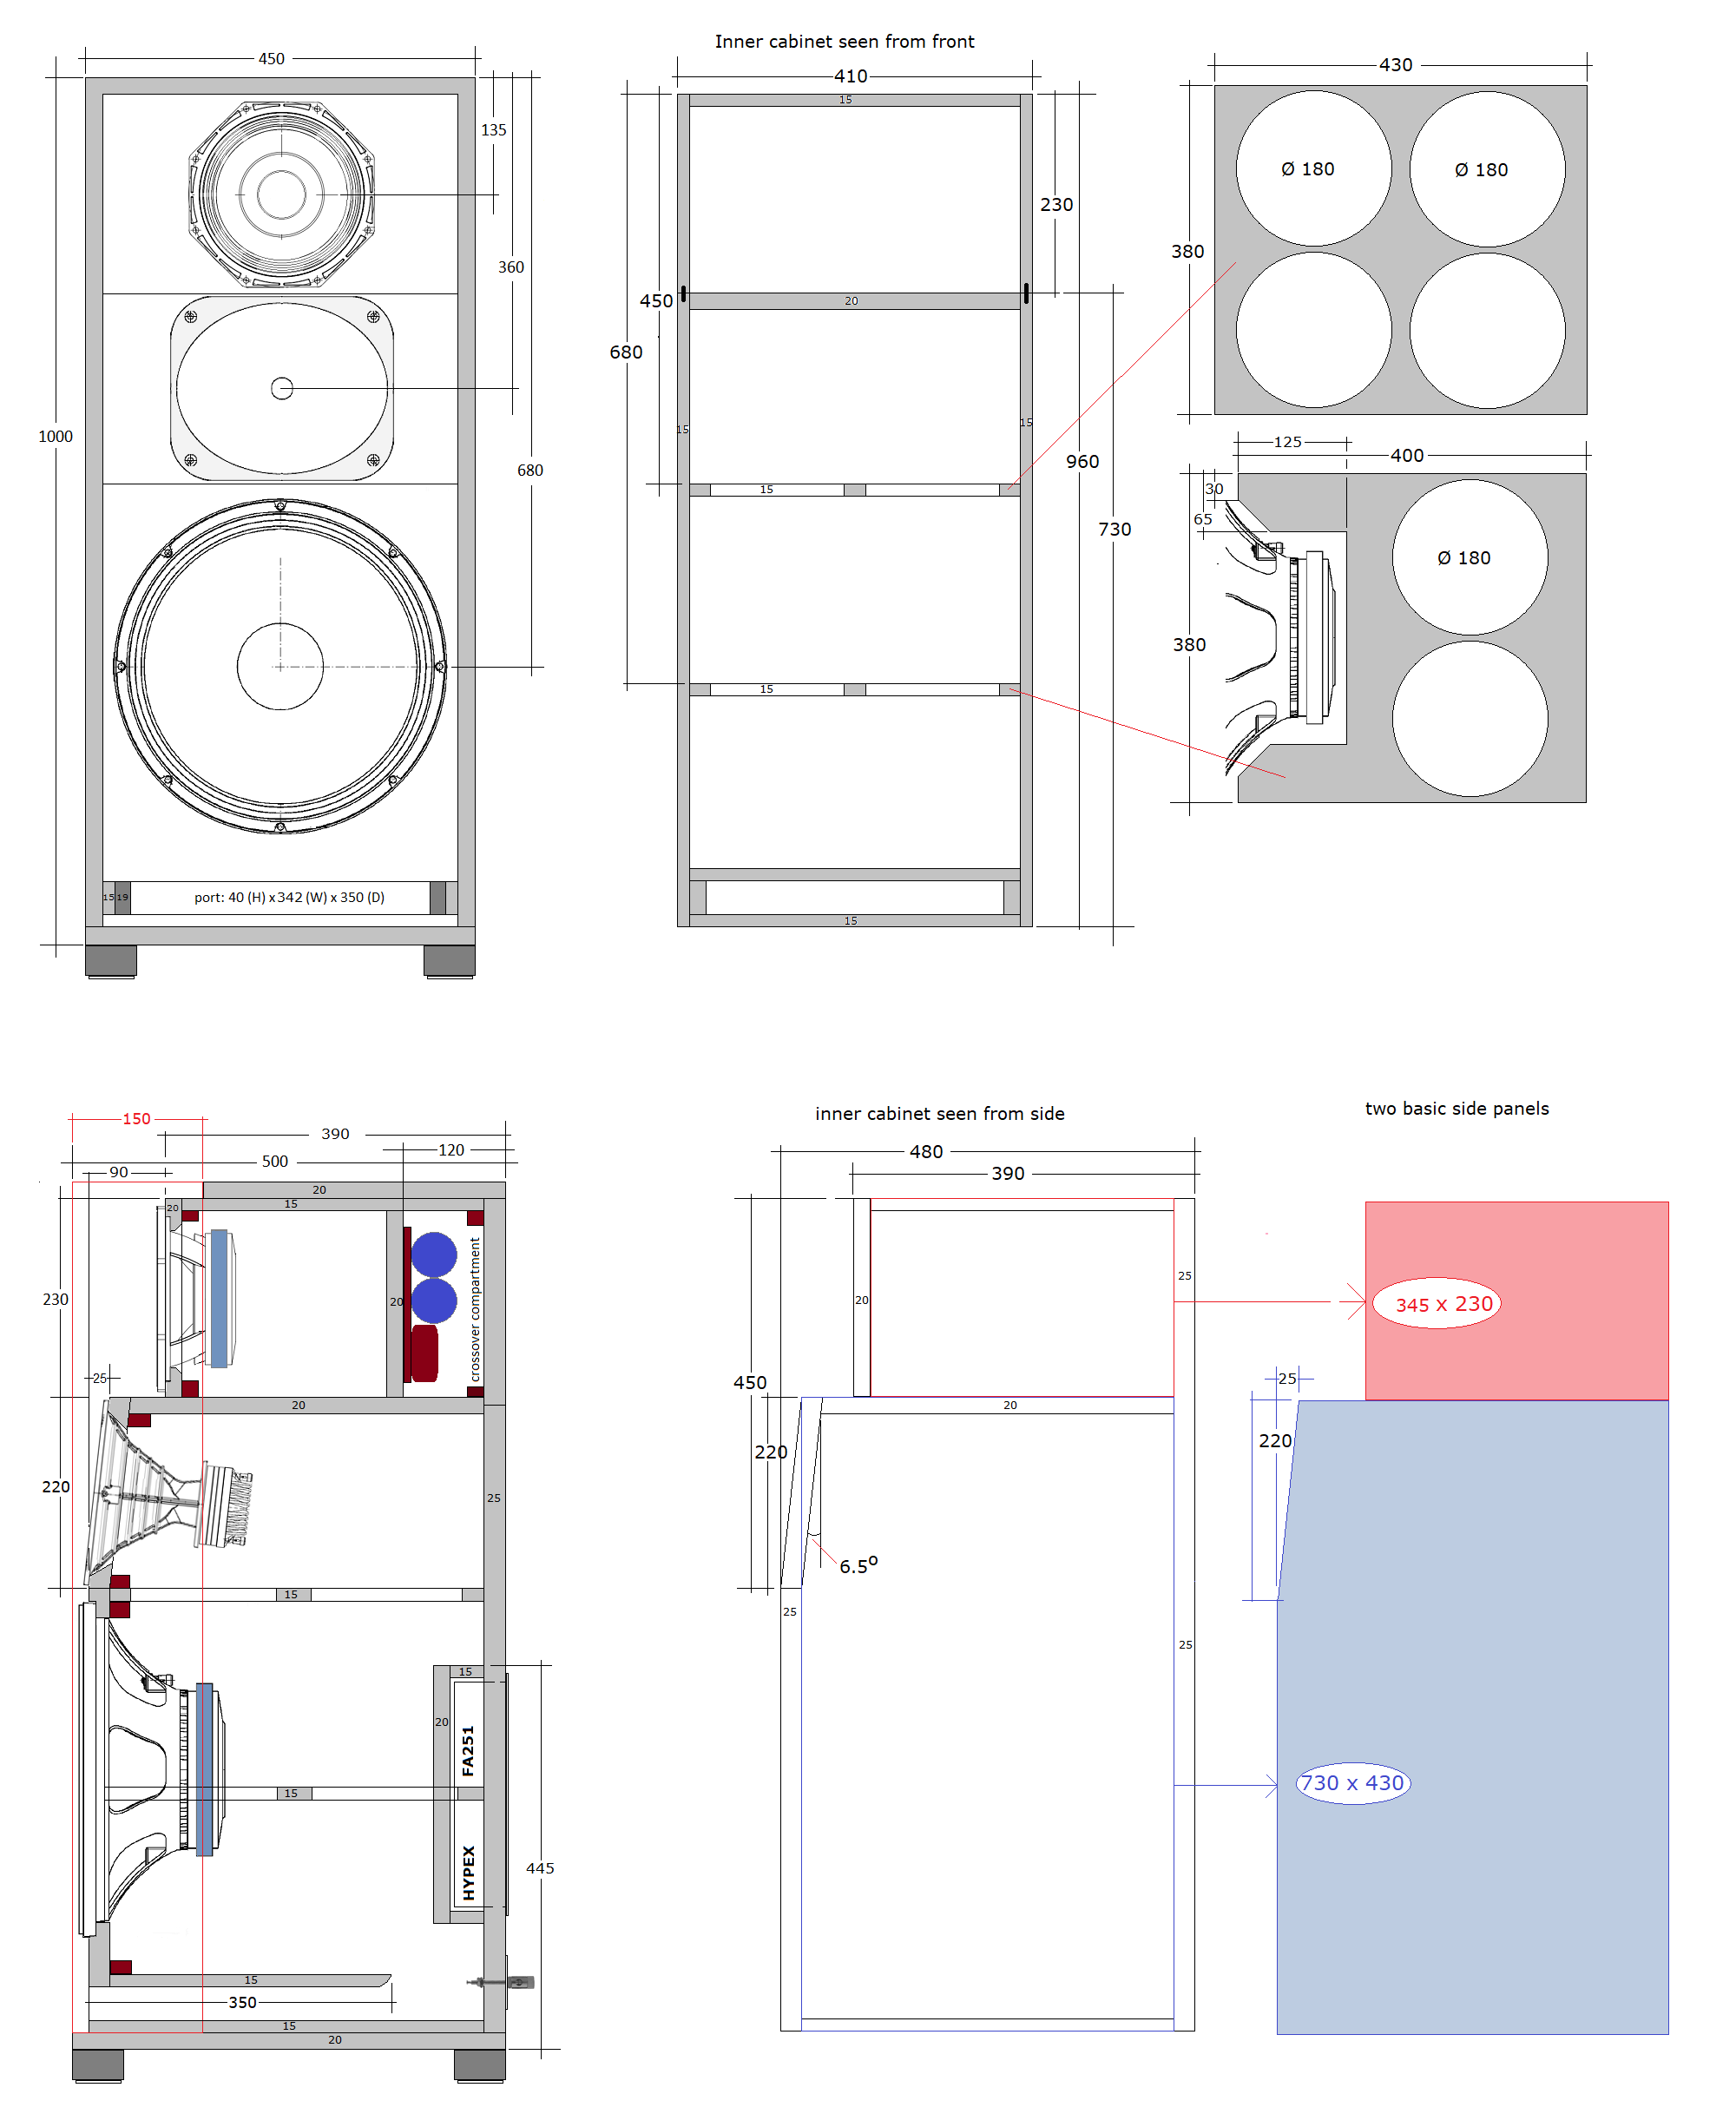
Click image to view large.
The inner cabinet is made from 15 and 20 mm panels. Front and rear from 25 mm panels.
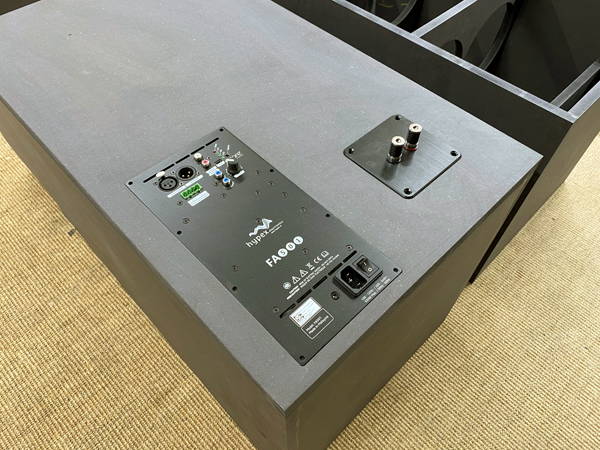
The Hypex modules
BACK TO INDEX

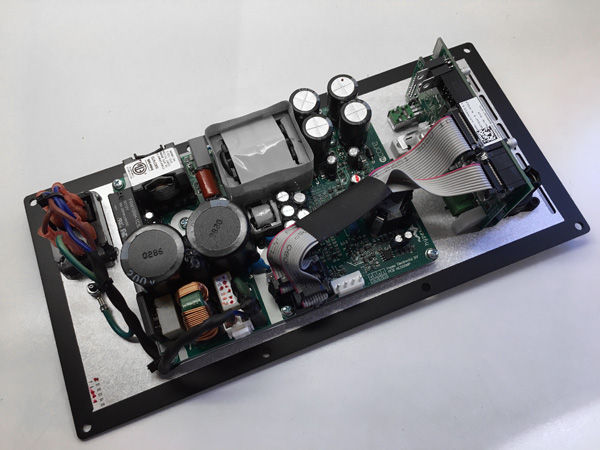
The Hypex FUSION FA501 plate-amp/DSP.
Go to Hypex page here.
Download software here.
Mockup
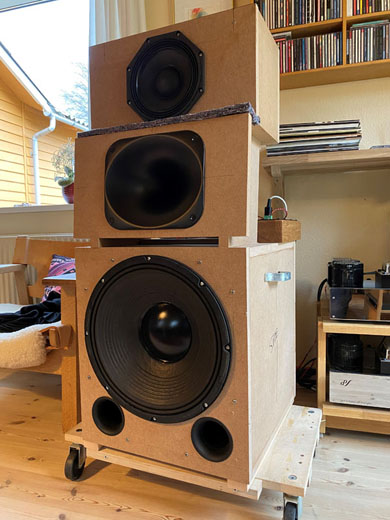

All things start with a mockup to measure - and hear - if this fantasy
works at all. Above the Ciare NDH-15-4S, 18 SOUND 15W700 and ScanSpeak
38WE/8582T00 woofers with a passive crossover and
bi-amped with my EAR-861 and Hypex UcD400ST power amp. Initial testing
was promising for all, albeit the 1580 € 38WE may be a bit over the
budget here. Also some different midrange drivers were tested, but this
16 Ohm Faital did it - and saved us some expensive uF for the high-pass
filter due to the high impedance.
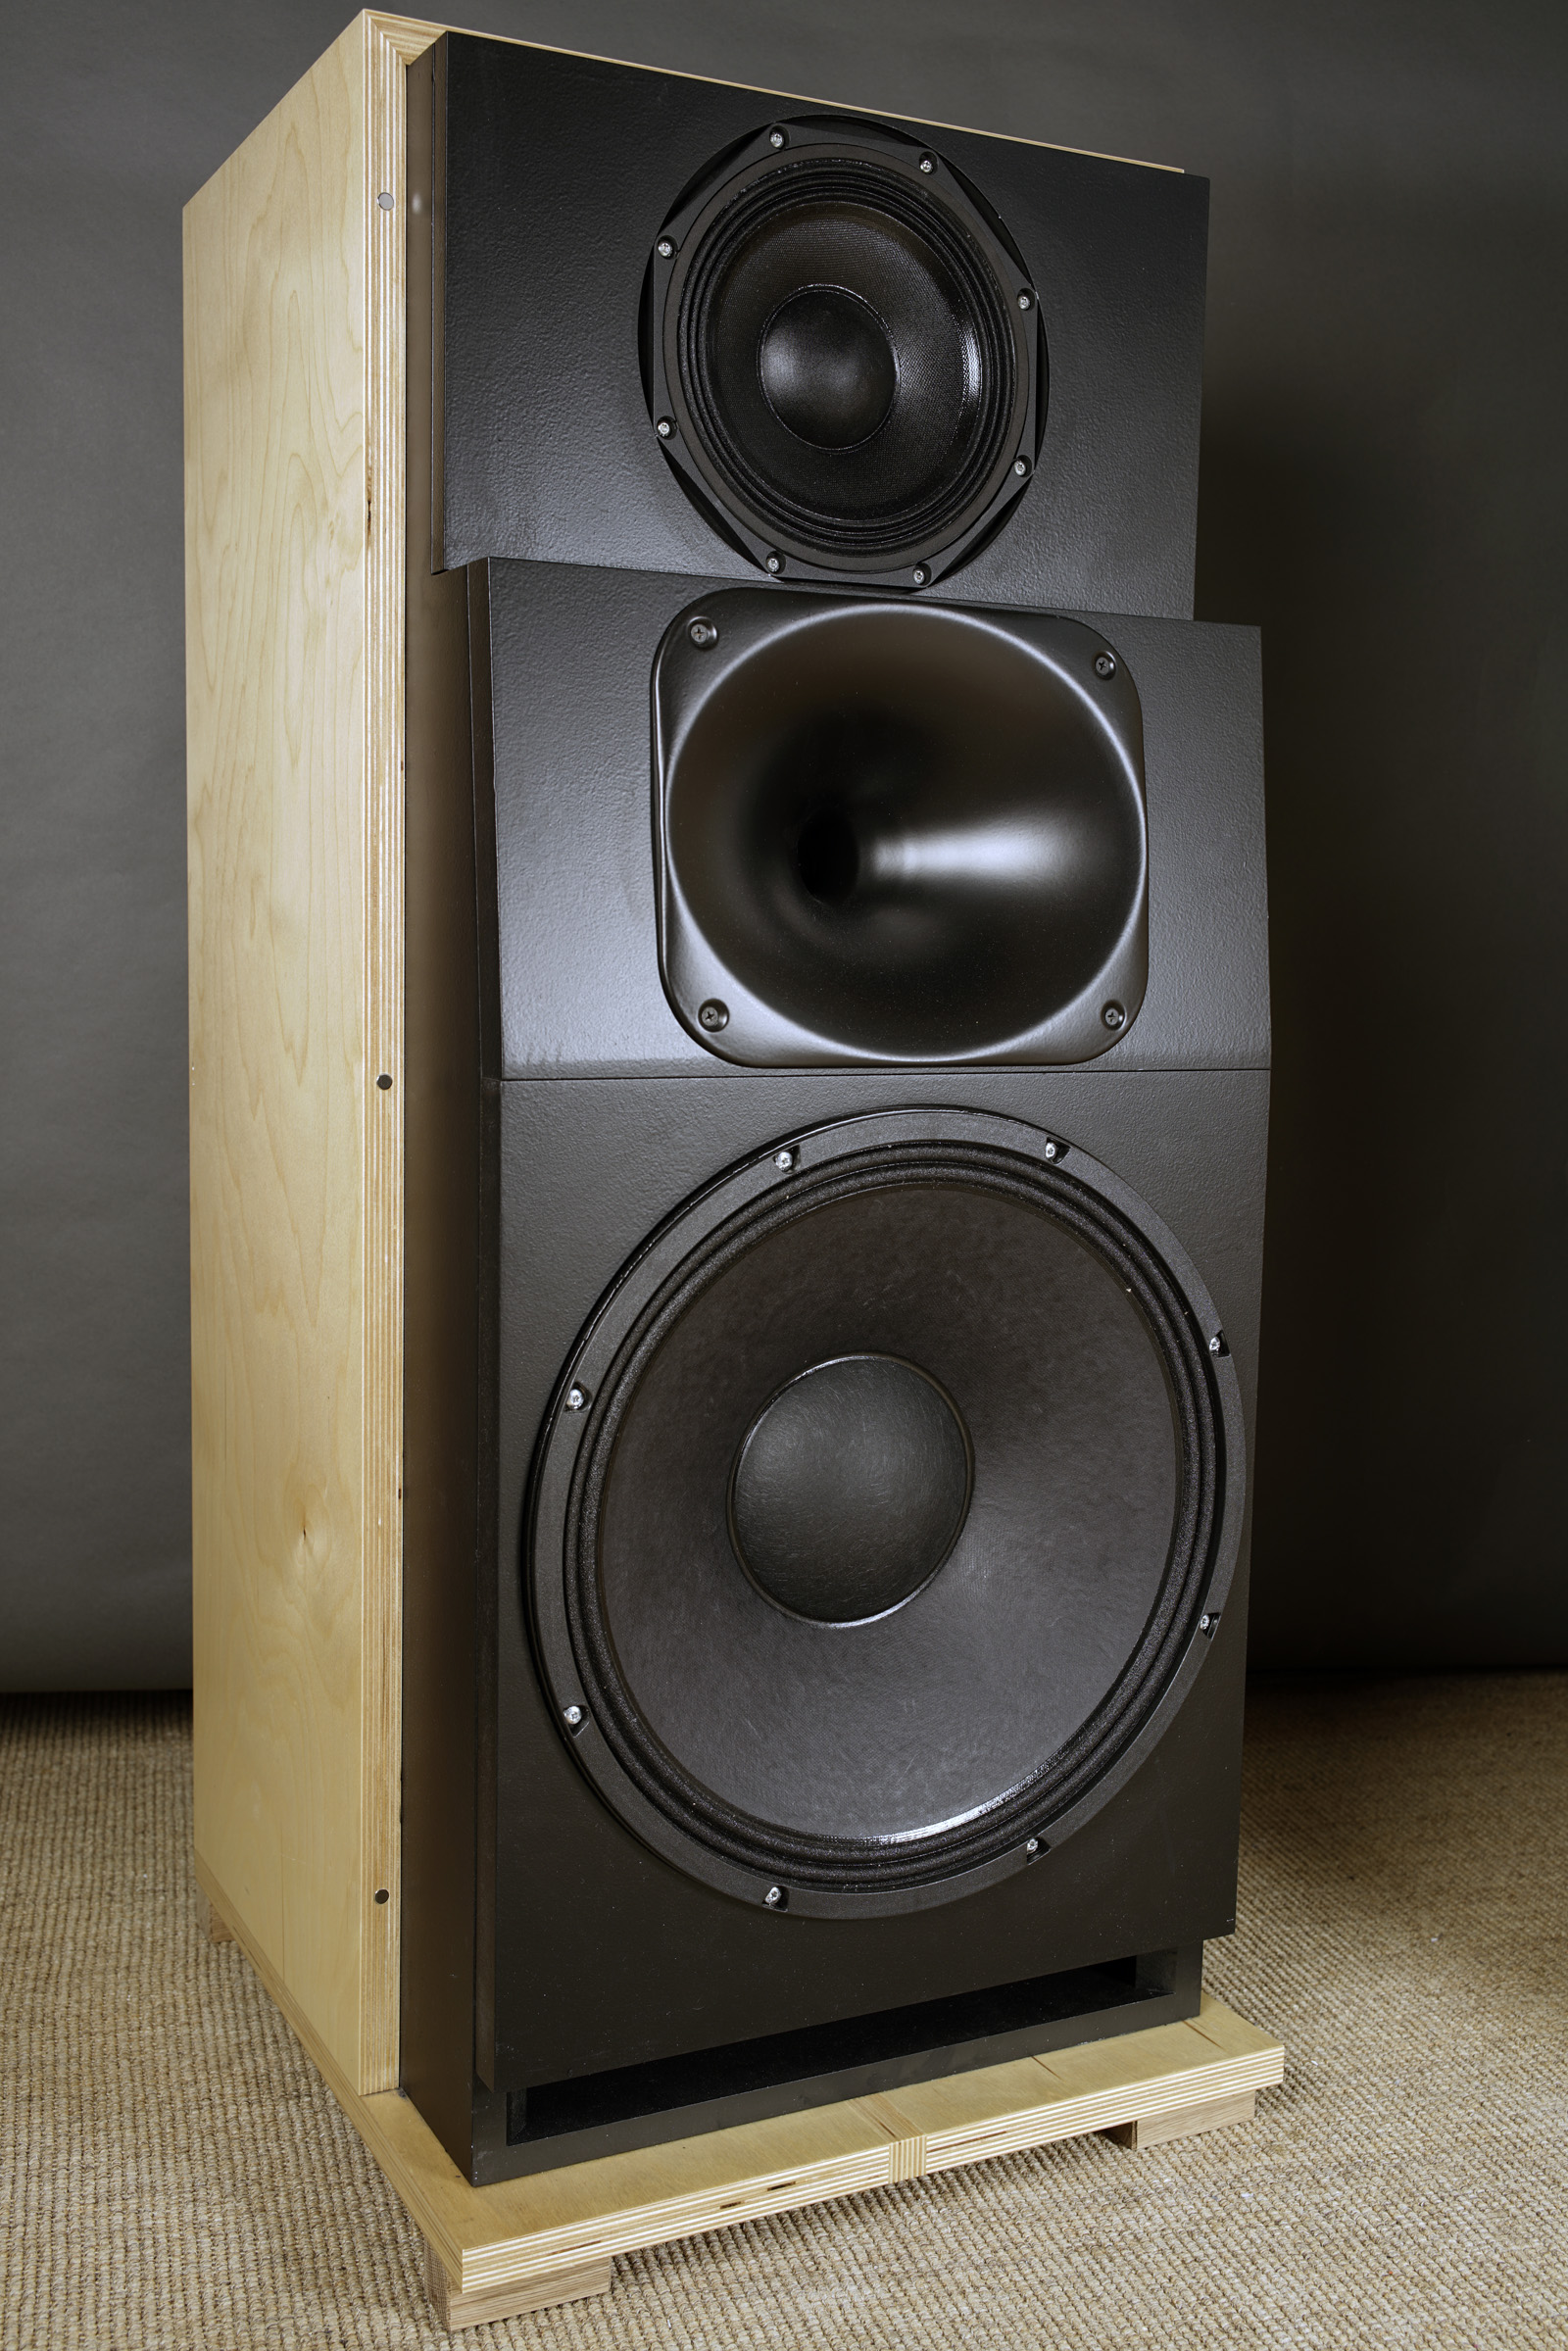
The "thing" with this construction is the time-alignment of the horn and
midrange driver, thus the horn had to be in the middle and the midrange
on top and pulled back some 90 mm relative to the bass panel to be time-aligned with the horn.
From my workshop experiments it was clear the speaker had to be lifted a
little and the horn needed a ~6o tilt for proper integration of
all drivers and a listening distance of 2-3 meters and sitting in an
assumed standard chair. So, my ~10 cm platform dollies were pulled out
and placed under the cabinets and some 5 deg. wedges were made to tilt
the horn baffle and midrange cabinets. So done, the final fine-tuning
could start and the speakers taken to our living room for further
fine-tuning. Bless my wife for not complaining, these monsters were
there for weeks.
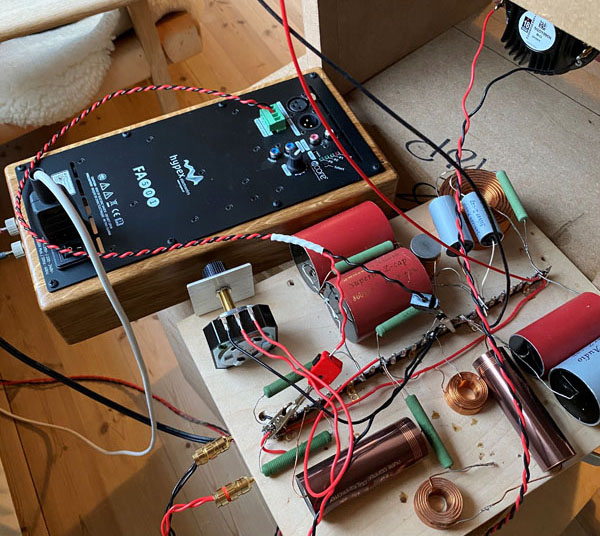
Prototype crossover and Hypex module.
I used a Fostex attenuator R80B to balance the horn correctly (to my
taste).
Excellent attenuator, by the way. And it DOES NOT degrade the sound I
can tell.
After some time, I made a program for my Hypex FUSION FA501 amps with a
2nd order low-pass filter at 240 Hz and a 2nd order high-pass filter at
20 Hz (vinyl). This arrangement proved so much superior to the passive
version, I decided to only launch the Hypex powered version, although I
know some people will be pissed from a not having a fully passive speaker. But this
is how it works the best, and we want the best and with the 18 SOUND 15W700
we need some equalisation and it can
be driven from both the FA251 or the FA501. I have tried both and I
cannot argue the FA501 for this application is better than the FA251.
And the Hypex is fed from the crossover, so no need for a line signal.
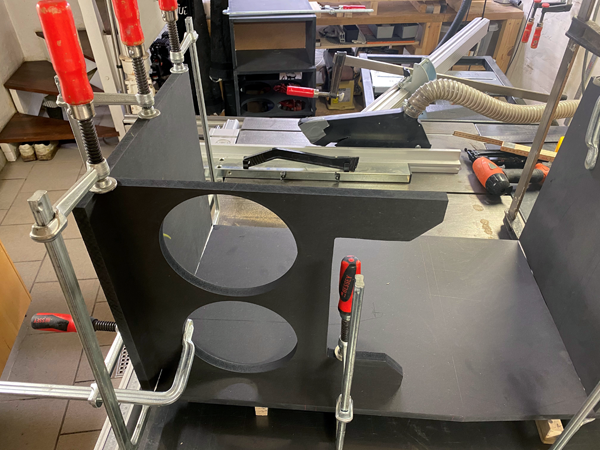
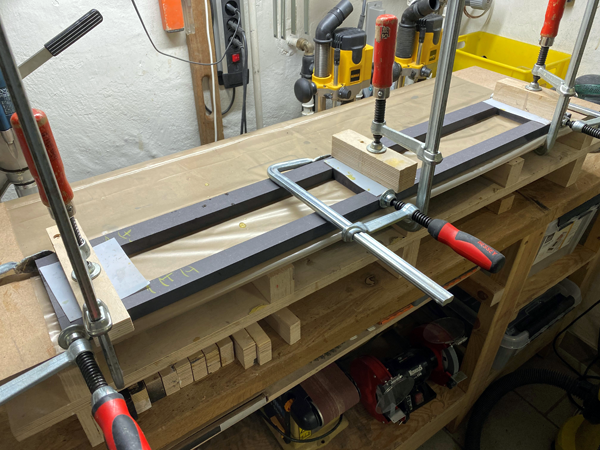
Cabinet construction:
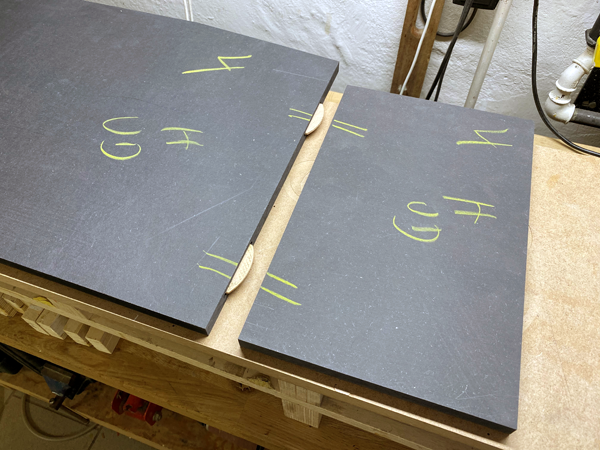
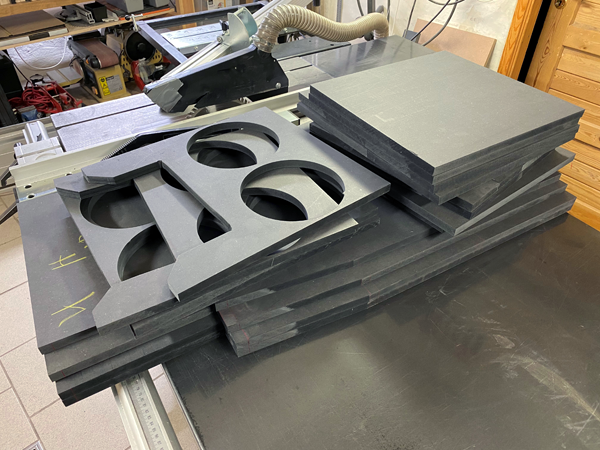
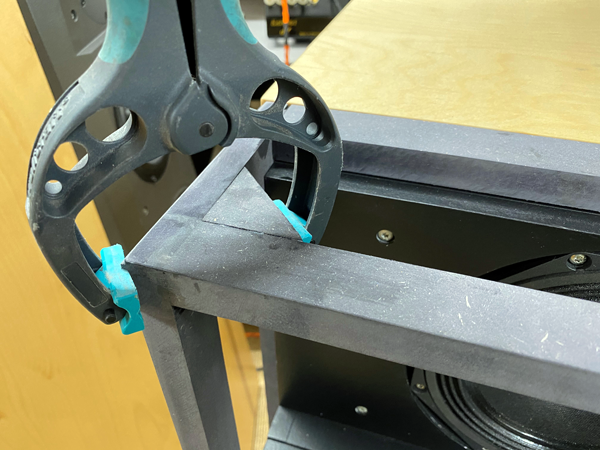
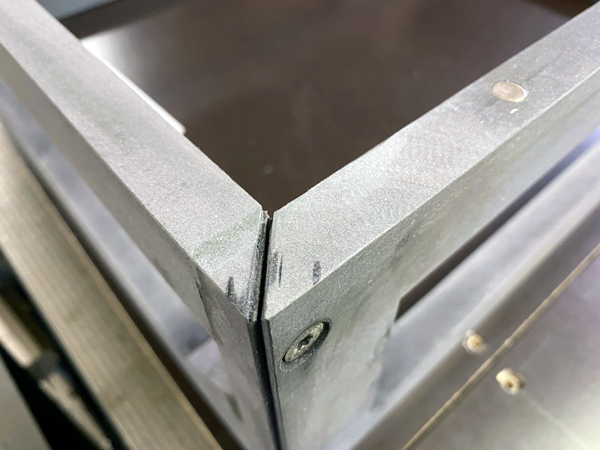
Left: Connecting mid cab side panel and bass cab side panel. Right: All
basic elements for the inner cabinet minus front and rear.
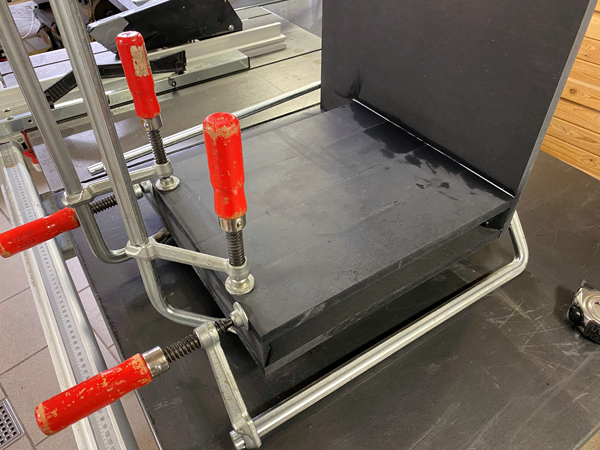
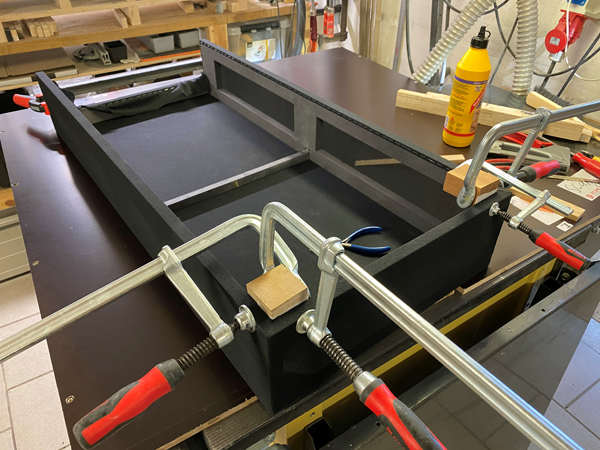
Left: I started gluing the bottom panel to one side panel and used a
brace to align 90 deg. Right: Next I glued the port in place.
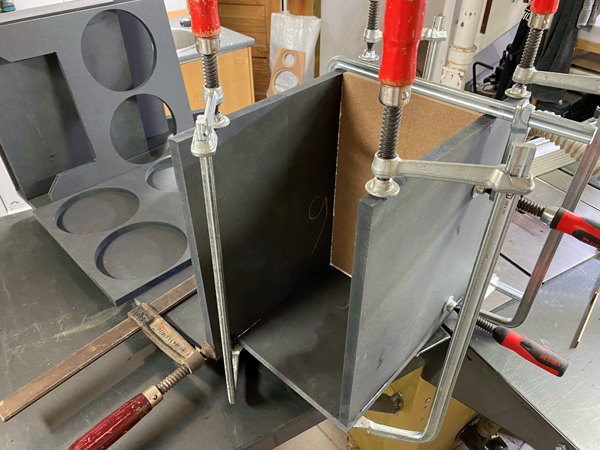
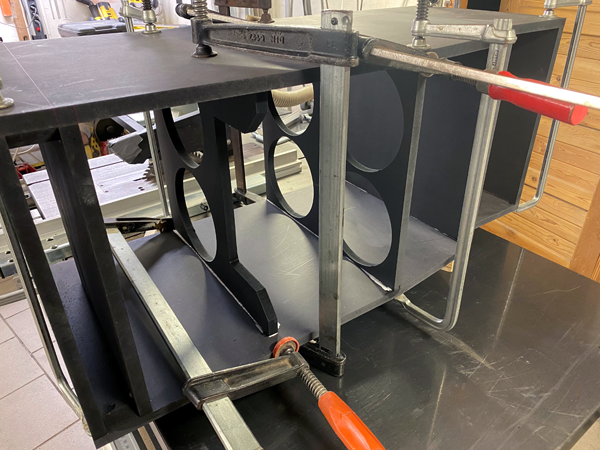
Left: Gluing the midrange cabinet. Right: Gluing the two braces. After
that I glued the last side panel in place.
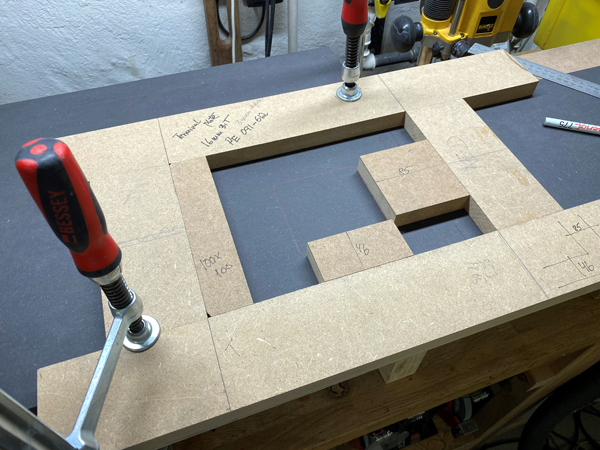
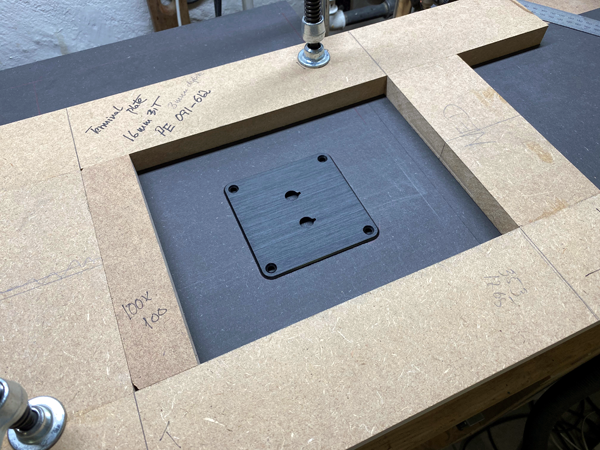
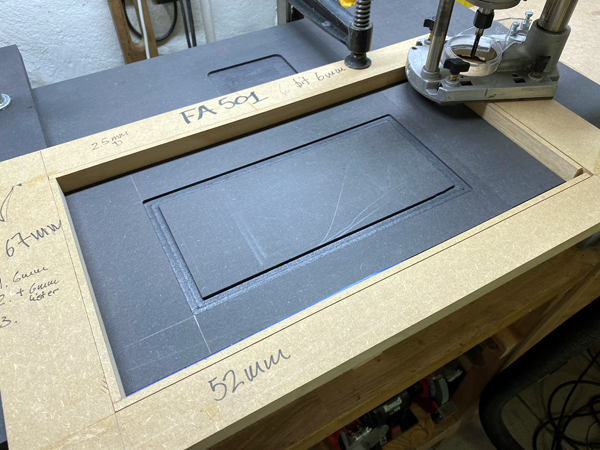
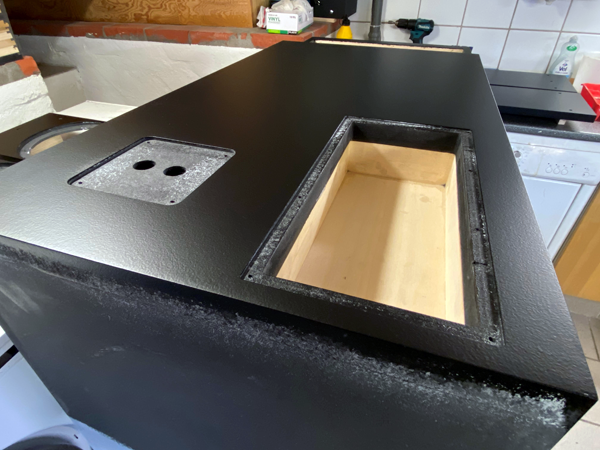
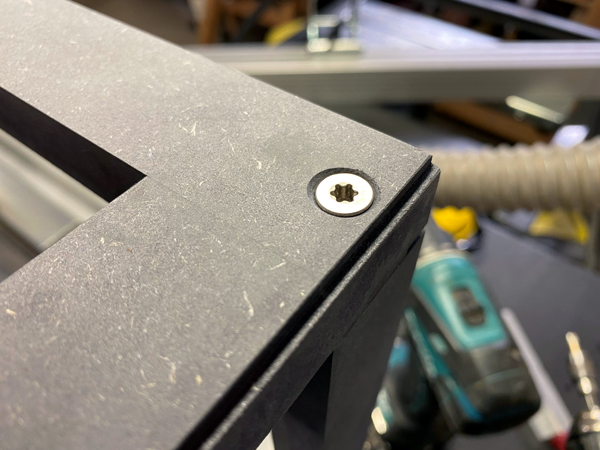
Routing for the binding post plate. Use 16 mm bit to fit corner radius.
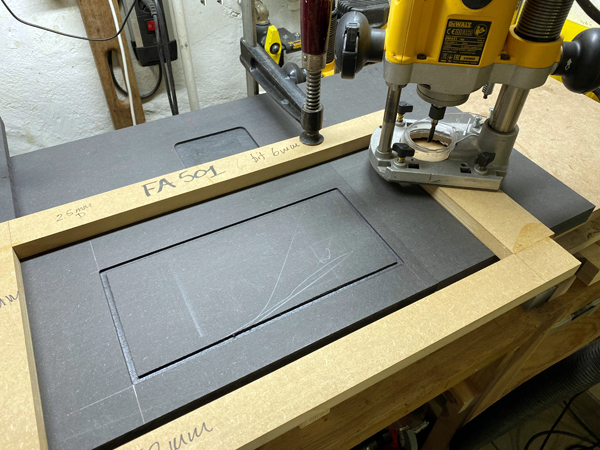
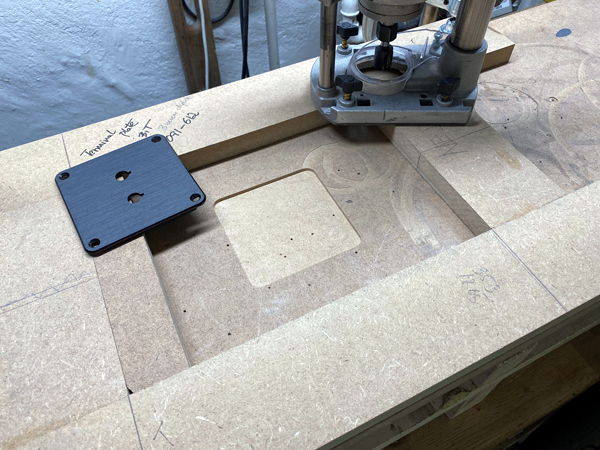
Left: Binding post plate done. Right: Routing for Hypex plate-amp. Use 6
mm bit to fit corner radius.
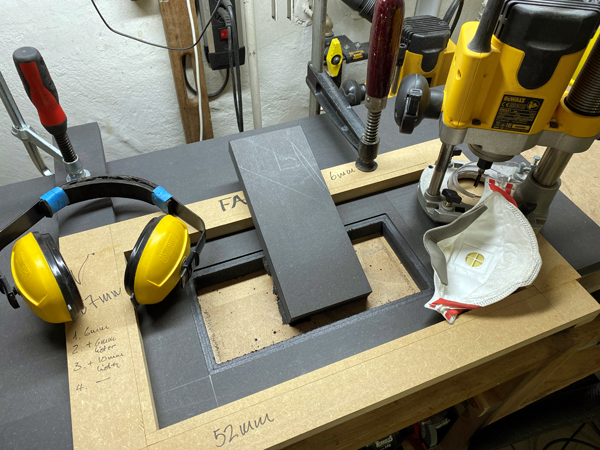
Left: Insert 6 mm fillets and route once more.
Right: Insert 10 mm fillets and do the final routing. Time for a latte.
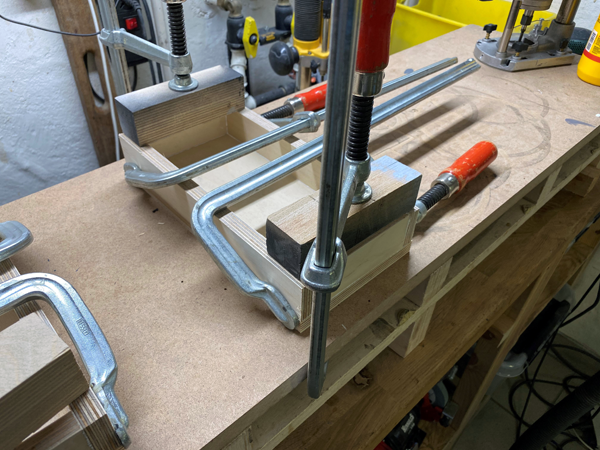
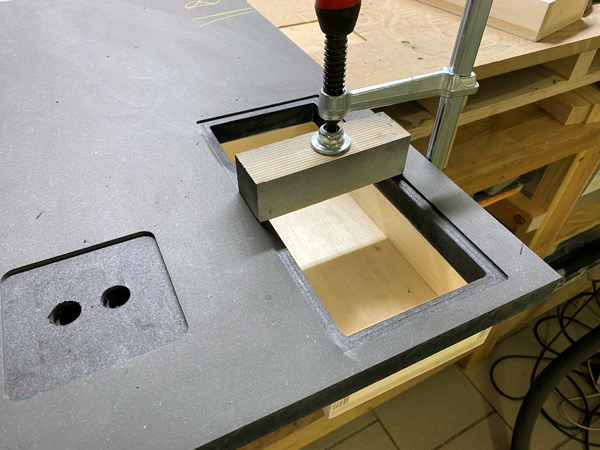
Gluing the Hypex compartment.
Left: Testing rebates for Hypex and binding posts.
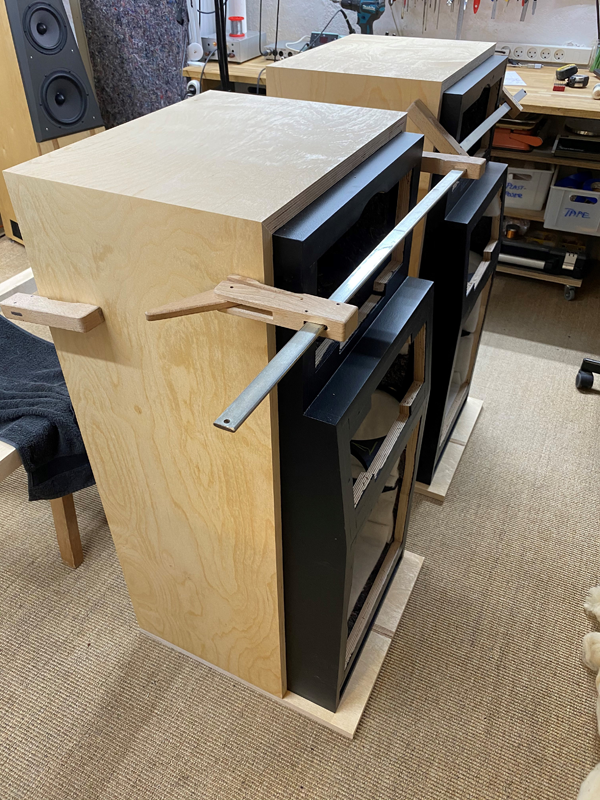
Right:
Fillets glued to front of cabinet. I wanted all front panel to be
detachable. You never know what ideas may come up.
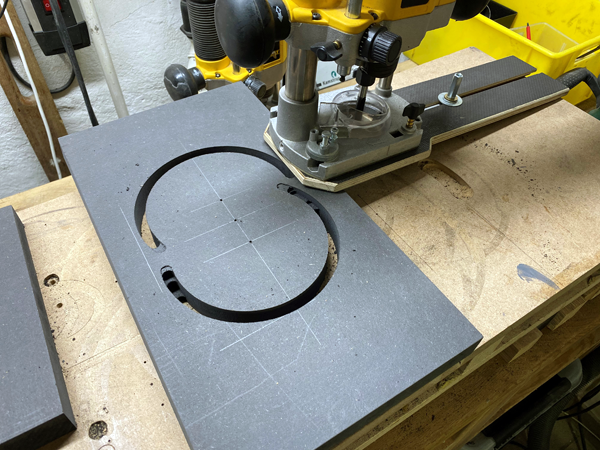
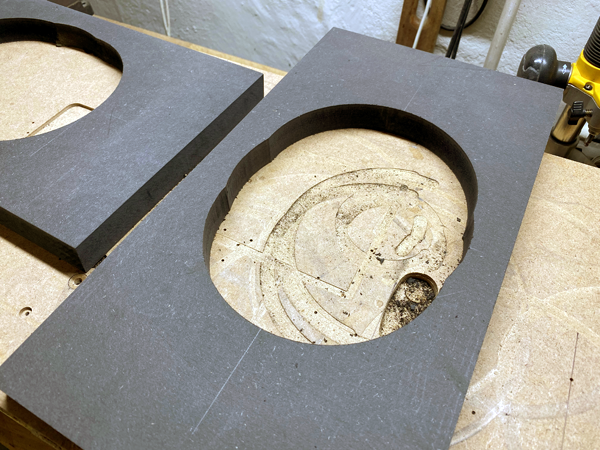
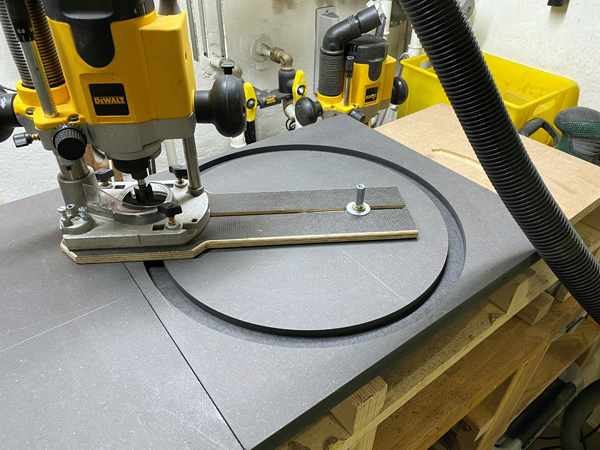
Routing for the horn.
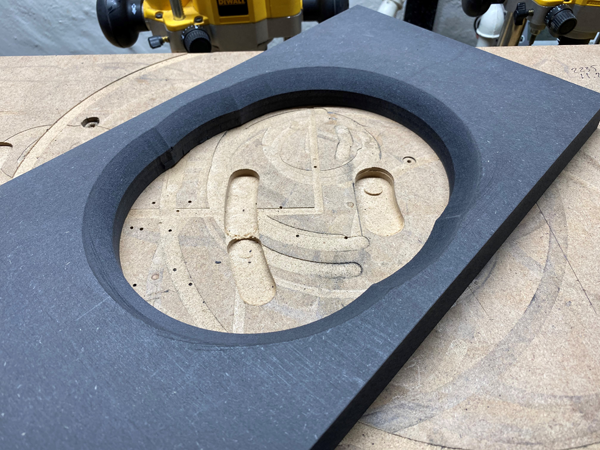
Chamfer 45 deg. to ~14 mm
depth.

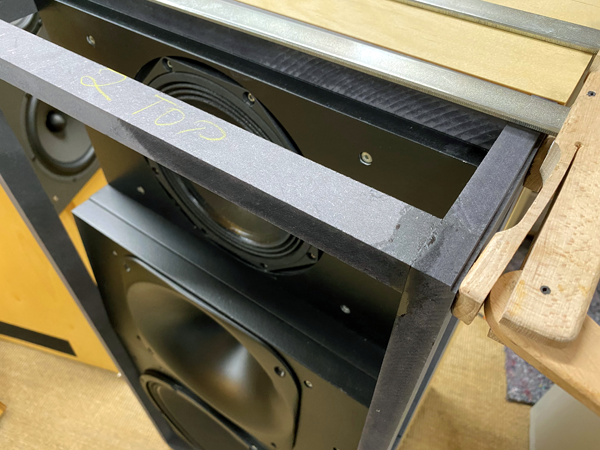
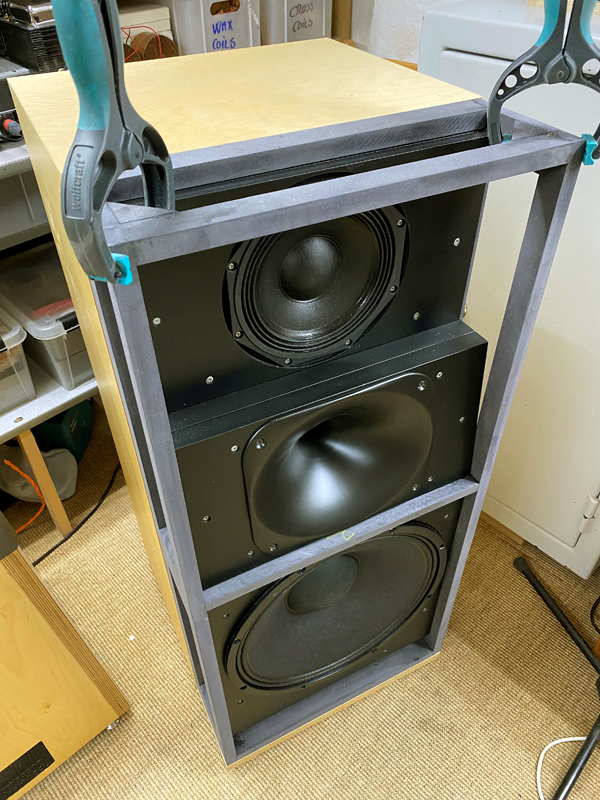
Left: Routing for bass. I recessed the bass 10 mm in order not to hit
the front grill. The 15W700 has a serious rugged basket.
Right: Testing all drivers.
Screws for the heavy bass drivers do not come
with the kit. Search your local DIY home market for e.g. 5x40 mm screws.
Check
tips page.
I made an error cutting the side and top panels for the midrange cabinet and had to use a 16 mm front panel and flush mount the driver to time-align with the horn. Don't do this and just follow the drawing.
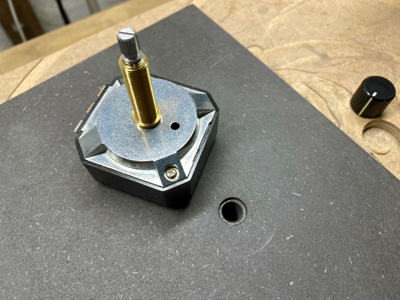
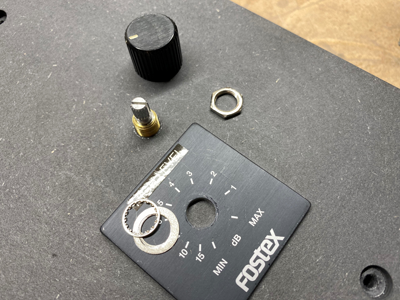
Preparing for the horn attenuator. Drill a 9 mm holes for the shaft.
Rebate some 2 mm from rear side with a router.
Two times primer, three times coat.... Takes time with all the 24-48
hours drying.
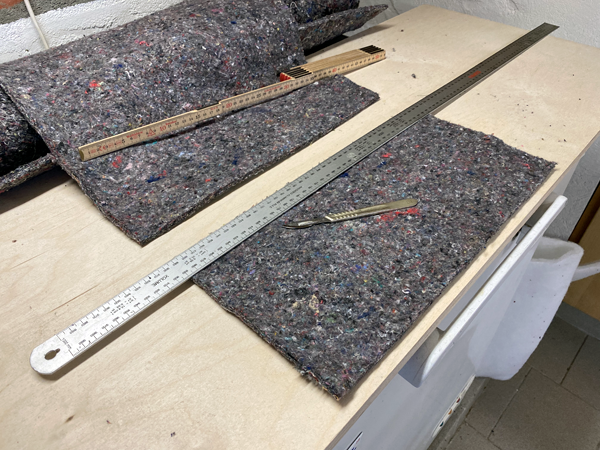
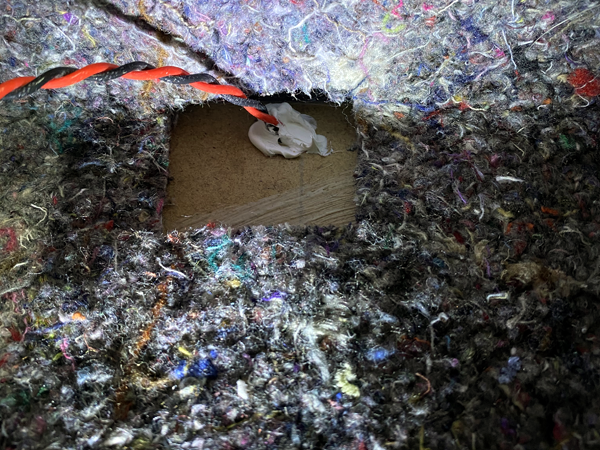
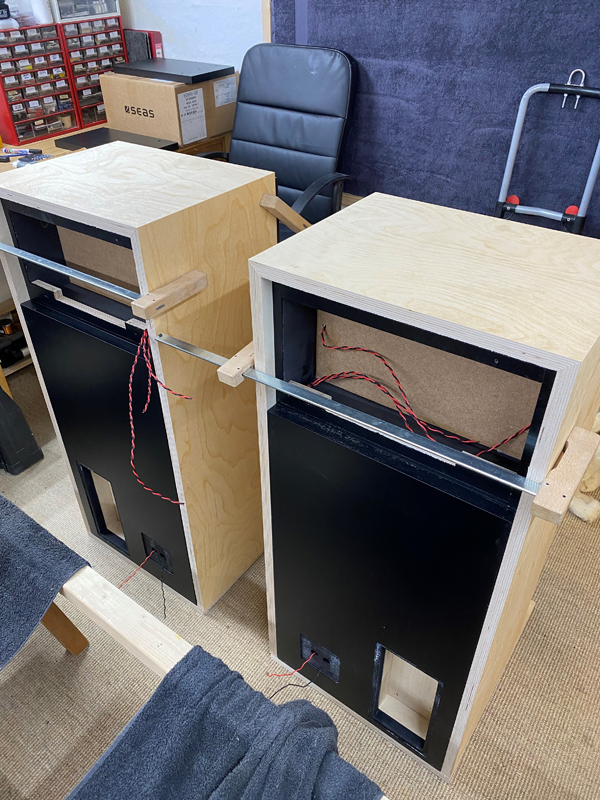
Cutting felt sheets and pulling wires - and
sealing wire holes.
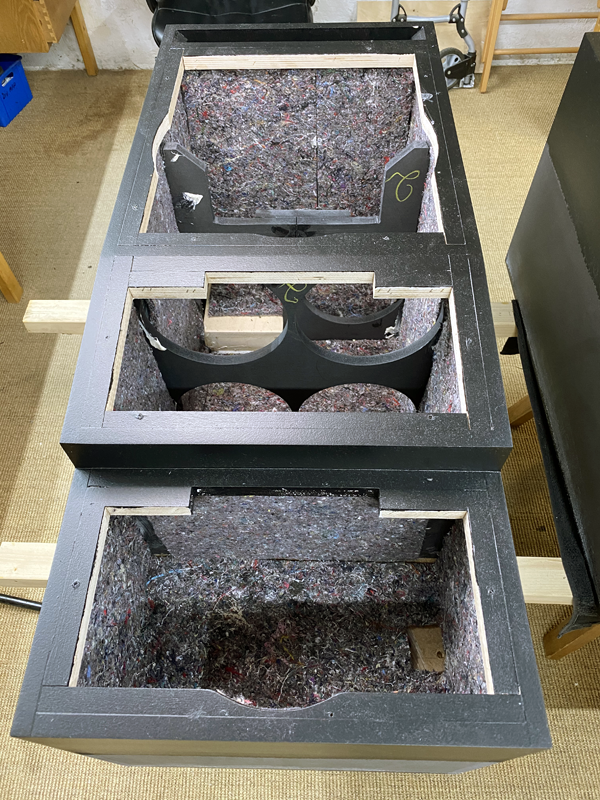
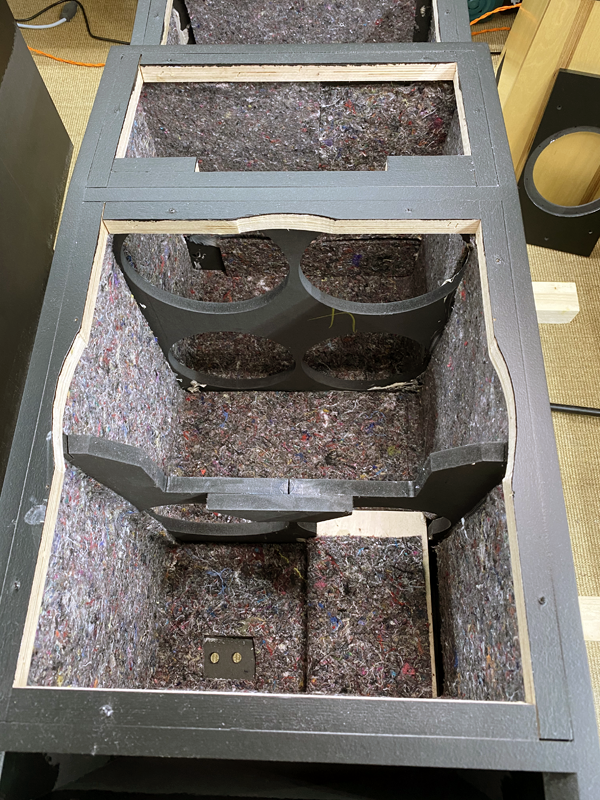
Felt on all internal panels, seen from top
and bottom.
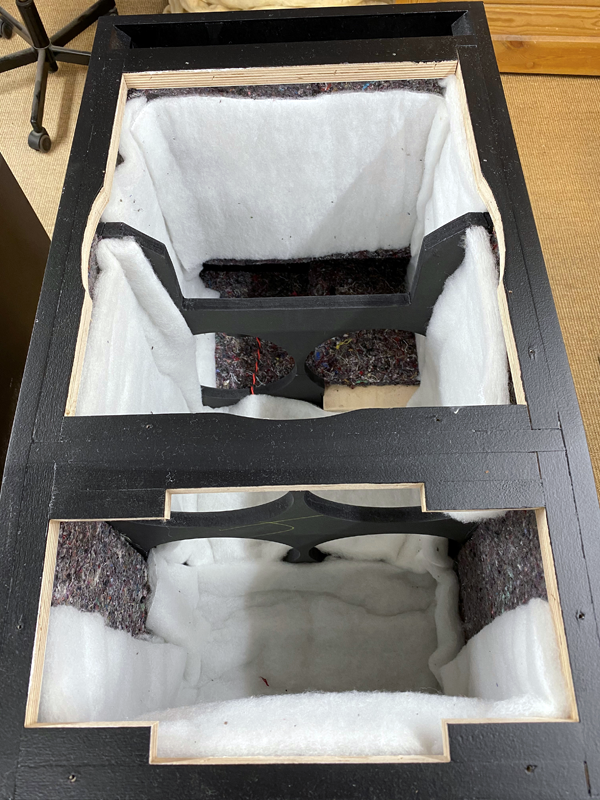
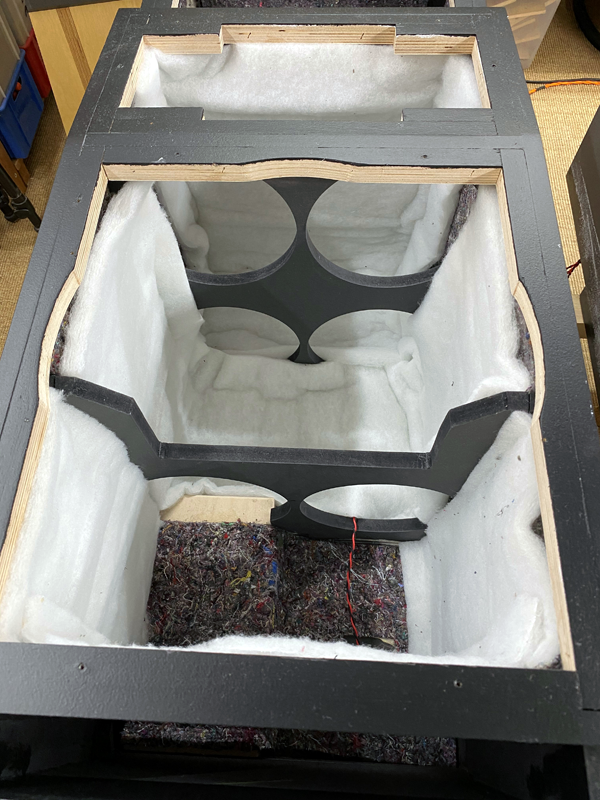
Placement of acoustilux seen from top and bottom. Fasten with a few
staples.
The midrange cabinet is filled with sheeps wool, 300 grams. Forgot to take a picture.
Preparing the Baltic birch cladding and base plate.

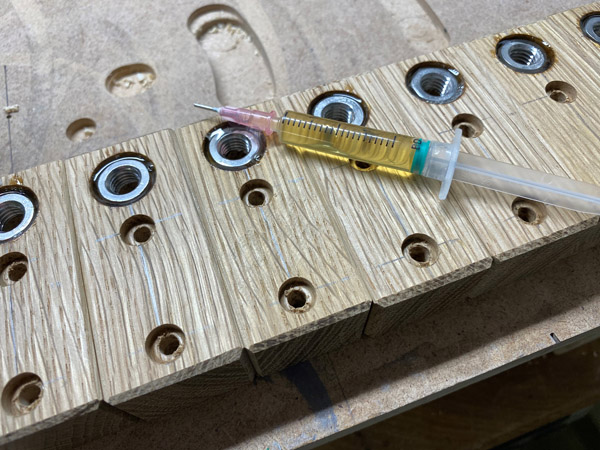
Preparing the feet and
gluing the M10 nuts with epoxy.
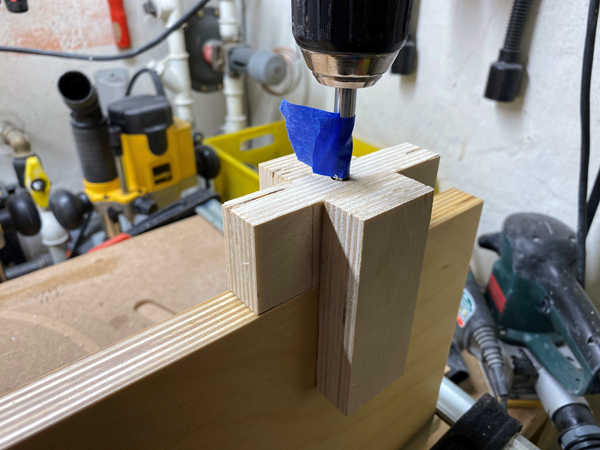
The front grill frame is held in place by strong neo 8 x 8 mm magnets.
Above a guide for making vertical holes.
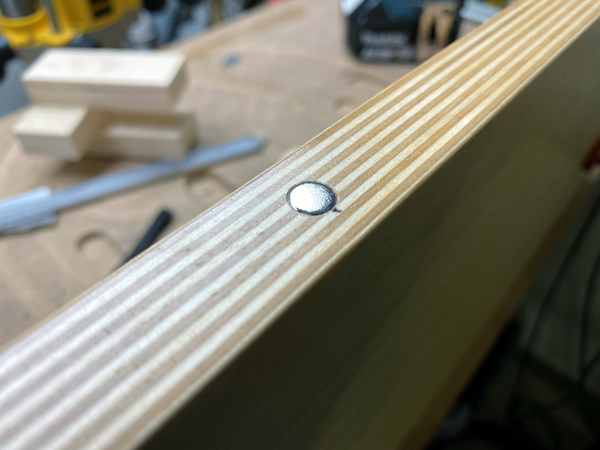
Add a drop of epoxy to the holes and make damned sure the polarity is
the same for all!
And opposite polarity for those going into the grill frame.
Crossover for non-attenuation option.
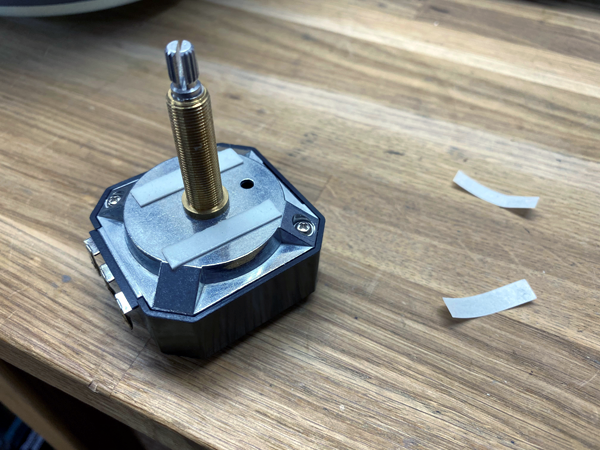
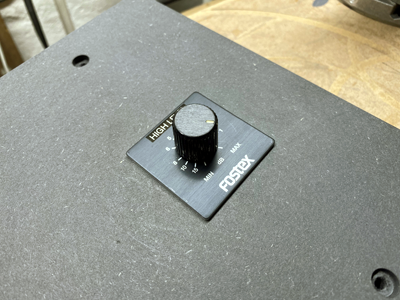
Add two self-adhesive strips to the attenuator to prevent rotation.
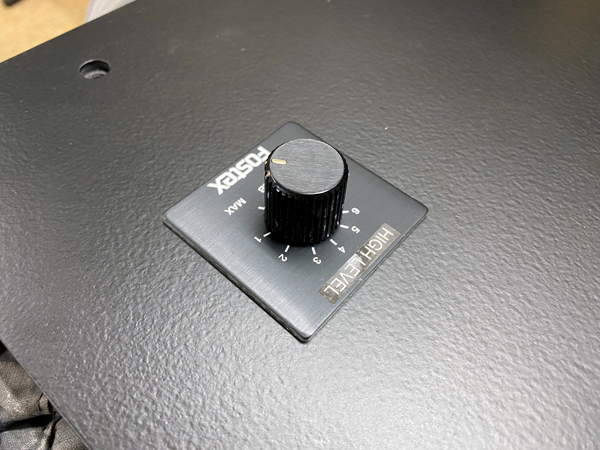
With attenuator. Highly recommended.
Wiring for attenuator option.
Finally 95% though. Now just the front grill.
For protection from kids, you may get a way with simple frames for the
midrange and bass driver - unless they might stuff the horn with a
banana or sausage...You never know what kids may do.
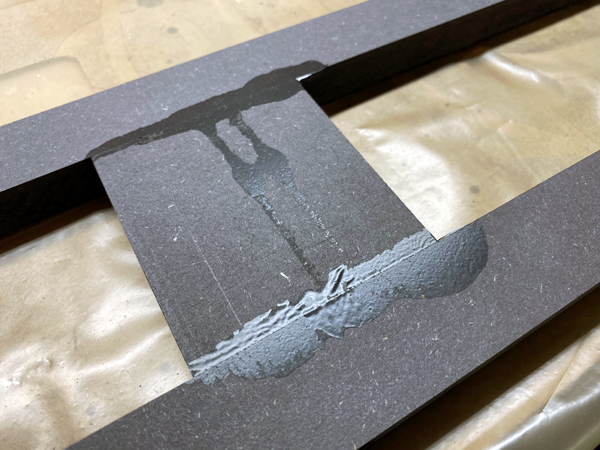
Starting on the grill frames. Made from 19 mm black HDF and glued with
epoxy.
Takes some time because the epoxy has to cure for 24 hours. I use Teflon
sheets for isolation.

Gluing the front upper bars.
There will not be any drawings on how to make the front grill as you
have to adjust to your cabinet dimensions.
The frames are held in place by 6 neodym magnets, 8x8 mm. Three on each
side placed 10-50-90 cm from bottom panel.
Pay notice to the 2x2 mm groove on top for the seam of the fabric.
To further strengthen the frame structure, corner inserts and screws.
Holes were drilled 4.8 mm, filled with ~1 ml epoxy and 5 x 70 mm
stainless steel screws inserted.
This should make the frame really strong.
Frames ready for some fabric.
Make small groove in upper back corner for the seam when stretching the
fabric round the frame.
Left: Securing upper corners with a bit of glue (PTFE insulation).
Right: Add strip of glue round the staples. Image from a another grill.
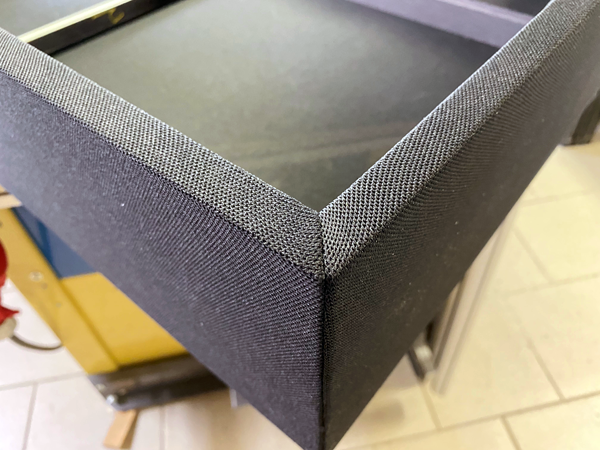
Fabric
The fabric is not included in the kit as I guess most will not make the
front grill - and it's not that easy I can tell, although worth while.
Fabrics are available in four colours, white, black, brown and grey.
Link to Jantzen pdf:
http://www.jantzen-audio.com/wp-content/uploads/2020/08/Speaker-Front-Cloth-Catalogue.pdf
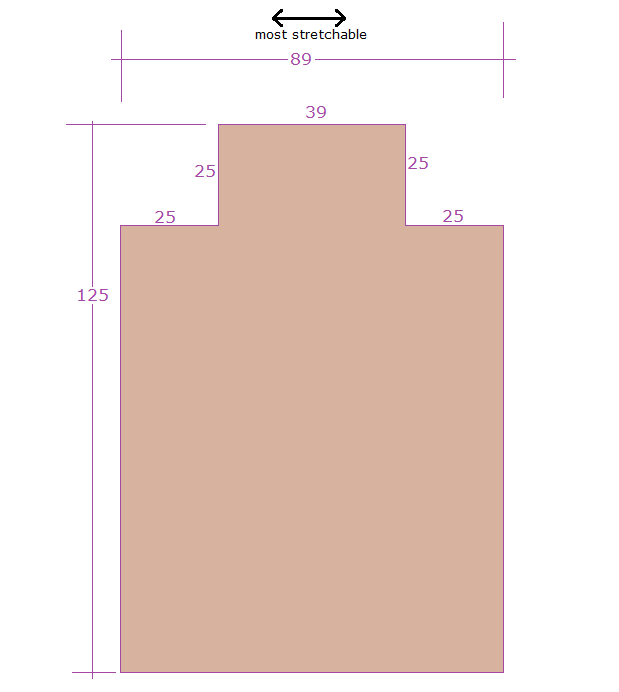
Order 1.5 meters to have enough. The fabric is 185 cm wide and most
stretchable on width and not so much on length. Cut in half on length to
have two pieces ~92 x 150 cm. A bit overkill but better more than less.
Below you find my cut-out plan. The frame width is 45 cm and the fabric
can be stretched some 10% without trouble, so make cut-outs to some 39
cm width and sew the corners. After sewing trim off surplus carefully.
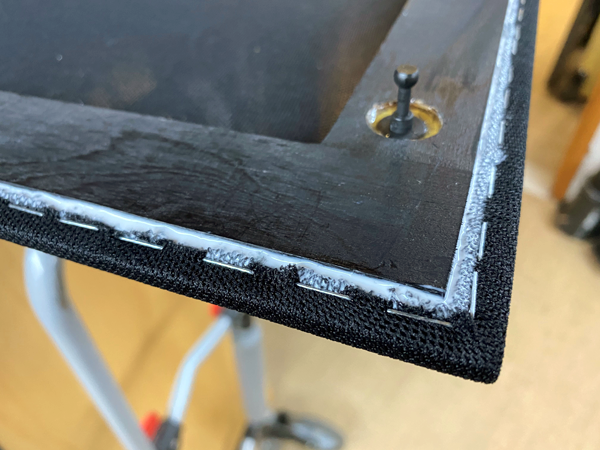
Follow images above and you should have an idea of how I made it. The
fabric is attached with staples and secures with ordinary PVA glue.
I don't like grill pegs for this frame, rather 8 x 8 mm neodym magnets.
Bought on eBay/Germany from
here. And again: Make sure you insert magnets into
the cabinet and frame with the correct polarity - and all the same.
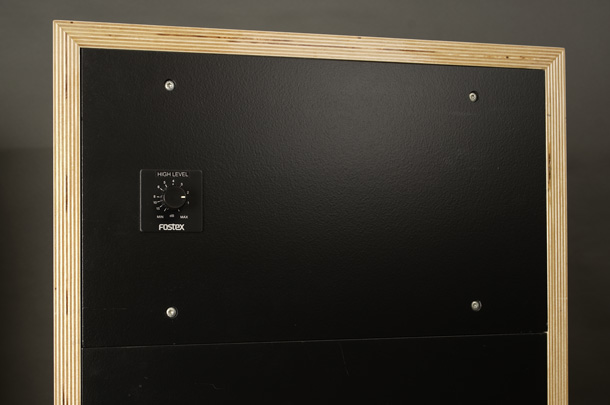
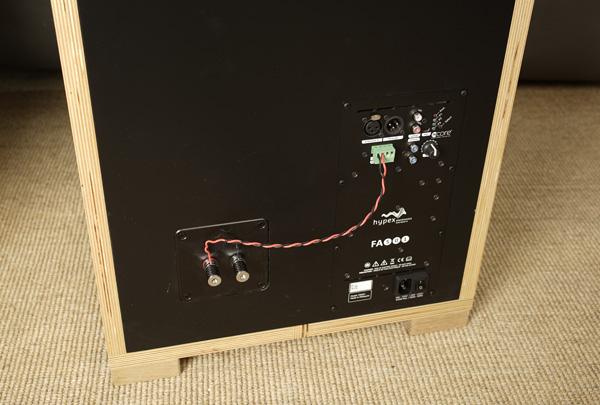
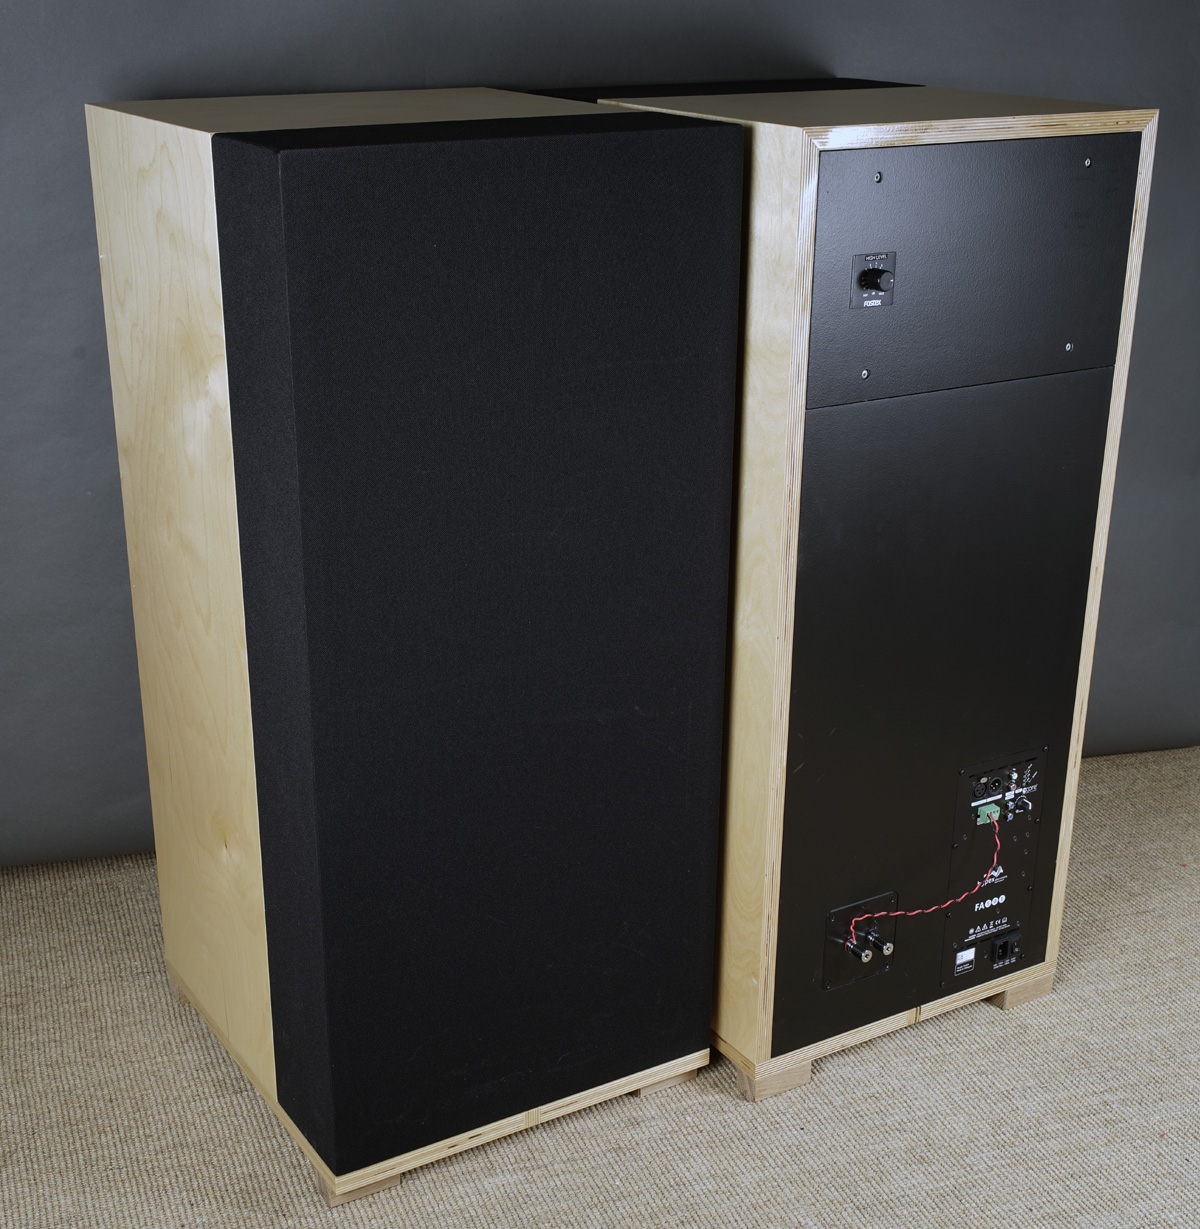
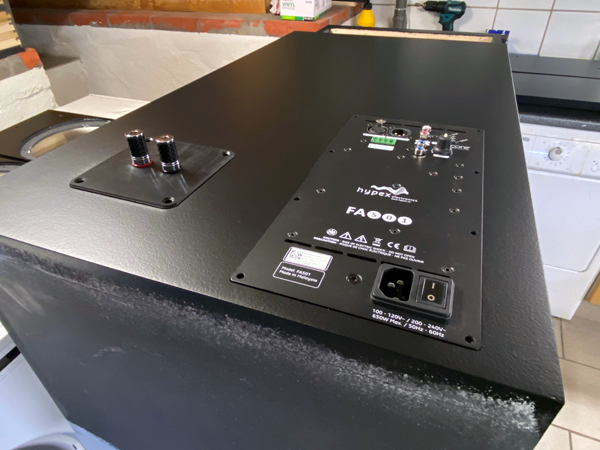
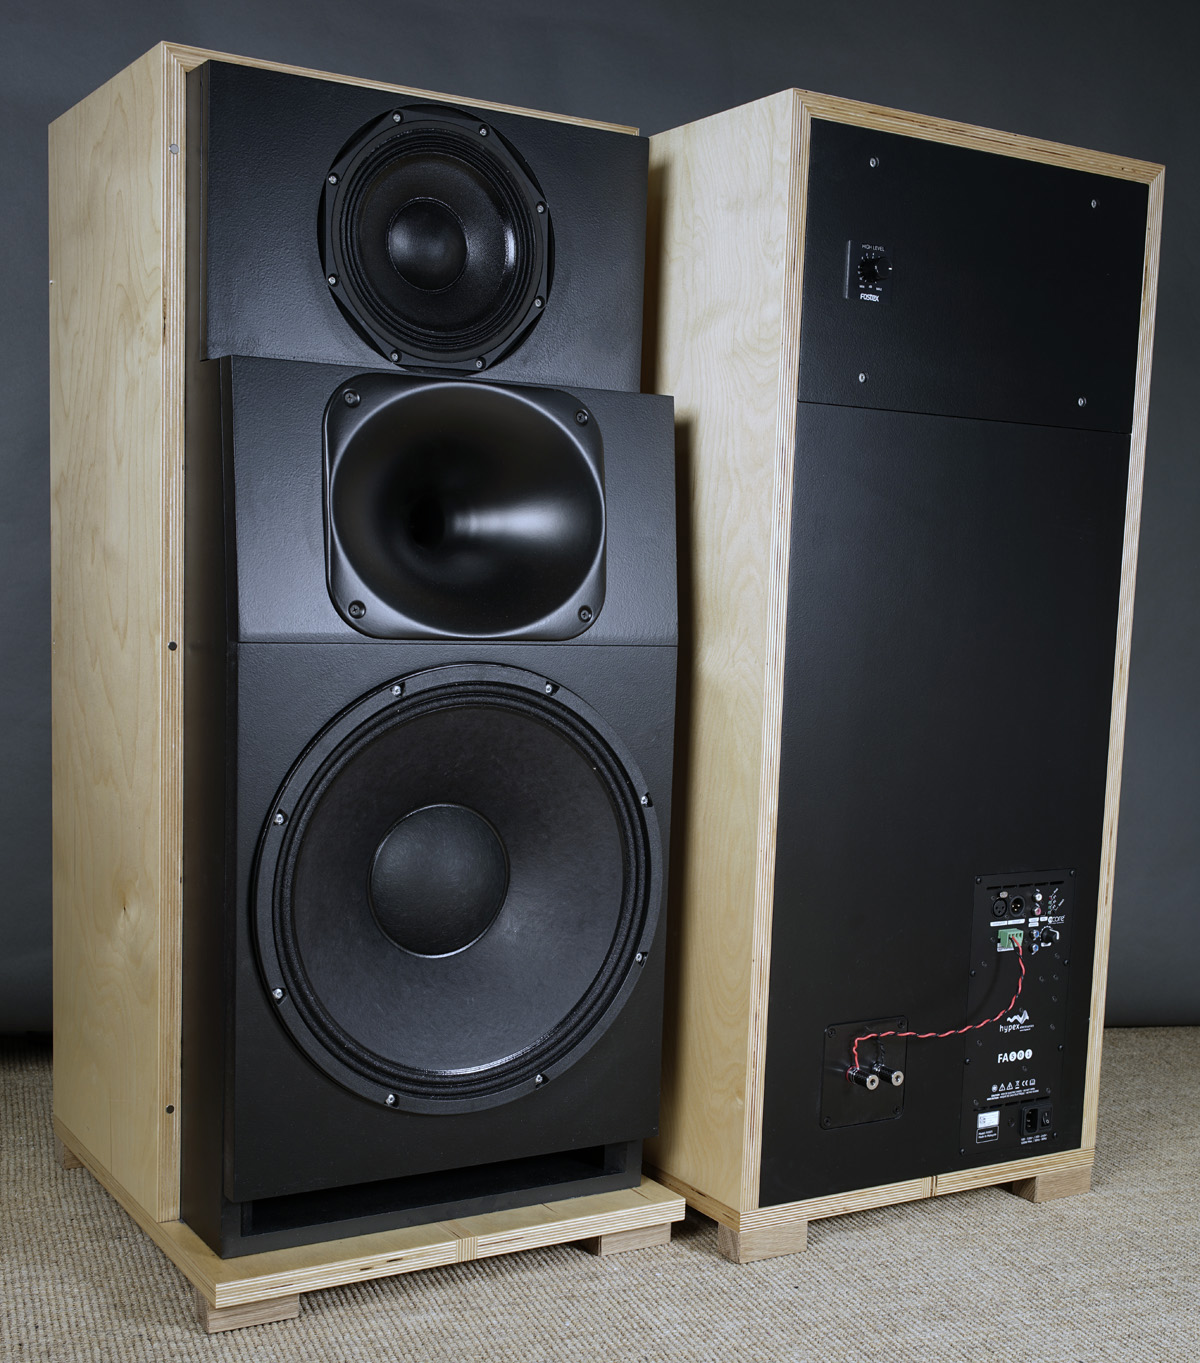
The finished rear panel.
A few comments on
MEASUREMENTS before you start interpreting the readings below.
First of all, if we think measurements will
tell us how a speaker sounds, we're wrong. The perception of sound is
way too subjective to be reflected in any measurements we can perform. A
loudspeaker system is meant to give us a satisfying idea of an acoustic
event and for some people a pair of 5 USD ear-plugs are enough, others
spend 200 kUSD on a truly full-range pair of speakers - and the latter
may not be happier than the former.
Measurements may give us an idea of tonal balance of a system, i.e. too
much or too little energy in certain areas, although dispersion
characteristics play a vital role here. A two-way 7+1 and a three-way
7+4+1 may display similar horizontal dispersion, yet sound very
different. Measurements may tell us about bass extension if far-field
measurements are merged with near-field measurements. In addition to
this, ports may contribute to bass extension. Most of we diy'ers do not
have access to an anechoic room for full-range measurements from
20-20000 Hz.
What cannot be seen is what kind of bass performance we get in a given
room. Bass performance is highly dependent on in-room placement of your
speaker and the same speaker can be boomy in one place and lean in
another. Actual SPL level at 1 meter distance and 2.8V input is useful
for en estimate of system sensitivity and combined with the impedance
profile may give an idea of how powerful an amplifier is needed to drive
the speaker to adequate levels.
What measurements do not tell is the very sound of the speaker unless
displaying serious linear distortion. The level of transparency, the
ability to resolve micro-details, the "speed" of the bass, etc., cannot
be derived from these data. Distortion measurements rarely tell much
unless seriously bad, and most modern drivers display low distortion
within their specified operating range.
Many people put way too much into these graphs and my comments here are
only meant as warning against over-interpretation. There are more to
good sound than what can be extracted from a few graphs. Every graph
needs interpretation in terms of what it means sonically and how it
impacts our choice of mating drivers, cabinet and crossover design.
What measurements certainly do not tell is the sonic signature of the
speaker, because speaker cones made from polypropylene, aluminum,
Kevlar, paper, glass fiber, carbon fiber, magnesium, ceramics or even
diamonds all have their way of adding spices to the stew. Nor do
measurements tell what impact the quality of the crossover components
add to the sound, from state of the art components to the cheapest of
coils and caps, they all measure the same if values are correct, yet
sound very different.
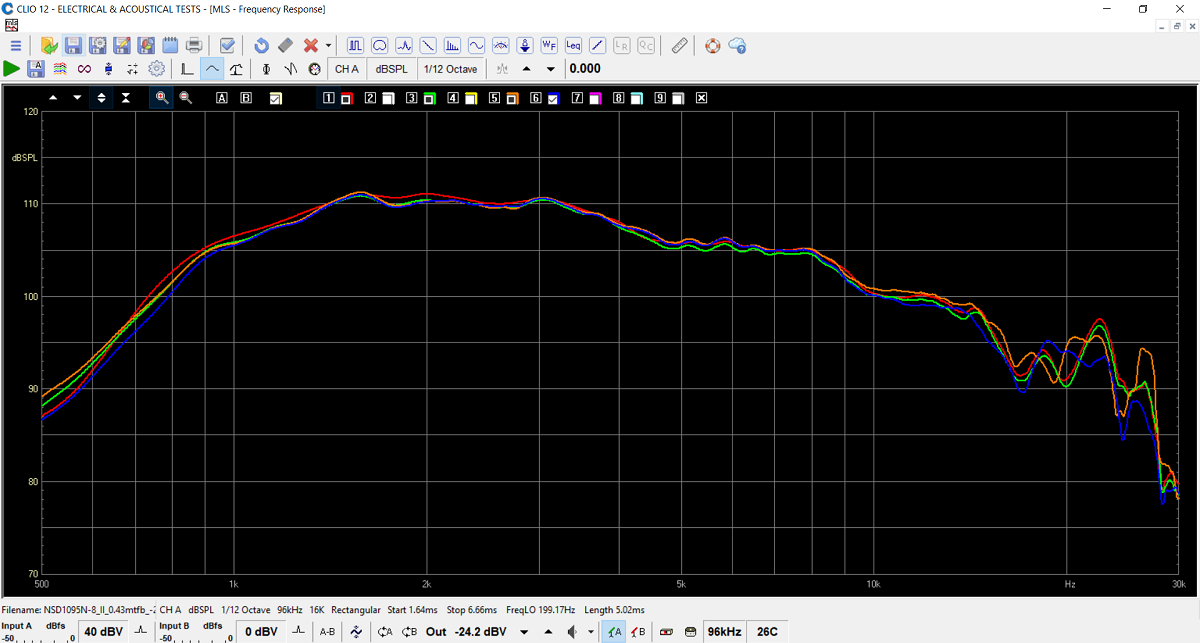
Above the response of four of my six NSD1095N-8 compression drivers with
XT1086 horns.
Just to show the consistency of this arrangement. As tuning of the horn
is critical, nice to know this is just working perfect.
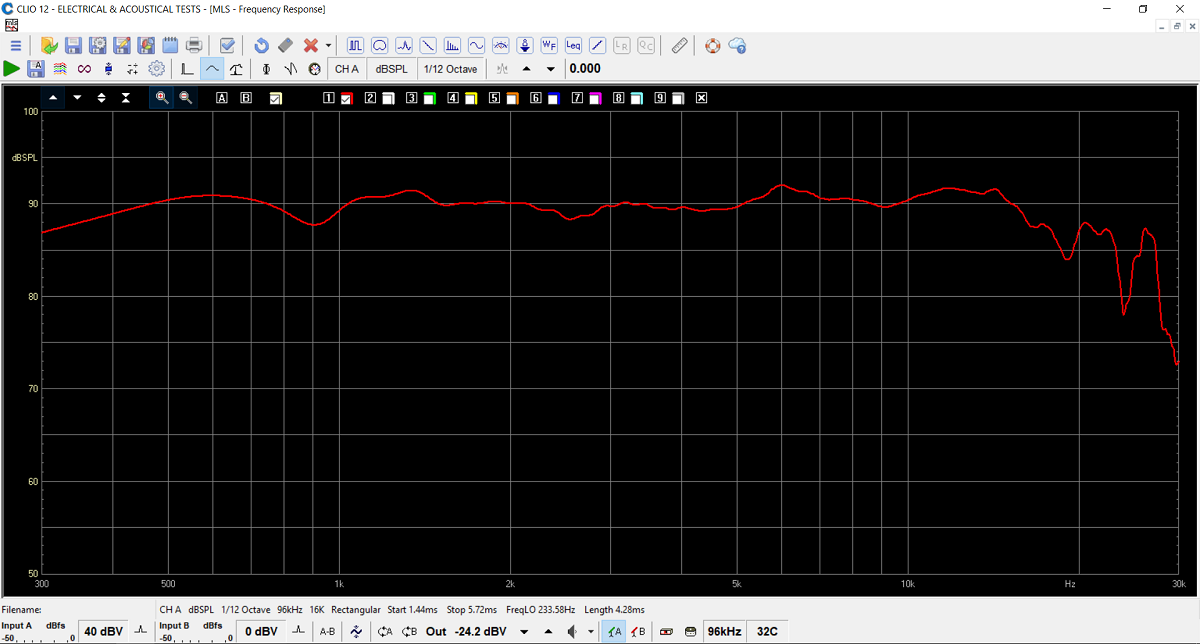
Response of midrange and horn.

Impedance of midrange and horn. Basically an 8 Ohm speaker.

BTW: This 15W700 has a very good frequency response - and really high
sensitivity. You may ask why the system is tuned at 92 dB with a bass
driver capable of 97 dB. If we did, it wouldn't say much below 80 Hz,
thus via the Hypex extended bass and an overall balanced voicing. Also
the NSD1095N-8/XT1086 is not capable of doing 97 dB all the way to 20
kHz.
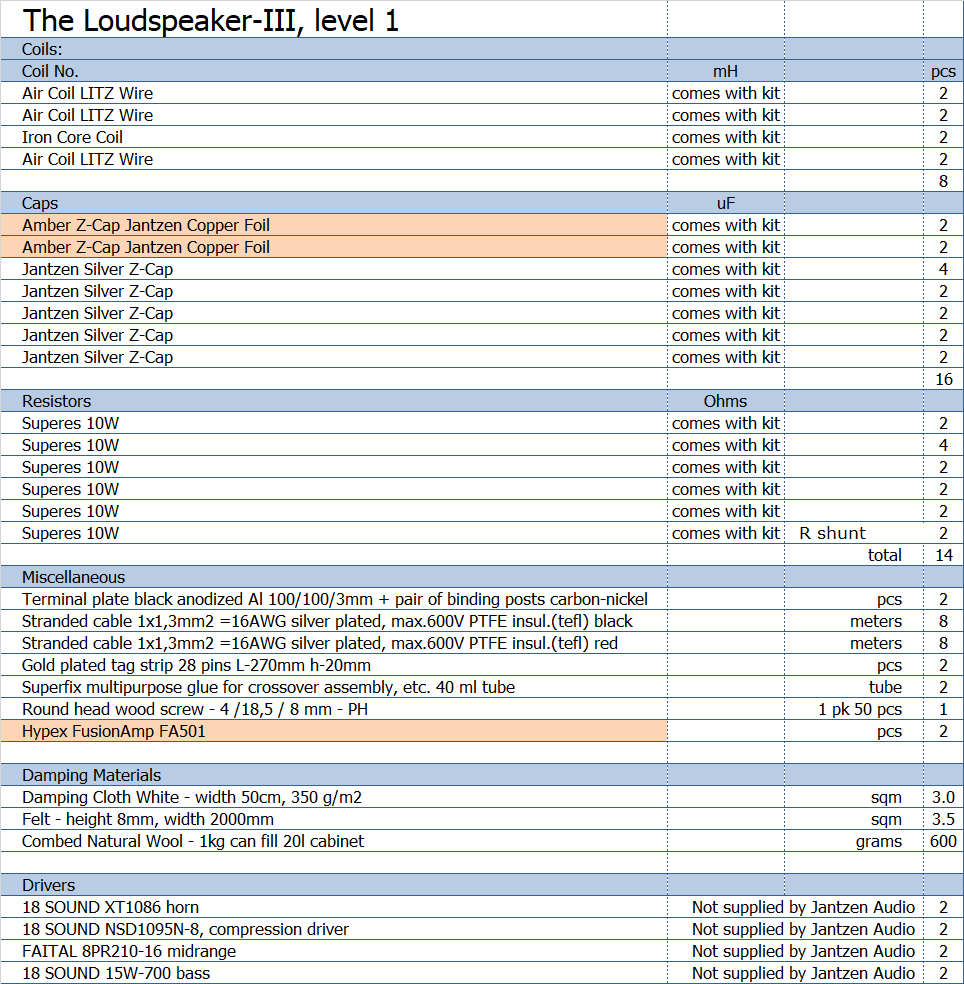
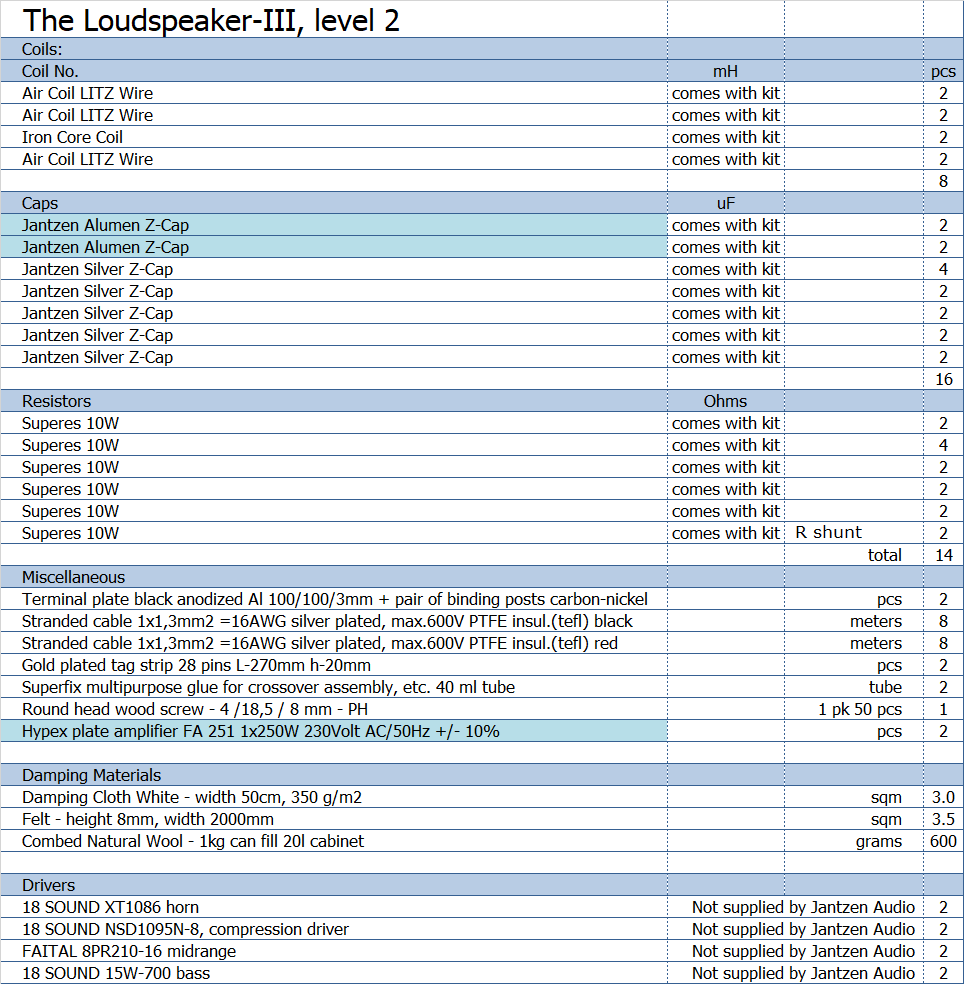
The two kits are identical except for this:
Level 1 has Amber-Z capacitors for the horn and Hypex FA501 for bass.
Level 2 has Alumen-Z for horn and Hypex FA251 for bass.
For the time being the used litze wire coils are out of stock and replaced by WAX foil coils. They do the same thing.
Drivers
available from
LEAN, UK
All kit and component prices may be subject to
change and are always to be confirmed by Jantzen Audio Denmark.
Download Kit Sale Presentations:
![]()
All technical questions to troels.gravesen@hotmail.com
All questions regarding purchase of kits, please mail Jantzen Audio at contact@jantzen-audio.com
CROSSOVER-LAYOUT
BACK TO INDEX
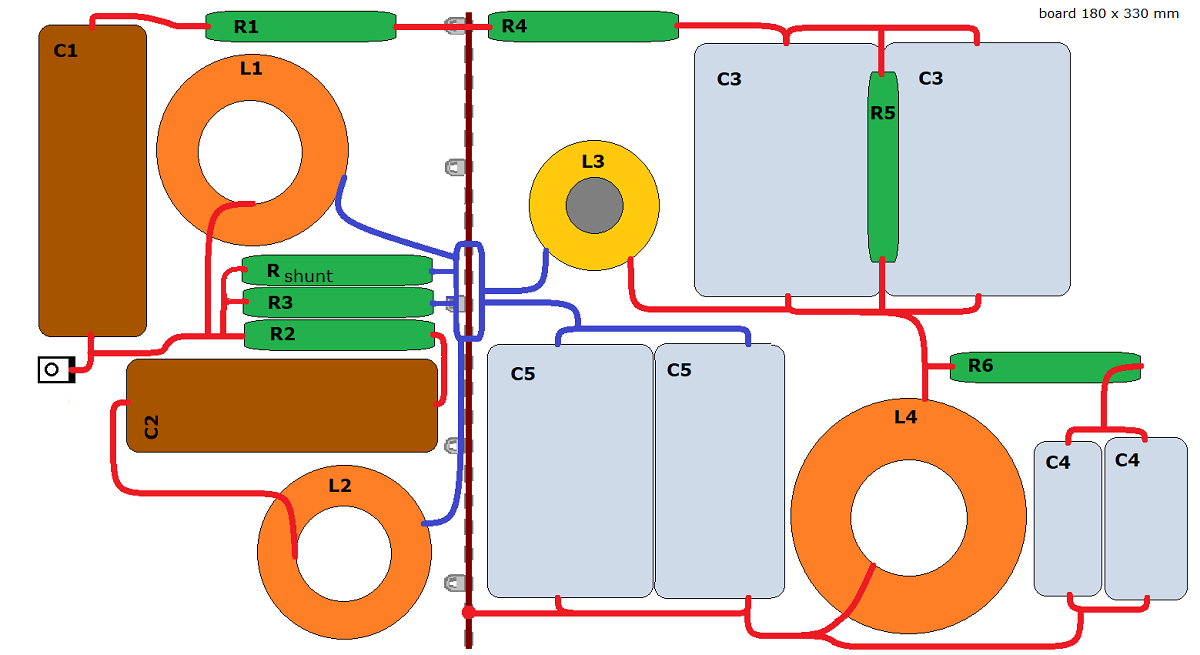
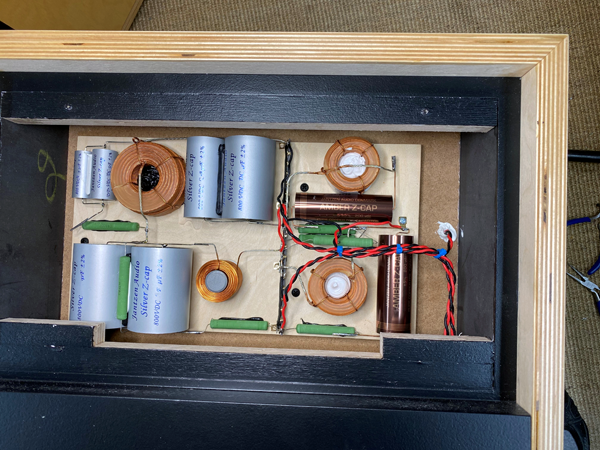
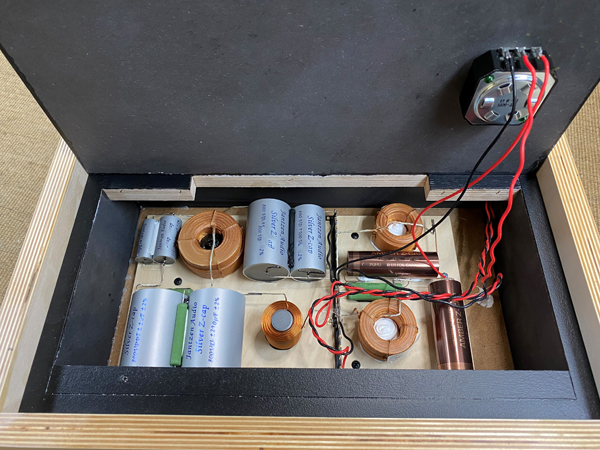
Crossover layout for midrange and horn.

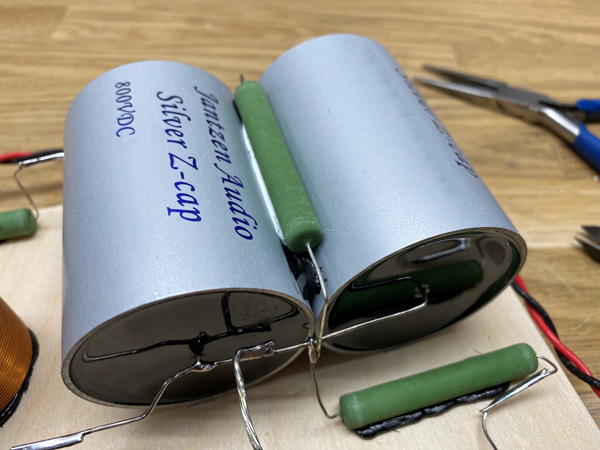
The finished crossover. Click images to view large.
Gluing on wax is not ideal, thus fill the coil centers half up with
Superfix - and they stay in place.
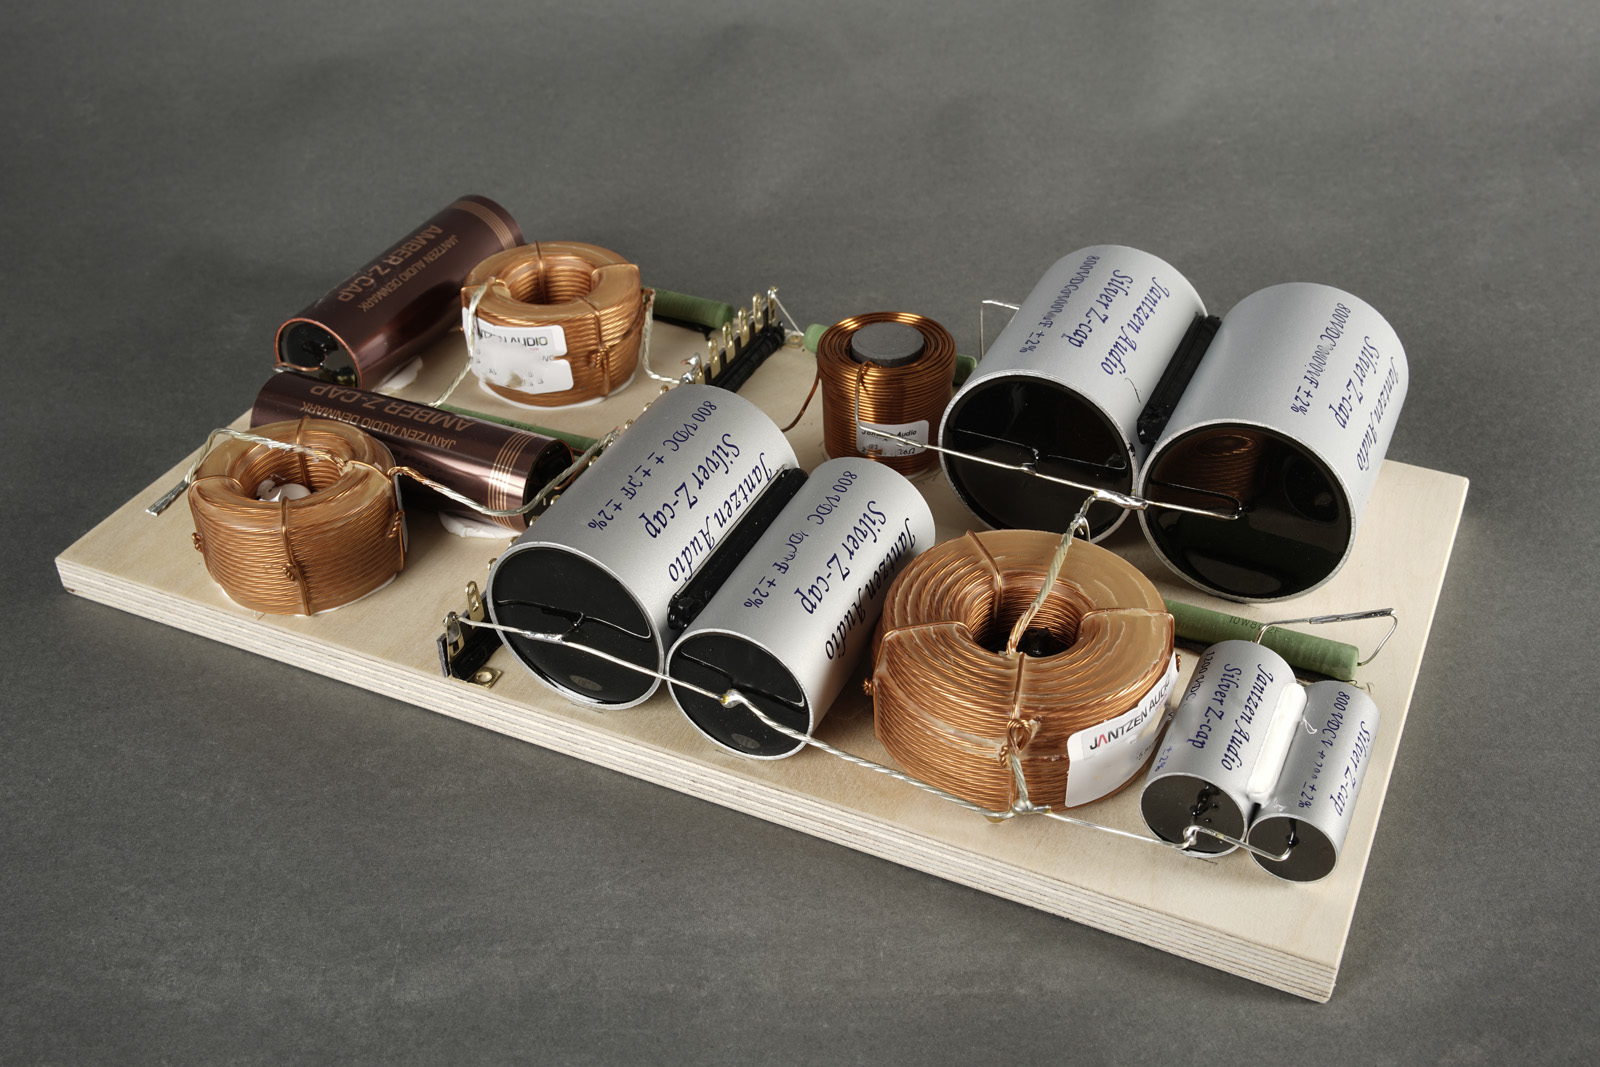
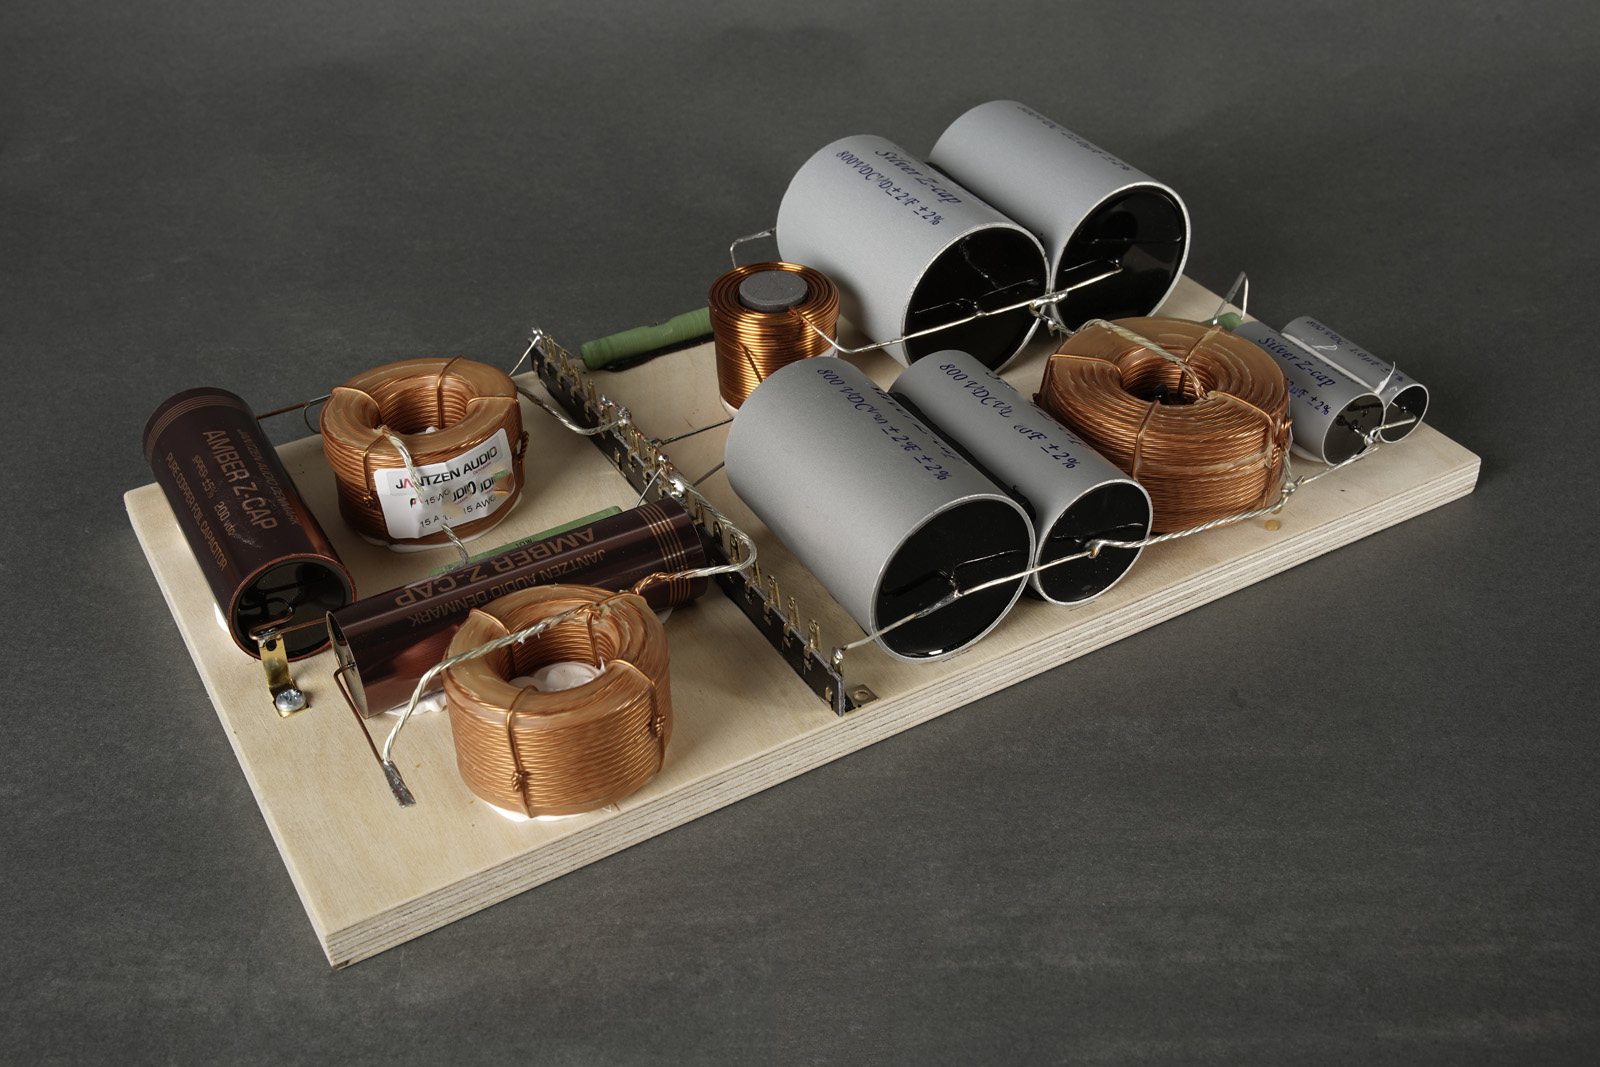
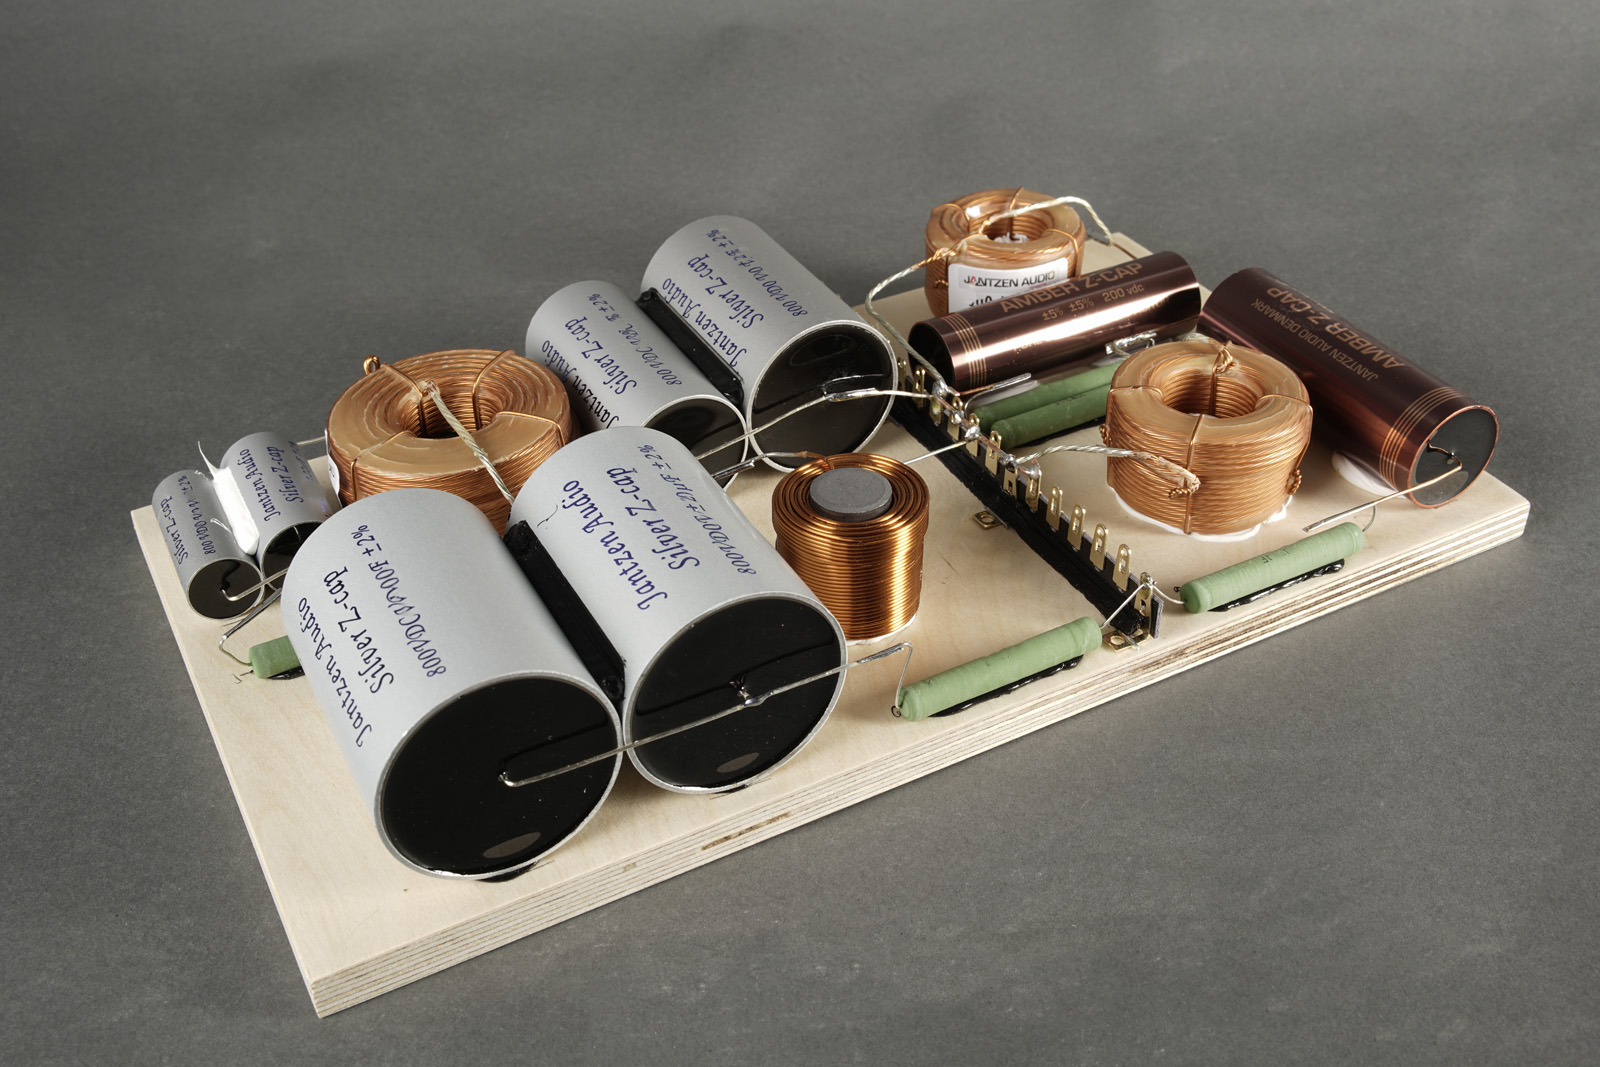
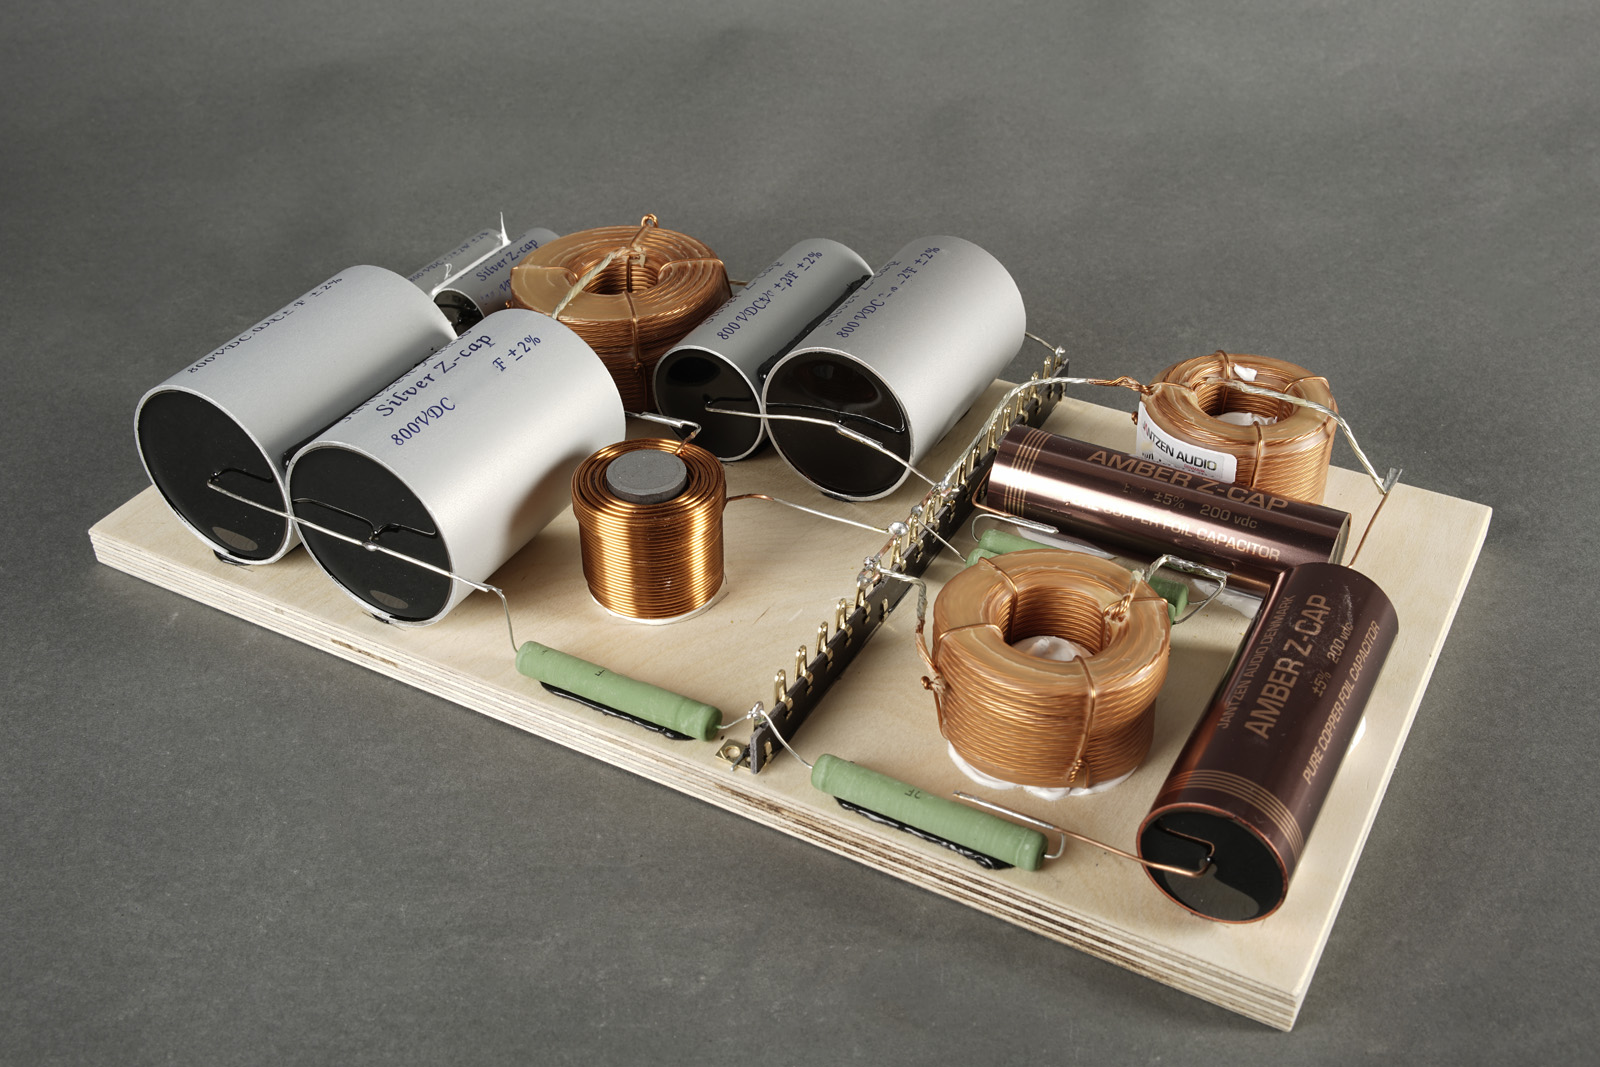
Sorry, forgot R5 before the photo shoot. Here it is. Make sure it
doesn't touch the aluminum tubes of the Silver-Z caps.
SPEAKER WIRING
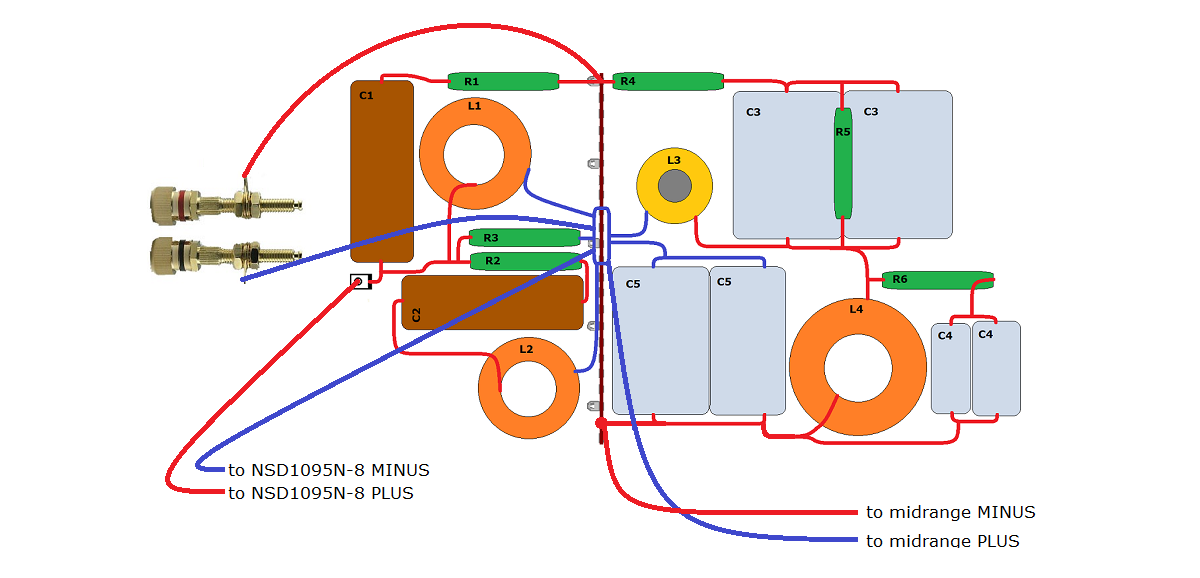
Be aware of midrange connected with inverted polarity, PLUS from crossover goes to driver MINUS.
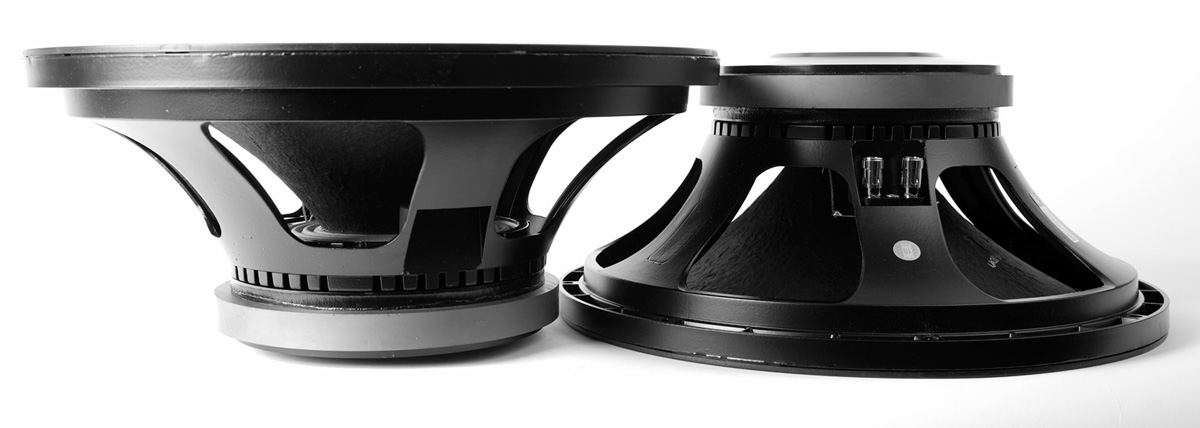
Every speaker construction should start with a 15" bass driver!
JBL knew this already in the mid Nineteen-forties.

After many months in service I finally made a base from solid oak to support the speaker.
Looks nicer than previous small blocks of oak.