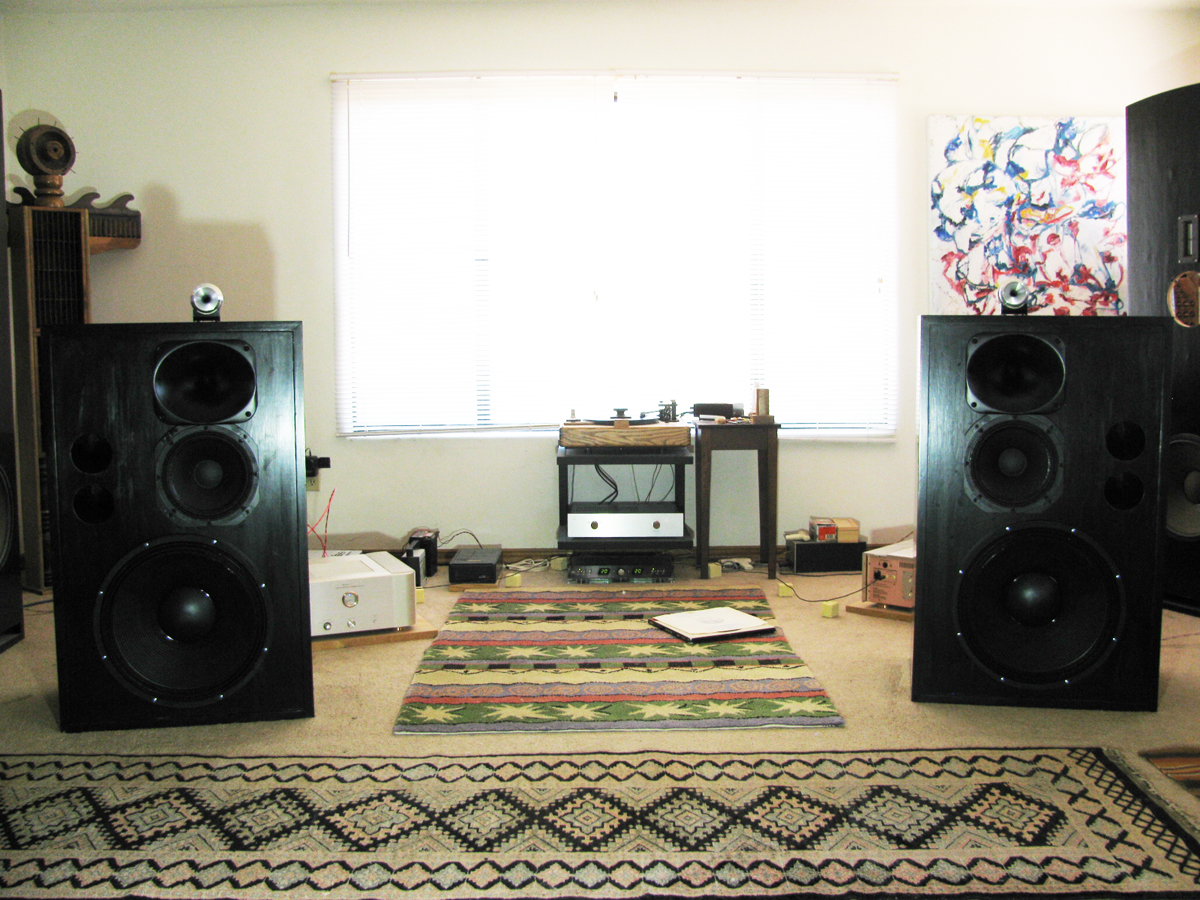
The Loudspeaker-1, built by Paul, US
Copyright 2023 © Troels Gravesen
Hi, Troels
It’s been a long haul for me, with health issues interfering, but I’ve
finally completed and listened to The Loudspeakers (TL1). First LP was
“Kind of Blue”; second was “Sketches of Spain”; third was Solti/Chicago
Symphony Orchestra, Bruckner 7th Symphony. I am so happy, and so
relieved, that the voicing is neutral, and these are NOT the usual
“high-end hi-fi” speakers, designed to render audiophile sound effects.
They do, however, play complex, full-range acoustic Music naturally,
without strain. I will shake them out as soon as I have the house to
myself. Meanwhile, my wife commented that the drum roll at the end of
the first movement of Bruckner 7 “shook the house” (it’s a big house,
and she was at the other end of it, watching TV). I guess it did, but I
did not mention to her that I wasn’t playing it all that loud!
I will try for photos and say more soon, including construction details
and more on the sound in my system, in my room.
Best regards,
Paul
28-06-2023:
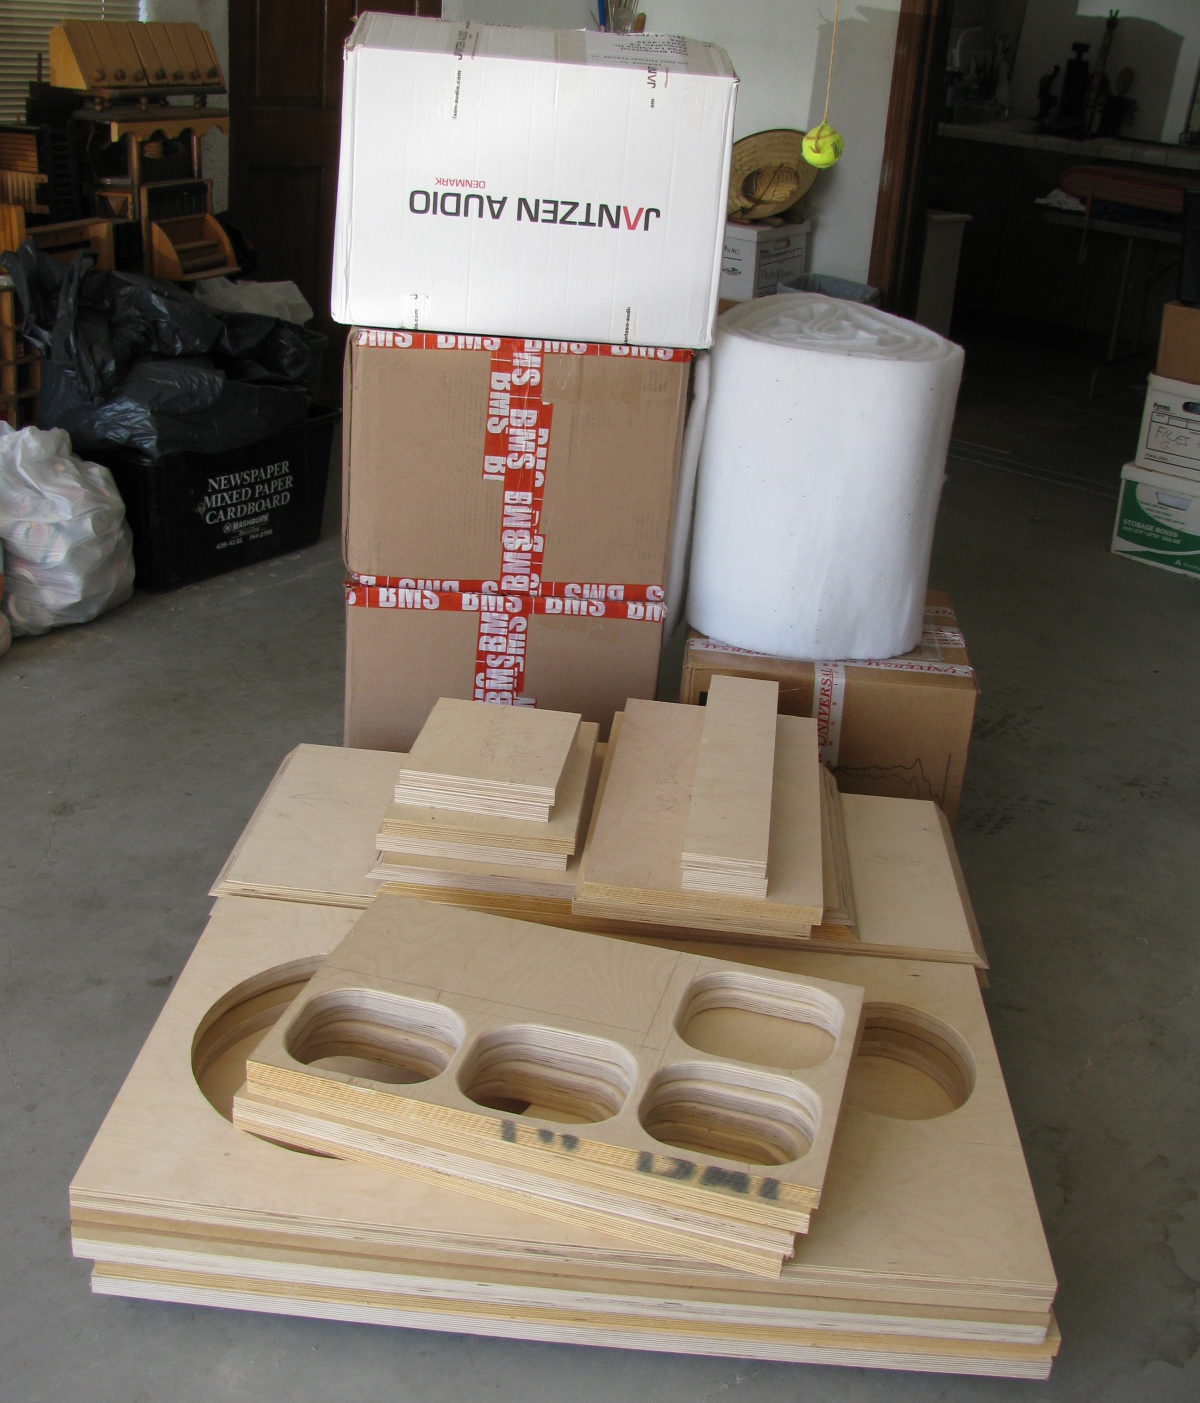
I already mentioned that I hit snags along the
way that dragged out my project. I also did everything myself, in my
garage, which I do not recommend. Get Help! What I have going for me is
60+ years of Audio, including DIY, and 50+ years as a Master Carpenter
and Builder. “Circumventing” giant panel saws, I put a nice 60 tooth
Diablo blade on my Skilsaw, and I used straight edges clamped to the
panels to cut all parts from 5’ X 5’ X 1” Baltic birch plywood, with
additional 15mm MDF laminated (total 40+mm) for the front baffles. I
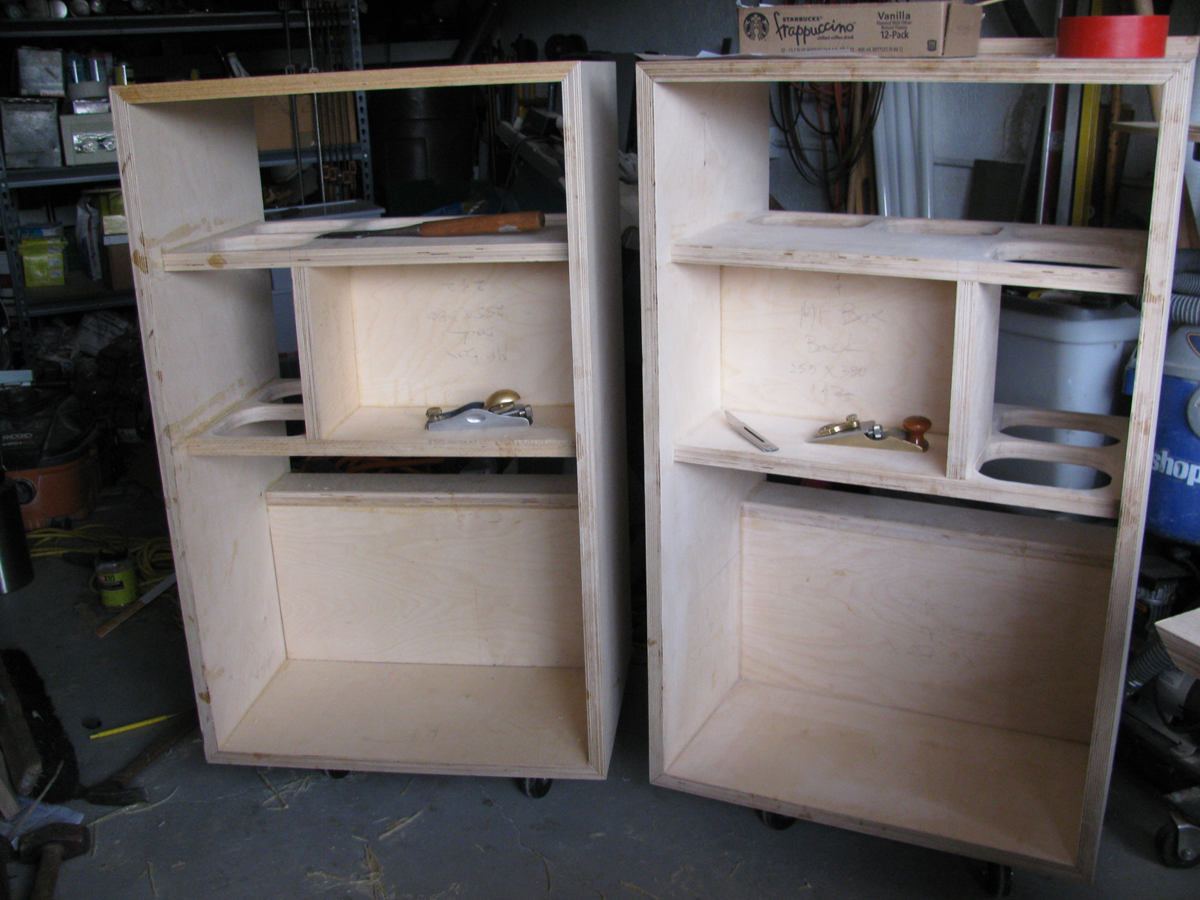
made sub-assemblies for the braces/midrange boxes and the X/O boxes. I
used large biscuits on the mitered corners and small biscuits to keep
all other mating parts aligned during assembly, glue-up and clamping. I
dry assembled and clamped all parts and assemblies repeatedly, making
necessary adjustments until everything fit together perfectly before
committing to glue, at each stage along the way. I tested several glues
before settling on Titebond polyurethane multi-surface adhesive for the
casework, and Henry 1171N “Surelock” adhesive for the laminations and
for gluing (as opposed to stapling) cabinet dampening materials. I could
not have done the project without the 25 minute working time the
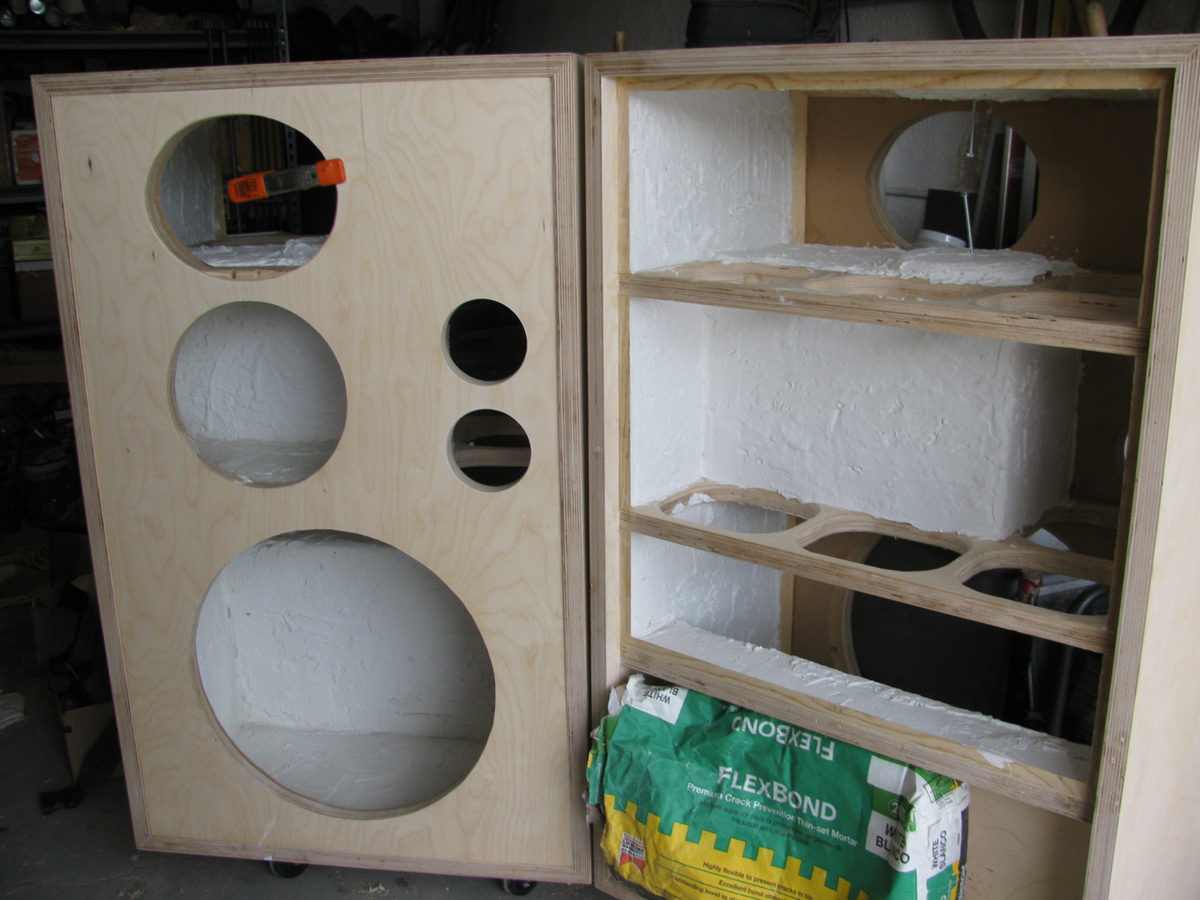
Titebond polyurethane affords! After testing, I decided not to include
the extra bracing or horn box Troels used for his TL2s. I did glue in
“critically sized and located” pieces of 15mm MDF above and below, in
the horn alcove. As I have done for years, based on tests, I “parged”
inside the cabinets with stone and large format tile mortar, about 40
pounds (dry weight) per cabinet. I prefer this treatment to bituthane,
sheet asphalt, or mass-loaded vinyl tile. I used the recommended 4” ABS
pipe for ports, and I wrapped each port in thin, self-stick bituthane
(waterproof flashing…) before gluing the ports into the front baffles. I
went for the all-passive X/Os, wired part to part, set-up for bi-wiring
from 1 amp per channel. My amps are Marantz MA-9S2 monoblocks that put
out 300W into 8 Ohms and 600W into 4 Ohms, and they are made for
bi-wiring. I used 12 AWG Speltz Anti-Cable wiring. I tested and came up
with a solution for horn ringing: “Mortite”/modeling clay/electrician’s
putty, applied to the horn as shown in the picture. The black screws
included in the Jantzen kit (1/4” head diameter) drove right through the
woofer frame, so I used #8 X 1 ¼” truss head screws instead (3/8” head
diameter) for the woofer only. Too bad these screws are silver. I’ll
trade them for a black version if I see it. I took a couple of wrong
turns and made the wood finishing way harder than it needed to be, but
Birch is tough to stain dark, in any case. Based on my trials, the right
way to do it the best and the “fastest” (no do-overs…) would have been:
Charles Neil prep/filler; General Finishes oil based gel stain; Minwax
oil based wipe-on Poly. Let everything dry thoroughly and sand very
lightly between coats.
As for sound in my system, I listen mostly to LPs, and some CDs, no
streaming. I’ve put a lot into the system over many years. I enjoy all
sorts of Music, from Jazz, to Classical (including opera), to Country,
to Rock, and Pop (including musicals). These speakers are meant to
“improve” upon speakers I’ve spent a long time tuning the way I wanted,
that “grew up”, as it were, in my own system. Meanwhile, my TL drivers
are still breaking in. Safe to say, even now, however, The Loudspeakers
are “objectively better” speakers. The power, clarity, articulation, and
downright authority of these speakers is plain with my amps, loud or
soft, but more so loud. They can do live (or darn close…) volume without
strain, according to the recording, and in The Real World this means
“headroom”, which in this case means more Music without the “cringe
factor”. They have already taught me more about Bruckner than my
previous speakers have done over many years. Mozart’s Cosi fan tutte is
thrilling, loaded with color, moods and Joy. As mentioned by others,
they have a “flat frequency response”, which in this case means natural,
very lifelike voices and instrumental sounds that carry the story and
intent of the music and the performers. Details do not “jump out” but
they are “inherent” in the Music, there for the close listener. Like
Troels says, it is easy to listen to Music with these speakers; they do
not ram it down your throat. They render clearly from most recordings
what I care most about, without overdoing it or highlighting problems. A
great recording can make great Music. A poor recording of a great
performance can still produce great Music, even though it does sound
like a poor recording, and this is very important to me, to maximize
available program. They do “ambience” and “soundstage”, and the Music
detaches from the speakers and charges the room. They are amazing
anywhere near on-axis, and there is enough musical energy “in the room”
to dance around them. All in all, very nice, just what I wanted, in
fact, and worth the effort and the expense to Music Lover me. I will
talk more about Music via these speakers at the GoodSoundClub Forum, and
there is more about my system and listening habits there, as well.
Add another “Thank you, Troels”!
Best regards,
Paul
04-01-2024:
As great as The Loudspeakers sounded early on, they are really living up
to their promise as the drivers, etc. have broken in, and this process
took a while. Then I got a New Year’s Day gift of truly
spectacular bass and “soundstage” when I turned up and used my Hi-Fi
News test LP, and I finally got my tonearm dialed in again. Wow! Upright
bass is very natural, whether plucked, slapped or bowed, and it’s as
loud as any other part of the sound spectrum, apropos. Orchestral bass
is astounding, very powerful tutti, and a great rendition of the very
low frequency and very “full” bass that some composers (like Bruckner)
use to “float” the rest of the orchestra on. Jazz and rock LPs I am well
familiar with are refreshed and energized with this bass, and
well-recorded and mixed drums sound spooky real, with tremendous impact
and overall energy. The Loudspeakers’ calling card is that no matter how
they are pushed they do not choke up or otherwise call attention to
themselves, they just fill the room with Music. I have been at hi-fi for
over 60 years, and The Loudspeakers are as versatile, “natural” and
“realistic” sounding overall as any speakers I have ever listened
to/through. I am VERY happy with The Loudspeakers for small and great
Musical works, alike, as they scale up and down seamlessly, keeping
voices and instruments realistically sized and in their proper
relationships, proportions and perspectives. I realized I was holding my
breath about the 18” woofer crossing over at 200 Hz, so I am glad to
report that these heavy woofers can tiptoe very adroitly, no problems
with the stock XOs! Overall, great, compatible drivers, brilliant X/O
work, and unimpeachable results!
Happy New Year to All,
Paul