Discovery 12W
Copyright 2020 © Troels Gravesen
DISCONTINUED, now
open kit.
Source drivers and crossover components locally
|
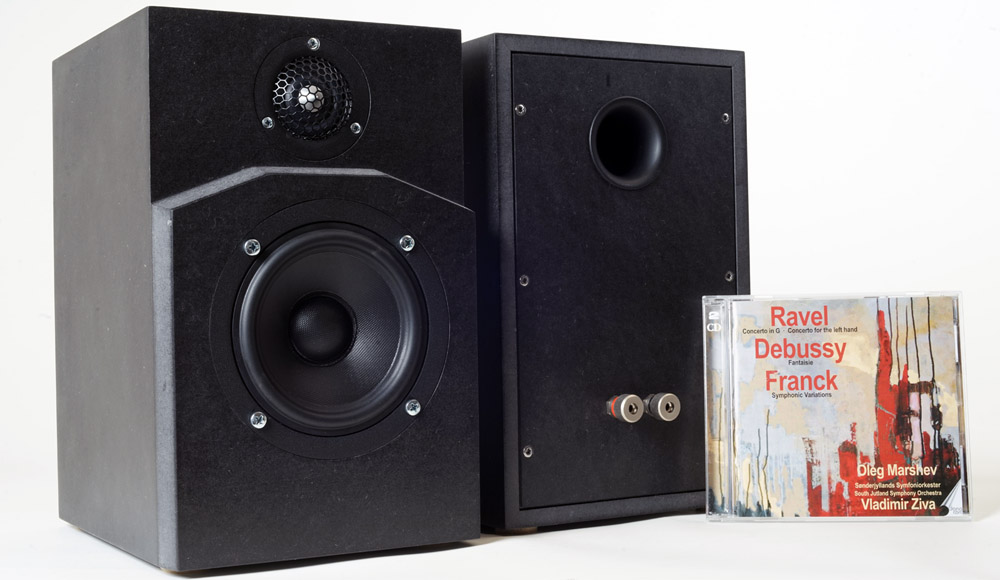
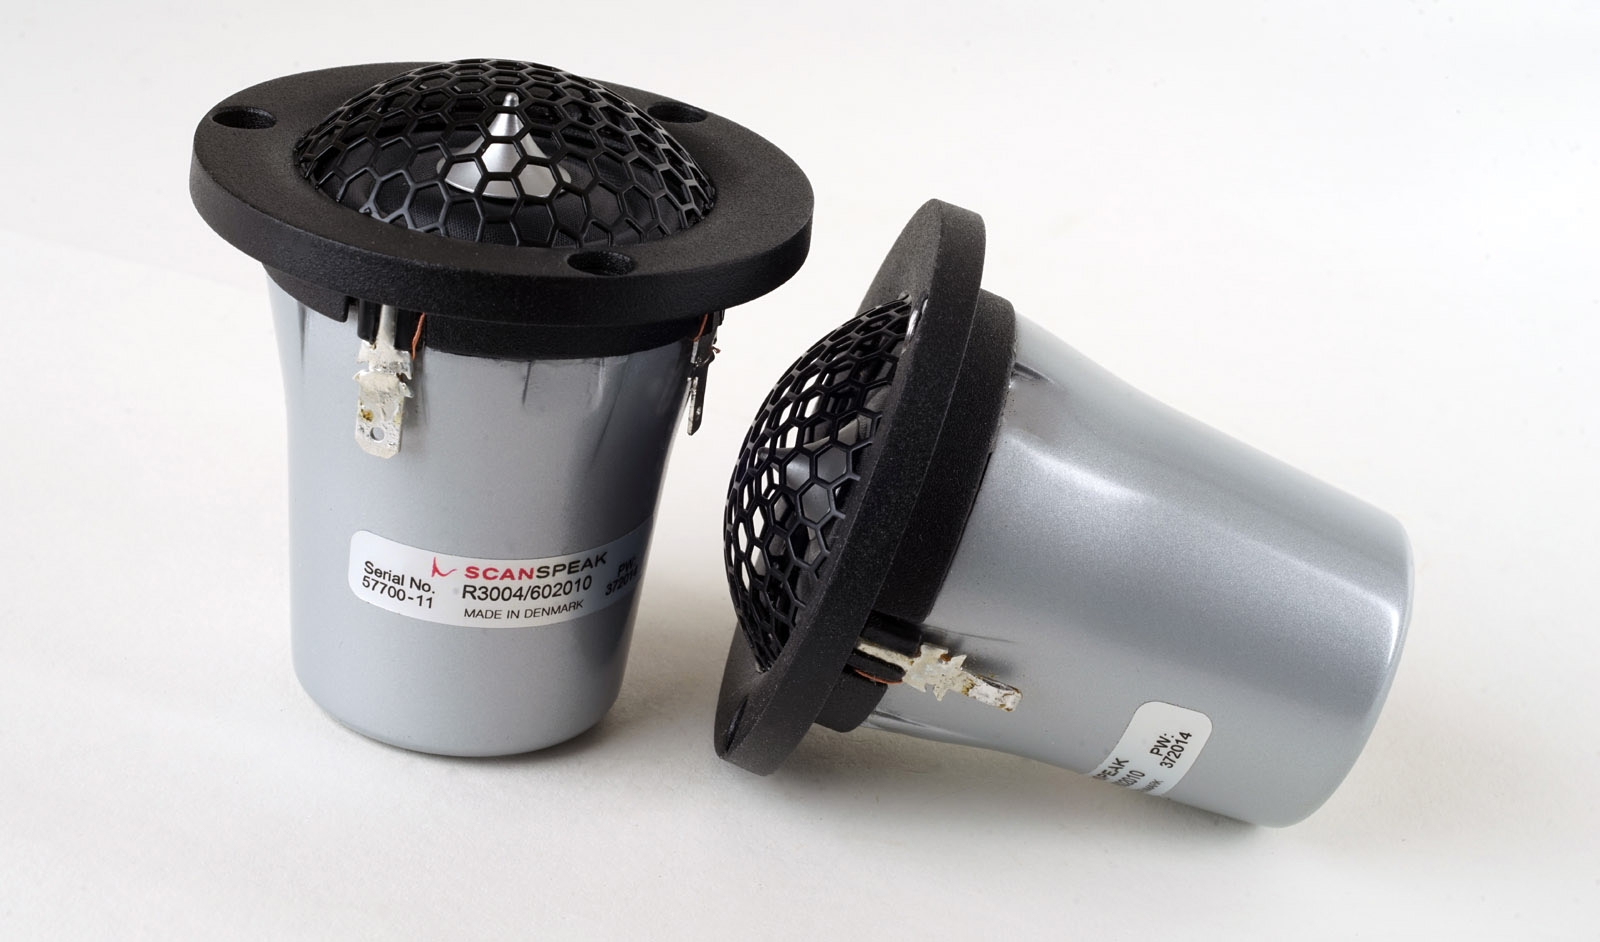
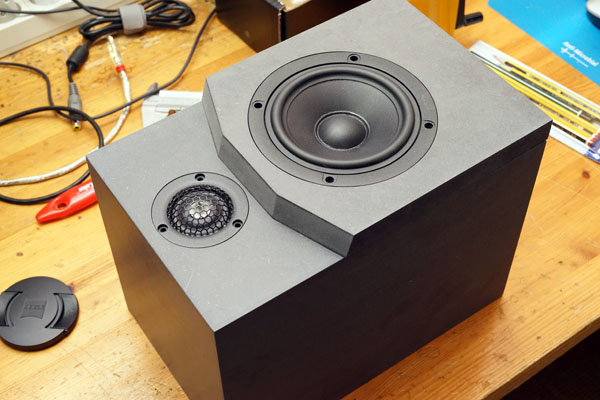
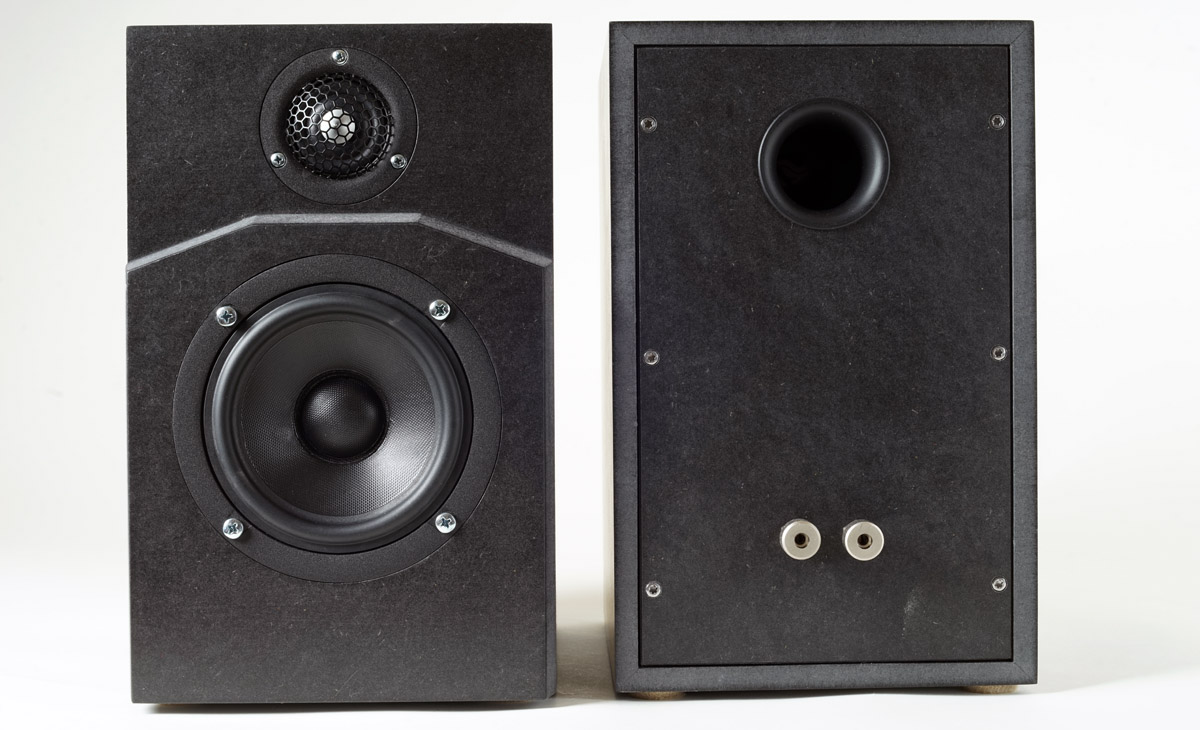
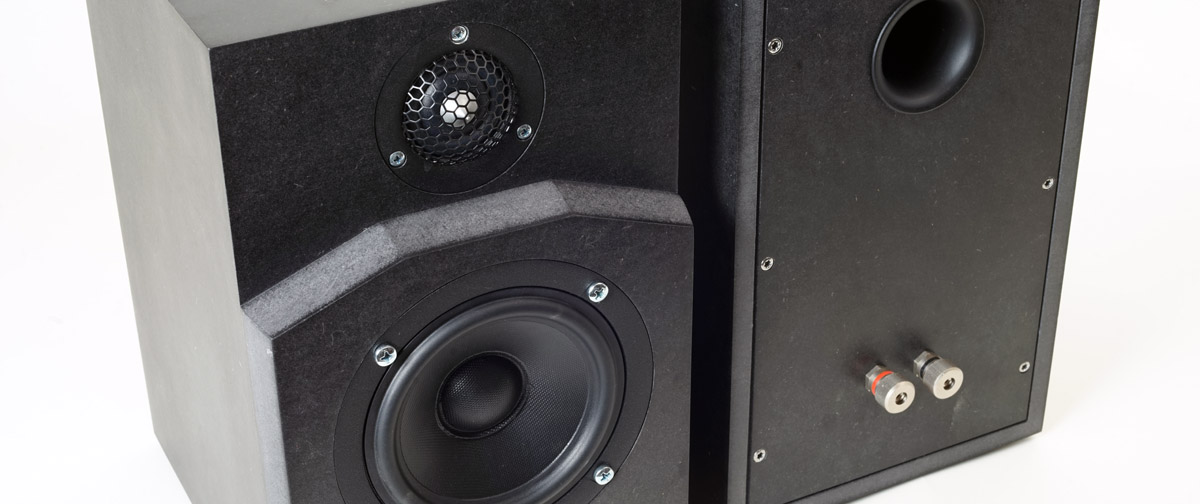
Go to on this page: Making small minis is fun! I made a small mini for ScanSpeak's 2014 Munich Highend show, and I'm still waiting for the new 12WU (see June 2014 post) driver to be launched. Until then we might take a look at the smallest midbass driver in the Discovery range, the 12W/8524G00. It goes without saying this provides a significant reduction in building costs and adding to this is the use of the R3004/602010 in replacement of the Be dome used for the Munich show. The R3004/602010 is not exactly cheap at 145 EUR, but the small size comes handy and basically offers the same quality in sound compared to standard face-plate ring radiators in the Illuminator range of tweeters, like R3004/662000. Using the R2604/832000 would mean we have to start cutting the face-plate and I don't want to do this. In total the drivers alone are 409 EUR. We can get a more speaker for the same money, but not this small. And this speaker must be small to suit desk top application and small sound systems. And why not make your kids get used to good sound from an e.g. NAD 3020D amp, being fed from a laptop or other digital sources? The DISC-12W may be a way to better sound culture.
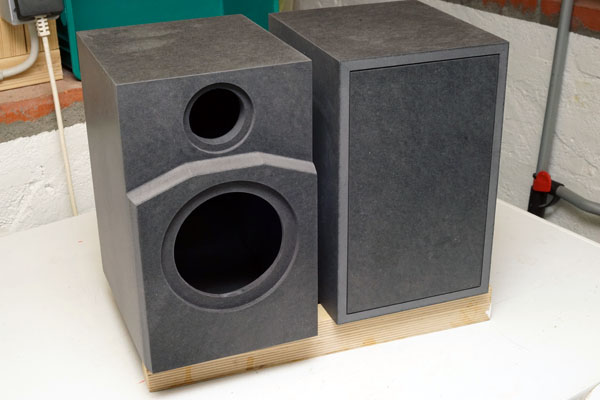
Before you start building such small speakers, be sure you realise
what a modest 59 cm^2 membrane area can do. From the cabinet size we
have F3 = ~70 Hz. Don't expect gut shaking, earthquake impact on your
listening room. There are limits to how much air such small membranes
can move. But the midrange...many of these small 4" drivers deliver a
midrange so smooth and dynamic.
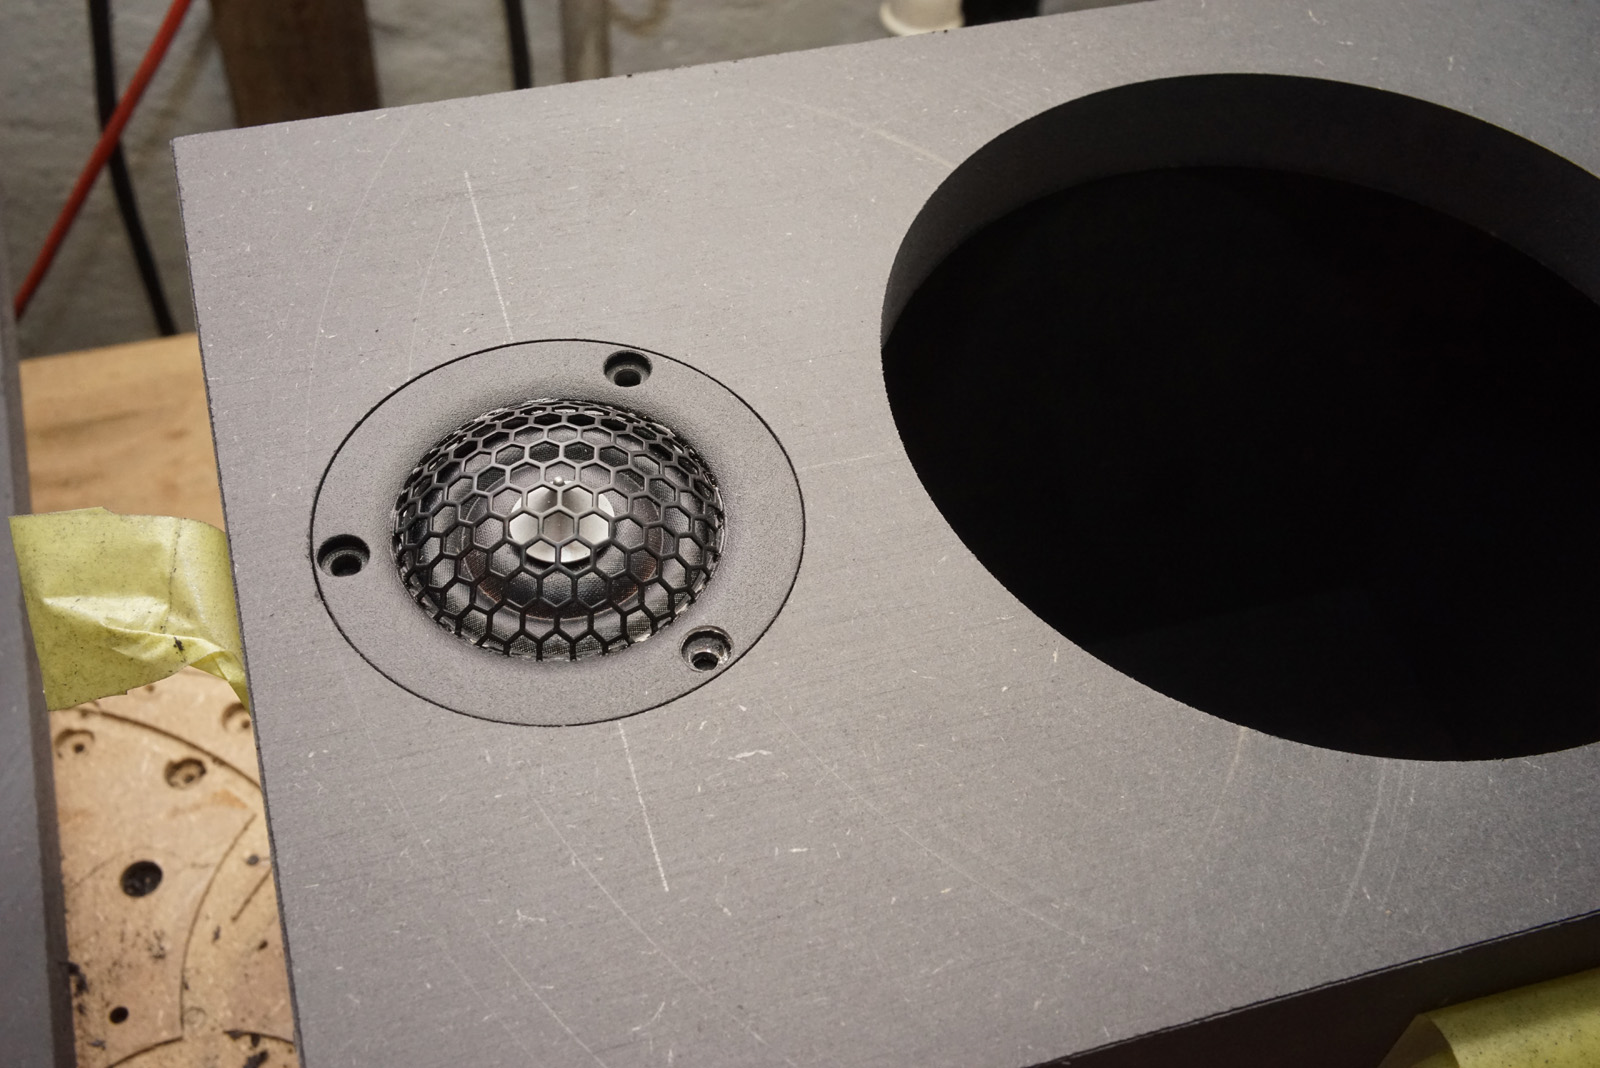
The 602010
tweeter is costly compared to the 12W, but it's just sooo good - and
it's small.
Basics:
Download specs here: 12W/8524G00 R3004/602010
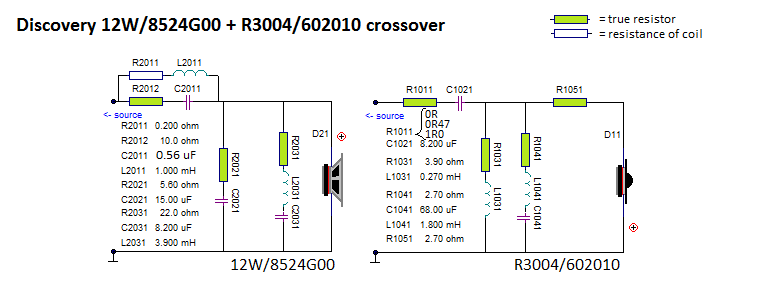
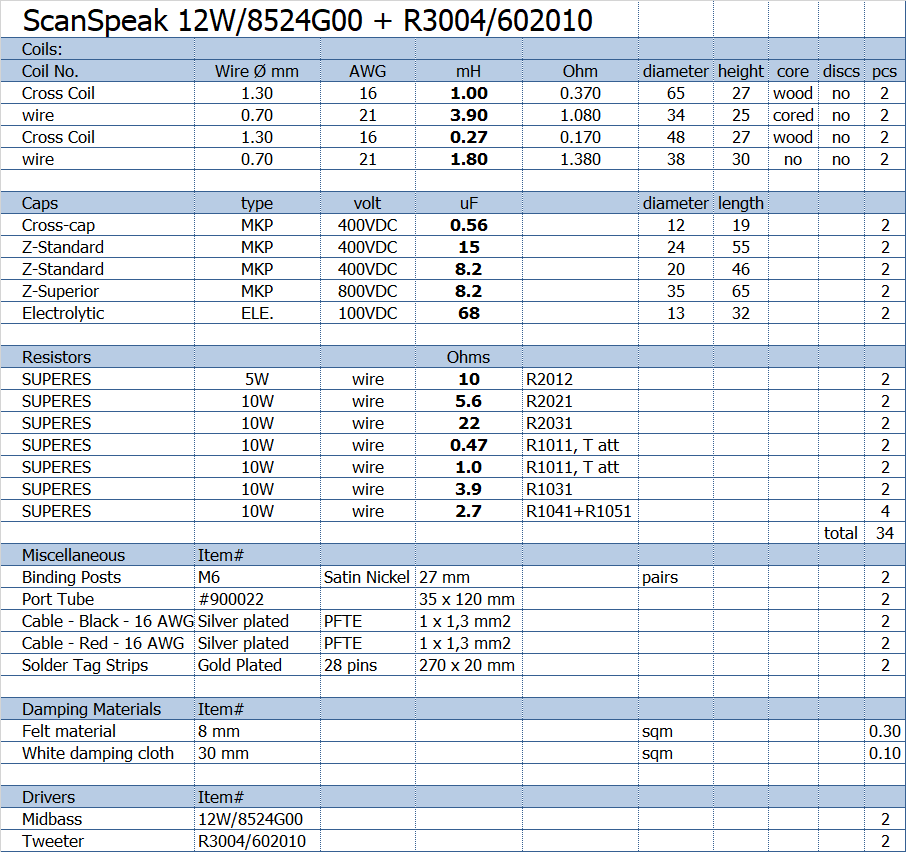
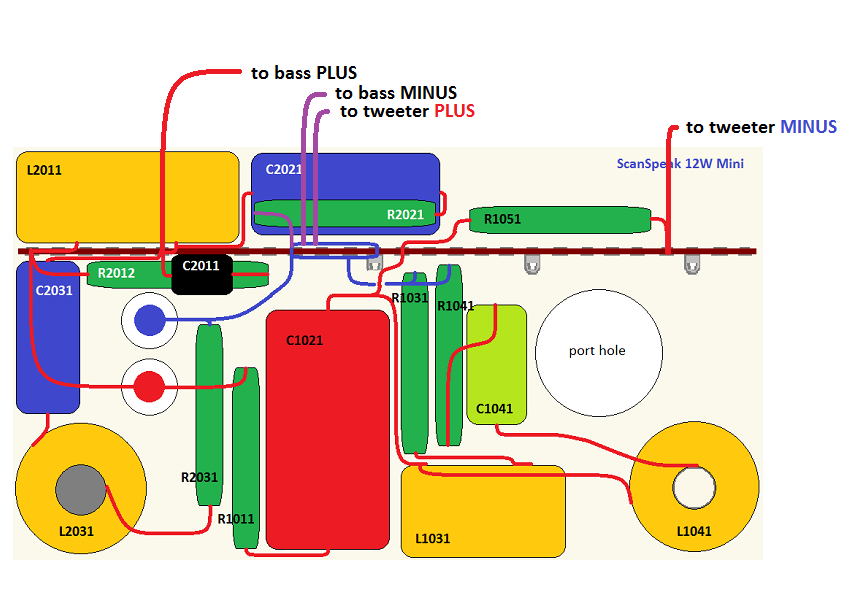
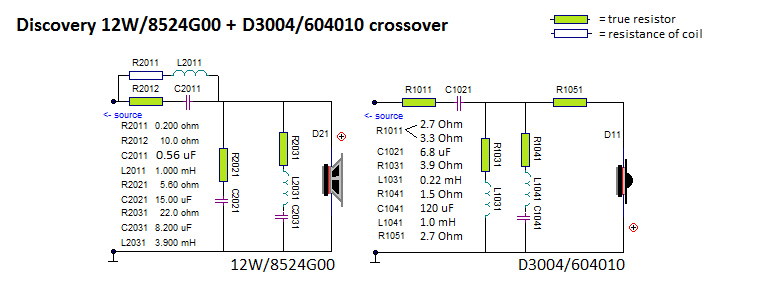
Fine-tuning the crossover always require minor changes to components' values, but the final set-up didn't change from the simulation. LCR2031 just removes a tiny bit too much energy around 1 kHz and LCR 1041 handles tweeter impedance bump and smooths roll-off towards lower frequences, thus also improves power handling. R2012+C2011 suppress a minor 12W peak in the 7-8 kHz area, which would otherwise mingle with treble performance. This is a small speaker with an overall very neutral and balanced presentation.
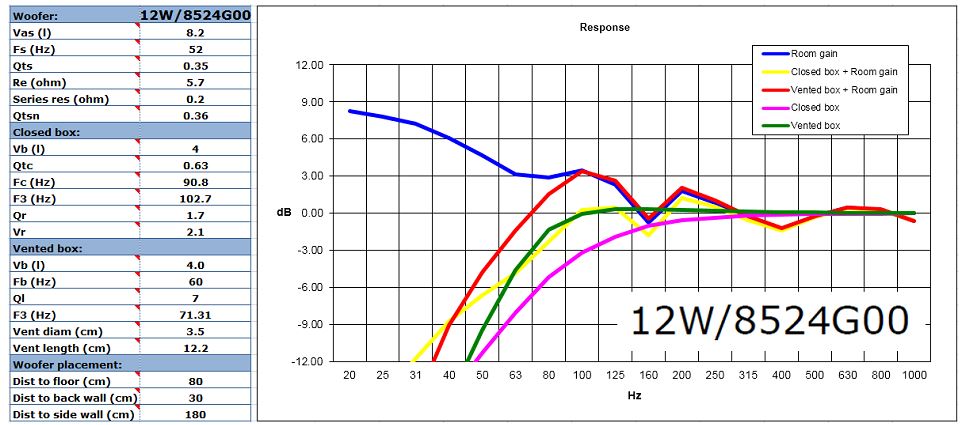
Above box simulation. As can be seen, 4 liter
closed makes Qtc = 0.63, but here we want a little bass boost and use a
vented design.
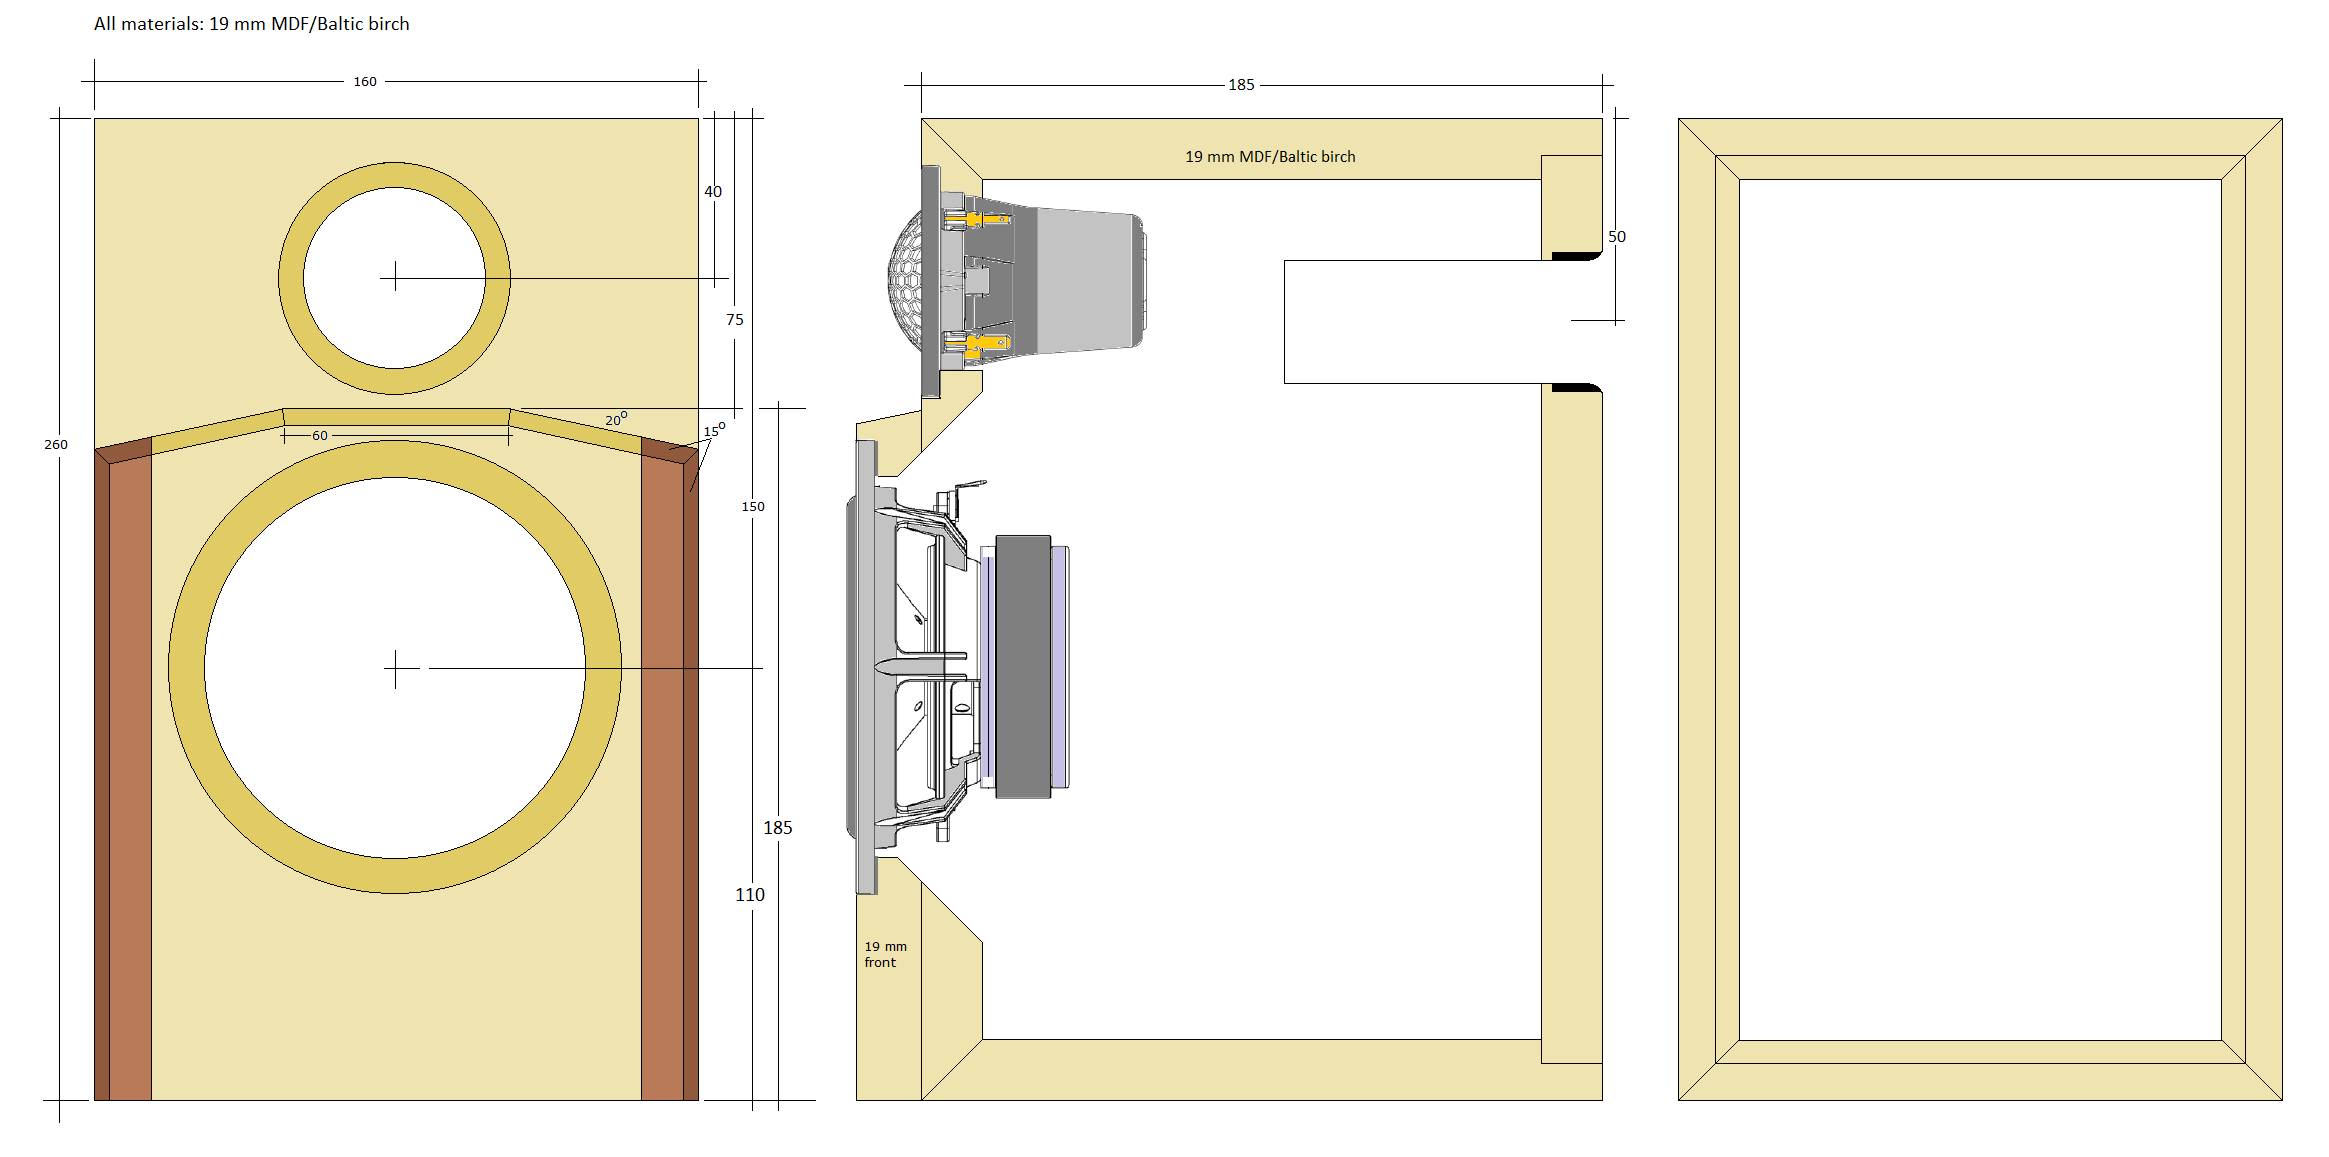
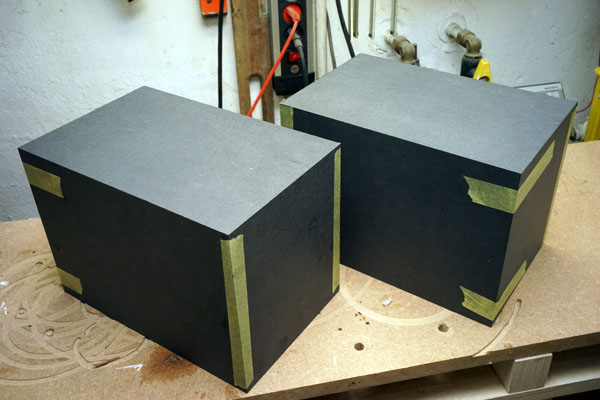
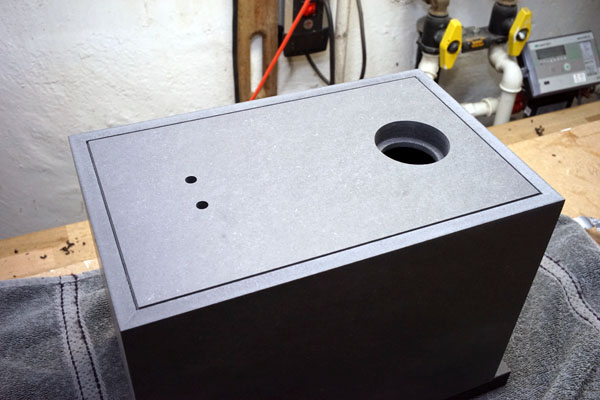
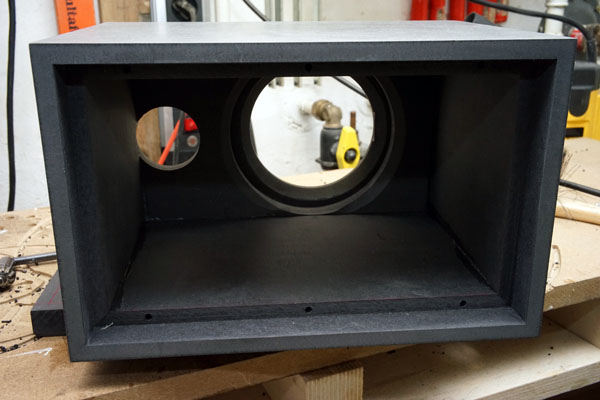
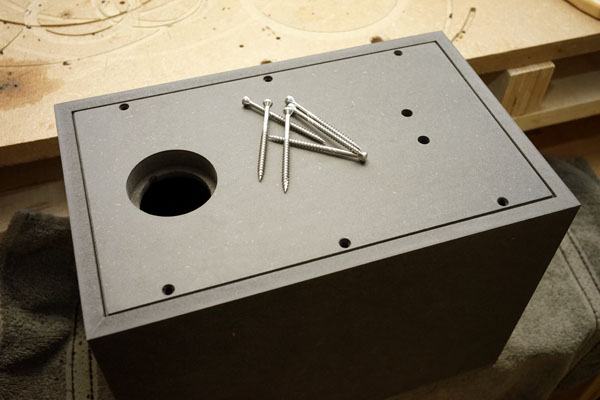
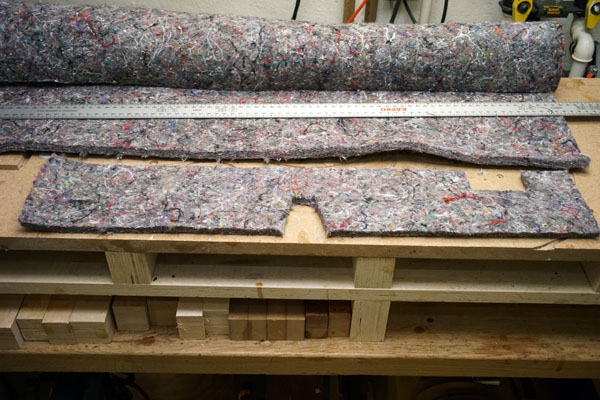
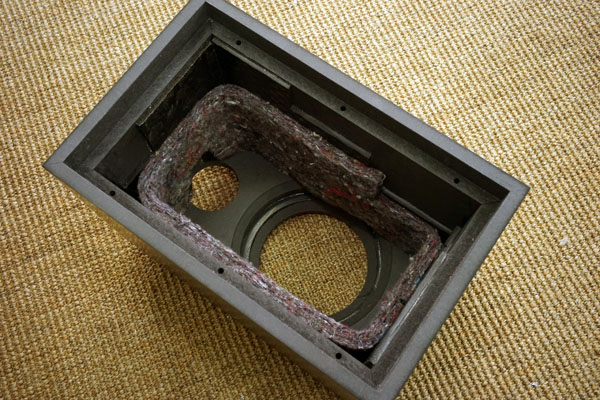
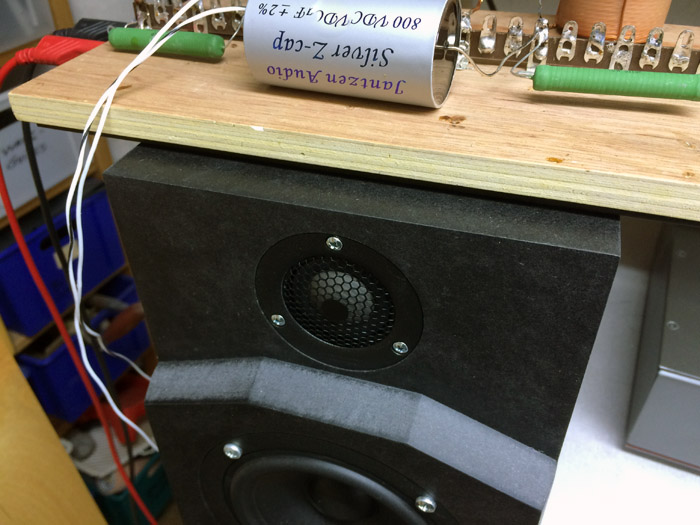
The cabinets were designed for 20 mm black MDF, actually HDF,
high-density fiber board.
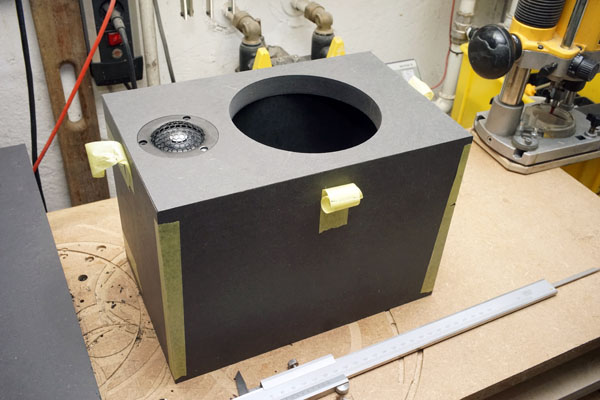
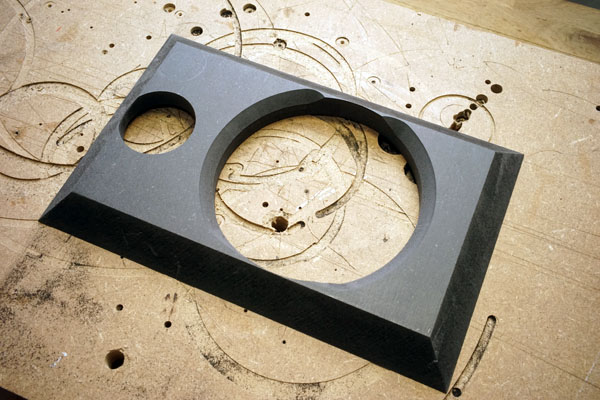
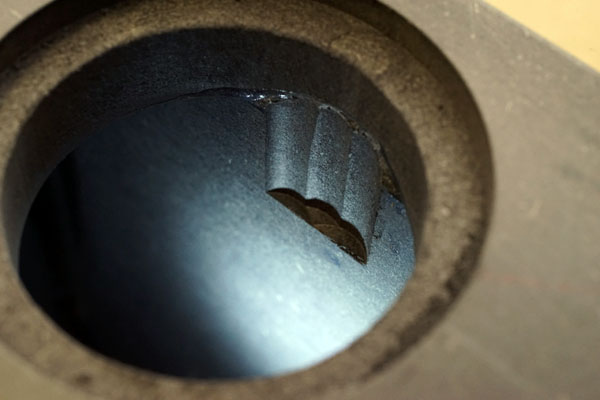
Alternatively use 19 mm standard MDF. The W12 baffle can be from 18-20 mm thickness. Do remember
chamfering the
12W driver hole as shown on drawing. Due to the combined thickness of
the front panel, the small driver needs room to breathe.
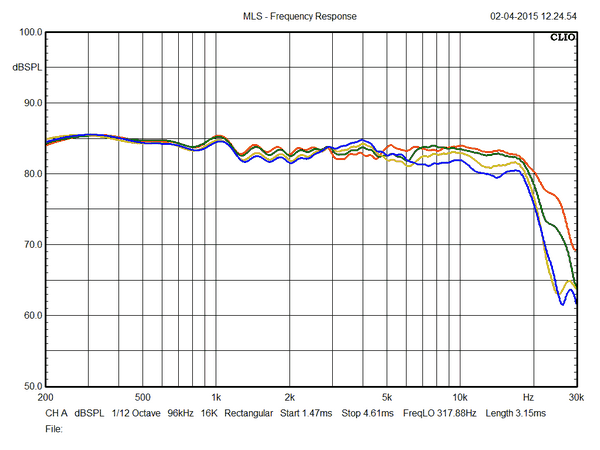
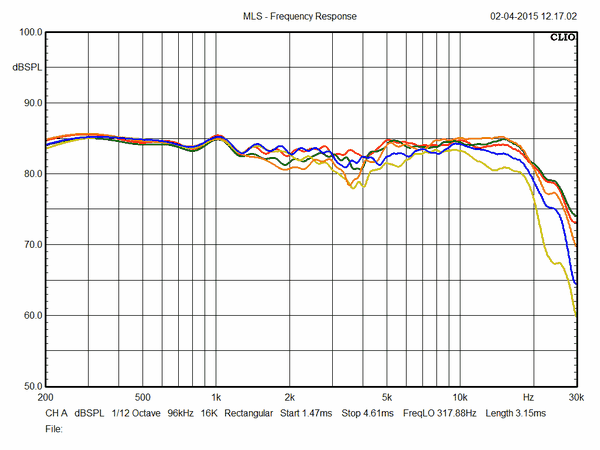
A few comments on MEASUREMENTS before you start interpreting all the readings below. First of all, if we think measurements will tell us how a speaker sounds, we're wrong, very much wrong indeed. The perception of sound is way too subjective to be reflected in any measurements we can perform. A loudspeaker system is meant to give us a satisfying idea of an acoustic event and for some people a pair of 5 USD ear-plugs are enough, others spend 200 kUSD on a truly full-range pair of speakers - and the latter may not be happier than the former. Measurements may give us an idea of tonal balance of a system, i.e. too much or too little energy in certain areas. Measurements may tell us about bass extension if far-field measurements are merged with near-field measurements. In addition to this, ports may contribute to bass extension. Most of us diy'ers do not have access to an anechoic room for full-range measurements from 20-20000 Hz. What cannot be seen is what kind of bass performance we get in a given room. Bass performance is highly dependent on in-room placement of your speaker and the same speaker can be boomy in one place and lean in another. Actual SPL level at 1 meter distance and 2.8V input is useful for en estimate of system sensitivity and combined with the impedance profile may give an idea of how powerful an amplifier is needed to drive the speaker to adequate levels. What measurements do not tell is the very sound of the speaker unless displaying serious linear distortion. The level of transparency, the ability to resolve micro-details, the "speed" of the bass, etc., cannot be derived from these data. Distortion measurements rarely tell much unless seriously bad, and most modern drivers display low distortion within their specified operating range. Many people put way too much into these graphs and my comments here are only meant as warning against over-interpretation. There are more to good sound than what can be extracted from a few graphs. Every graph needs interpretation in terms of what it means sonically and how it impacts our choice of mating drivers, cabinet and crossover design. What measurements certainly do not tell is the sonic signature of the drivers, because cones made from polyprop, alu, kevlar, paper, glass fiber, carbon fiber, magnesium, ceramics or even diamonds all have their way of colouring the sound.
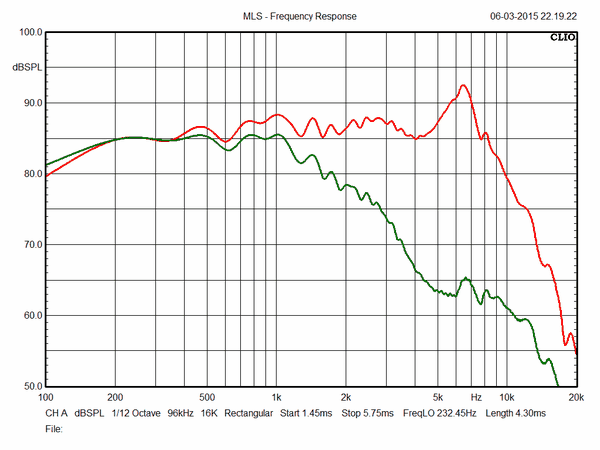
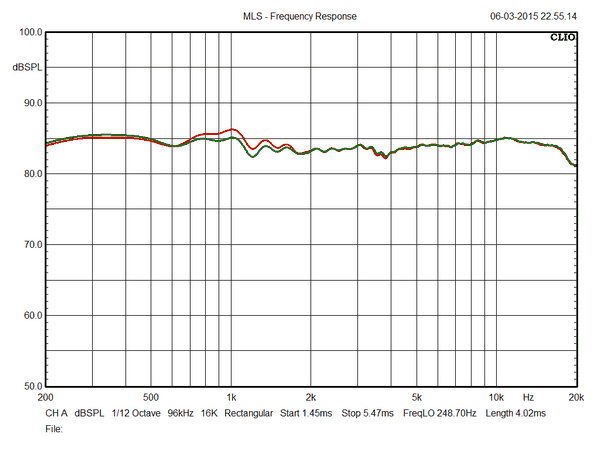
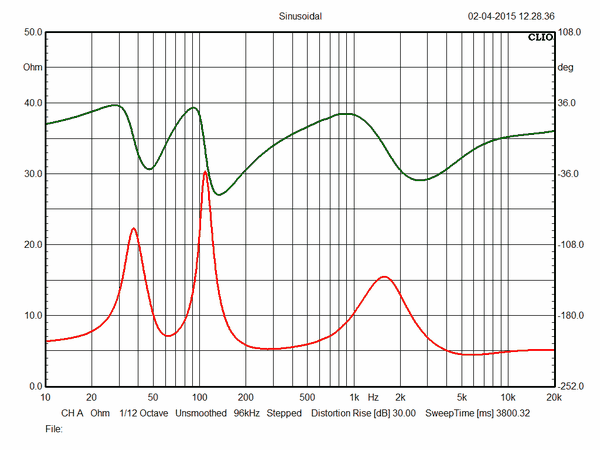
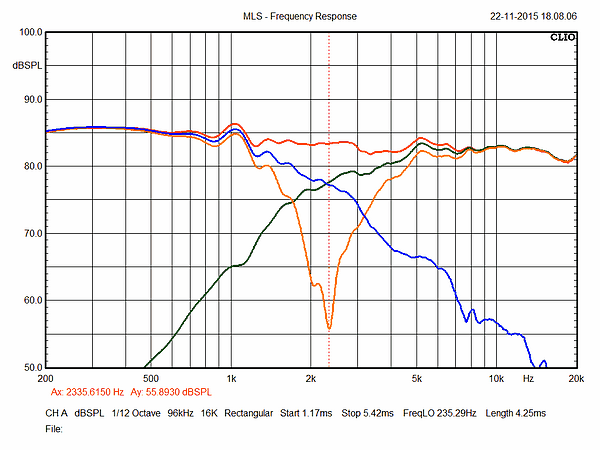
Above left: The 12W response without filter (red) and with filter
(green) but with no midrange LCR correction. In the beginning it looked
like we could omit the LCR circuit, but one the tweeter was in place,
things changed and we have a small notch around 1 kHz. Taming this area,
brought back the overall balanced presentation. Actually you can place a
switch on your rear panel to put on/off the LCR circuit if you want a
more forward sound. Also tweeter level could be adjusted by a switch,
making R1011 either 0R, 0R47 or 1R0. 0R is bright, 0R47 is balanced, 1R0
is slightly laid-back.
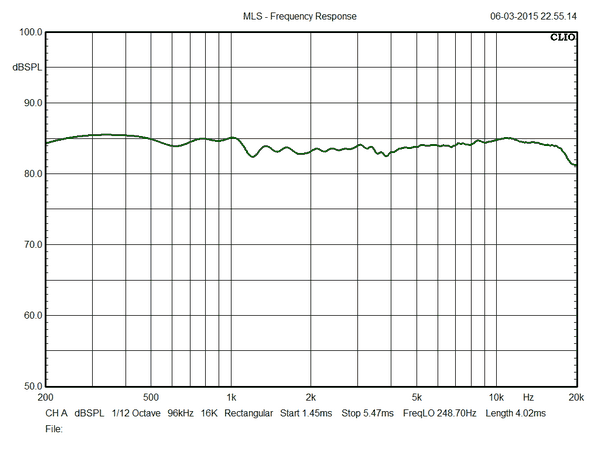
Above left: Response from finished system w/wo midrange notch filter. Right: Final system response from my preferred tuning, w/ notch filter and R1011 = 0R47. My default for R1011 is 1R0.
Please source components locally. Jantzen Audio no longer supports this kit.
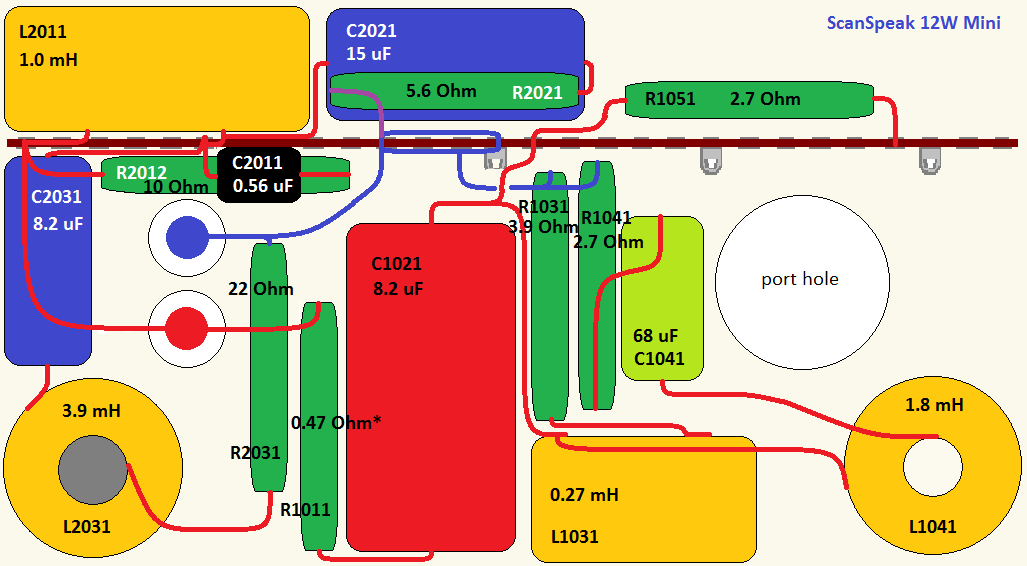
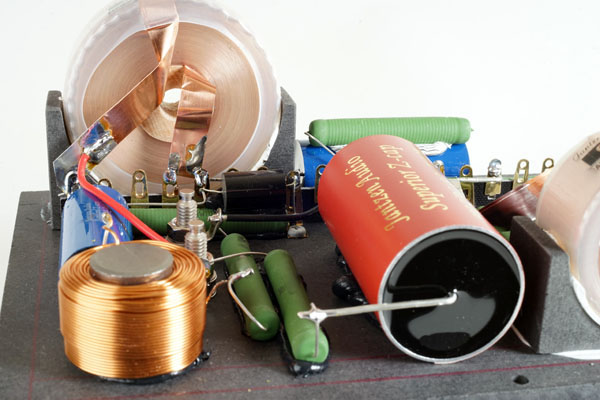
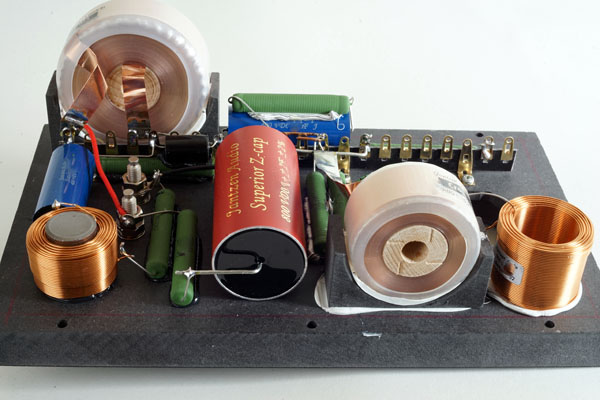
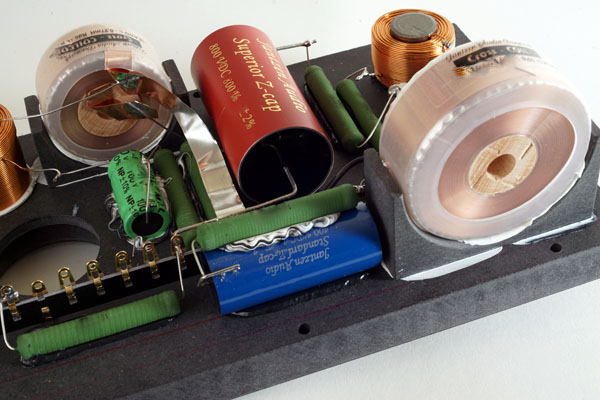
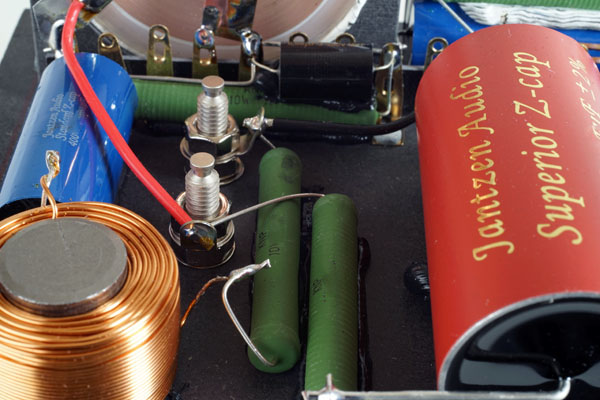
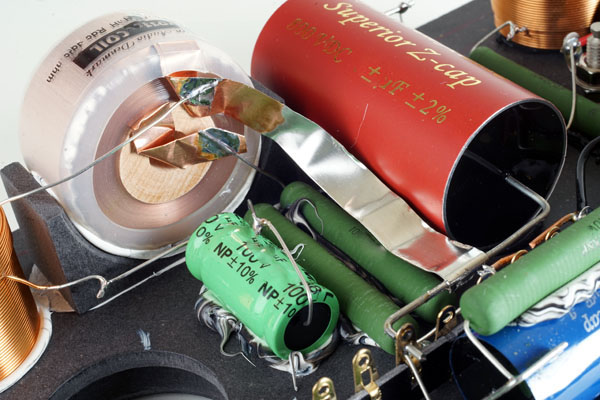
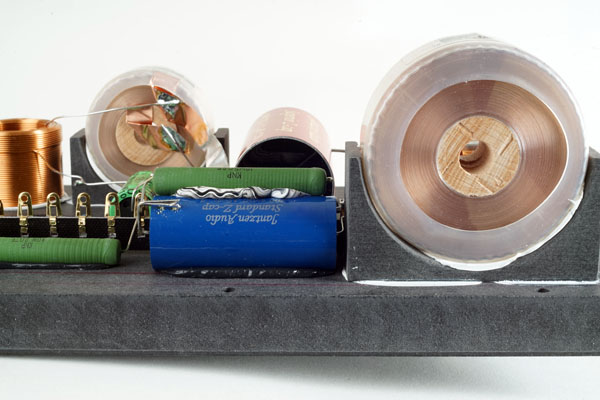
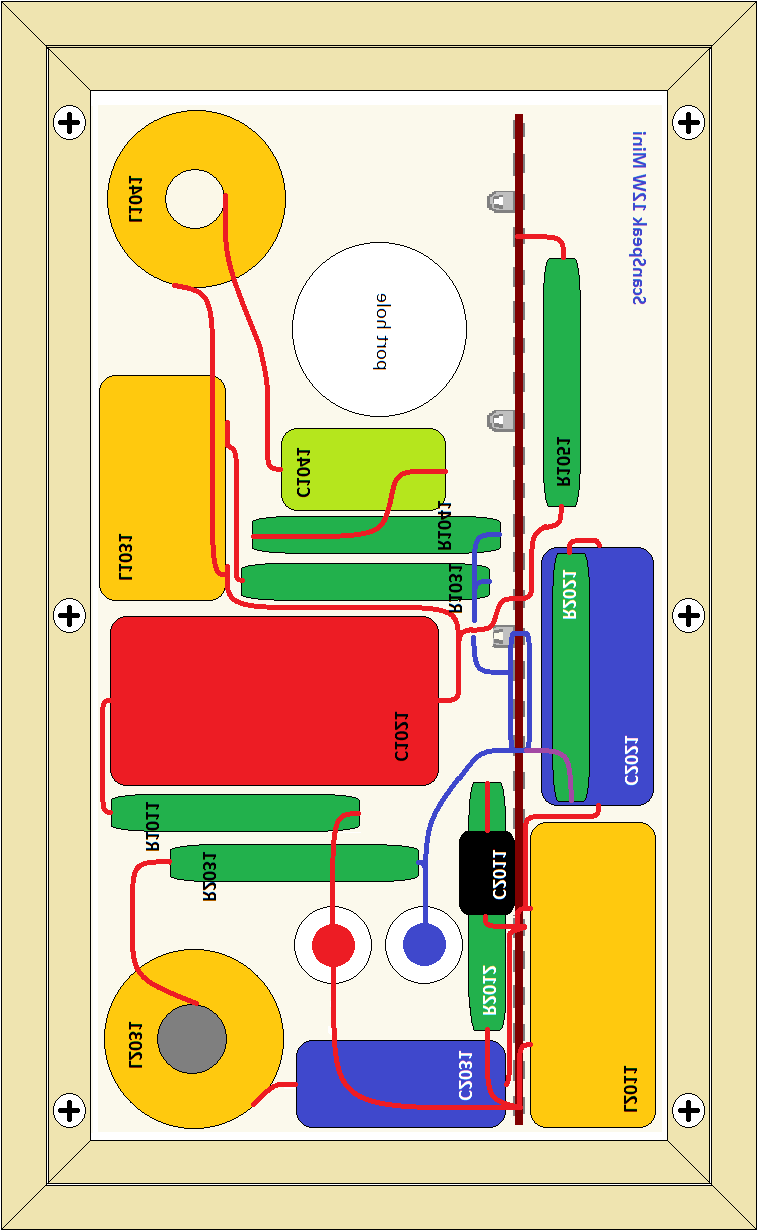
CROSSOVER-LAYOUT
Due to limited space the two foil coils are supported by crates made
from 20 mm MDF.
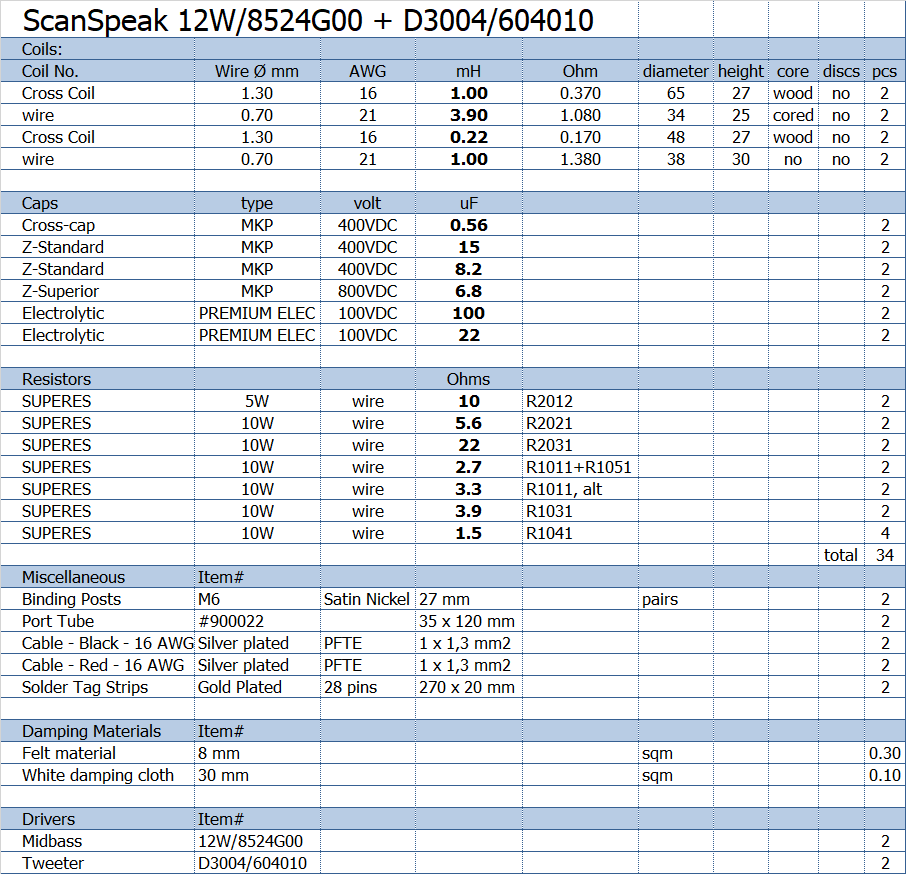
Wanna make the ultimate Discovery W12 version? The new beryllium dome,
D3004/604010, obviously fits the routing for the R3004/602010 ring
radiator.
|