Answers to some of the most common questions I have on:
CONSTRUCTION OF CROSSOVERS
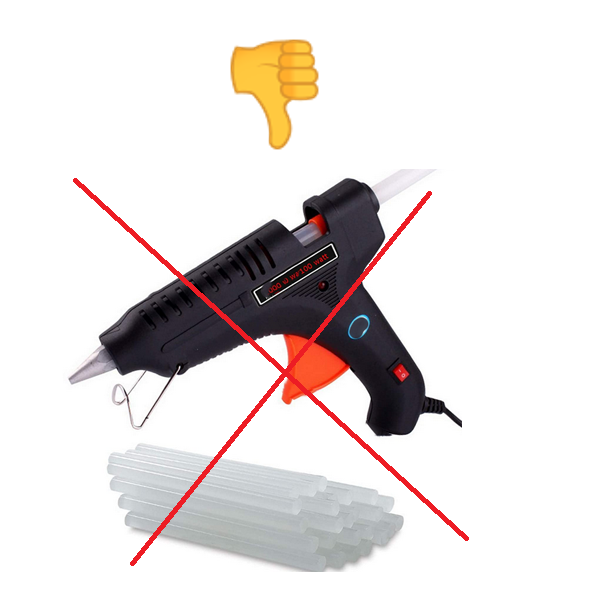
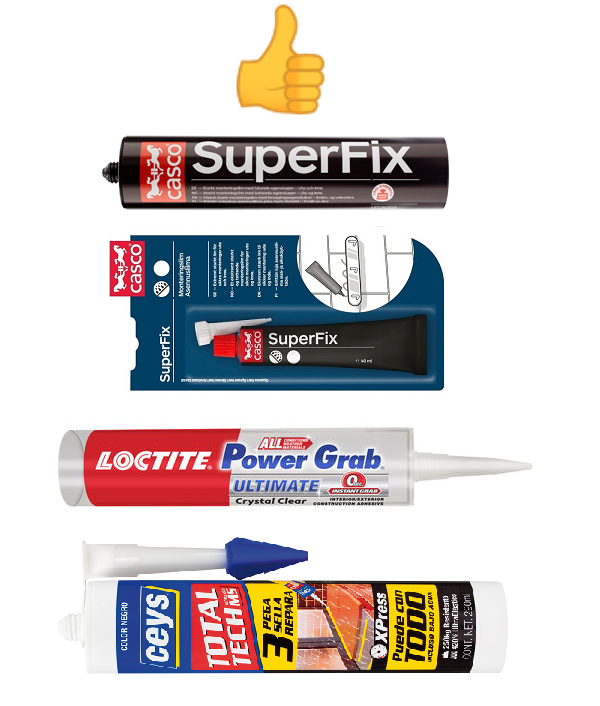
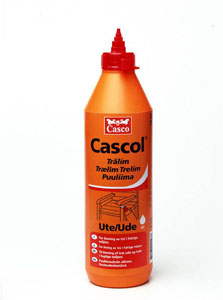
For crossover boards, silicone glue may
work great, but this is even better and settles faster. Superfix from
Casco
or
Bostic.
Except for Scandinavia, I have no idea about the
availability of this compound in other countries. It's expensive, around 20-25 US $ for 300 mls, but worth
it.
It's a non-toxic, doesn't smell, tough to get off your
fingers, doesn't take any solvents except alcohol, flexible and easy to
cut when hardened (remove crossover components because you've got new
ideas...). Superfix, 40 ml, is now included in most kits from Jantzen Audio.
You may have to order extra for large boards.
From Erik, Netherlands:
Casco and Bostik are hard to get here
(Netherlands), but now I know what to use. Similar construction glues
are here available from Bison or Pattex and they are available in every
building market. Best regards,
Erik
From MB, Spain:
I've asked about "MS technology" to a friend that works in a
chemical company and these kinds of glue are very often used in Car
Repairing due its properties. He told me that another brand that have
this technology is "Teroson", and some of the glues are: teroson ms 9120
sf wh cr310ml, teroson ms939 wh fc570ml and teroson ms 9220 bk cr 310ml
epig.
Finally, I’ve done more research about the “Ceys” glue and is a Spanish
product. It’s made in Bigues i Riells (Barcelona). Ceys is a company
that is part of “AC Marca Group”. It’s website is:
http://www.grupoacmarca.com/en
I’ve talked with them (so kind!) and have explained me that they have
subsidiaries in America (Mexico and Chile) and Europe (Portugal, Czech
Republic, Slovakia, Romania and Hungary), so maybe it’s easy to find
this glue in those countries.
Use 9-12 mm boards for crossovers. BB or MDF.
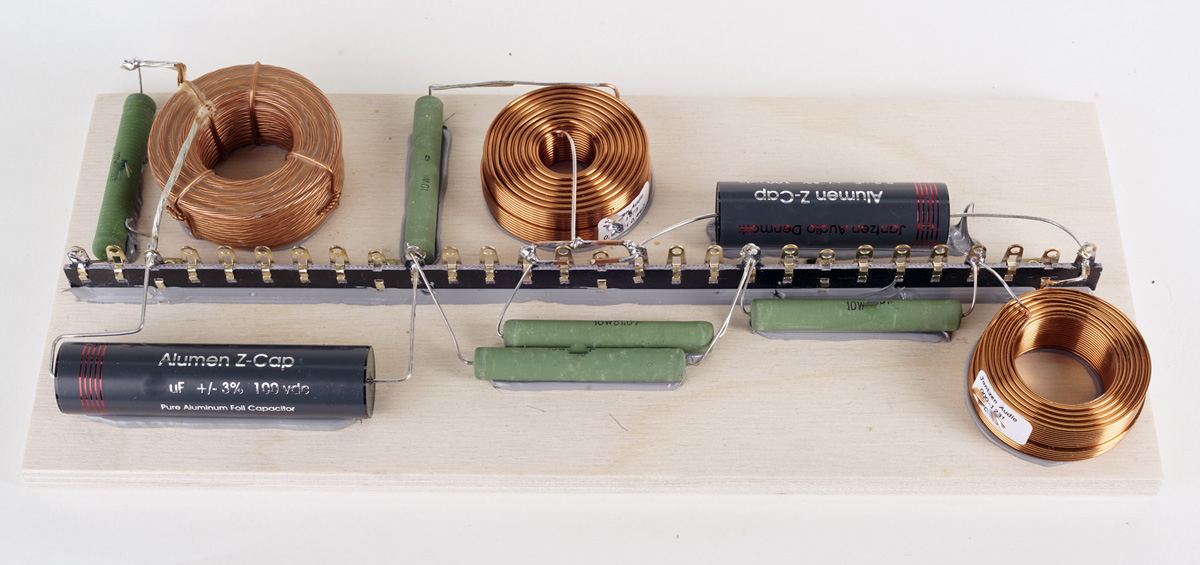
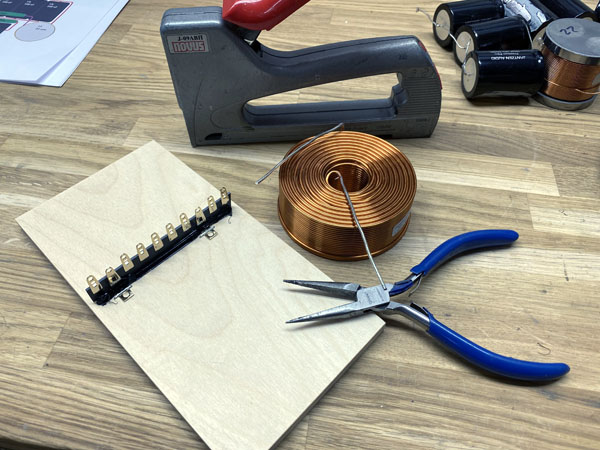
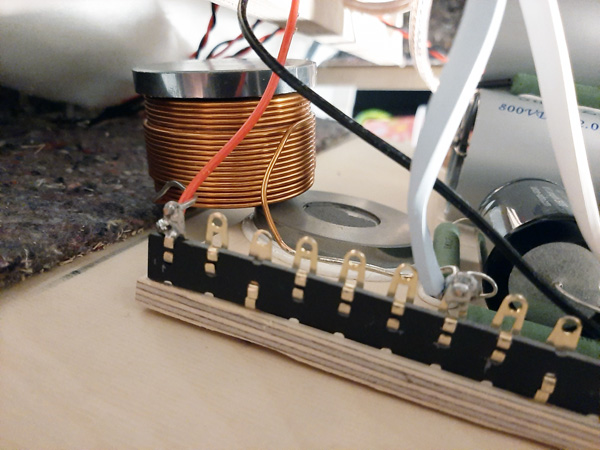
Solder tag strips helps you keeping good
order and overview, in particular when several components, wires have to
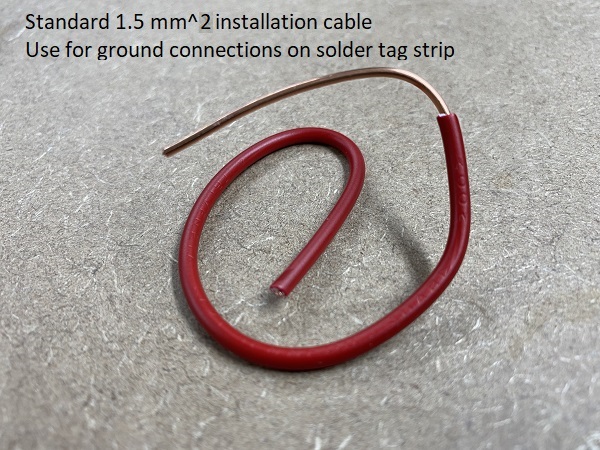
be connected to the same spot. I always make a ground loop from a piece
of solid copper wire like here with three components attached + several
wires when connecting the drivers. Not easy to do "in the air".
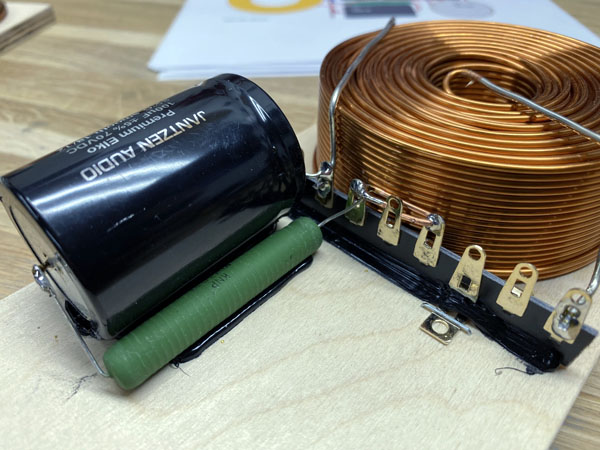
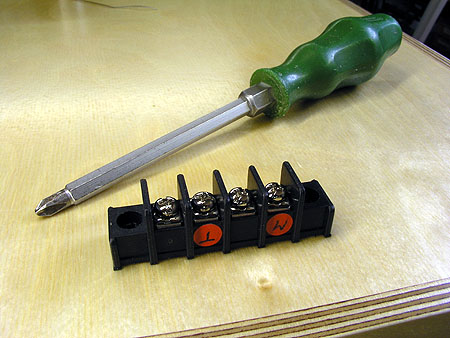
Tools and making the board
First of all: None of the components are polarized. It does not
matter how you do the orientation of capacitors, resistors - or coils.
There is no in or out on any of the components.
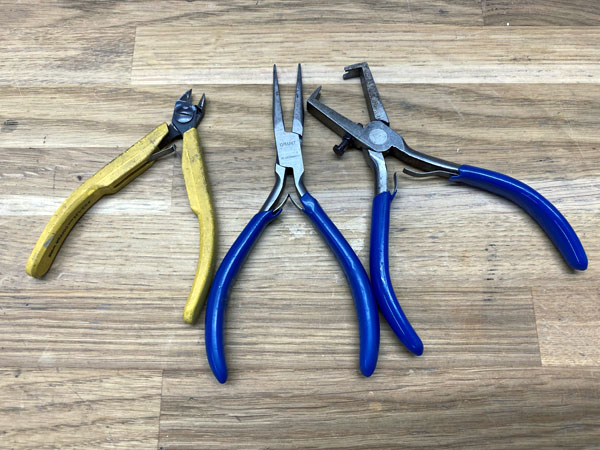

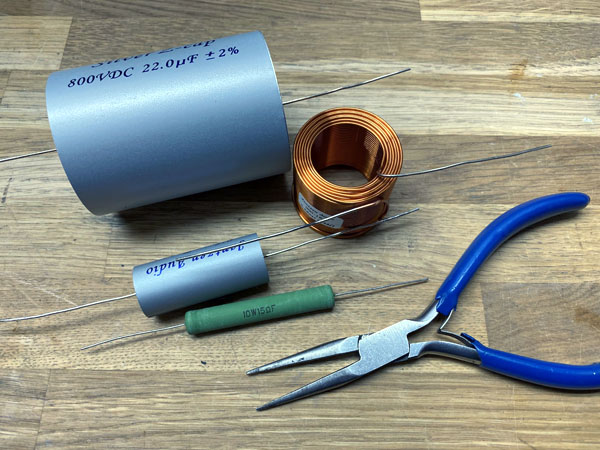
Tools needed for crossover work.
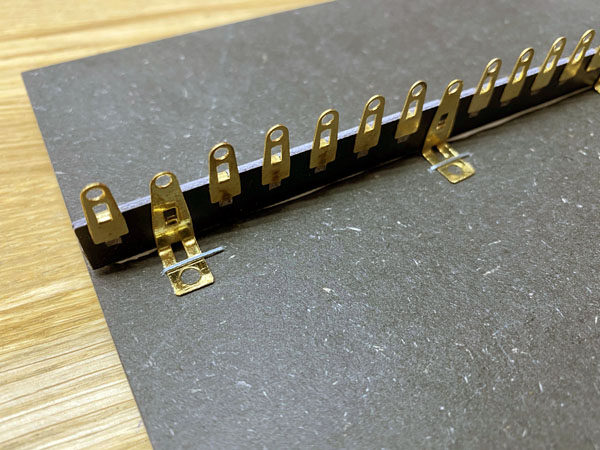
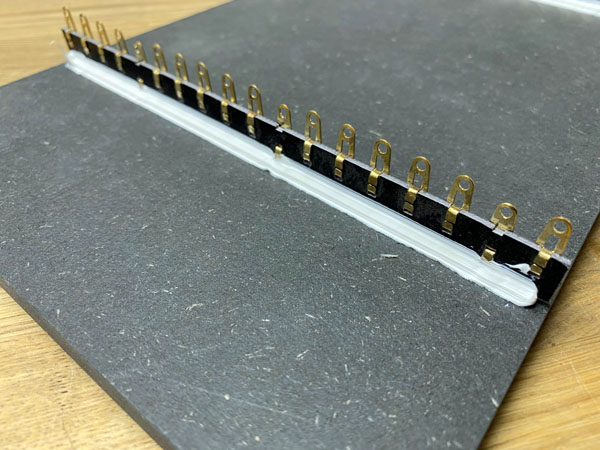
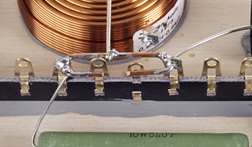
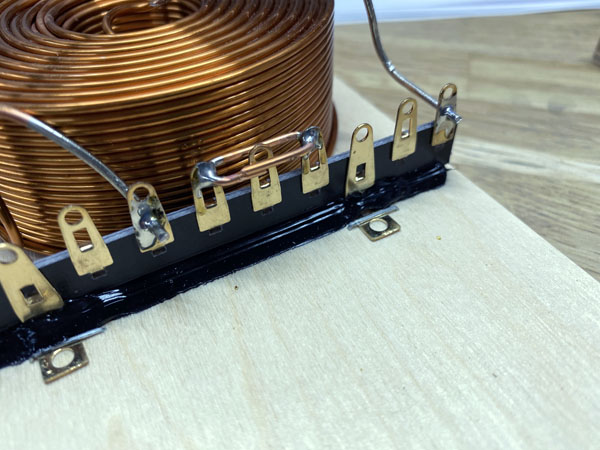
Fasten solder tag strips with staples and add a line of Superfix or
similar to make sure it doesn't vibrate.
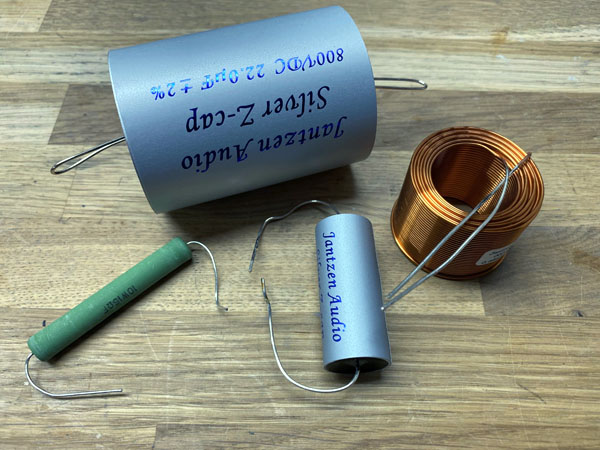
Start straighten the leads of all components to enable nice bends.
First of all you need a nose plier and a diagonal cutter to make the
crossovers. Nose plier seen above to the left. Use the nose plier to
straighten all leads of resistors, caps and coils, so you have a nice
starting point for adding the components to the board. Add the solder
tag strip and fasten with staples and preferably also a strip of
Superfix to dampen vibration like seen close-up below.
- or use some cut-off wire from one of the coils. They usually have long
leads.
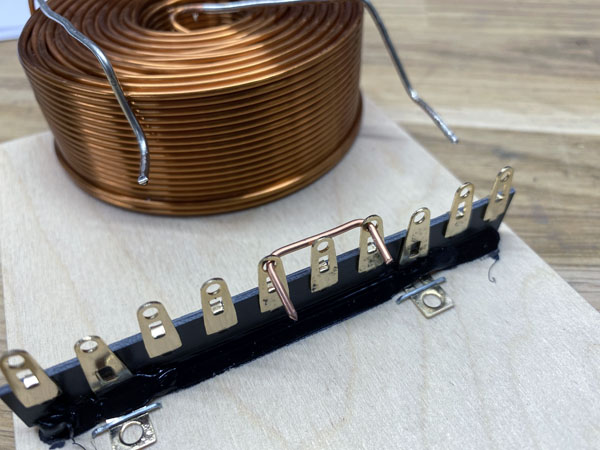
Use the solder tag strip to fasten components and to keep good order.
Make a ground connection from a piece of solid piece of copper wire. I
does not have to be a loop, just a piece of wire.
This is very useful when you have to connect several components
and wires to the same spot.
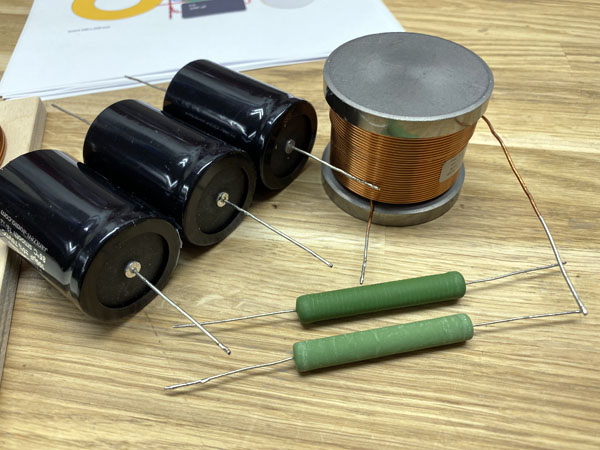
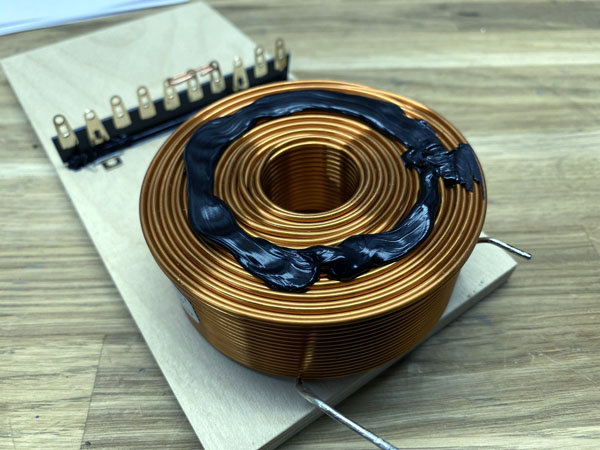
Coils are added Superfix like seen above and gently insert leads into the
solder tag strip solder points.
Add solder and heat generously to make sure you have a good connection.
I have countless examples of - sorry to say so - birds' nests sent from
people that want me to check if the layout is correct. I mostly can't
tell. If you want me to check your crossover, make sure to follow the
layout drawings and and please provide sharp well-lit images.
And also please insert image into e.g. MS Paint and add wire suggestions
with indications of "going where" and "coming from". Thanks!
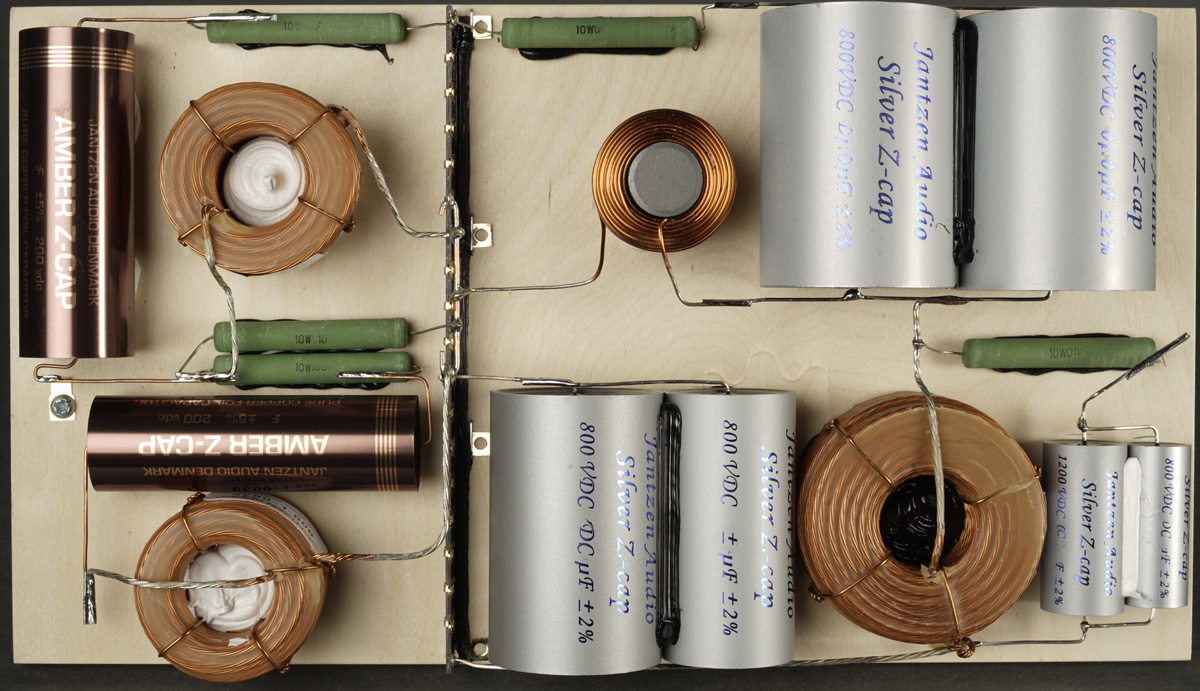
A nice layout helps ensuring everything is working correctly.
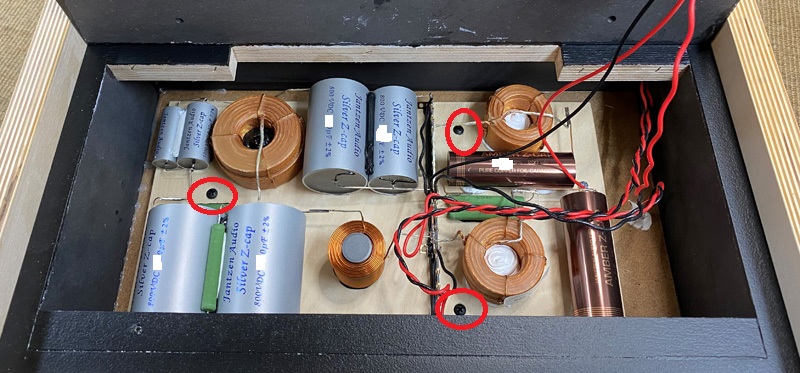
Always mount crossover boards with screws!
You never know if you made an error and have to remove the board.
Make absolutely sure none of the leads touch
the aluminum can most capacitors are embedded in.
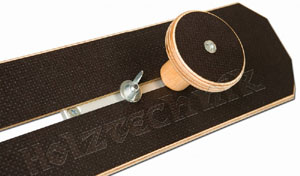
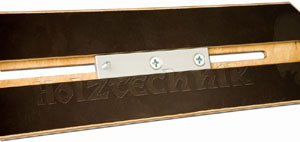
Heavy foil coils
Foil coils can be heavy! Use a dowel and a
gluing ring
of Superfix or silicone glue.
You can also use brass or stainless steel screws to the wooden center plug.

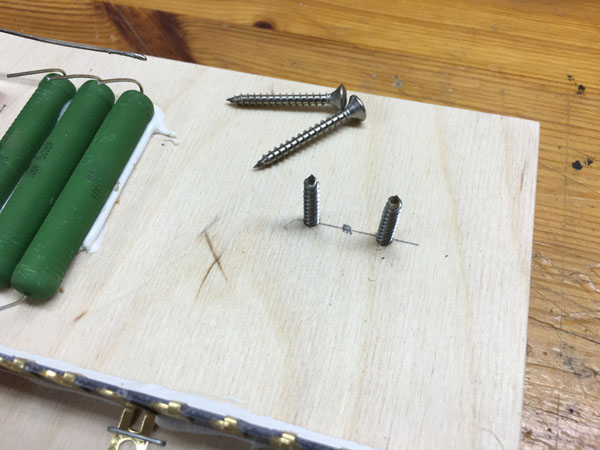
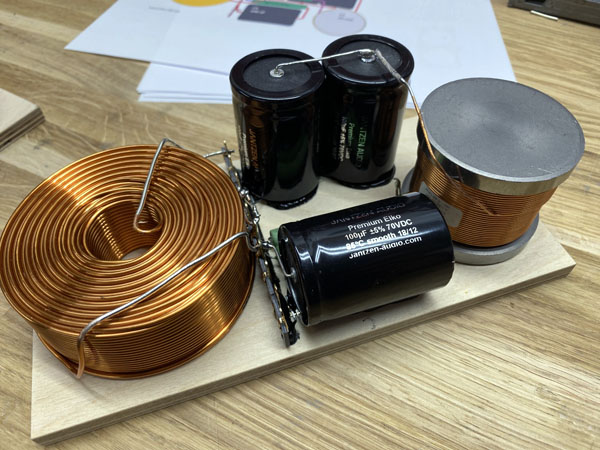
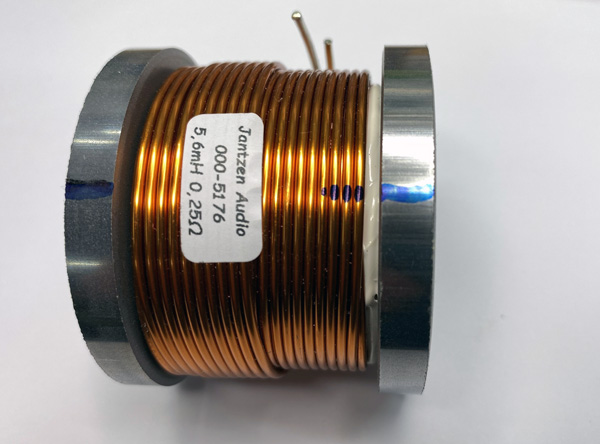
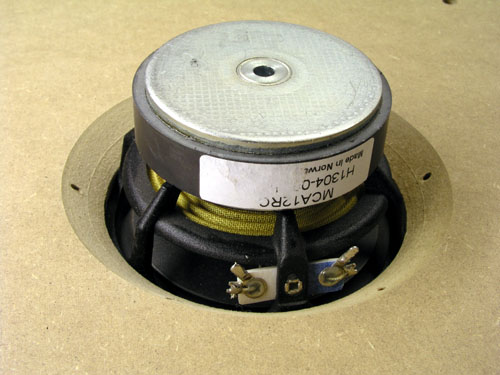
The bass coil is a chunky beast of more than
two kilos and needs special attention to make sure it stays in place. I
used two stainless steel screws that won't impact inductance. Use brass
or stainless steel. Drill holes into the center wooden plug with 15 mm
distance.
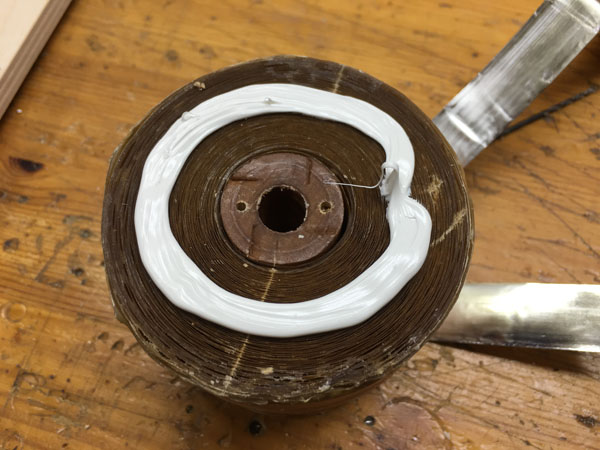
Add a ring of glue to make sure the coils do
not vibrate on the crossover board.
For smaller foil coils, a dowel and Superfix will be enough.
For heavy foil coils, like more than 3-400 grams, the above +screws.
Should you ever plan for shipping your speakers, make sure they can take
a lot of Gs.
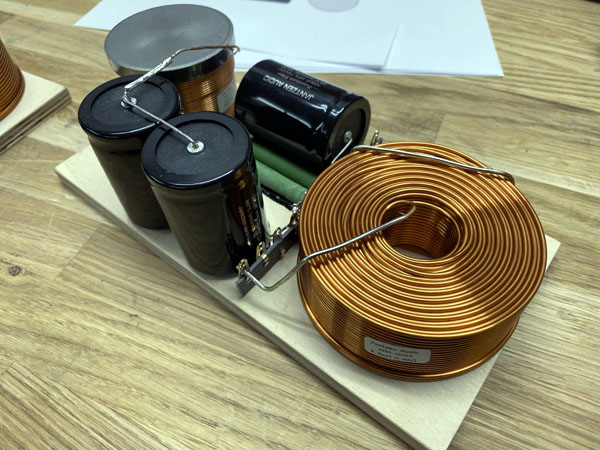
HEAVY CORED COILS
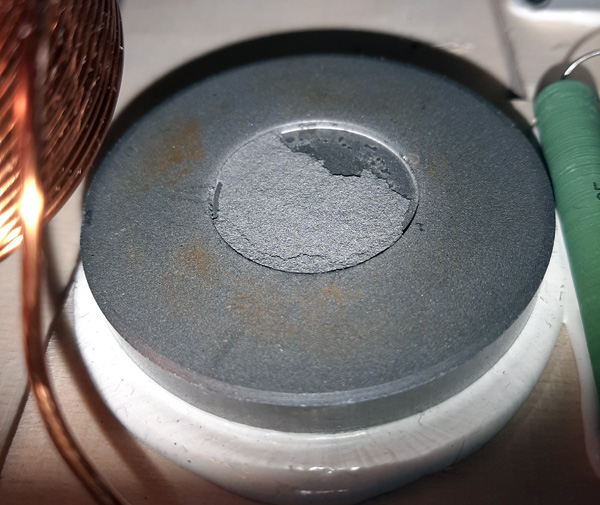
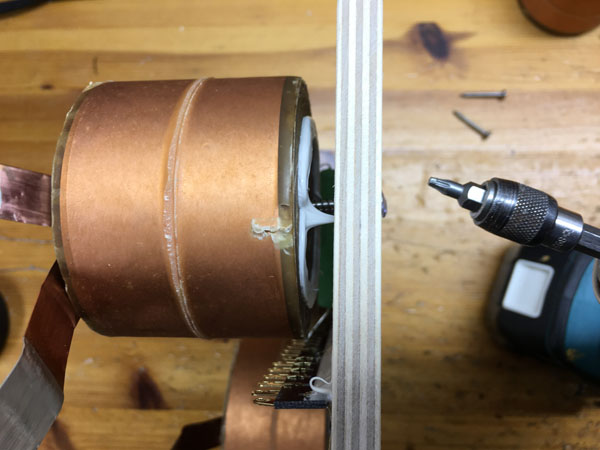
Had a mail from an unfortunate builder (pics above). One of these heavy
cored coils slipped the disc. This is not an unusual problem and I have
had the problem myself.
Cure: (pics below)
Rotate the coil until it fits the disc and mark the position of the coil
relative to the disc with a marker. Add a ring of superfix on the coil
or disc and press gently the coil into place. Leave for 3-5 hours to
settle.
This will leave the coil in perfect condition - and maintain its correct
inductance.
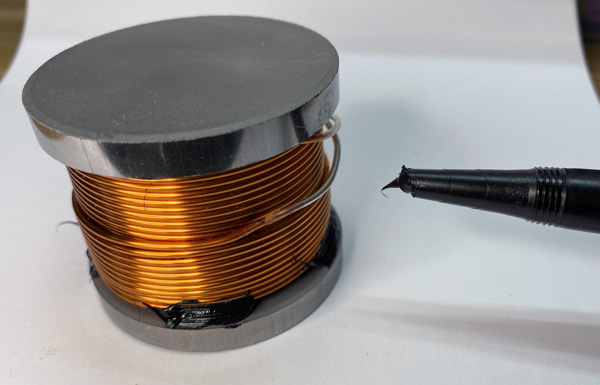
For the other heavy cored coils, add Superfix like seen below on image
to the right. I add Superfix all around the disc. A pointy tip of your
Superfix vessel helps getting as much Superfix in between as possible.
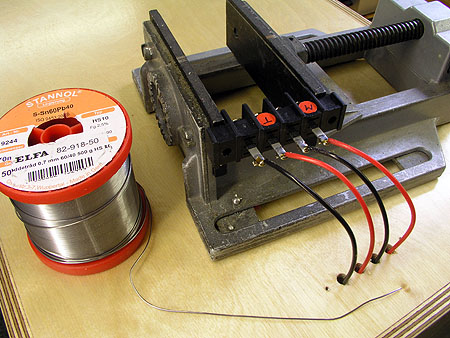
SOLDERING
BACK TO TOP
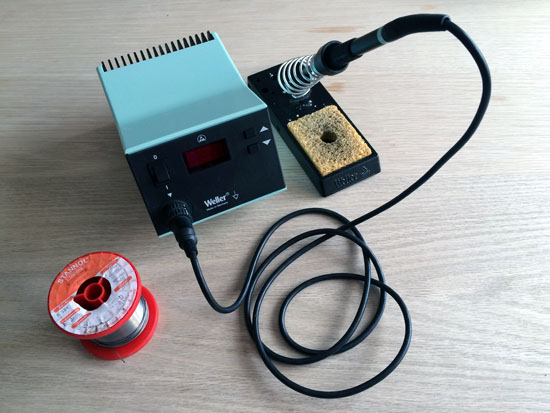
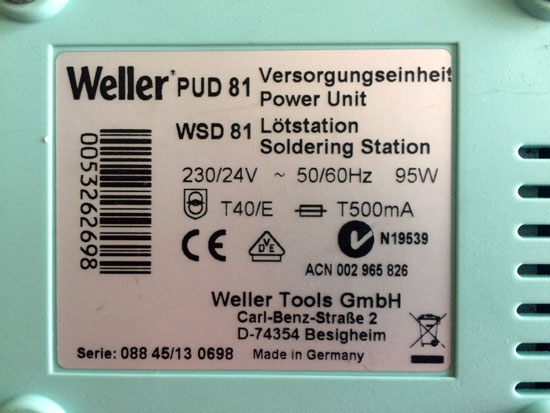
I have the question on soldering from time
to time and here's what I use. The Weller WSD81/WSP80 is expensive and
much less than this can be used for making perfect soldering. The
soldering iron, WSP80, is 24V/80 watt and I mostly use a B tip for
crossovers at 400-450 deg. C.
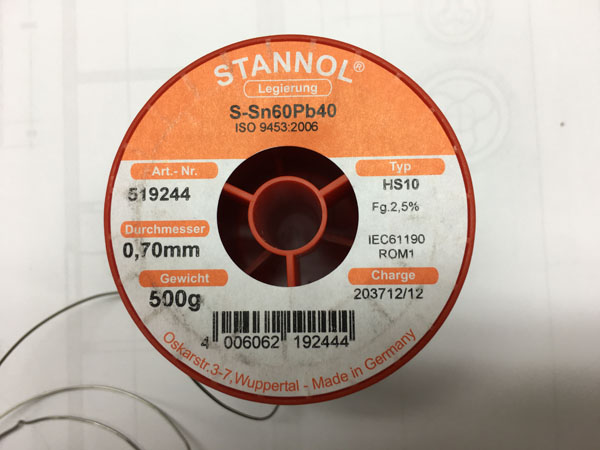
The solder I use is 0.7 mm 60/40 (Sn/Pb). This is not RoHS compliant,
but works much better than 99.7/0.3 (Sn/Cu), which is a terrible. I
never use silver solder.
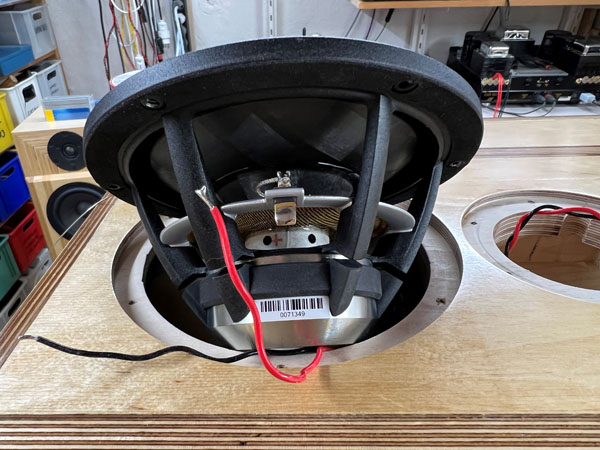
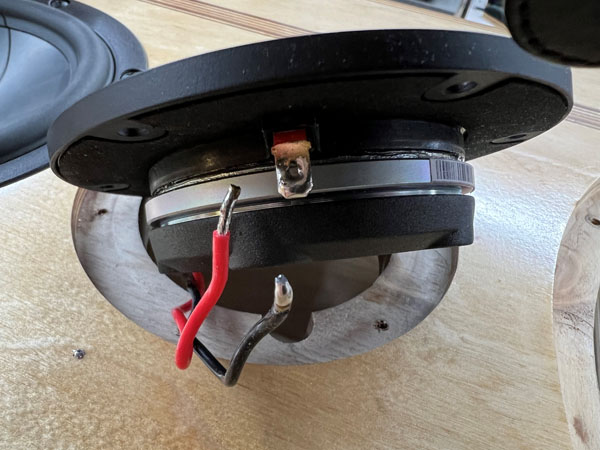
Take care when soldering tweeter terminals. They are usually fragile.
Add solder to the wire and next to the terminal, but only for a second
or so. Hold the wire to the terminal and heat as little and short as
possible to make the two merge.
Solder wires to speaker
terminals
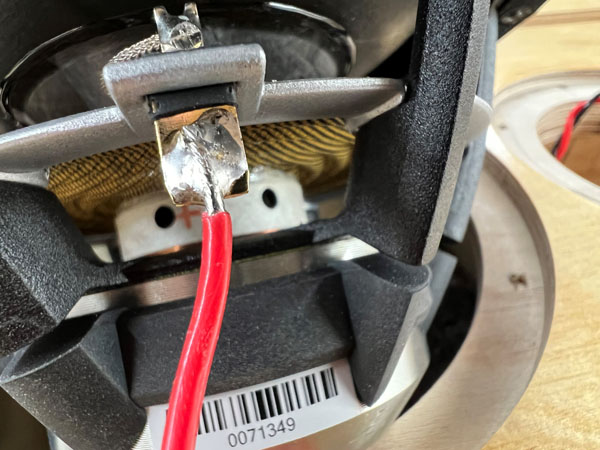
Speaker terminals can be fragile, in particular
tweeter terminals and too much heat may melt the plastic support.
Always apply some solder to wire and terminal before connecting.
This way you add a minimum amount of heat to the speaker terminal when
combining.
This goes in particular for tweeter terminals. They are fragile and you
should heat the wire/terminal for no more than a second.
When it comes to the solder lugs of binding posts, add generous heat -
the PTFE cables can take a lot.
Wood Glue for Cabinets
BACK TO TOP
 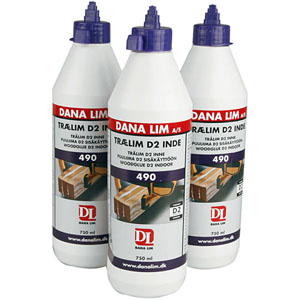
I use nothing but standard PVA glue
for cabinets. No nails or screws. I guess this is more or less the same all over the world.
"Wood
Glue" is usually PVA based adhesive.
You can use screws, but take care with particularly MDF. Pre-drilling
is necessary not to split the MDF.
US:
Titebond PVA Glue - Titebond II,
http://www.titebond.com/product/glues/e8d40b45-0ab3-49f7-8a9c-b53970f736af
Available on Amazon and Zoro.com for a
good price. The Titebond III has a higher strength and longer setup time
which is an advantage and the price is almost the same as Titebond II.
Also, it is waterproof.

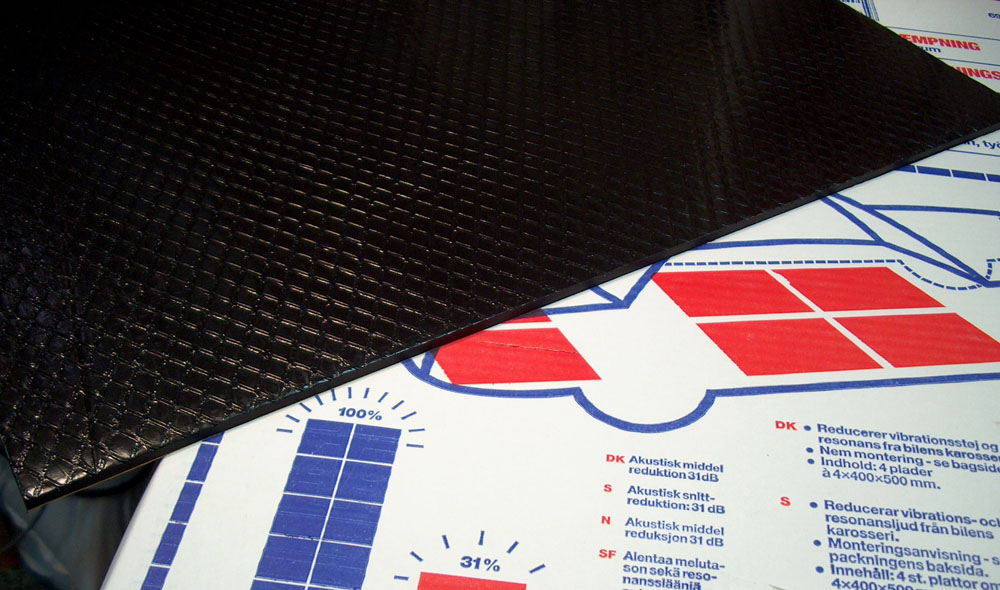
Bitumen pads
Should you use bitumen pads?
Bitumen pads are usually optional when you buy a kit and it
really depends on what materials you use. My general recommendations is
this:
a: If you use 15-16 mm MDF/HDF or plywood: YES, add 4 mm bitumen pads to
your purchase.
b: If you use 19 mm MDF/HDF: Yes, I would use 4 mm bitumen pads.
c: If you use 20-21 mm Baltic birch or 22 mm MDF... Well, may not be all
that necessary, but if you want to do a little bit extra now that you
are spending many hours building cabinets, then maybe.
d: 22 mm MDF + 4 mm bitumen pads will reduce volume a little and you may
have to compensate for loss of volume and add to the depth of the
cabinet.
The bitumen pads I use you can find here on page 7:
http://www.jantzen-audio.com/wp-content/uploads/Damping-Materials-Catalogue.pdf
I should have a density of 3.6-4.0 grams/cm^3.
There is usually a lot of confusion about "sound dampening" sheets of
various materials. Bitumen pads, made this way, does not absorb sound as
such, it will reduce panel vibration due to weight and elasticity.
Disregard the self-adhesive properties, it takes glue to stay in place
for years. See below.
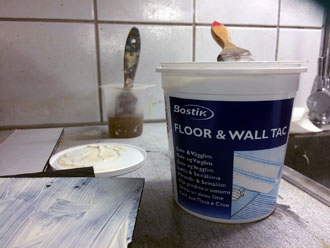
Glue for Bitumen Pads
BACK TO TOP

click images to view large
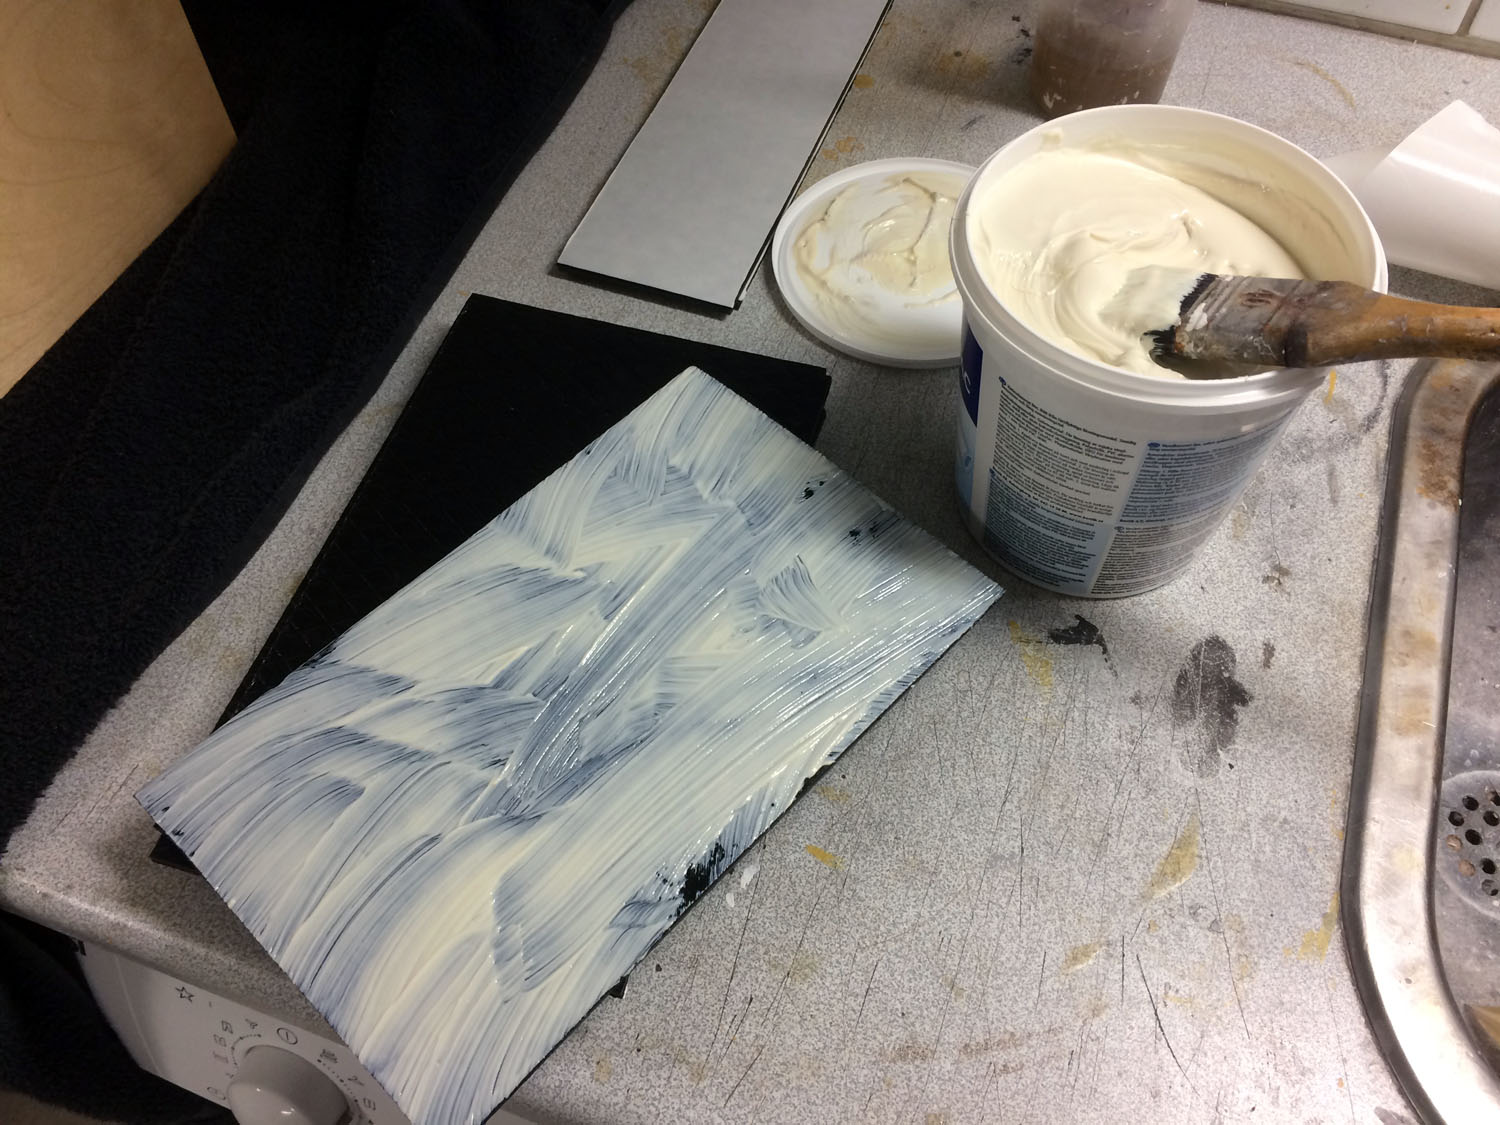
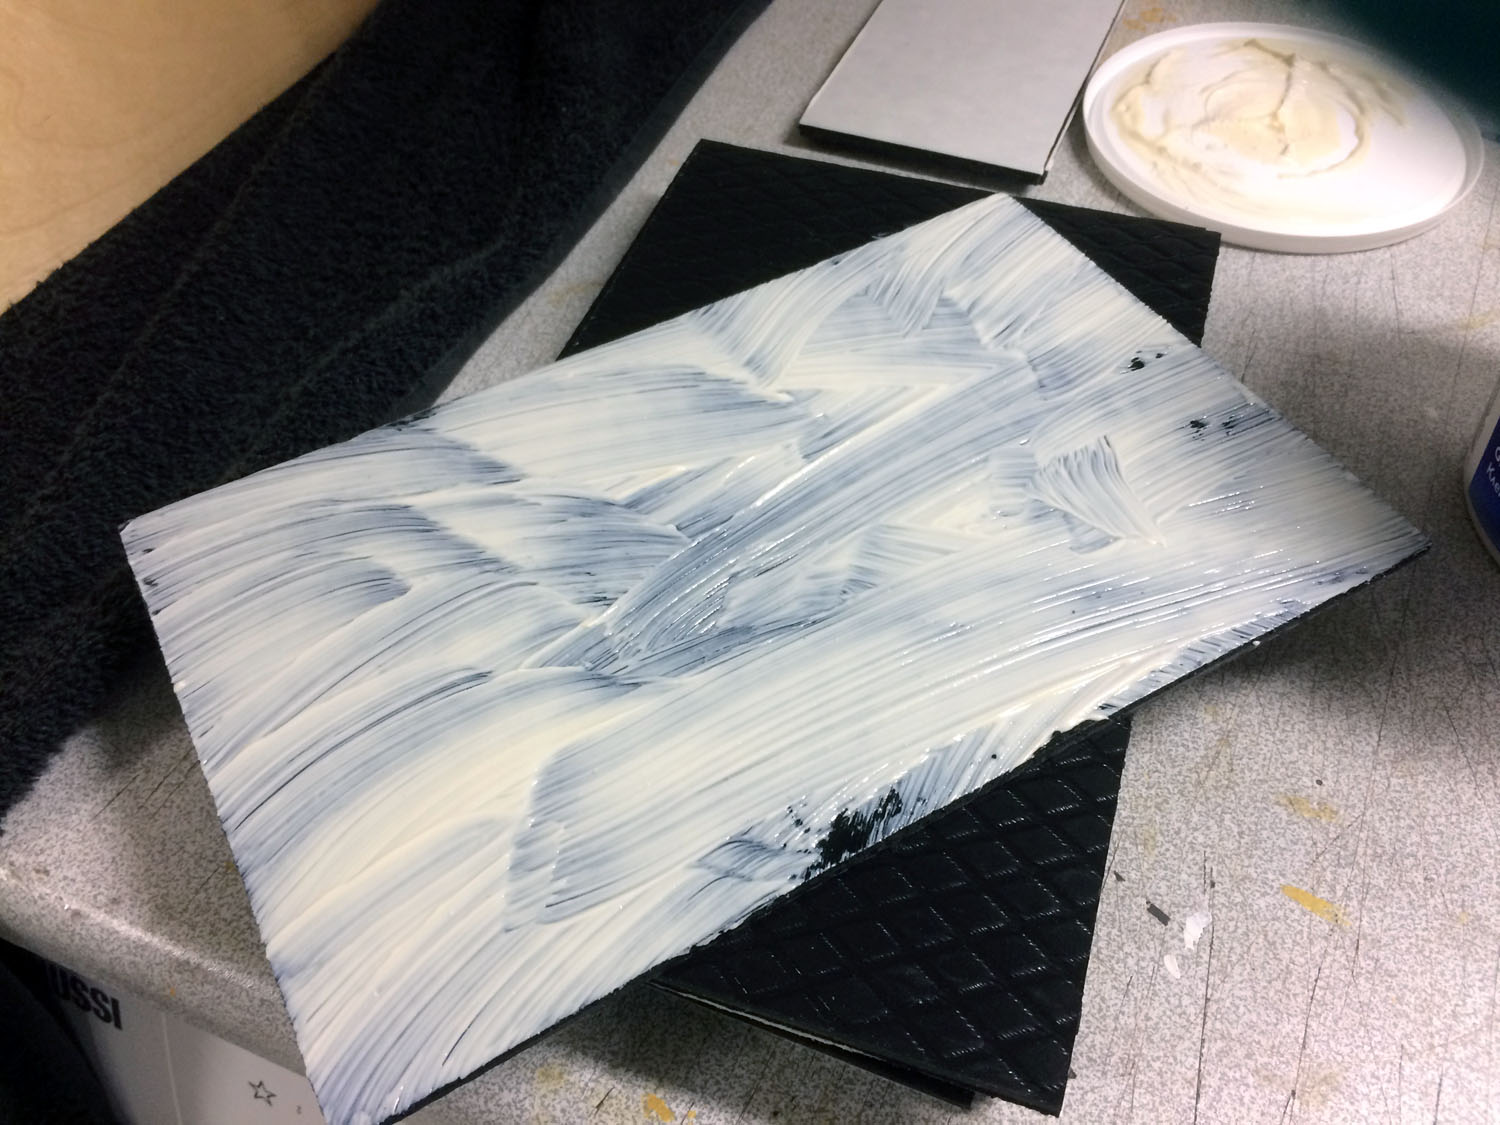
Although bitumen pads may be self-adhesive, they
need to be glued to the panels. Years ago I relied on the sticky sheets,
only to find they would start peeling off a year or two later.
Thus, I
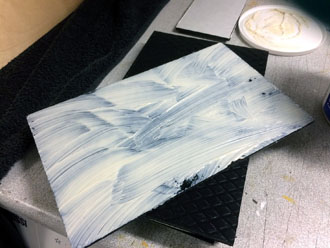
recommend using the kind of glue we use for e.g. floor vinyl
tiles/sheets. This is some sticky, gooey stuff and use disposable gloves
when using it. Add a thick layer to the sticky side of the bitumen pad
and place on internal panels. Make sure it's got contact to the entire surface. This "floor tac"
to some degree stays elastic, which adds to the damping properties of
the bitumen pad.
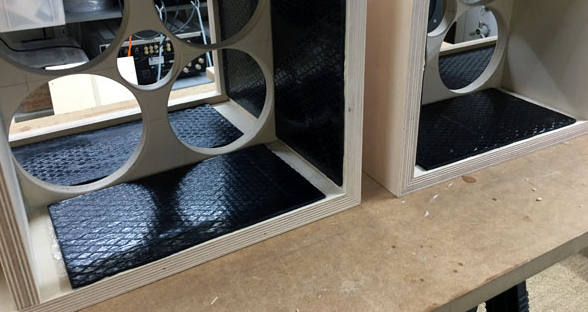
Bitumen pads do not necessarily have to cover the entire surface. Some
10-20 mm from nearby boundaries are OK.
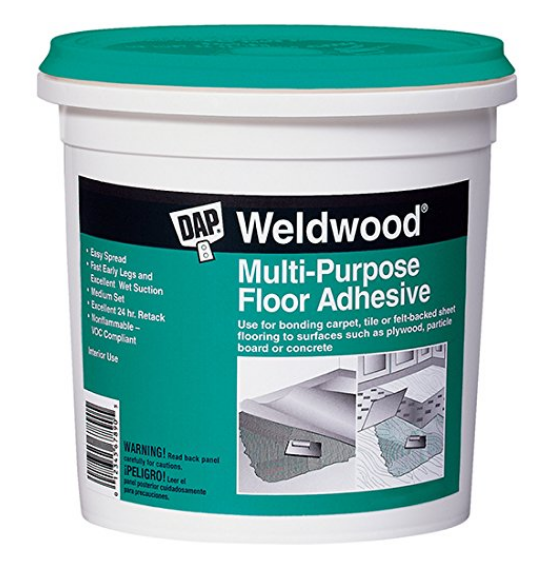
US:
This is the best choice from the company DAP Weldwood,
https://www.amazon.com/00141-Multi-Purpose-Floor-Adhesive-1-Quart/dp/B0006MXRXO
Available on Amazon and Zoro.com for a
good price.
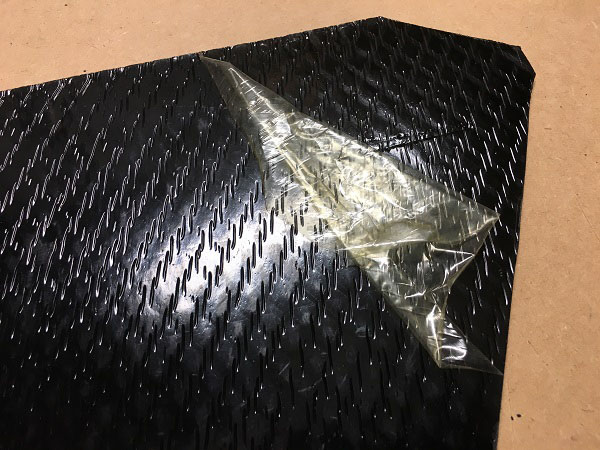
Bitumen pads sometimes come with a very thin foil. Peel it off if
possible if you have
to attach felt sheets afterwards.
I use the same glue for attaching the felt, but it doesn't need as much
glue as the bitumen pad.
Gluing felt
and acoustilux
BACK TO TOP
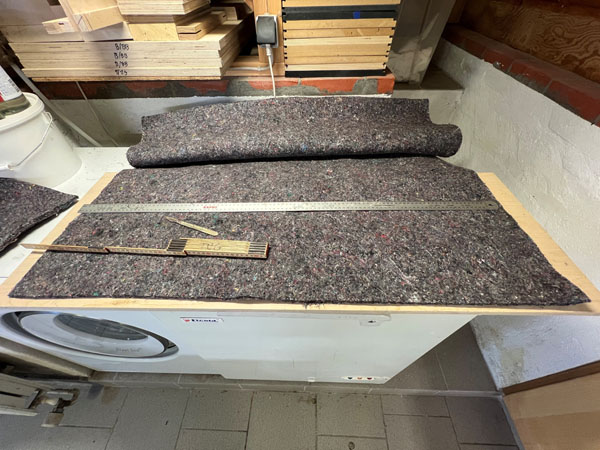

Here's my setup for cutting felt. Ruler and a scalpel.
It takes a few blades as the felt makes the scalpel dull fairly quickly.
Floor tack is excellent for gluing felt.
Acoustilux is fastened by dots of vinyl glue - or staples, which I use
mostly.
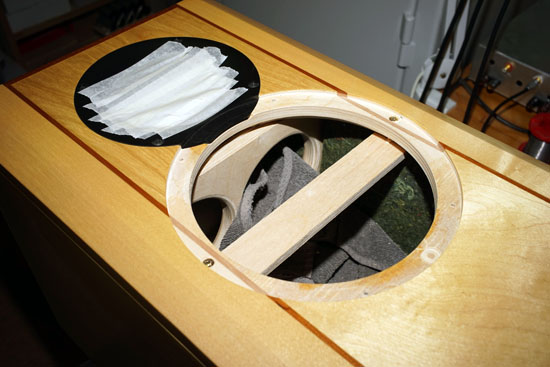
If there is acoustilux on top of the crossover this is just kept in place
by nearby boundaries - or staples.
Acoustilux here placed above the crossover and held in place by side
walls/braces/staples.
Setting up speakers
BACK TO TOP
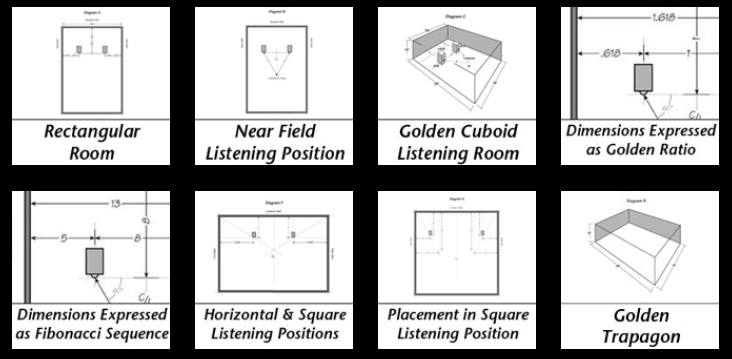
It goes without saying that setting up speakers correctly is pivotal
for getting the best from your kit. There are loads of sites
on the web to help you out, and here's one:
https://www.cardas.com/system-setup
Remember the room is half the system! It doesn't help buying the most
expensive gear if your room is less than reasonably well acoustically. A
pair of speakers can sound wonderful in one place and dreadful in
another.
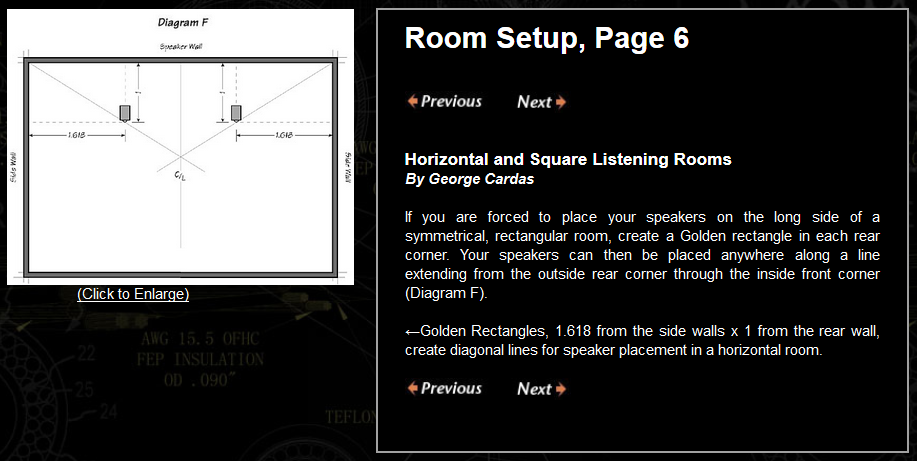
This one fits my room the best. The numbers mean of if you have the
speakers 1 meter from the front wall (the wall behind the speakers) you
have an optimal distance of 1.62 meters to the end walls of the room. If
you have the speakers 0.8 meter from the front wall, then 0.8 x 1.62 =
1.3 meters to the end wall.
If you have the speakers on the end wall, the distances are the same,
only visa versa, 1 meter to side walls and 1.6 meters to front wall. I'm
sure not everyone can fulfill these guidelines.
Now, the above only goes for two dimensions, but the height of the
speaker is another key player.
MY LISTENING
ROOM
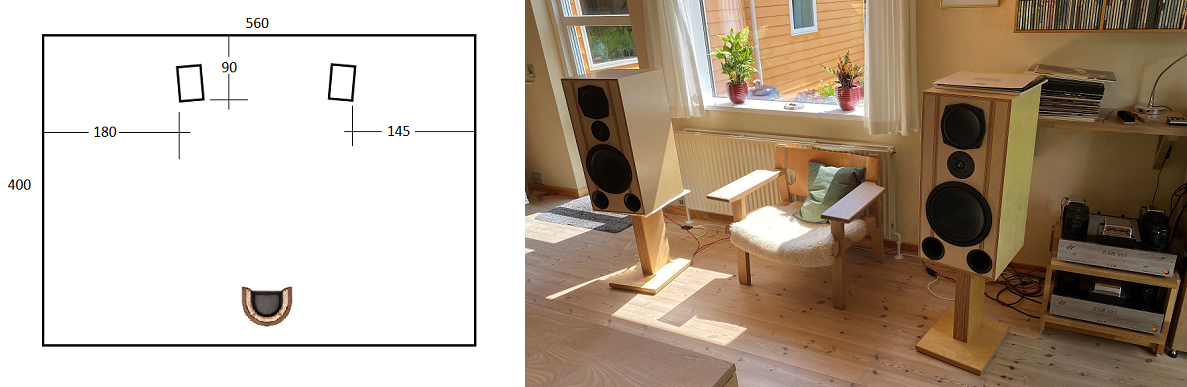
Regardless of speakers, I always have them
approx. in the positions shown on the drawing above. Mostly toed in some
5-10 deg. depending on speakers dispersion.
MDF AND BALTIC
BIRCH
BACK TO TOP
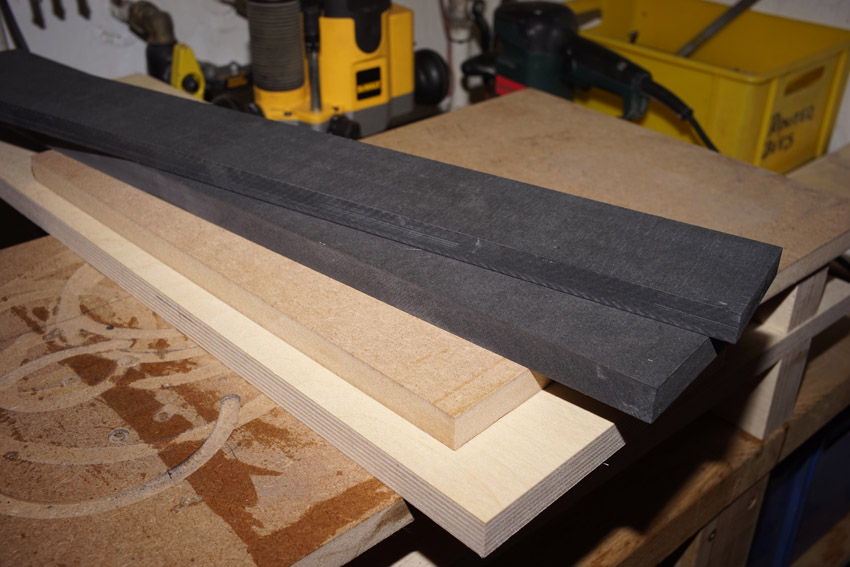
Above my three
preferred materials for cabinet construction, MDF standard, MDF black
(= HDF, high density fiber board) and Baltic birch. I rarely use anything but 15-16 and 19-20.5 mm
thickness.
To the best of my knowledge the black MDF is the same as the product
sold as Valchromat, having a density around 800 kg/m^3. Valchromat is
produced in Portugal by
Investwood.
Read about it here:
https://woodandwire.co.uk/what-is-valchromat/
Ordinary plywood, "construction plywood", is NOT suitable. Too
low density and much
too resonant.
Hardwood, like oak, birch, teak, etc.,
can certainly be used given its (usually) high density. All in all,
proper bracing to reduce panel resonance is the key factor in all
cabinet constructions.
MDF is excellent due to homogeneity and in particular the black MDF,
which I often use for front panels. Black MDF is really HDF,
high-density fiberboard, weighing some 0.84 g/cm^3 compared to 0.64
g/cm^3 for the common brown MDF, although it depends on MDF thickness.
Thick MDF sheets often have a rather soft center as producers may cut
production cost by reducing glue content. This black MDF has an almost
ceramic feel to it and comes at approx. twice the cost of standard MDF.
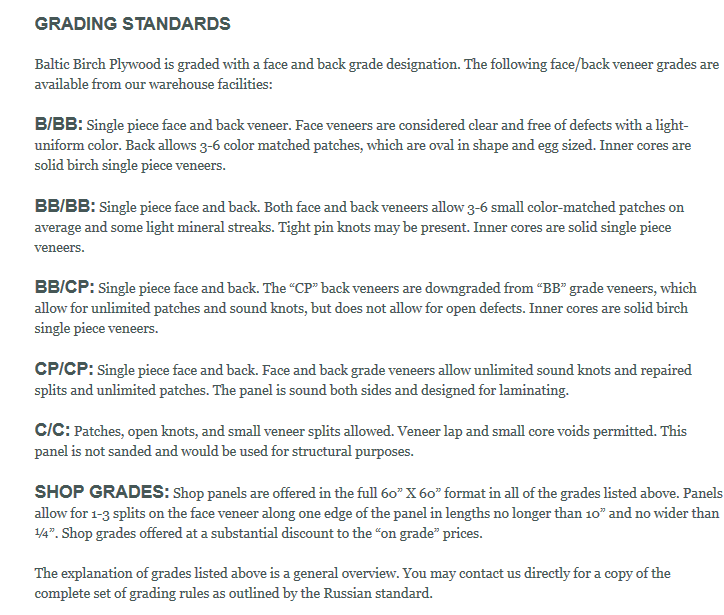
For most cabinets I use Baltic birch as it gives me the final finish at
once without going through the trouble of veneering. See lacquer
treatment below.
The Baltic birch I use is usually 20.5 mm but it can vary a
little. Sometimes I use 15 mm for bracing. Baltic birch may consist of
15 layers for a 20 mm sheet and the density is some 700 kg/m^3. It comes
i various qualities, e.g. B/BB, which is what I use:
The Arch
USE OF CNC
I sometimes have the request for
cabinet dimensions suitable for making the cabinet cuts and routings for
CNC application, in short CAD files.
Sorry, not possible. All my constructions are meant for
DIY by hand. The reasons are several:
1: Builders have to source their cabinet materials locally and may use
various panel thicknesses. In addition to this, all things have
tolerances - not least wood based materials, that may not only have
batch to batch variations, but also vary in thickness due to storage
temperature and humidity. When having your panels at hand, measure
thickness and adjust cabinet dimensions accordingly.
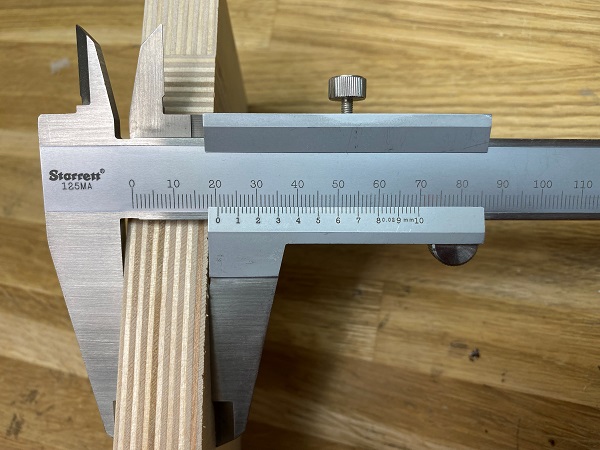
As can be seen, my current "20 mm" BB panels are 20.6 mm.
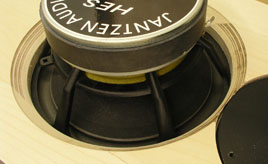
2: Driver dimensions come with tolerances, believe it or not, but an 8"
driver may vary sometimes up to 0.5 mm i diameter. Routing for exactly
225 mm may leave you with a rebate unable to receive the driver. Too
large rebates just doesn't look good.
WAIT until you have the
driver at hand and make your own measurements.
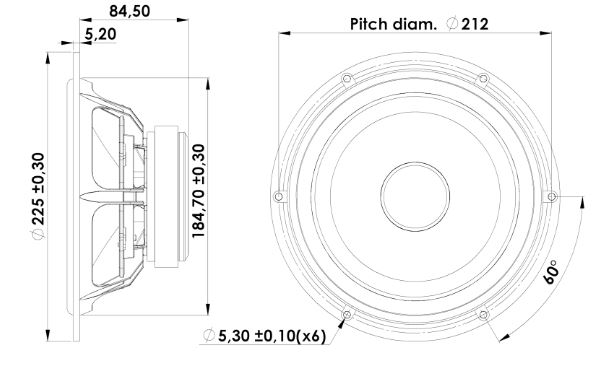
As can be seen from data sheet, diameter may vary +/- 0.3 mm.
So, never start routing for drivers until you
have them at hand and can measure diameter with your ruler or caliper.
Should you prefer to make your cabinets by CNC, please make your own
calculations - and as always, stay true to front panel dimensions and
drivers' placement.
Routing
for drivers
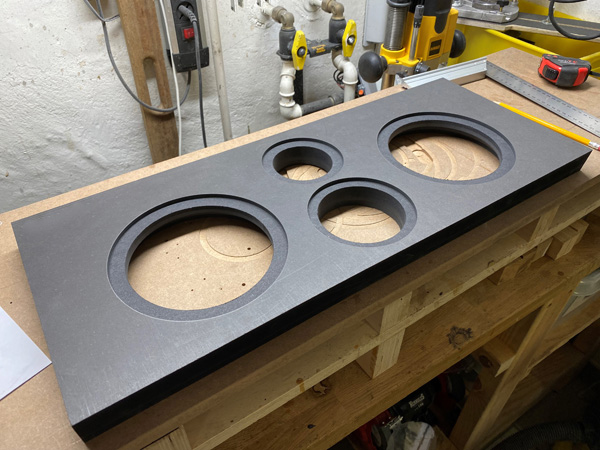
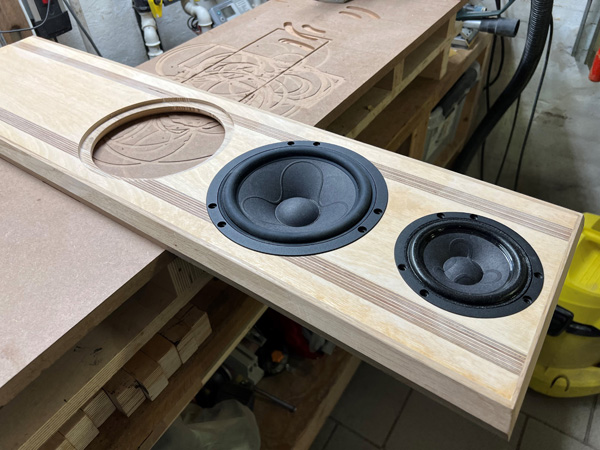
The message here is clear and simple:
NEVER route for drivers before you have then at hand!
All industrial items have tolerances and the
overall diameter on a 6" driver may easily vary +/- 0.3 mm and making a
driver rebate too small is a pain as you have have already removed the
center hole. See below.
Use a caliper and measure the diameter and make test routings in MDF of
similar to get it right first time you lower the router to your
expensive Baltic birch panels.
If you have to paint your front panels, some paint may reduce the inside
diameter of the rebate and you have to either remove this or add to the
overall diameter. For tweeters in particular, a tight fit as well as
correct depth can be crucial in getting the best frequency response.
Read here:
http://www.troelsgravesen.dk/measurements.htm#Flush_mounting_of_tweeter(s)
MAKING A
DRIVER HOLE BIGGER
BACK TO TOP

Driver basket comes with tolerances and I always
advise not to route for drivers before you have them at hand and can
measure the diameter exactly. My new baby, the
JA8008-HMQ,
came in a basket 0.3 mm wider than the old one. This is within
tolerances, but my QUATTRO cabs had a very tight match to the driver and
I could not squeeze the new driver into the rebate and had to increase
radius by 0.2 mm.
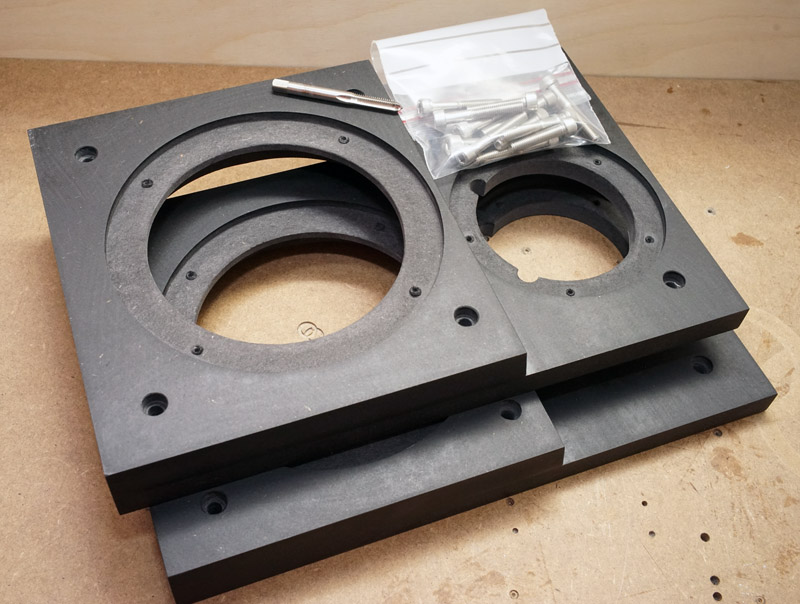
I have a whole box of inserts like seen above and I use them whenever a
new driver just doesn't fit in. In most cases I have to countersink the
screws not having the router bit destroyed by the screw heads.
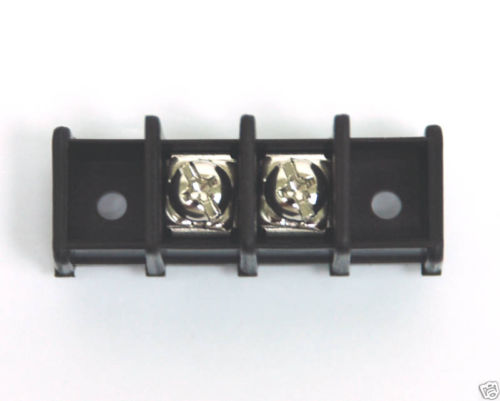
TERMINAL BLOCKS/CONNECTORS
BACK TO TOP
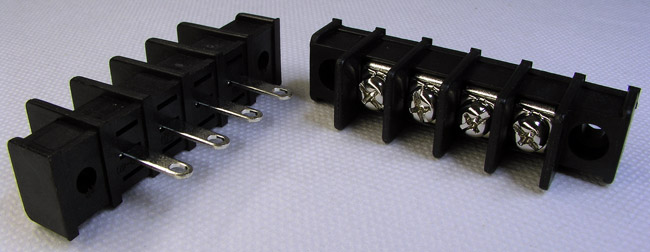
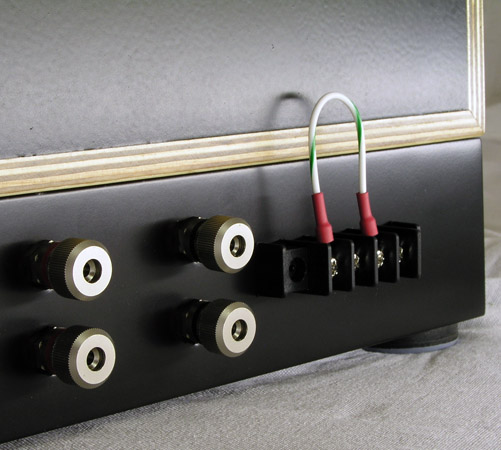
To make good connection between cabinets(e.g
Jenzen speakers) we need connectors that can be tightened hard and
represent little metal mass at the same time. I'll claim these
connectors are better and cheaper than anything else you can find and
much better than any banana plug in some dubious socket.
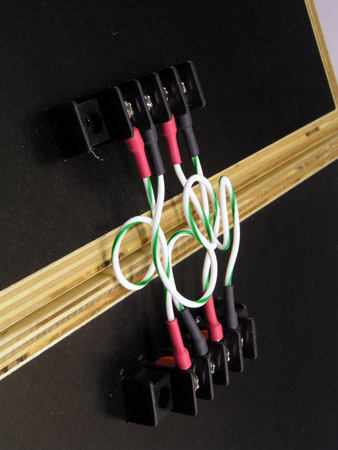
They can be used for connecting speaker cabinets and if we want e.g. tweeter
attenuation easily assessable.
I have only found one supplier of these terminal blocks and he's in
Taiwan, but easily assessable via eBay:
http://www.ebay.co.uk/itm/5pc-PCB-Terminal-Block-GGB-40-08-A04P-4P-20A-300V-pitch-10mm-Wire-Soldering-/141207380595?pt=LH_DefaultDomain_0&hash=item20e09da273
The placement on eBay may change from time to time, if so, start
here:
http://stores.ebay.co.uk/wondercobuy79?_trksid=p2047675.l2563 - and
use search function for "terminal block" and scroll down.
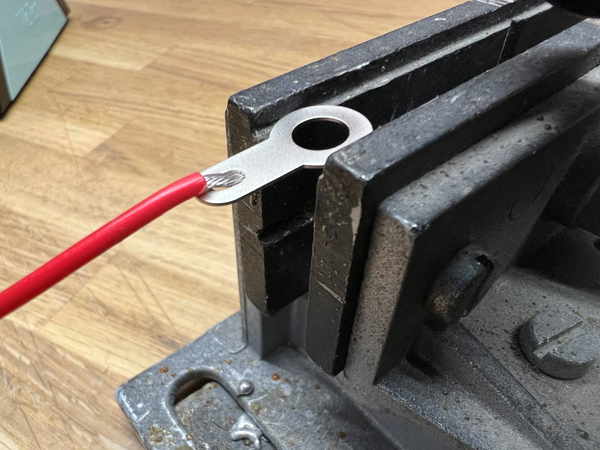
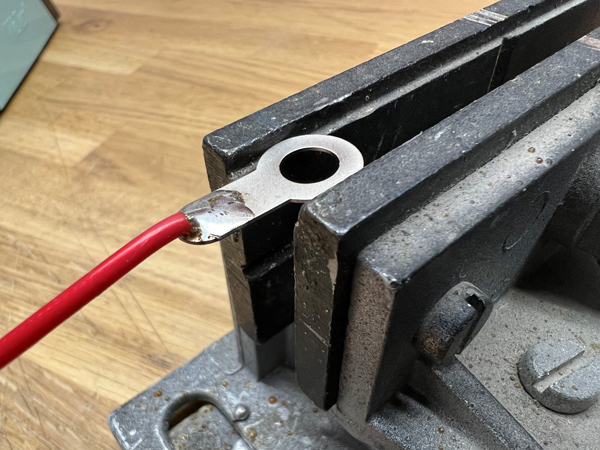
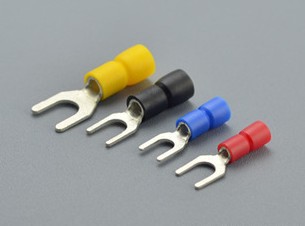
You need 7 mm forks to go with these. DO NOT crimp wires! Remove insulation and solder.
BTW: These connectors are used by Vandersteen due to low metal mass -
and cost obviously.
Turns out Parts Express have them too:
http://www.parts-express.com/nte-25-b100-04-4-pole-solder-lug-type-barrier-terminal-strip--090-856
item 090-856.
Available with two connectors too.
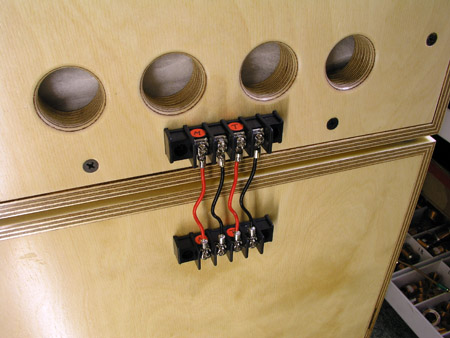
Use Teflon insulated wire and heat thoroughly!
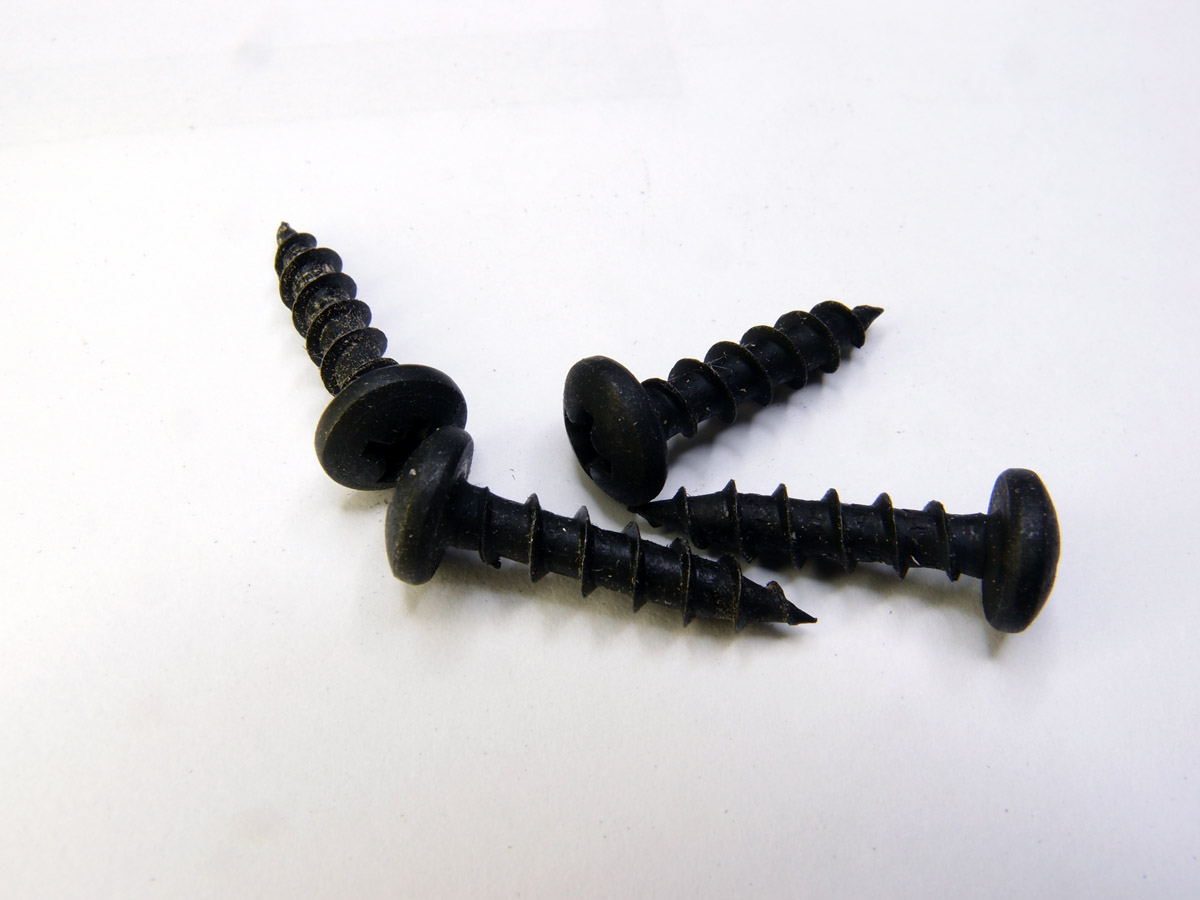
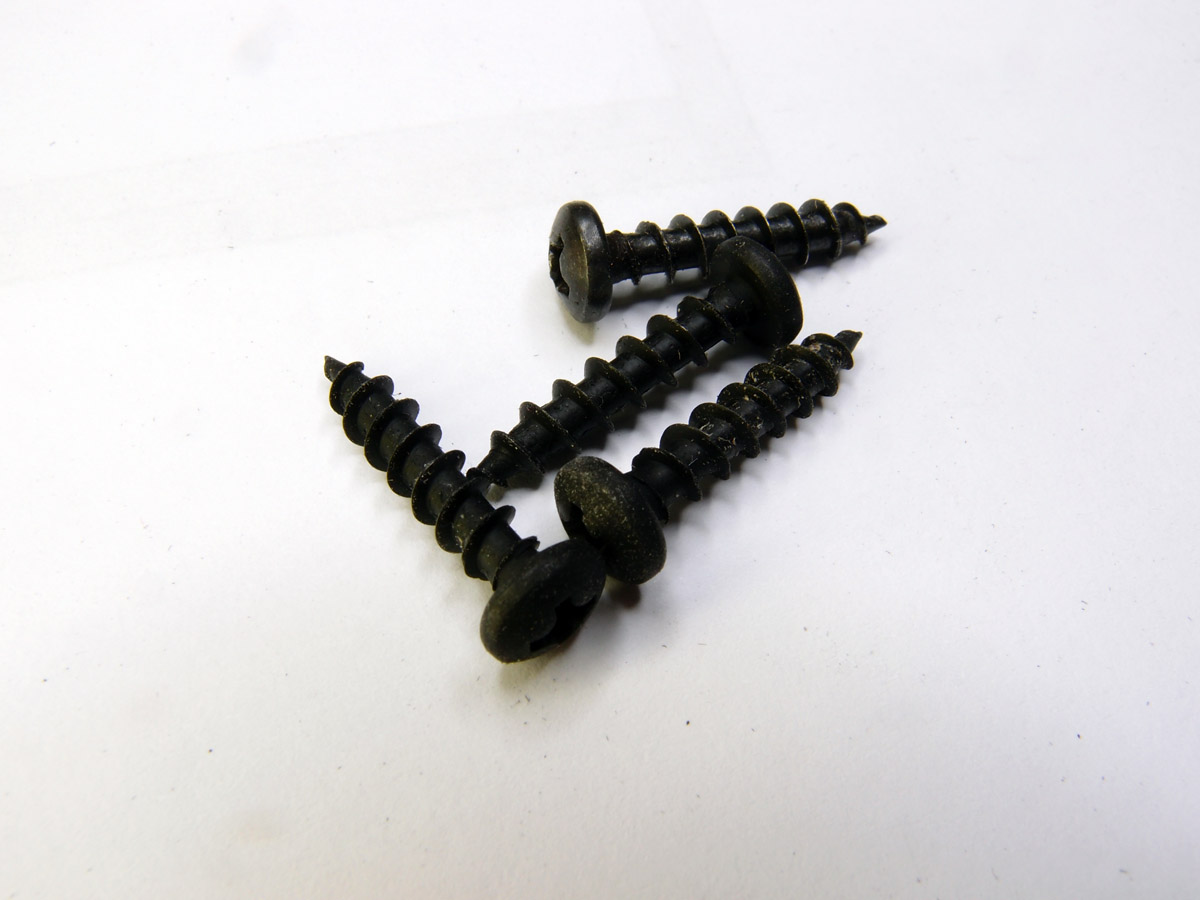
Screws for
mounting drivers
BACK TO TOP


Click images to
view large.
All screws available from
Jantzen Audio.
First of all: Threaded inserts and T-nuts: I
hate them! They do nothing good a standard wood screw cannot do.
Threaded inserts are a pain to mount correctly and most
often there is not enough space to mount them properly due to chamfering
of driver hole.
T-Nuts: Even worse! I had numerous diy-speakers in
for crossover work and the first thing that happens when you have to
un-mount a T-nut mounted driver is that one of the T-nuts gets loose and
starts rotating with too little of the screw exposed for cutting. And
mostly you cannot get to the inside of the cabinet to get hold of the
loose T-nut.
Next: 6-8 good wood screws will fasten any driver more
than needed. If I know I have to remove the driver several times I start
drilling a 2.5 mm hole (in MDF) and fill the hole with synthetic
lacquer. Leave it overnight and you'll have a plasticised hole even
stronger. For solid wood this is not needed. In all cases with the above
shown screws, drill a 2.5 mm hole before mounting the driver.
I've
searched Europe for similar screws but can't find any. These are black
"hardened" screws, acid treated or something. Don't buy painted screws
as the paint will start peeling off.
I use the #8 x 1 for bass
drivers (even up to 15 inch), #8 x 3/4 for middrivers and #6 x 3/4 for
tweeters. #8 x 1 means 8 mm diameter head and 1 inch long. You US guys
have some trouble with metrics it seems! Millimeter for diameter and
inches for length. Like the Britts using Celcius when it's really cold
and Fahrenheit when it's really hot.
Do not think a speaker driver is a something meant to go
into orbit. Fasten screws properly but don't overdo. I sold a
12" JBL driver to a guy complaining the voice coil was scraping. It
turned out he'd fastened the driver so tight with T-nuts that he had
bent the driver gasket!
At some diy forum I read a posting from a guy claiming
significantly improved sound from replacing his iron screws with brass
screws. I suggest some proper therapy too!
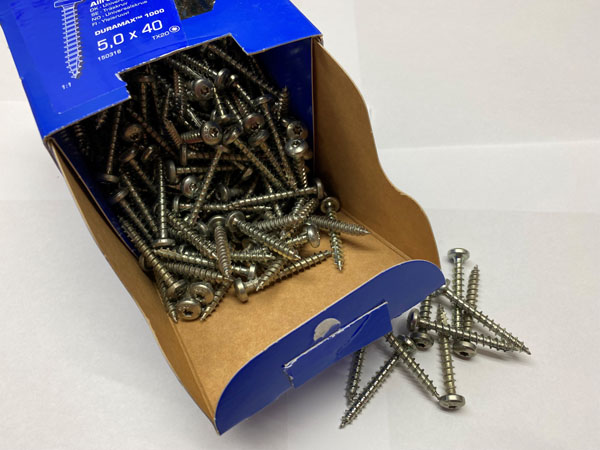
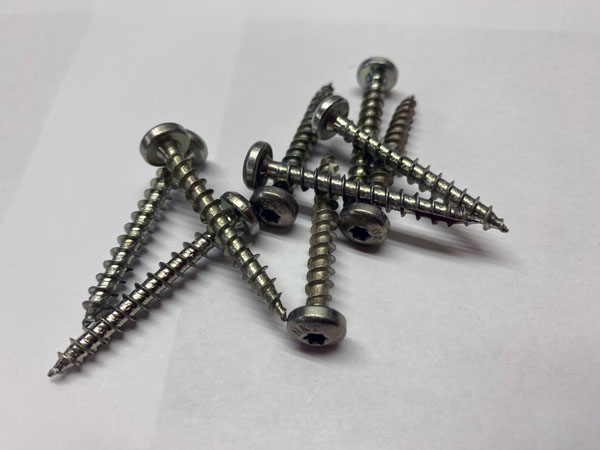
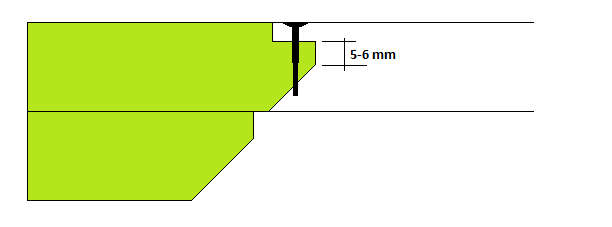
For large and heavy bass drivers like The
Loudspeaker-1-2-3, find some 5-6 x 35-40 mm screws at your local home
DIY market. Also use this for crossover covers and detachable front
panels like seen on The Loudspeaker-III.
REMOVING STUCK DRIVERS
BACK TO TOP
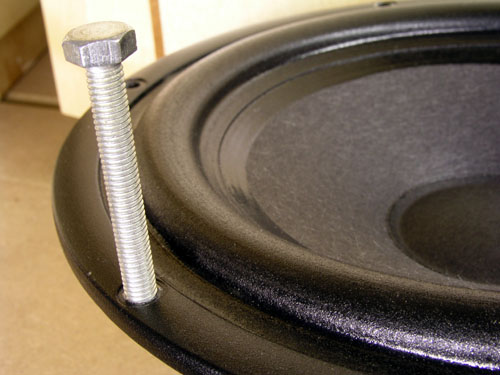
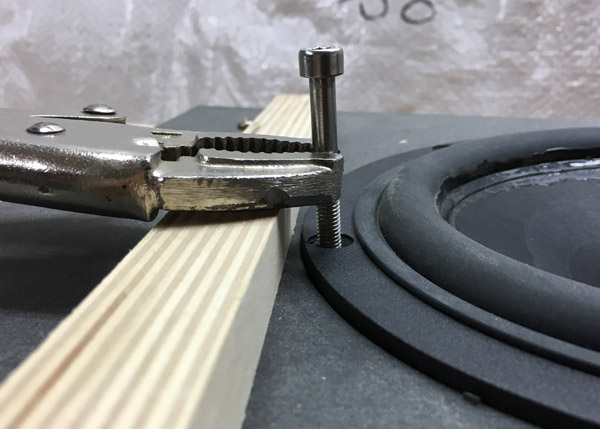
Sometimes it can be a real pain removing a driver
from its cabinet, maybe due to lacquer or tight routing and the simple
solution is making treads in one the mounting holes in the basket. For
8" drivers usually 6 mm threads work. For 4-5" drivers maybe 5 mm.
Measure hole diameter and use the the nearest size. Insert a screw and
lift the driver with a plier resting on a piece of wood. Simple as that.
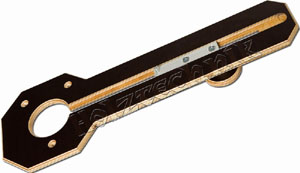
My
Router guide
BACK TO TOP

Click
images to view large
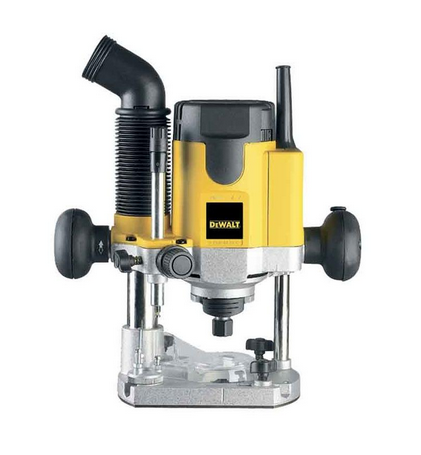
Router:
Dewalt DW621
The great thing about the Dewalt DW621 is that
is has rotating suction at the top!
The guide can be bought from Jantzen Audio and
also on
eBay (Germany):
https://www.ebay.de/usr/weyher-holztechnik
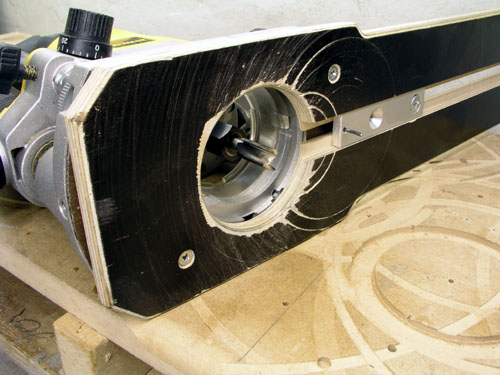
As can be seen from the
pics, the guide was modified as the pin (4 mm screw) is
too large and un-handy for precision routing. I shortened
the alu bar and inserted a 2 mm hard steel pin (concrete
nail). The large handle on top was also omitted as this
prevents routing very small holes.
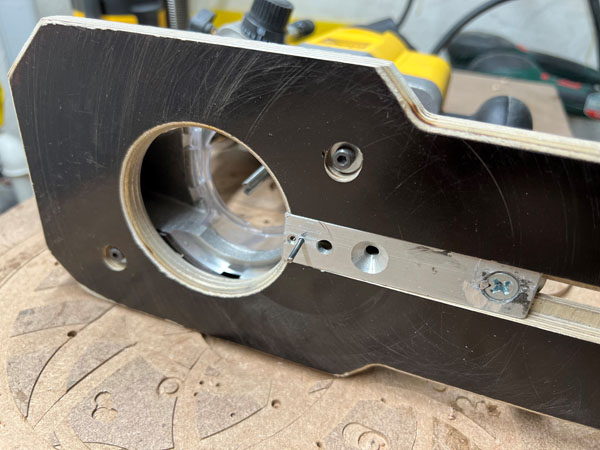
The modified router guide.
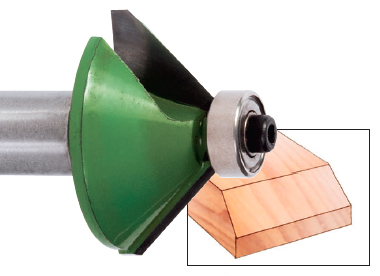
For chamfering driver holes I use this. Read
page on the
importance of chamfering driver holes.
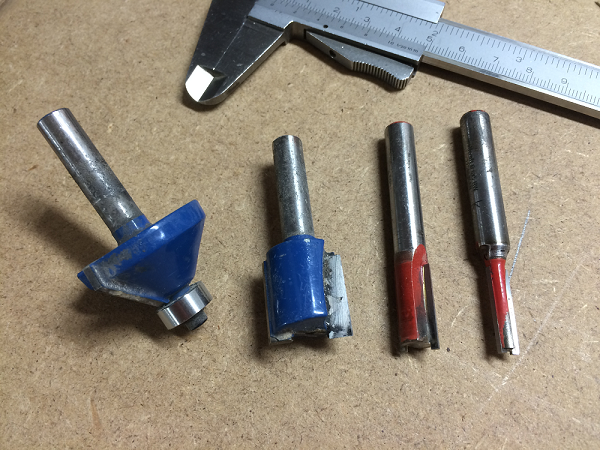
The router bits I use the most, 6, 10 and 20
mm.
And a 45 deg. angle bit to chamfer the rear of driver hole.
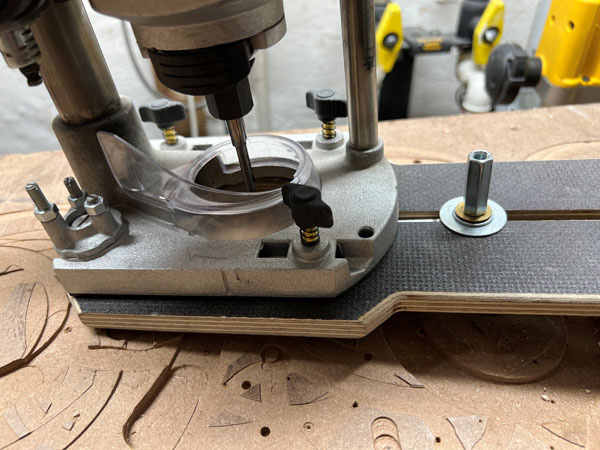
Routing for driver rebate
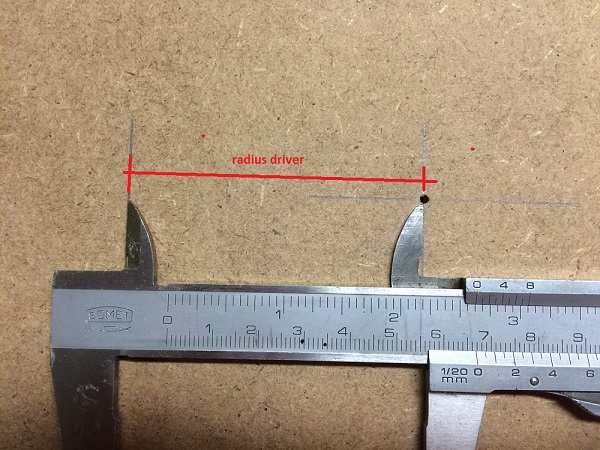
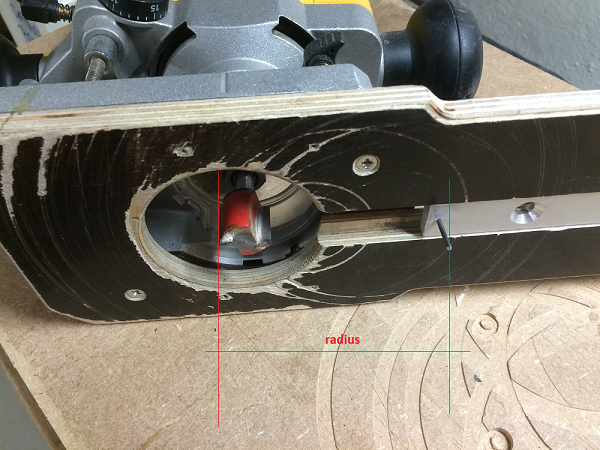
I've had this question also: How to measure
the cutting radius on the router guide.
I hope the images are self-explanatory.
I always start making the rebate a little too small, then increase
diameter by 0.1-0.2 mm at a time.
AND - I ALWAYS DO A TEST ROUTING BEFORE DOING THE FINAL BAFFLE.
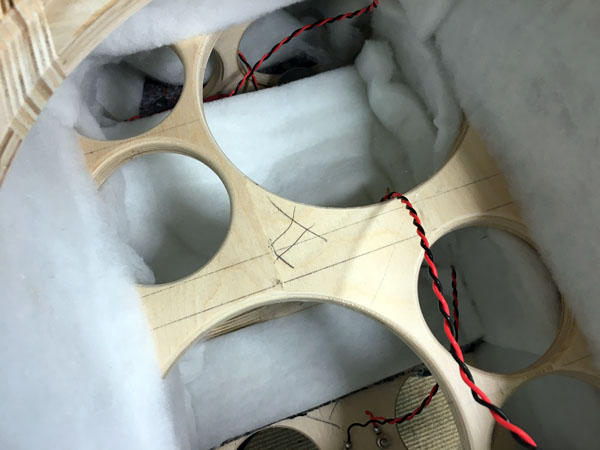
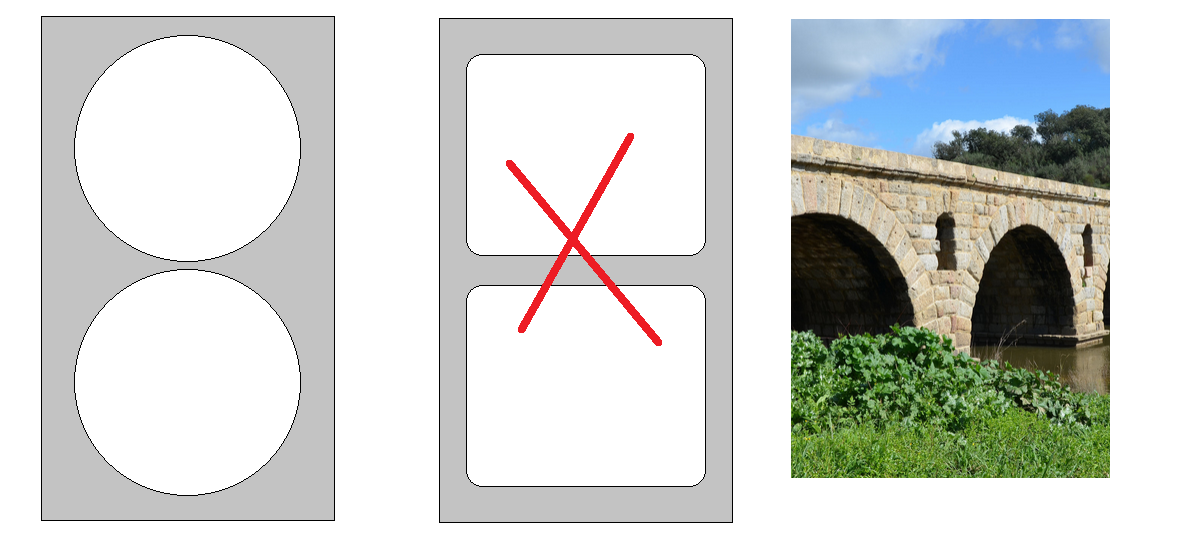
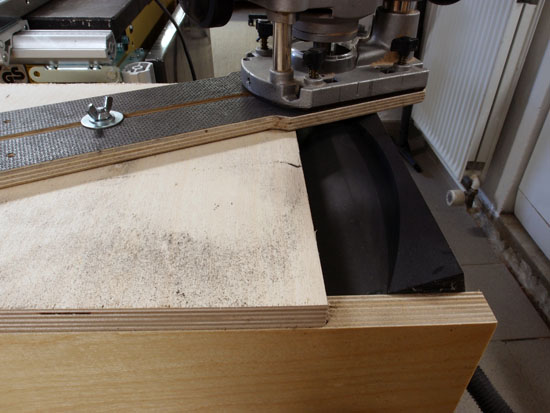
Making holes in braces
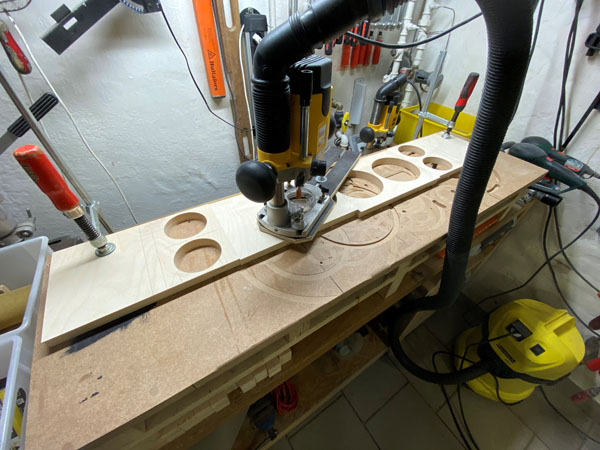
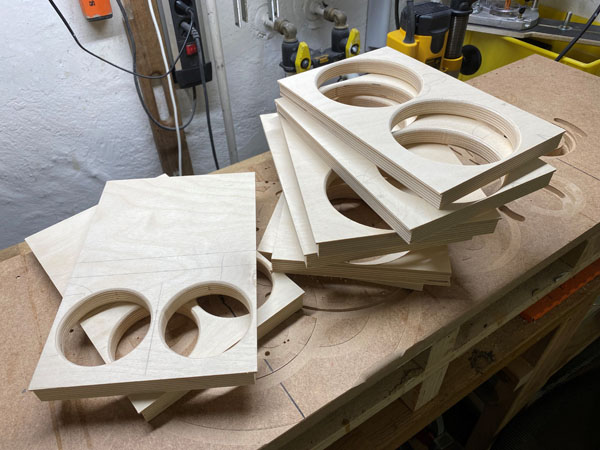
I've had the question many times how to make the holes in the braces -
and if I really do use the router to do so. Yes, I do. Making something
like seen on images above takes less than ½ hour. Using a jigsaw will
produce excessive edge ripping.
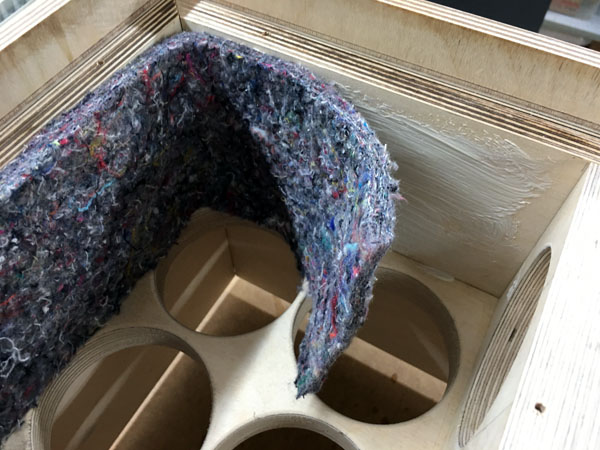
I use round holes in the braces - not "just" rectangular cut-outs.
The very simple answer is that the arch is MUCH stronger than the
latter.
You can find loads of videos in youtube explaining the function of
arches.
Around 4000 years ago the guys in Mesopotamia found out that they could
support tall structures much better with an arch compared to any
horizontal beam. This was developed to perfection by the Romans, who's
structures we enjoy here 2000 years on.
TABS
AND SLOTS FOR BRACES
BACK TO TOP

Had the question on how to make tabs and slots for the braces.
Hope images are self explanatory.
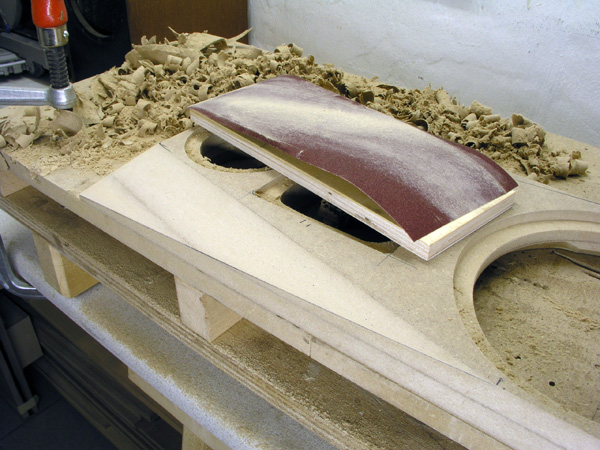
Faceting panels and fillets
BACK TO TOP
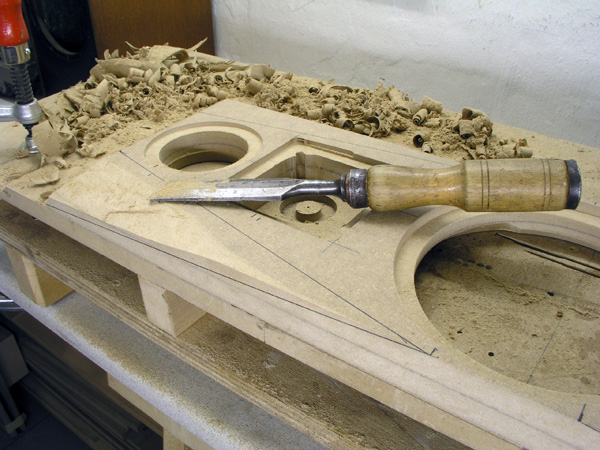
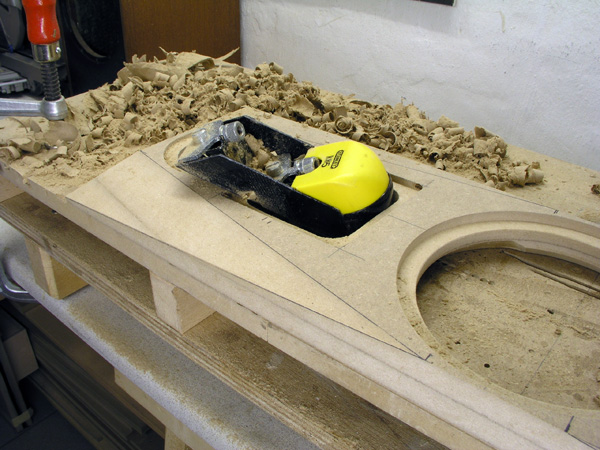
Faceting the front
panels as done for the ScanSpeak SP44 (discontinued model).
Use 1) chisel, 2) planer and 3) sandpaper. Takes a few minutes
from MDF.
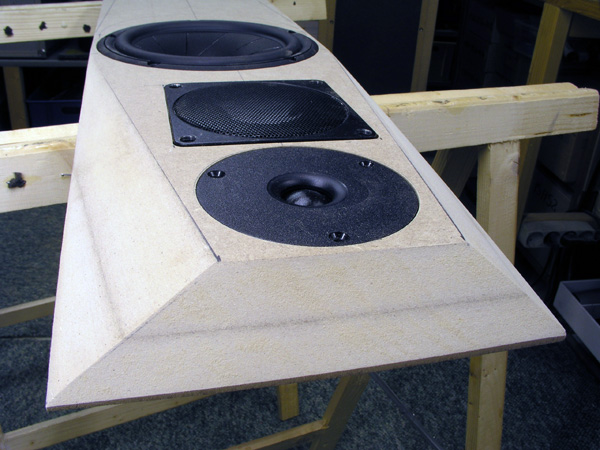
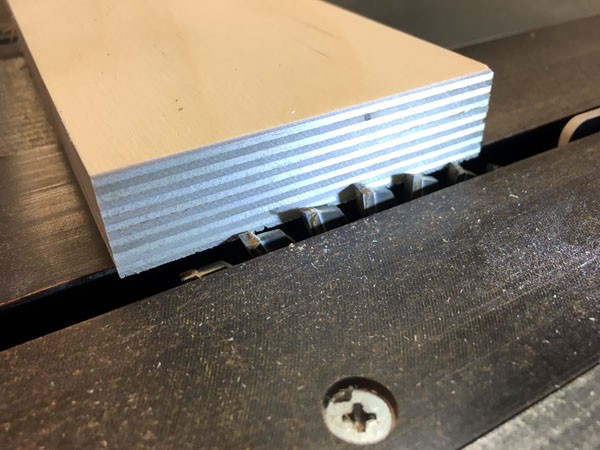
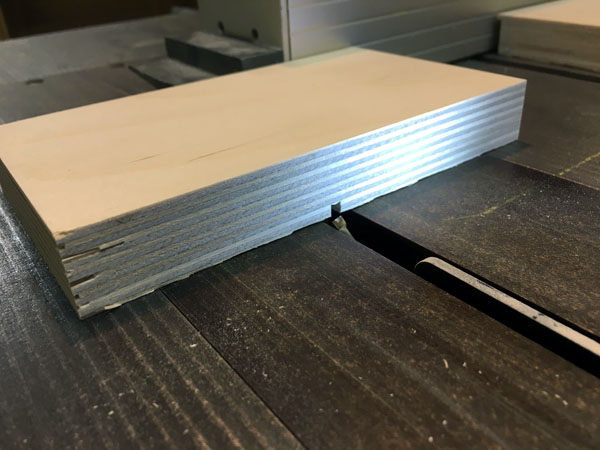
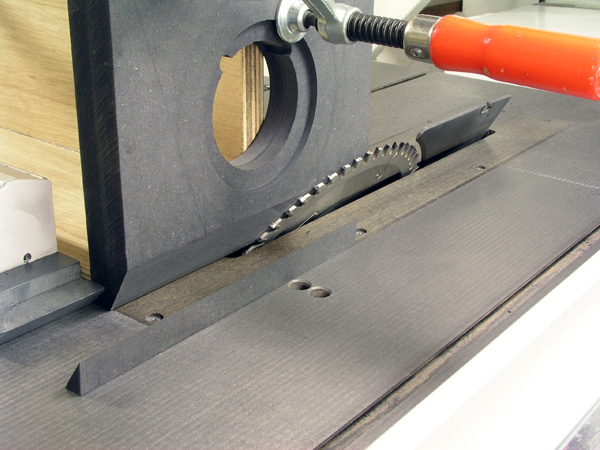
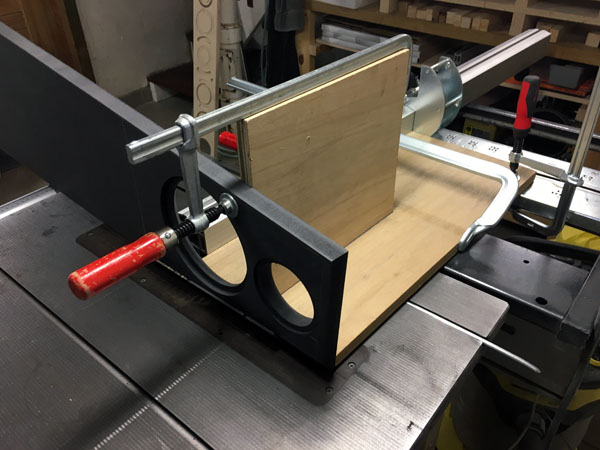
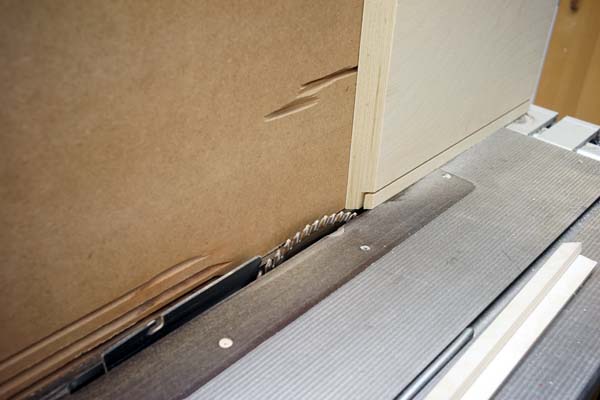
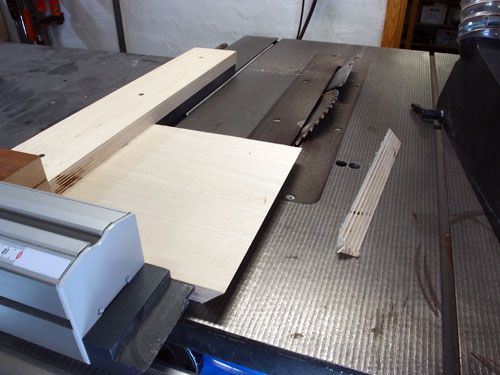
Using a table saw
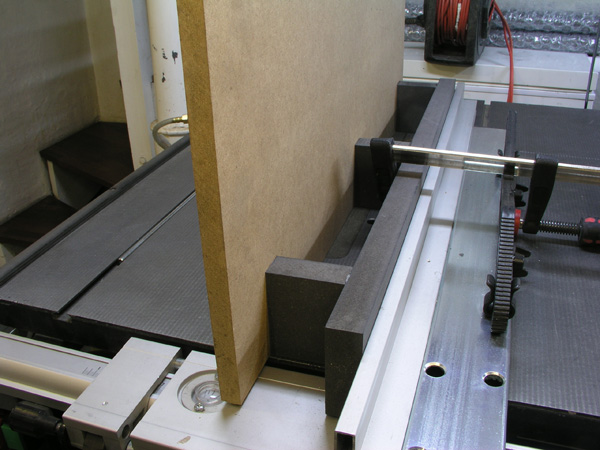
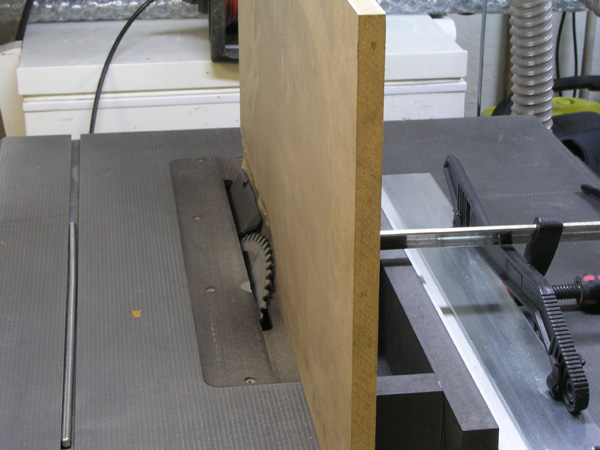
I hope the images
above and below are self-explanatory in how panels and fillets can be
faceted. Obviously the same thing can be done with a planer and
sandpaper but I admit you'll be less exhausted using a table saw.
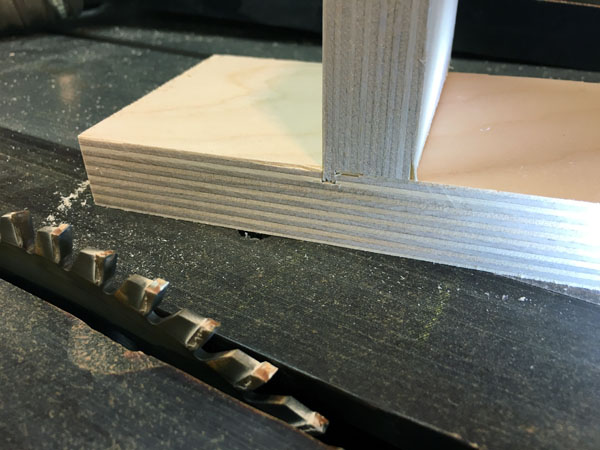
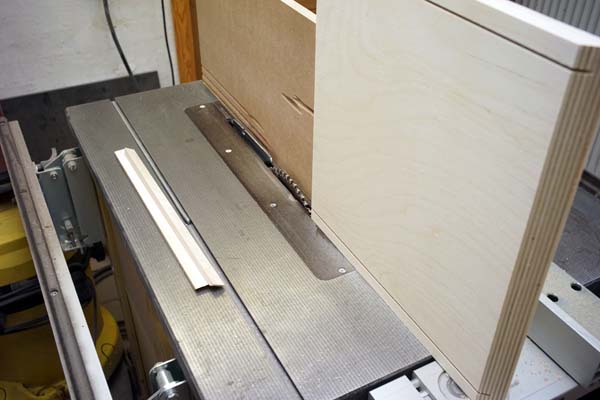
Faceting a whole front panel takes the rig seen on photos. I made this
from some MDF leftovers. Faceting a fillet (final image) is easier as
you don't need more than the standard table saw rip fence. Make sure you
count ten fingers when you're done as you can't use the blade cover
guard. Always make test cuts before doing your final panels to make sure
all adjustments are done.
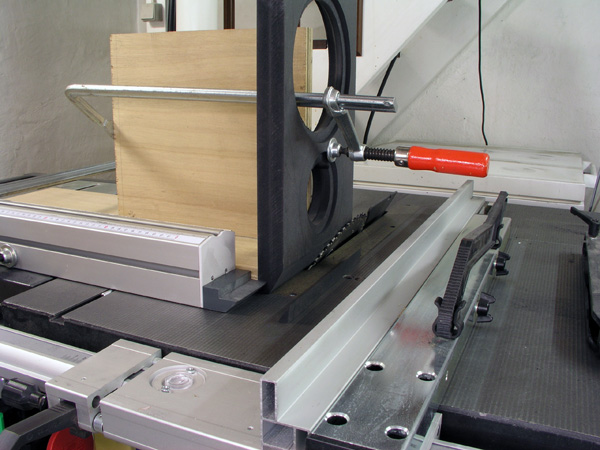
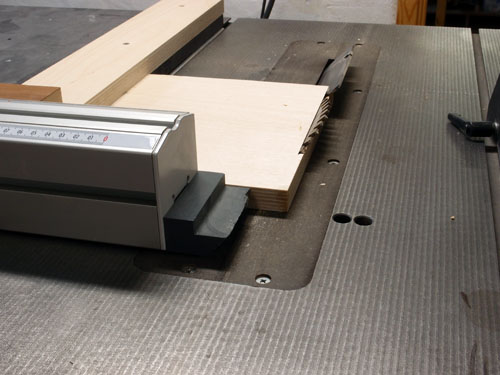
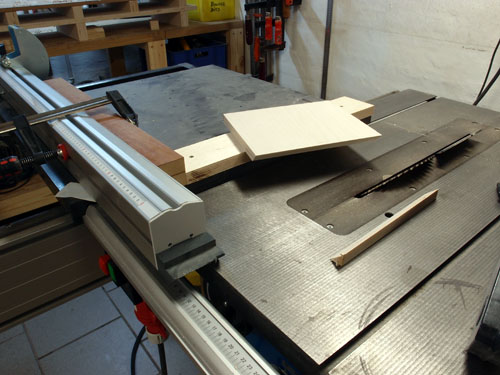
For small panels I sometimes use a rig attached to the sliding table.
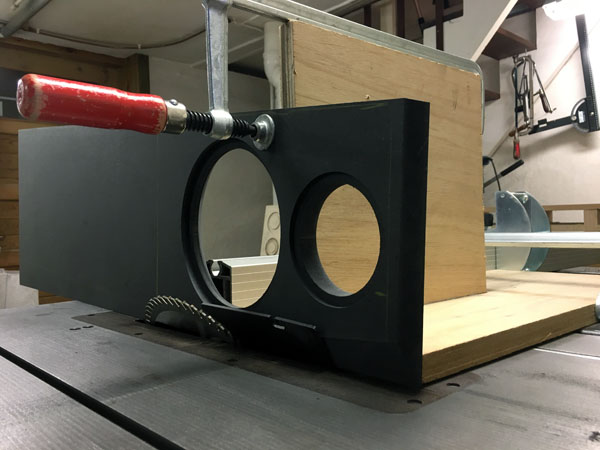
Here's a tricky faceting done on the table saw.
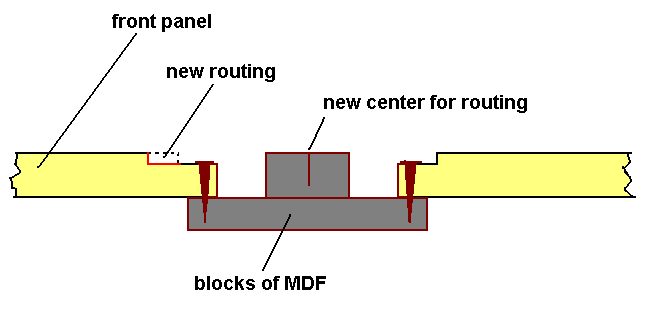
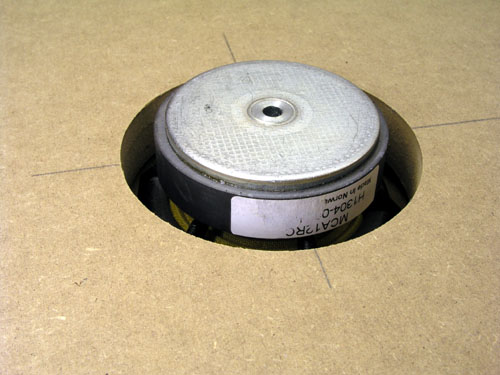
MAKING REBATES (- or rabbets (US))
I have the question all the time!! Have you made a laminate of panels?
No, just a rebate (or rabbet in US English) - or in Danish "en fals".
This makes a stronger joint.
Cutting 45 deg for cabinets
BACK TO TOP

Had the question on how to make these sharp 45 deg cuts: Cut from the
left side of the blade. Usually tilts towards your right.
Made a guide for the sliding table held in place by a clamp.
How to make your DIY table saw:
http://www.youtube.com/watch?v=FR94aheUe60
http://www.youtube.com/watch?v=fhfMQszFgS0
-
this one more sophisticated.
Lots of videos on youtube!
http://www.youtube.com/results?search_query=diy%20table%20saw&sm=3
The DTQWT front inner panel - may be useful in other places.

I've
had the question many times on how to chamfer the inner front panel of
the DTQWT cabinet.
Simply place a sliding board on the front, adjust
the router bit to the height of the side panels and move the router
slowly from side to side.
CHAMFERING DRIVER HOLES
BACK TO TOP
The amount of energy coming from the rear of the driver is
exactly the same as coming from the front!
Make sure your drivers can breathe and deliver their energy to the
absorption material inside the cabinet and not experience acoustic
resistance and diffraction from deep straight holes.
Read
here

This is how I usually make driver holes.
If you have double front panels due to stepped panels, do like this.
Normally I don not chamfer drivers holes once we're into 8" drivers, at
least not for 20 mm panels. For 40 mm panels I would.
For 10-15 inch drivers no chamfering is needed.
Lacquer, paint
and oil
BACK TO TOP
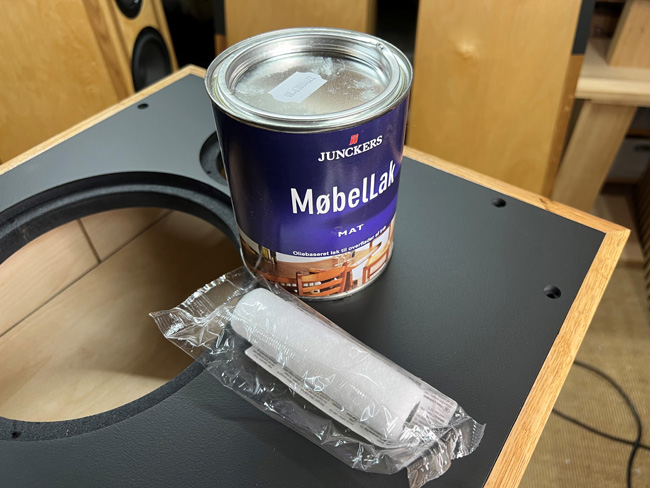
For finishing the Baltic birch panels I use synthetic lacquer applied
with a roller. Matt is used. Usually two coatings will do with in
between sanding (grade 240).
Make sure you buy a high-quality roller that doesn't leave fluff on the
surface.
I sometimes add the 1st
coat before the final cutting. This reduce edge ripping as the outer
veneer of Baltic birch is rather thin, unfortunately.
For cutting small object from Baltic birch without ripping edges I use a
4-6 mm MDF panel below the Baltic birch. Sometimes painters tape is
enough to avoid edge ripping.
PAINT
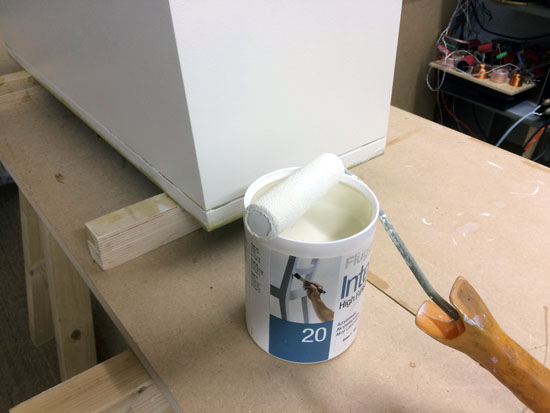
The quick and cheap finish: Water based paint applied with a roller.
Gloss 20 used here.
OIL

I mostly use mineral oil for the black MDF front panels. This product is
for hardwood kitchen tables.
It takes two coatings. For every application excessive oil must be wiped
off before drying.
Flanging straight vents
made from ABS plastic:
BACK TO TOP
The pics below are
hopefully self-explanatory.
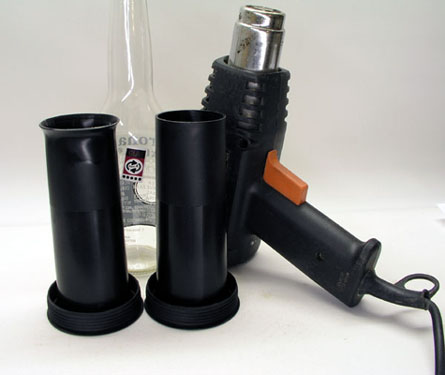
A number of vents are made from ABS plastic and usually
requires to be cut to target length.
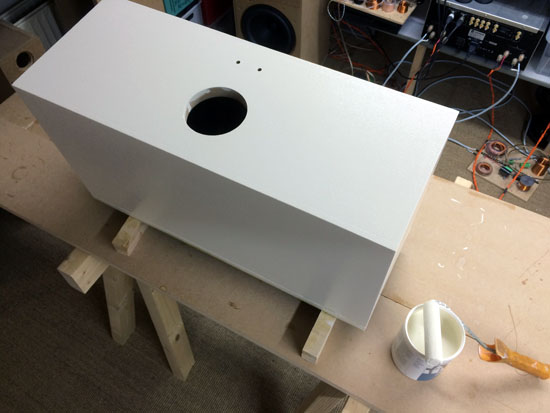
The outlet of the tube is already flared and after
cutting to required length, the inner opening may
be given the same treatment simply by heating the end of
the tube with heating gun.
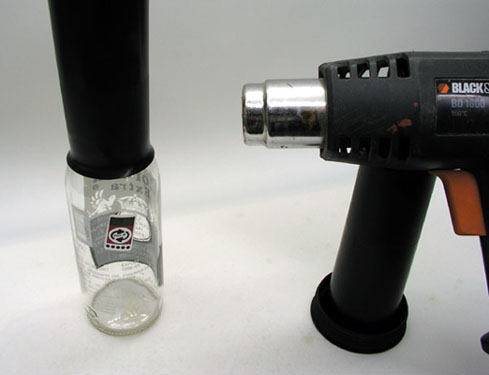
I run my B&D heating gun at highest temperature and
hold it 5-7 cm from the end of the tube while
slowly rotating the tube. When the tube opening starts
softening I push it towards the bottle shoulders
and continue to rotate while pushing. When done I hold
the flared end towards a piece of MDF while
cooling and you may add cold water to cool faster.
Solder tag
strips:
BACK TO TOP
This is a question I've had many times: Where do
you get the solder tag strips
used for the crossovers?
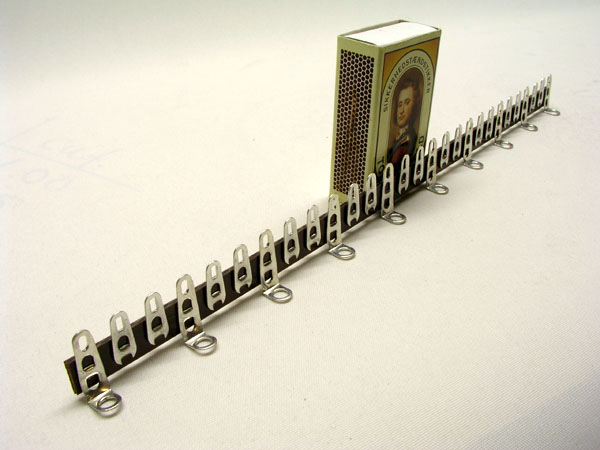
The above come from RS-Components and you have to order from
a shop dealing with electronics.
rswww.com homepage
Item 433-775, approx. 2-3 US$/ea. Minimum is 10
pcs.
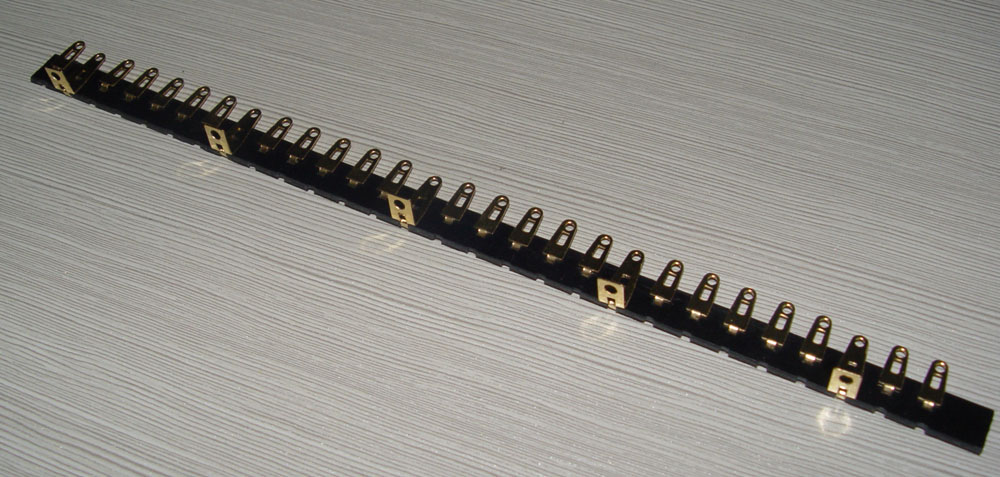
I introduced the RS-Components solder tag
strips to Jantzen Audio and they were able to source the gold plated
version seen above.
These are now standard with all crossover/speaker
kits from Jantzen Audio.
DAMPING MATERIALS AND CABINET DAMPING, LOOK
HERE
GASKETS
FOR MOUNTING DRIVERS
BACK TO TOP
I don't use gaskets for mounting
drivers unless inherent to the driver, but if for some reason your driver
rebates aren't nice and
smooth, you may need to add a gasket between the basket frame and cabinet.
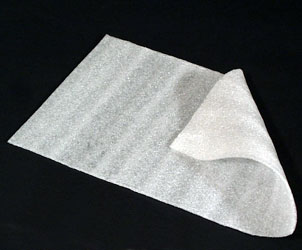
In the old days, when we made cabinets from chipboard, gaskets were
obligatory and we used self-adhesive foam/rubber strips.
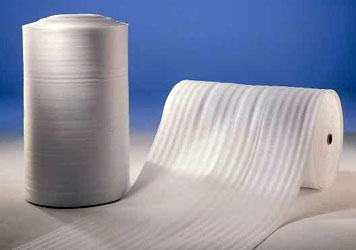
DIY: Cut
suitable circles from thin polyurethane foam, the kind of thing we get
every time we buy a new electronic gadget, glassware, or whatever we buy
these days, even fruit from China, I've seen.
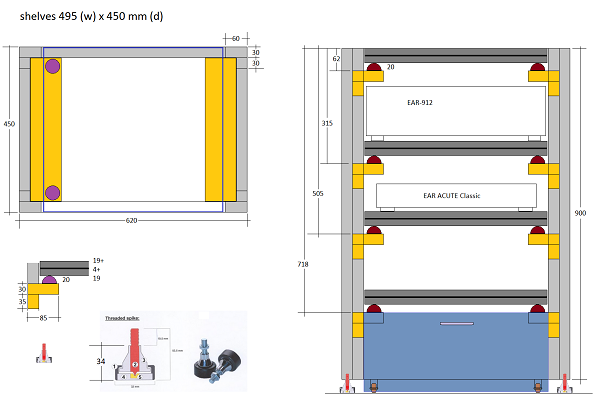
FEET FOR CABINETS
BACK TO TOP
I hate spikes and I honestly don't think they do
much good, if any.
I use cheap furniture feet bought at the local Bauhaus. About 10 EUR for
four.
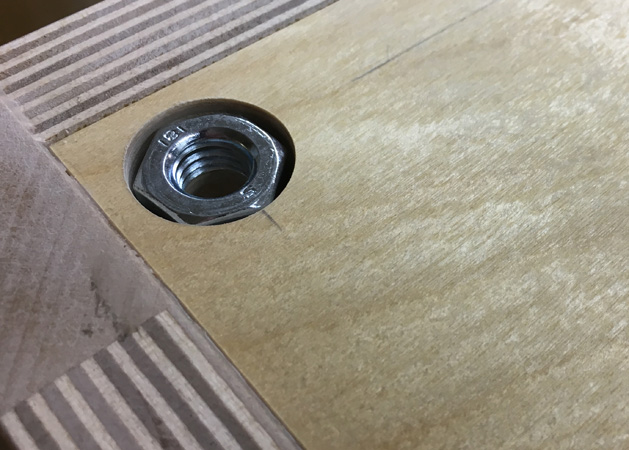
They have a 10 mm thread and I buy some M10 nuts and fasten them with
Araldite.
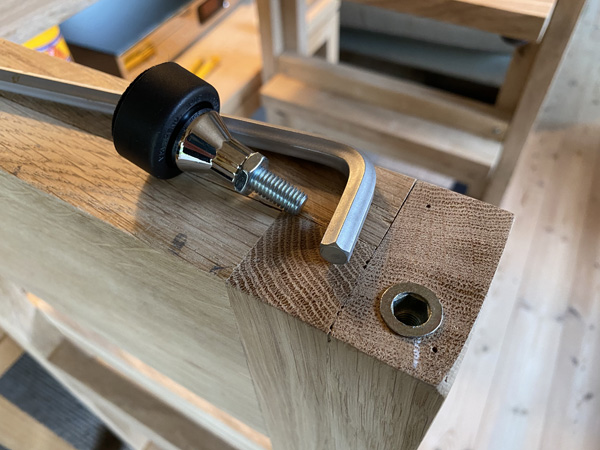
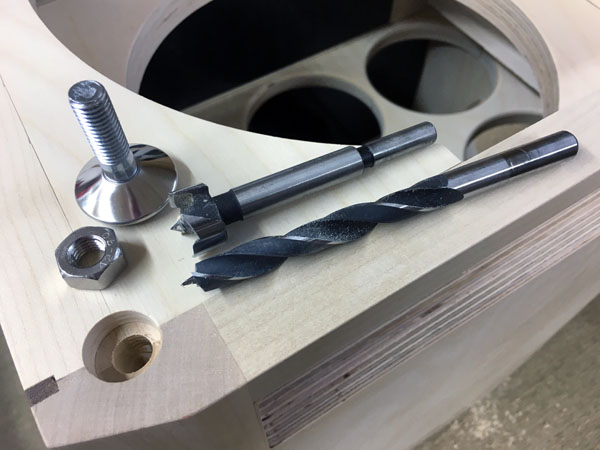  Preparing
for the adjustable feet. First I seal the nut with a thin ring of
Superfix, otherwise the epoxy will leak towards the bolt hole. Preparing
for the adjustable feet. First I seal the nut with a thin ring of
Superfix, otherwise the epoxy will leak towards the bolt hole.
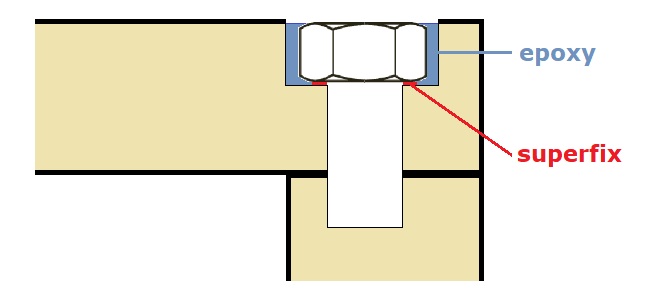
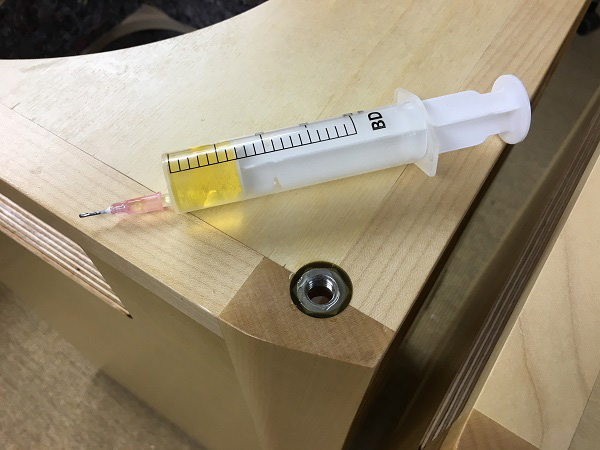
When dry, fasten the nut with epoxy glue. Fill a
syringe with epoxy and inject around nut.
I use WEST/SYSTEM 104 epoxy, mix 5+1, rather thin when mixed. Use large,
short and blunt needle to inject.
Soundcare
If it must be spikes, I suggest the Soundcare brand. Used them for
my rack
- and obviously very suitable for speakers, although you need two sets.
Available as an add-on to your kit from Jantzen Audio.
Soundcare prescribes 10.5 mm holes for the threaded inserts. For a place
like this - and oak - I suggest 11 mm as one leg started to fracture.
Hammer the insert slowly some 2 mm down and use the umbraco wrench
gently until fully inserted.
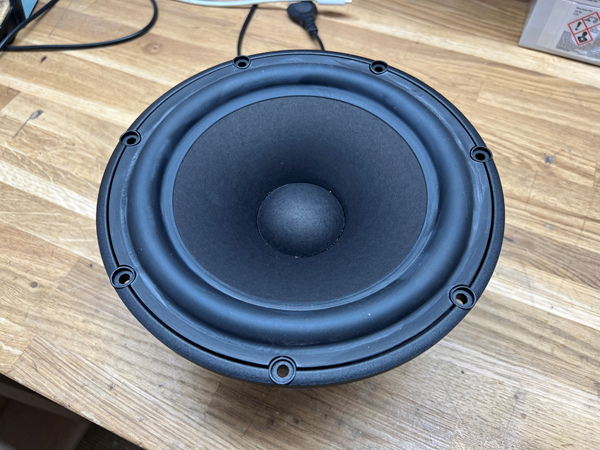
How to freshen up
driver rubber surrounds
First of all, rubber surrounds are unlikely to
deteriorate over time, but for sure the appearance may do so. Even
direct from factory they do not always look nice. Below a new ScanSpeak 22W driver,
before and after.
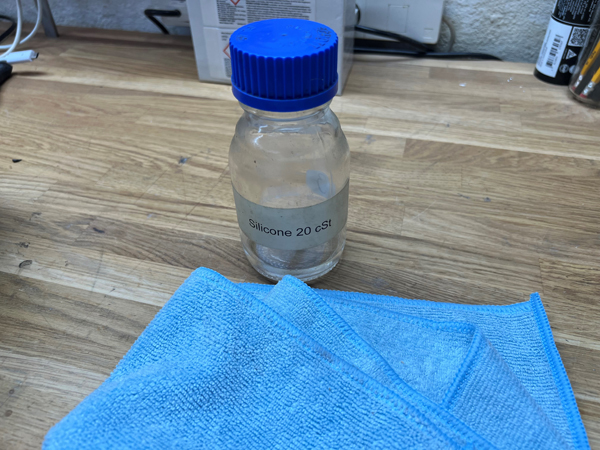
Next, you need some 20 cSt (viscosity in
centistokes) silicone
fluid. It MUST NOT contain solvent (spray types).
Google "silicone fluid 20 cSt". 20-200 cSt is OK, higher viscosity not
easy to apply.
It should not be much thicker than your kitchen olive oil.
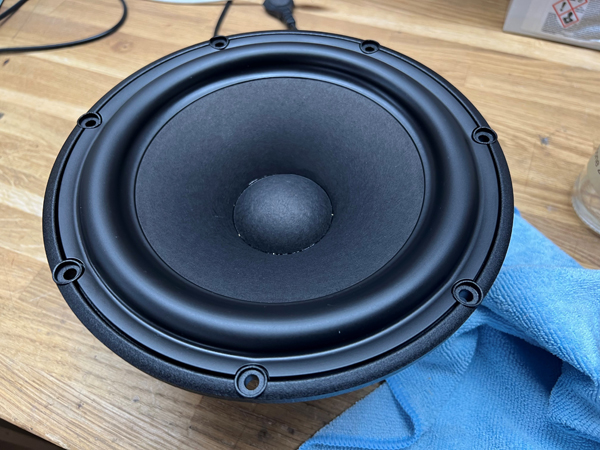
Before and after.
After applying the silicone, wipe the surround with a dry part of cloth.
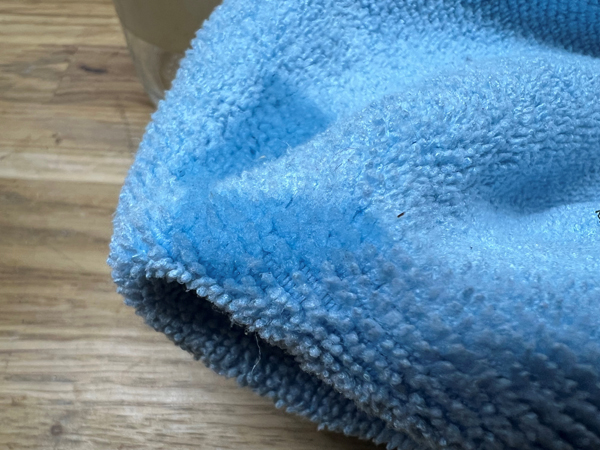
Left: Fibre cloth and 20 cSt (viscosity) pure silicone fluid. Moisturise
cloth lightly and press gently against rubber surround while rotating the
driver.
DO NOT blame me is you get silicone onto the paper cone!! So take care.
If shaky hand, cut a disc of cardboard that fits inside the rubber
surround to protect cone.
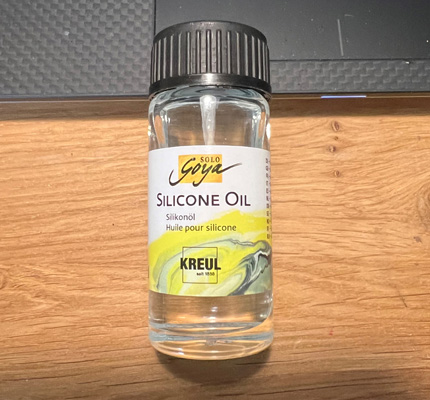
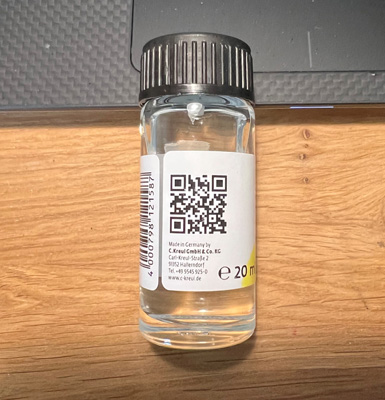
I googled "silicone fluid 20 cSt" and found this. It didn't say the
viscosity, but I took my chances and ordered, as it was only around 7€ +
as much in shipping.
However, appears to around 20 cSt or slightly below, but never mind, it
works. Available on Amazon, by the way.
SEALING WIRE HOLES
BACK TO TOP
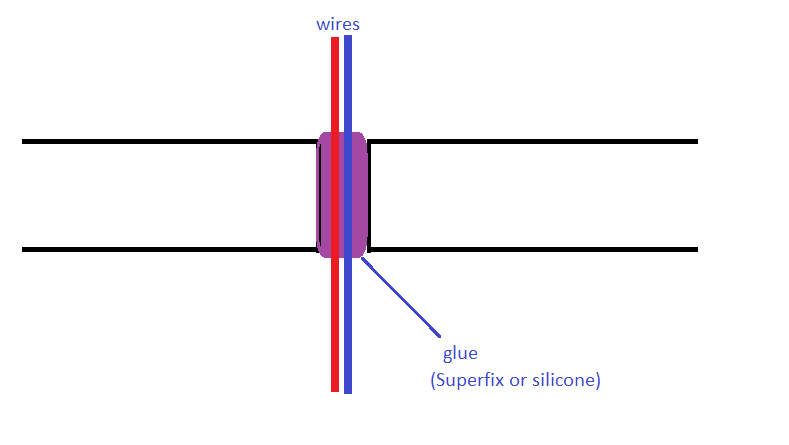

I've had this question several times lately: How
do you keep e.g. small midrange cabinets tight when you have to drill a
hole for the wires? Easy, drill an e.g. 8 mm holes, pull the wires and
fill the hole with e.g. silicone glue or Superfix. Any elastic filler
will do. I use a small syringe mostly allowing me to add filler from
both sides to make sure it is airtight.
PORT DIMENSIONS
BACK TO TOP
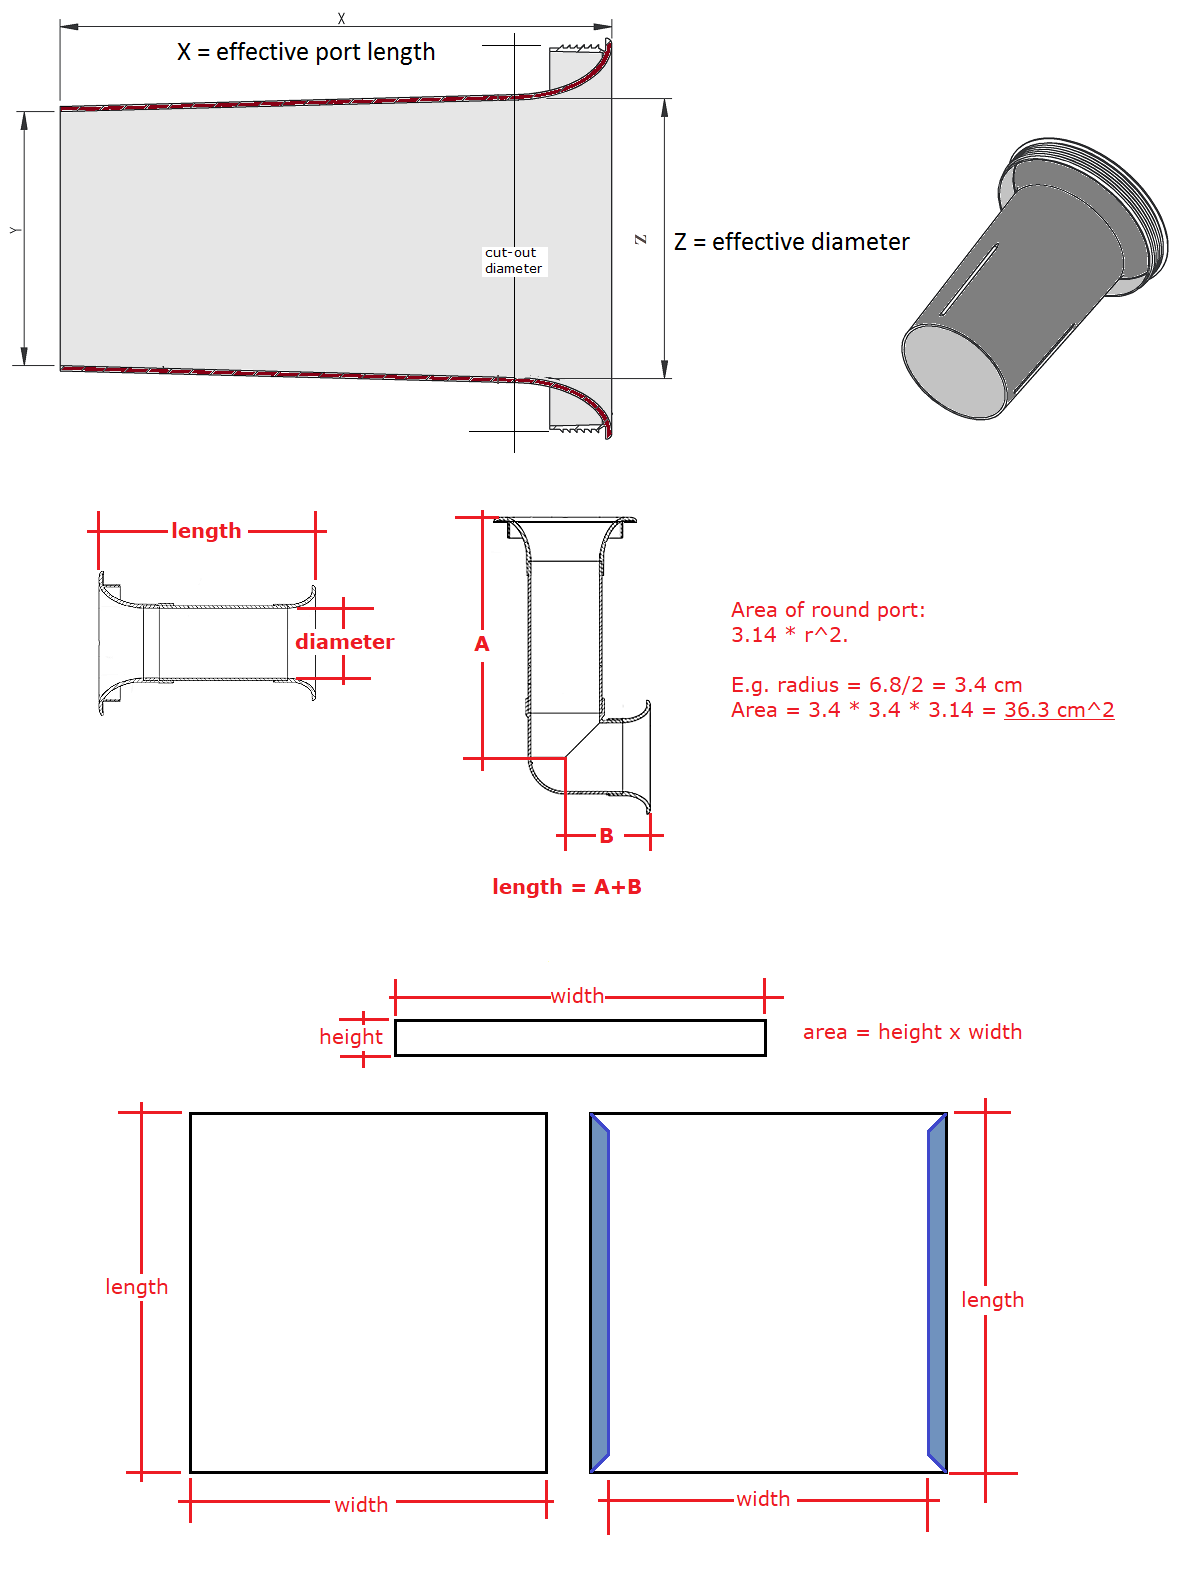
To cut a long story short, effective port dimensions of a slightly
tapered port is X and Z as seen above.
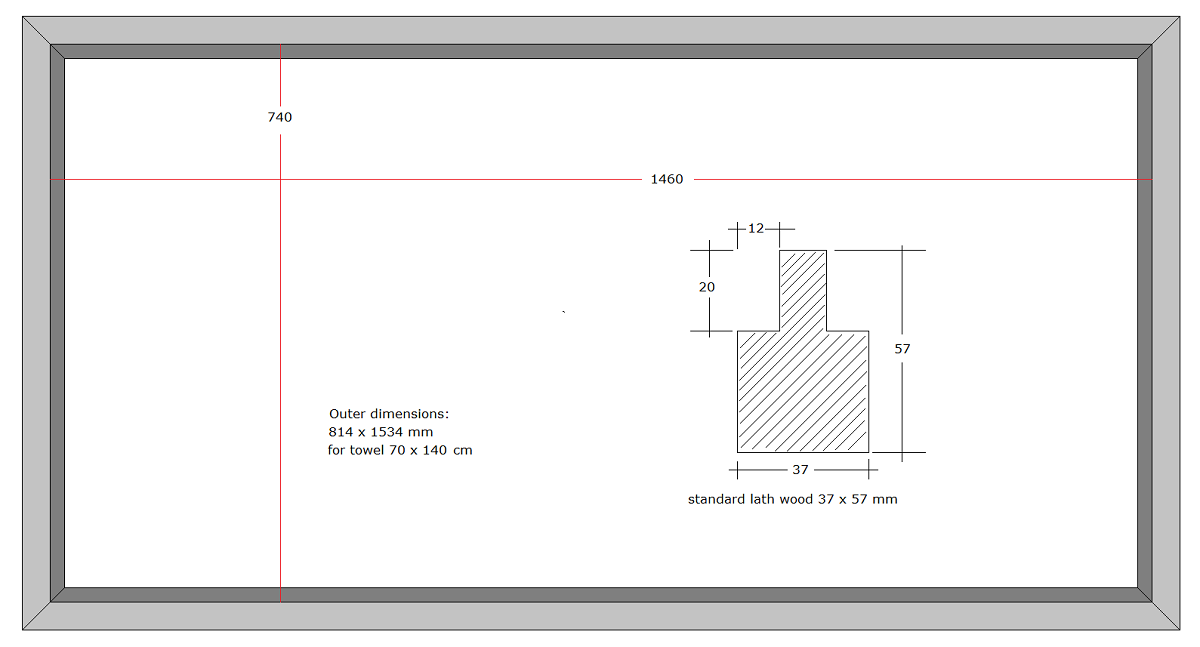
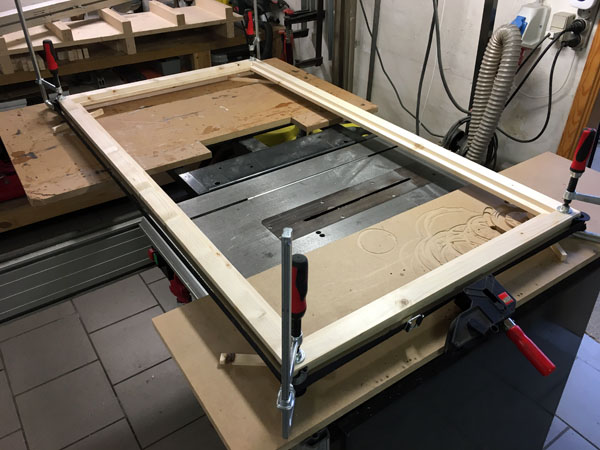
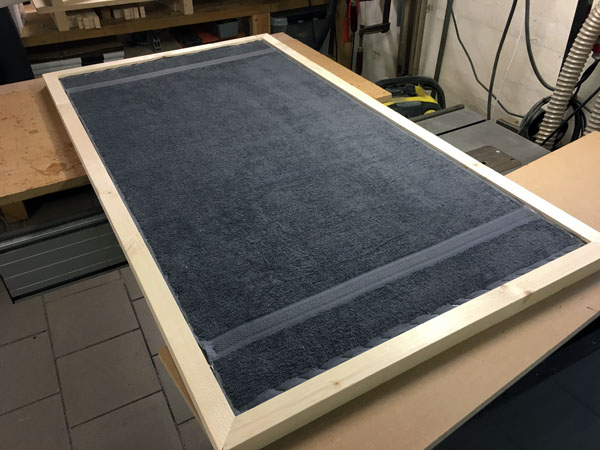
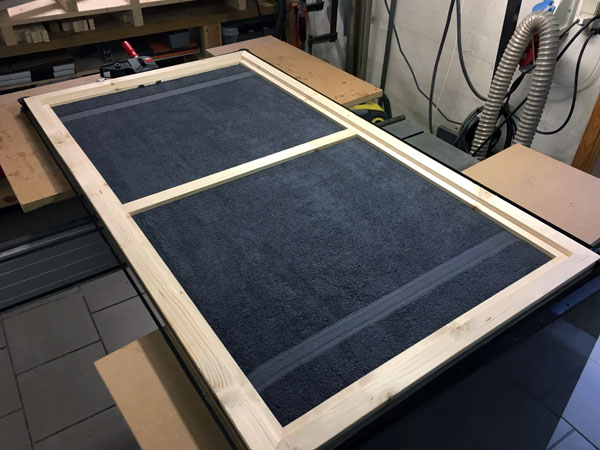
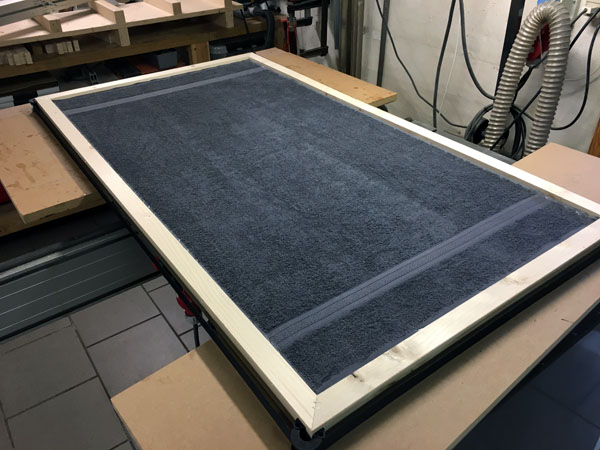
I read somewhere cotton towels were excellent for
making damping panels, so I bought twelve 70 x 140 cm heavy towels at
the local JYSK. For the frame I use standard 37 x 57 mm lath wood and
cut them on my table saw to the profile seen on the drawing.
Stretching the towels I found them covering some 740 x 1460 mm, thus my
inner frame were made to make these dimensions. Three layers on each
side were attached with staples.
I placed three of these in my workshop and does it work? You bet it
does.
Obviously they can be covered with some nice fabric if meant for living
room.
BACK TO TOP
|