DIY Loudspeakers: HOME INDEX UPDATES RESPONSE WHAT'S NEW
SBAcoustics
SBA61-NAC
Copyright 2016-20 © Troels Gravesen
Go to on this page:
DRIVERS
CROSSOVER
CABINET
MEASUREMENTS
SPEAKER-KIT
CROSSOVER LAYOUT
SOUND
Frankly, I never thought I'd do a speaker from all aluminium (cone)
drivers. My most recent experience dates back some 10 years and the
midbass was harsh on my ears. Later the manufacturer modified the drivers
(cone curvature) for
better performance, but I never got around to doing them again.
When I first set up this SBA driver and turned on the MLS signal
from the CLIO I thought I'd done something wrong - or was suffering
temporary loss of high-frequency hearing . Well, I hadn't. Usually
you can hear from the very MLS signal if a driver is trouble or if
it's smooth on the ear. This SBA driver was smooth on the ear.
Apparently the cone design with the ribbed imprints does its thing
in reducing cone break-up. I even found a manufacturer using
the 8" version as
midrange driver i a 3-way system up to 1800 Hz! Quite a bold
choice I'd say.

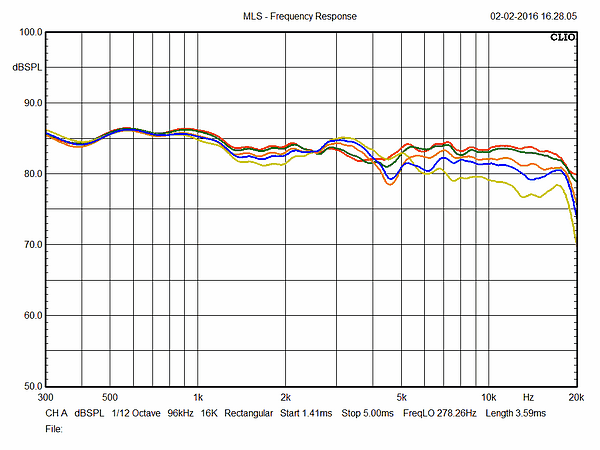
Comparing three SBA 6" driver in my test cabinet seen below created the graphs above. Orange is a paper cone, green is polyprop and yes, red is the alu cone! The alu driver is a 4 Ohm version, hence highest sensitivity. The alu cone has the smoothest midrange and lower treble range of them all followed by the PP cone and paper is worst. Pay notice any response is dependent on baffle size and shape so they will measure differently on another baffle. Dips and peaks in the 1-4 kHz range are a pain when it comes to designing crossovers. The PP has the smoothest roll-off of all from the 2100 Hz LR4 crossover if this is important to you. Based on modelling PP can do even with an LR2 filter.

Above the waterfall plots (CSD) of PP, alu and paper cone 6" drivers: SB17MFC35-8,
SB17NABC35-4 and SB17NRXC35-8.
PP is the smoothest of all, but the alu cone has the dominant
peak at a frequency higher than any of the others.
For what it is worth, paper is worst here, but with a 4th order
crossover @ ~ 2 kHz it doesn't matters.
It only took few changes to the crossover to fit in all drivers in the current setup and although we cannot tune them to exactly the same response, they sound not that different and I'm reluctant adding any sonic claim to a specific cone. It's hard to say one is more analytical than the others, nor that one is more smooth, lush, clean, etc. than the others. Being exceptionally linear throughout the midrange, the alu cone is probably the most neutral of them all with a small edge when it comes to detail. If you are one of the many having built the SEAS W15/OWI and have room for 5-6 more litres, this speaker may an option for a new project to get same level of transparency - and get some more bass. Now, the good thing here is that you can let your prejudice rule and pick the one you like! How about that?
Capacitors: Now, these SBA drivers are highly revealing and going from standard PP caps to all-Super-caps made a significant improvement. The "problem" is that these 4 Ohms drivers swallow a lot of micro-farad, but if you want to hear what these drivers can do, there's no way around it. All STANDARD-Z cap version will be available and you can later upgrade if you stick to the crossover layout for super-caps.
I will later launch version with the PP and paper cones, but here we go for the alu cone. The PP will be different from the two other as it will feature an LR2 crossover. PP drivers are generally easier on crossovers than hard-pressed paper or alu.

Click images to view large. Kit now delivered
with black cone midbass driver.
Basics:
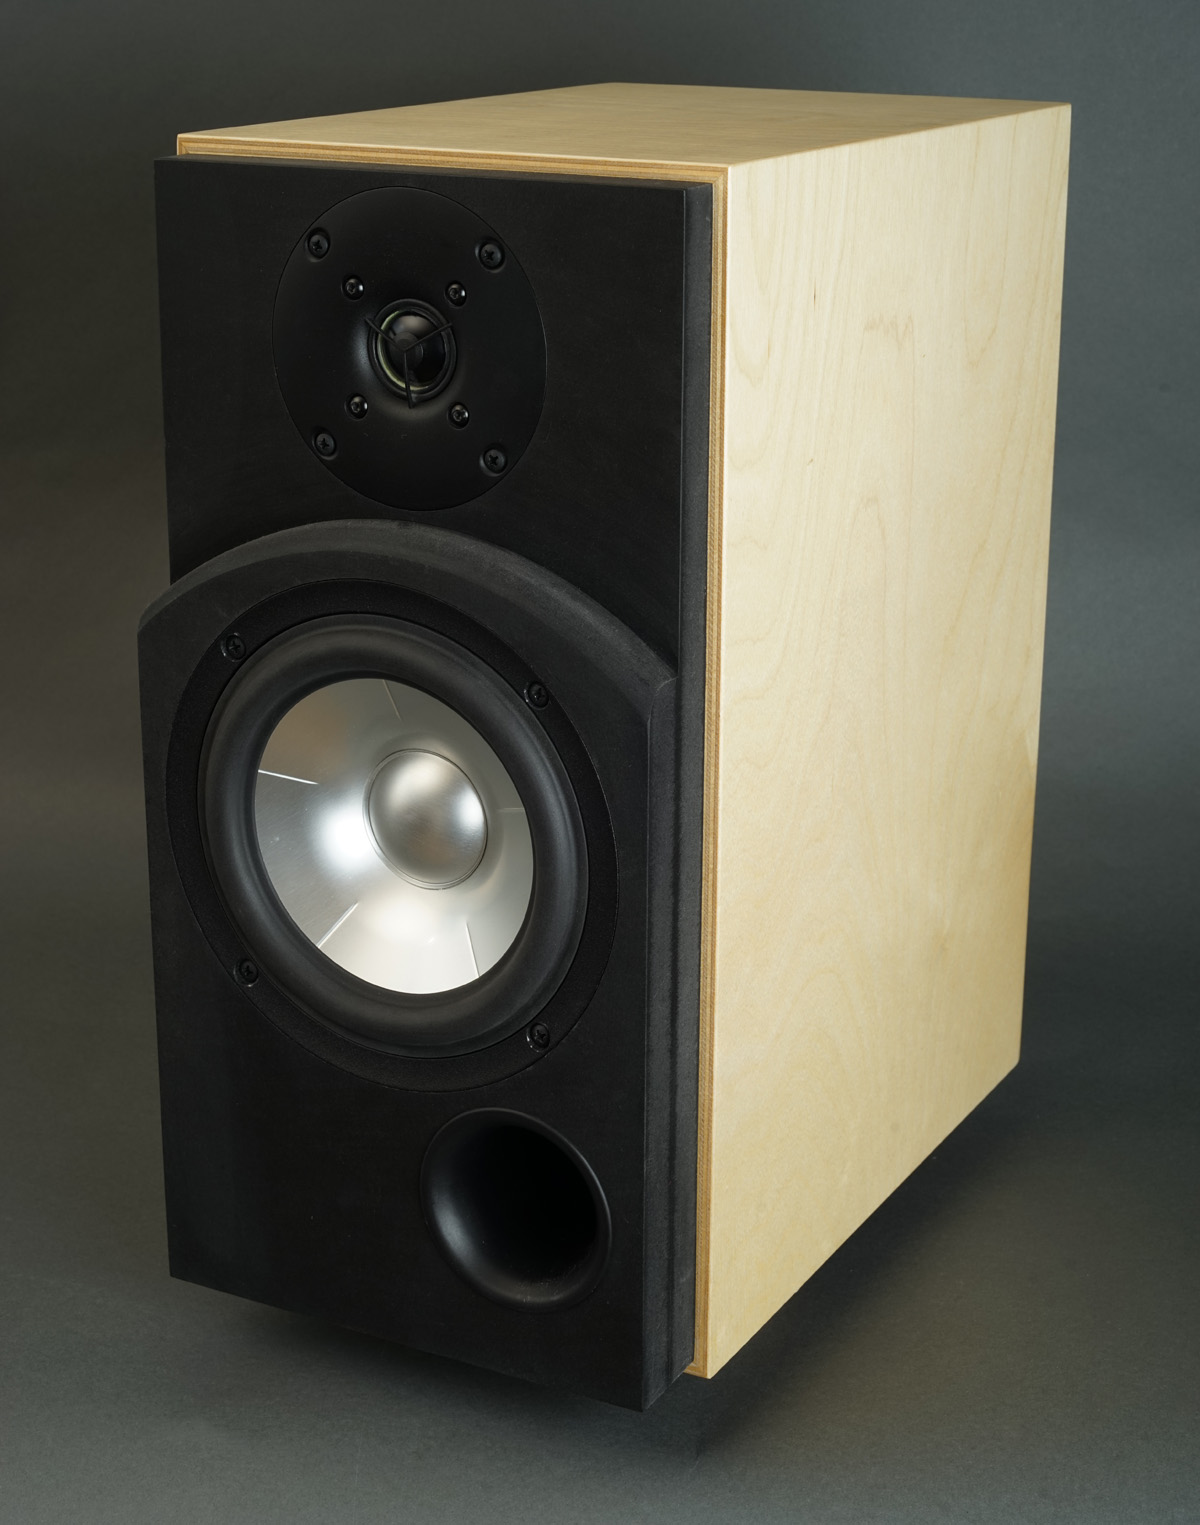
2-way 16 liter speaker from 6" mid-bass and 1" dome tweeter.
System sensitivity: 87 dB.
Impedance: 4 Ohms.
Power handling: 60 watts, and please read here:
http://www.troelsgravesen.dk/power-handling.htm.
Any burned driver is a misused driver!
Point of crossover: 2100 Hz, LR4 topology.
Useful links (Please
follow all links before e-mailing!):
http://www.troelsgravesen.dk/tips.htm
http://www.troelsgravesen.dk/tips.htm#CONSTRUCTION_OF_CROSSOVERS
http://www.troelsgravesen.dk/crossovers.htm
http://www.troelsgravesen.dk/LCR-RC.htm
http://www.troelsgravesen.dk/Inverted-Polarity.htm
http://www.troelsgravesen.dk/choices.htm
http://www.troelsgravesen.dk/power-handling.htm

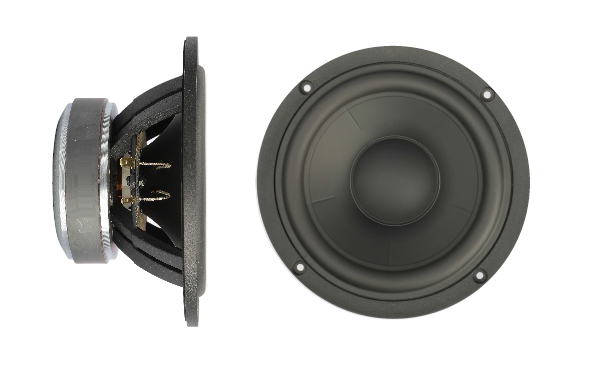
Download data sheets here: SB26ADC-C000-4 SB17NBAC35-4
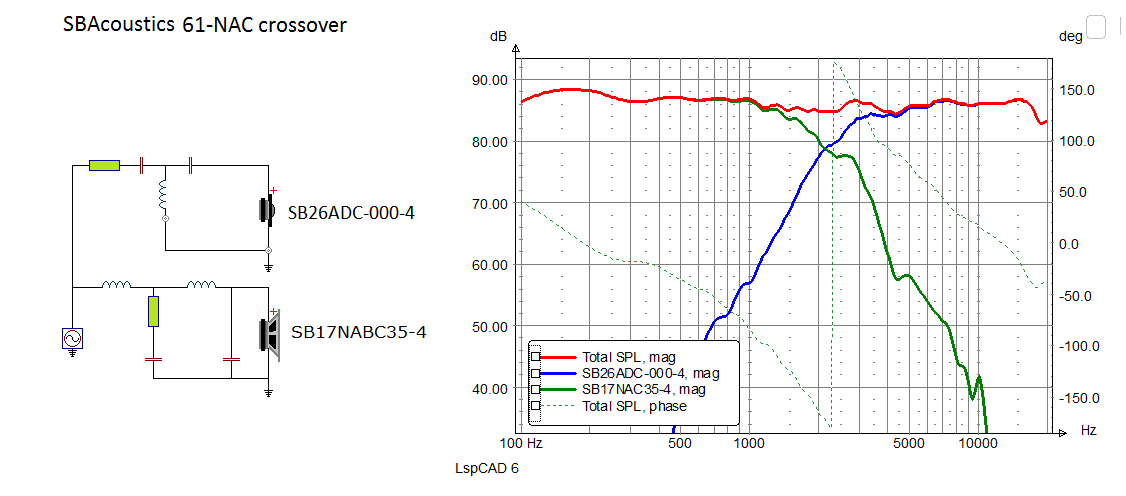
Above the LR4 crossover - almost as simple as it gets. To the right simulated response from drivers and summed
response.
Point of crossover 2100 Hz.
Disregard response below 300 Hz.
Crossover components' values come with Kit Instruction.


As can be seen above, the slopes fit the LR4 targets pretty tight.
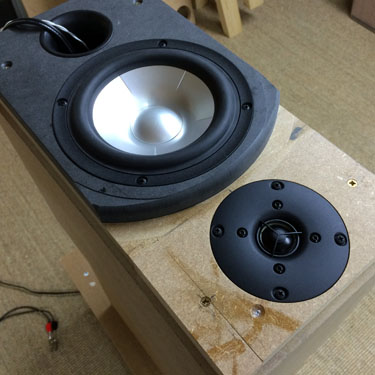
It took some experimentation of tweeter placement and on bass panel
shape towards the tweeter. Center placement of tweeter and a rounded
shape of bass panel with a radius of 14 cm made the best tweeter
response, which was fairly flat on an infinite baffle but on a very
small baffle lost level around 3-5 kHz and increased level in the
1-2 kHz range.
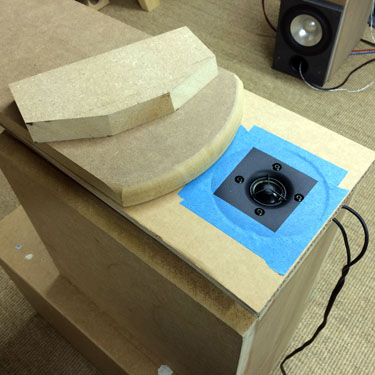
I had an idea of what would work and made the front test front panel
seen to the left. Not good. So, middle image shows back to the "drawing
board", cardboard, tape and a range of bass front panel designs. Final
result to the right. You can never tell how a tweeter behaves until
tried.
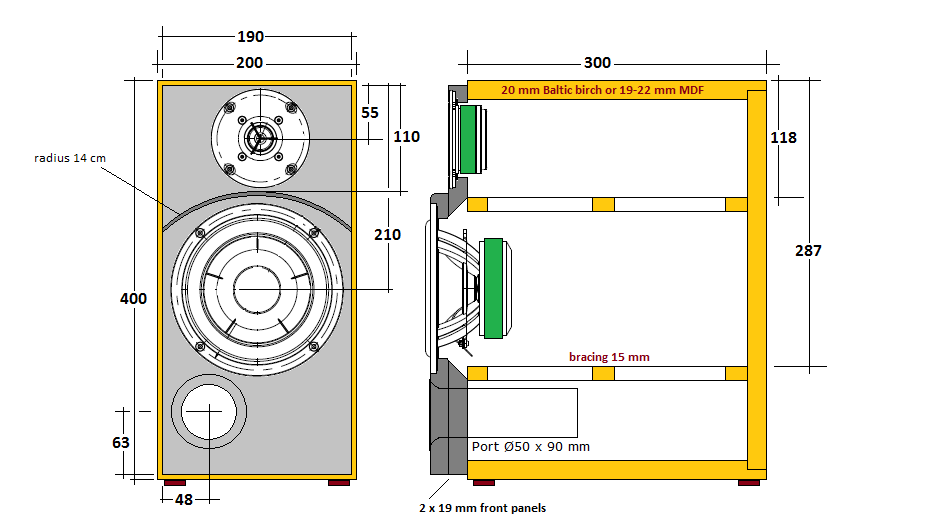
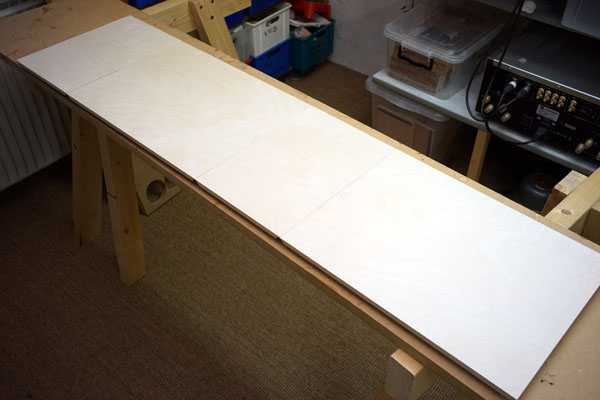
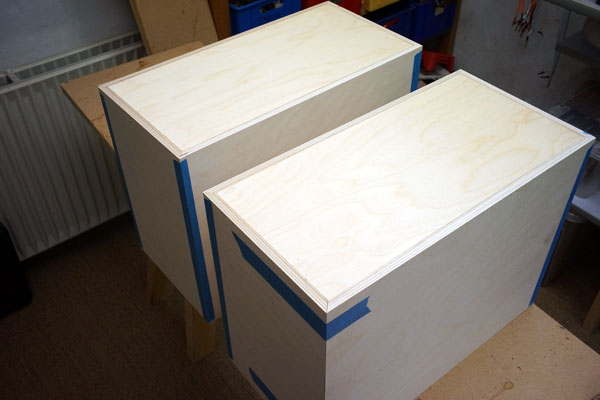
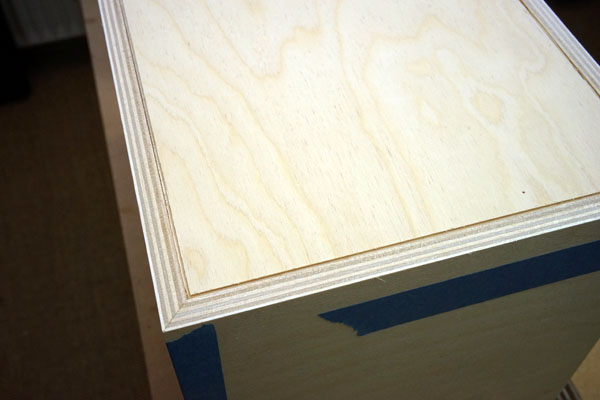
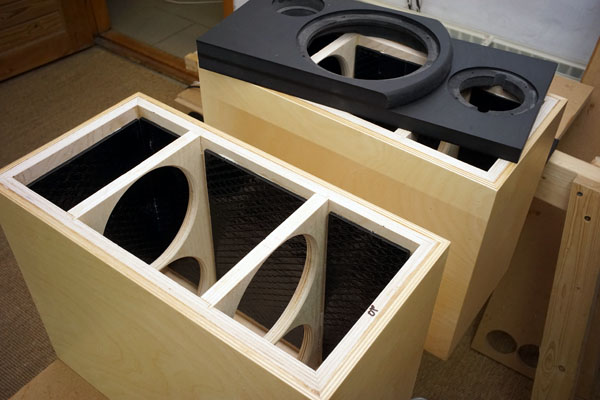
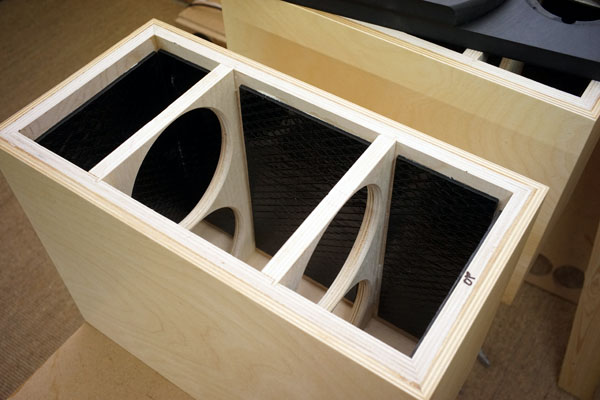
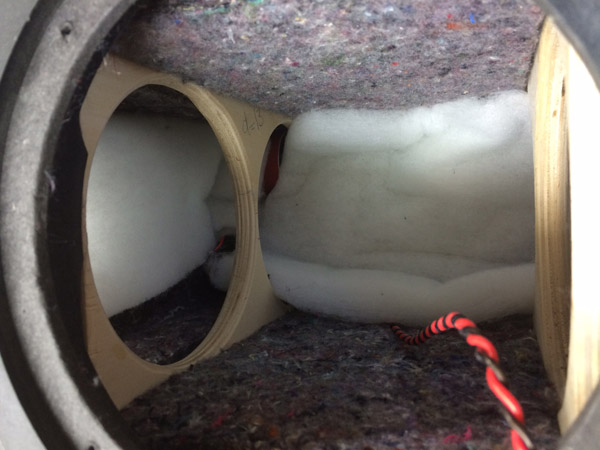
Net volume is 16 litres from 20 mm panel thickness.
Keep external dimensions regardless panel thickness.
16 mm MDF can be used for bracing.
All materials needed for a pair of speakers.
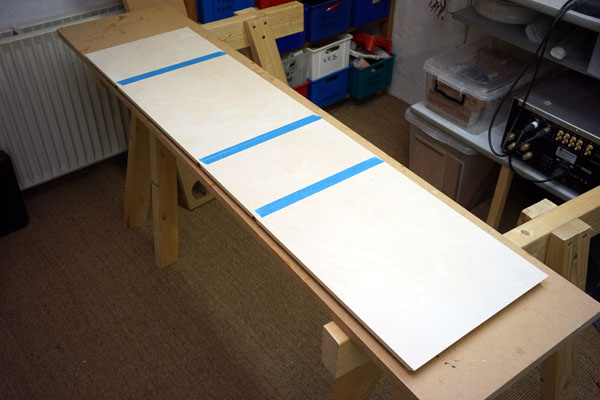
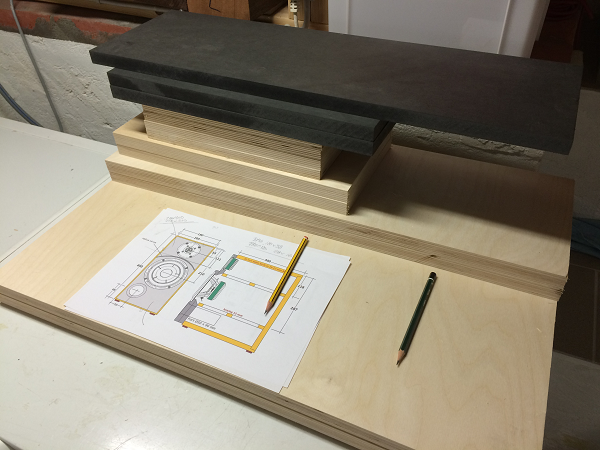
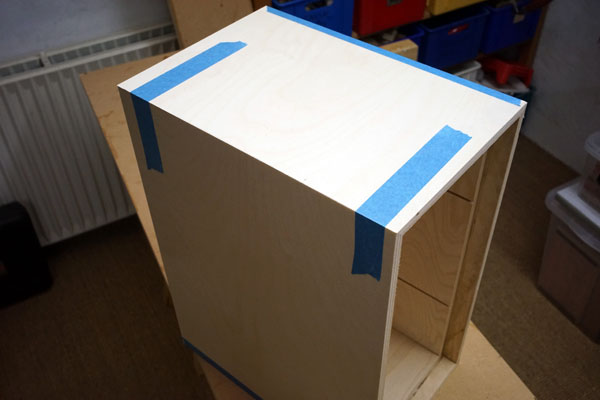
For a speaker like this and the 3-way classics I use the same procedure and start like seen above. This way I can make the final rear panels and bracings. When all things fit, I unfold the cabinet again and apply glue to all joints with a brush. As can be seen below I use three straps and a lot of clamps (not shown) to add further pressure to placed where needed.

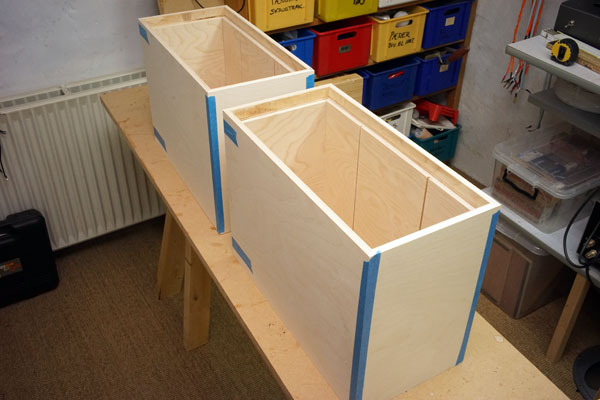
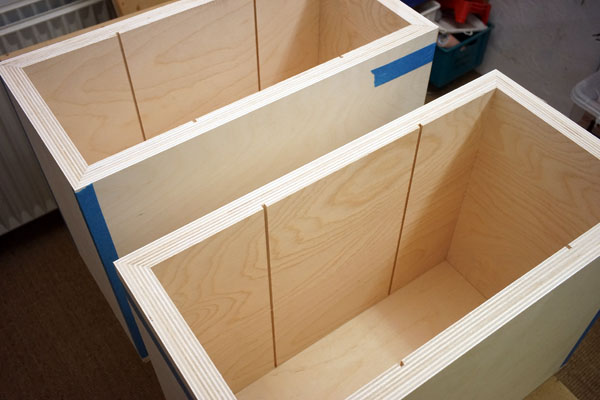
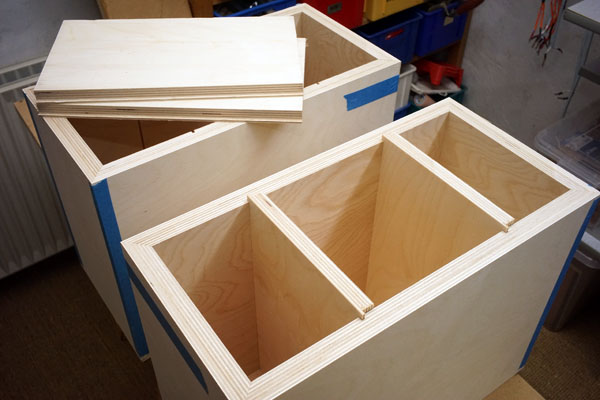
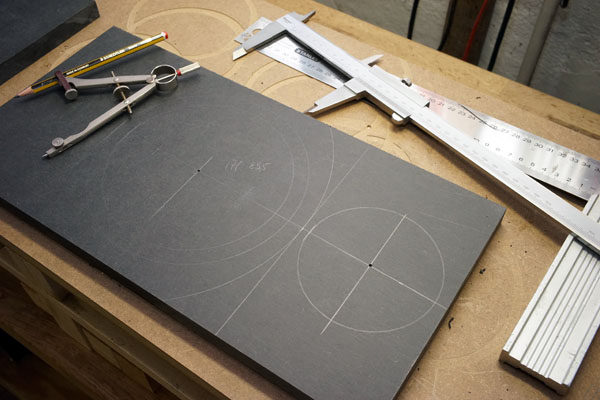
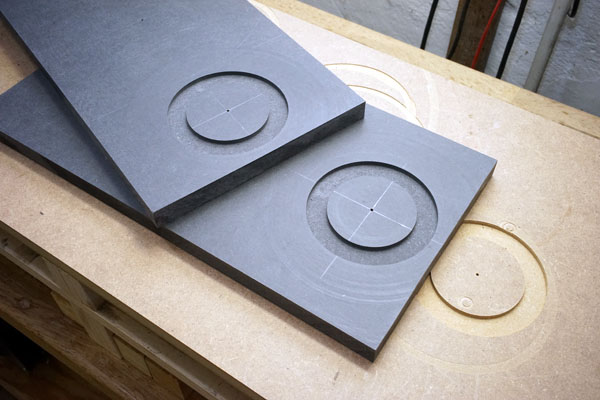
After making the holes (130 mm diameter) in the braces, the cabs are
ready for gluing.
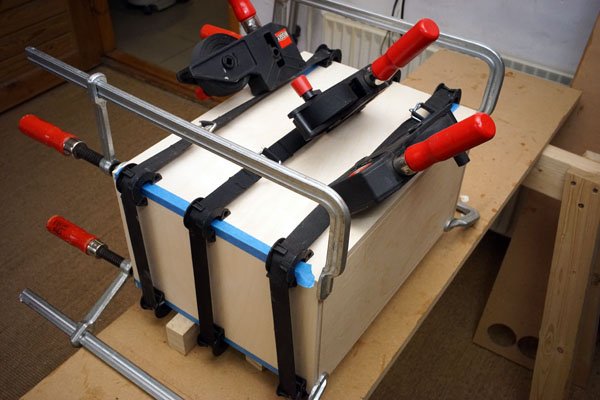
Actually more clamps were used than seen here, two for pressing the
braces towards the rear panel.
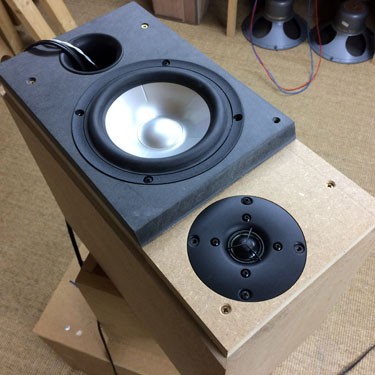
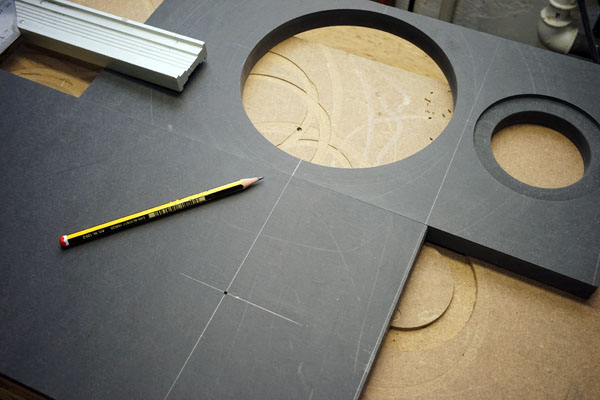
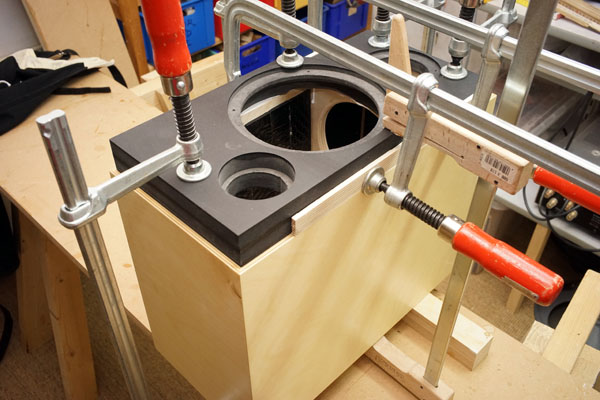
Right above: Mark placement of drivers on lower front panel.

Always do test routings before doing the final panels.
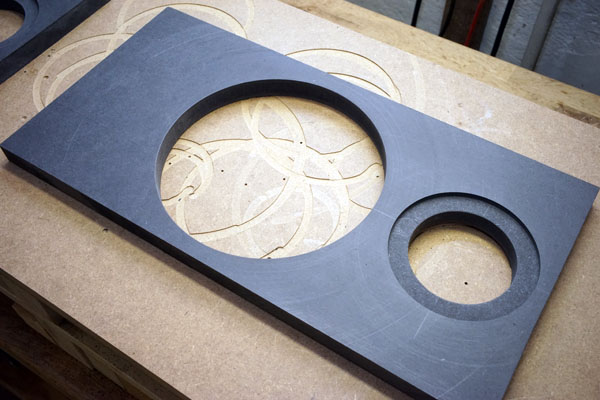
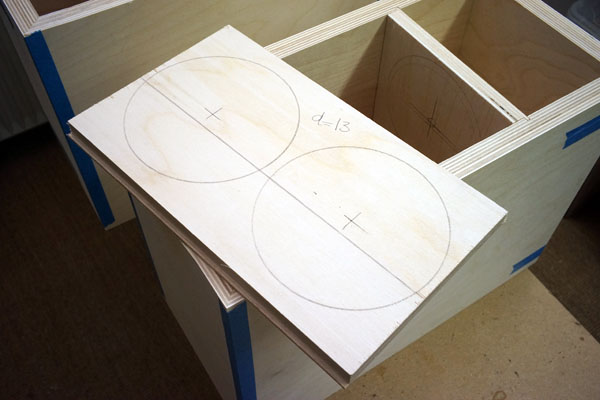
On inner front panel, make a 171 mm hole for the midbass.
Right: Place outer front panel next to inner front panel and mark
position of midbass.
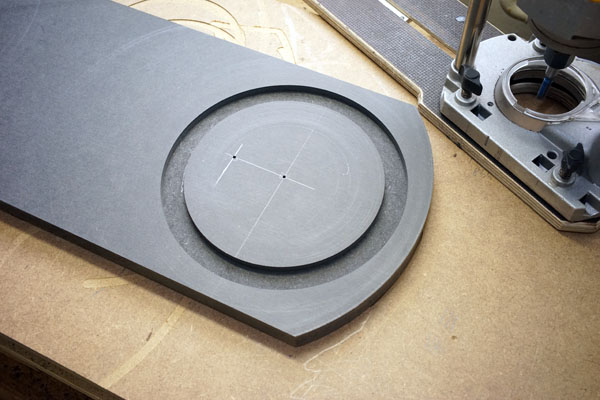

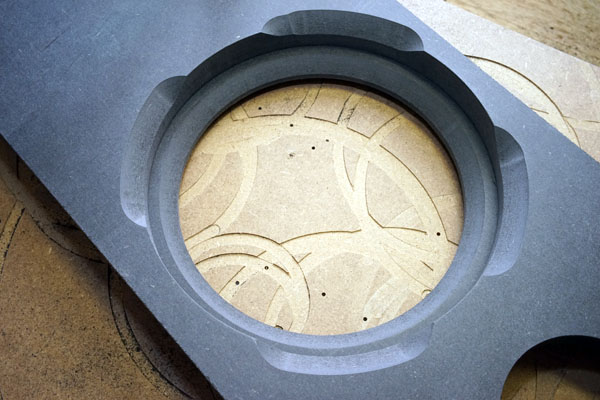
Left: Chamfer out panel bass driver hole from the rear.
Right: Inner panel may do with a little chamfering as well.
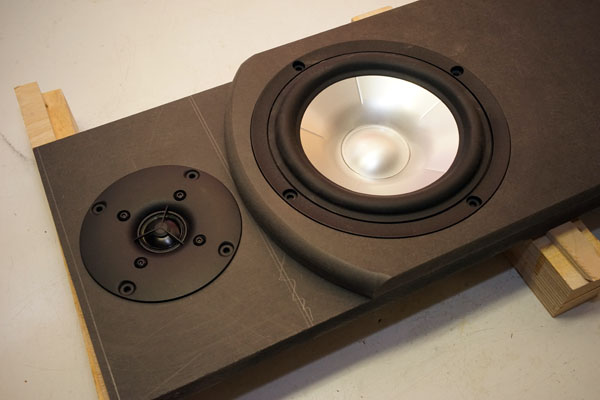
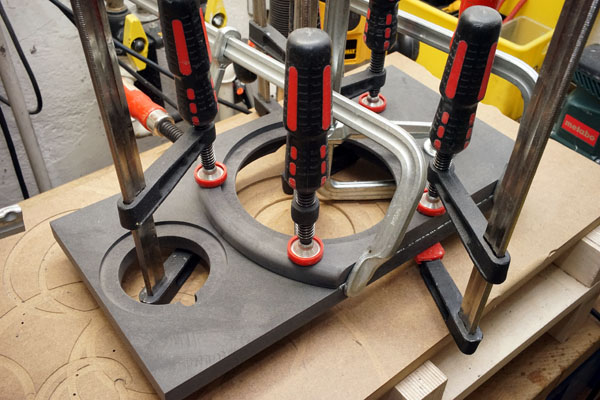
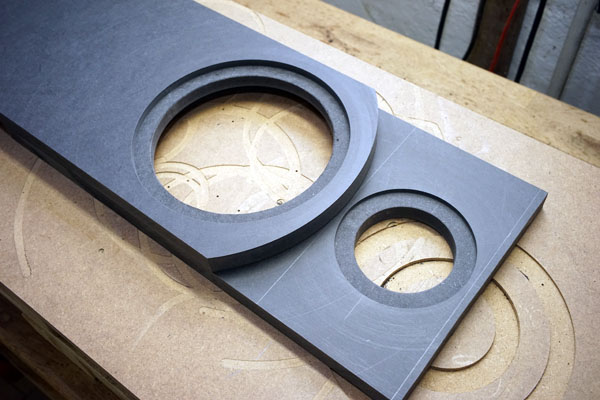
Testing driver and gluing outer front panel.
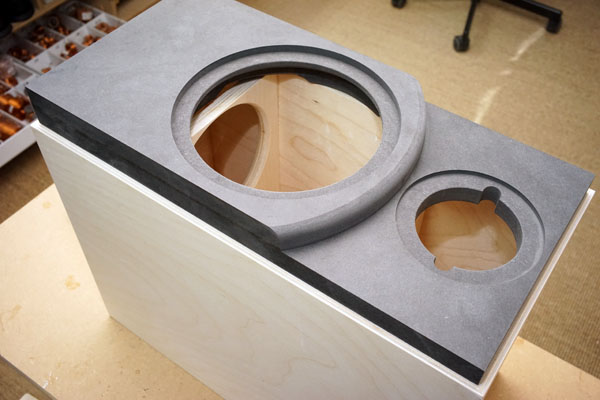
Trimming front panel width.
Gluing front panels.
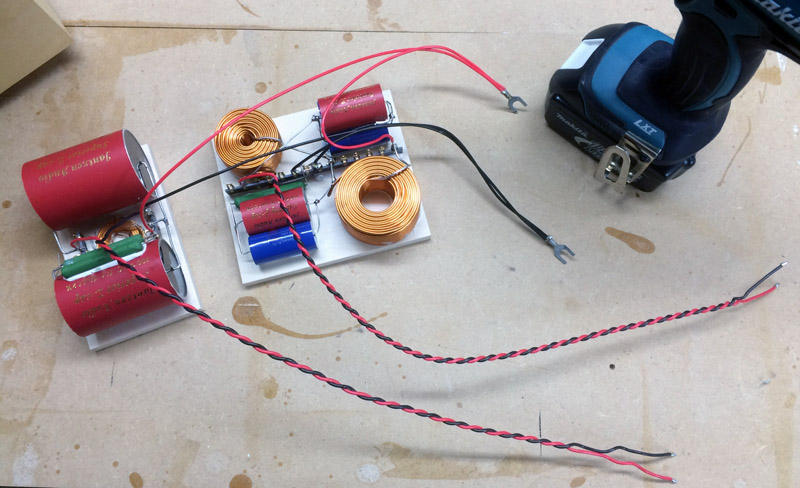
Crossovers ready for mounting. I used stainless steal screws not to
disturb the coils.
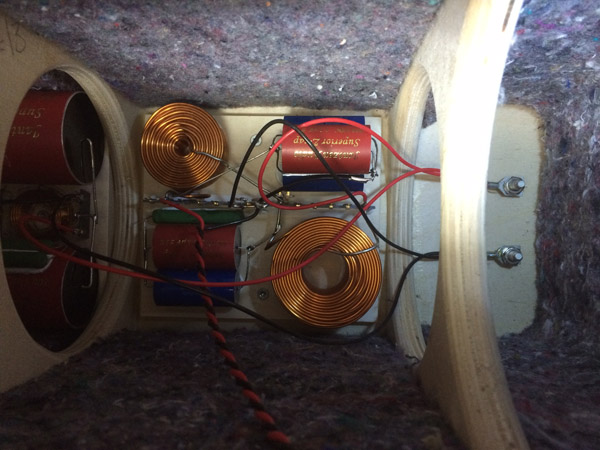
Left: Crossovers in place. Tweeter section placed on rear panel behind
tweeter.
Cabinet damping:
1. Add 8 mm felt to sides, top and bottom panel. No felt on rear or
front panel.
2. Add a piece of 20 x 20 cm 30 mm acoustilux above midbass crossover.
3. Fold a piece of 20 x 20 cm acoustilux behind tweeter. That's all.
Everything that can be counted does not necessarily count; everything that counts cannot necessarily be counted". Albert Einstein.
A few comments on MEASUREMENTS before you start
interpreting all the readings below.
First of all, if we think measurements will tell us how a speaker
sounds, we're wrong. The perception of sound is way too subjective to be
reflected in any measurements we can perform. A loudspeaker system is
meant to give us a satisfying idea of an acoustic event and for some
people a pair of 5 USD ear-plugs are enough, others spend 200 kUSD on a
truly full-range pair of speakers - and the latter may not be happier
than the former.
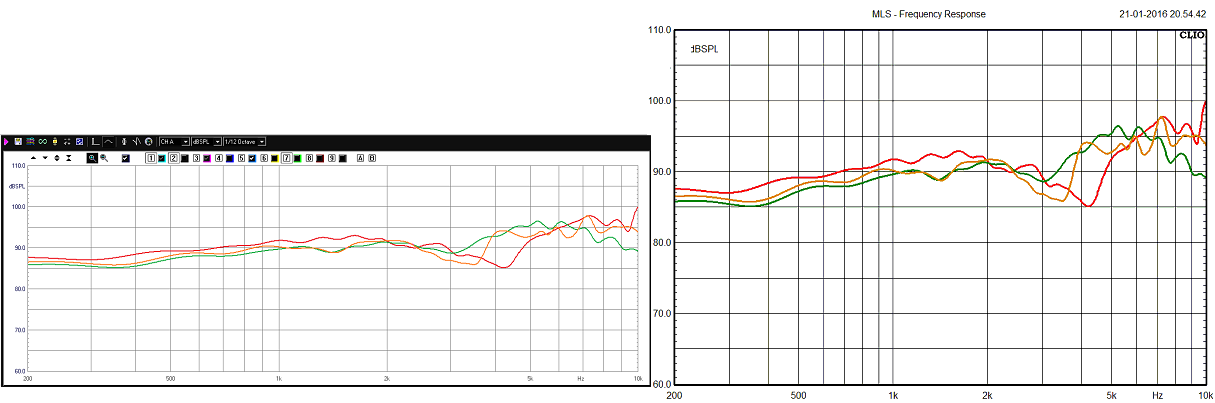
Above you see the same graph presented with the
same 50 dB scaling, but at
different width and height. Now, we may think the graph to the right looks rather
rugged, but if we stretch out the presentation (left) it suddenly looks
rather smooth. The left presentation is often used by driver manufacturers to make their frequency response graphs look better. If we
apply e.g. 1/6 or 1/3 octave smoothing things look even better. Just
this to display how easily measurements can be manipulated to look nice.
Measurements may give us an idea of tonal balance of a system, i.e. too
much or too little energy in certain areas. Measurements may tell us
about bass extension if far-field measurements are merged with
near-field measurements. In addition to this, ports may contribute to
bass extension. Most of us diy'ers do not have access to an anechoic
room for full-range measurements from 20-20000 Hz, nor do manufacturers
for that matter.
Some further info here on commercial speakers:
http://www.troelsgravesen.dk/Stereophile.htm. If I ever made a
speaker displaying such un-linear response, no one would probably ever
build it.
What cannot be seen is what kind of bass performance we get in a given
room. Bass performance is highly dependent on in-room placement of your
speaker and the same speaker can be boomy in one place and lean in
another.
Actual SPL level at 1 meter distance and 2.8V input is useful for en
estimate of system sensitivity and combined with the impedance profile
may give an idea of how powerful an amplifier is needed to drive the
speaker to adequate levels.
What measurements do not tell is the very sound of the speaker unless
displaying serious linear distortion. The level of transparency, the
ability to resolve micro-details, the "speed" of the bass, etc., cannot
be derived from these data. Distortion measurements rarely tell much
unless seriously bad, and most modern drivers display low distortion
within their specified operating range.
Many people put way too much into these graphs and my comments here are
only meant as warning against over-interpretation. There are more to
good sound than what can be extracted from a few graphs. Every graph
needs interpretation in terms of what it means sonically and how it
impacts our choice of mating drivers, cabinet and crossover design.
What measurements certainly do not tell is the sonic signature of the
drivers, because cones made from polyprop, alu, Kevlar, paper, glass
fiber, carbon fiber, magnesium, ceramics or even diamonds all have their
way of colouring the sound.
The choice of crossover topology has a huge impact on the sound
we get. We may produce the same frequency response from 1st, 2nd or 4th
order filters and they may be Butterworth, Linkwitz-Riley, Bessel and
others and they all sound different, very different indeed, so take
care!
SBA 61-NAC MEASUREMENTS

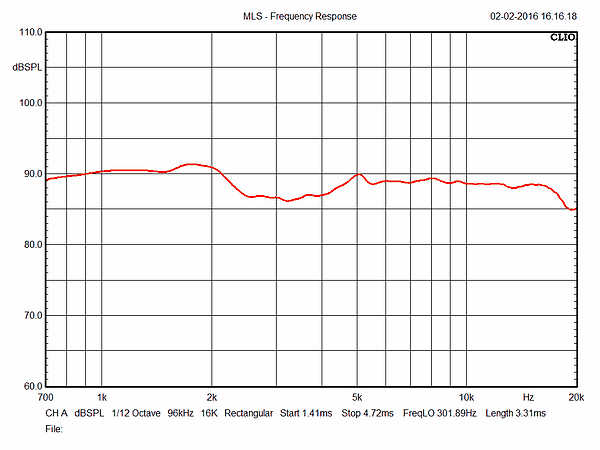
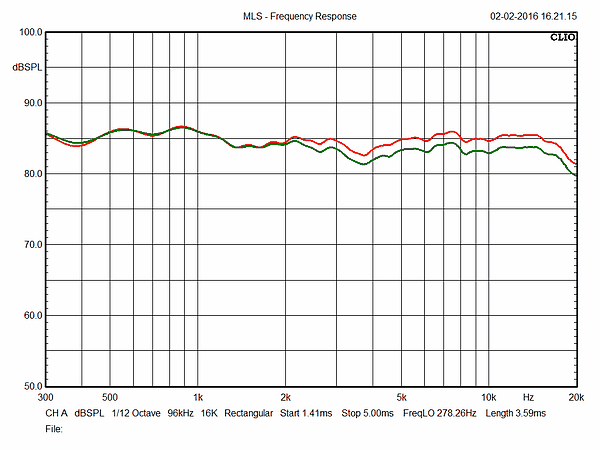
Left: Midbass response on final cabinet without crossover. Right:
Tweeter response.
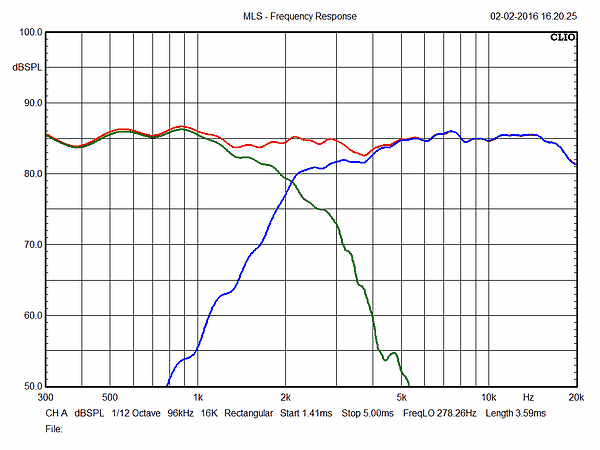
Left: Response of individual drivers driven from crossover and summed
response (red). Point of crossover around 2100 Hz.
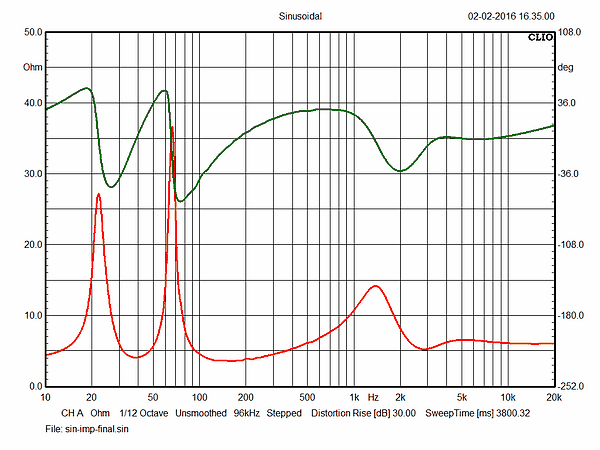
Right: Final system impedance for full length port (145 mm). Final port
tuning is a little higher. Port 50x90 mm.
Left: Horizontal dispersion at 0, 10, 20, 30 and 40 deg. off-axis.
Right: Tweeter attenuation from tweeter series resistor = 1R5 and 2R7.
Crossover components' values to come with the kit.
You can buy the kit with or without the
drivers - or some of the drivers if you already have some.
Please ask
Jantzen Audio for
options.
All kit and component prices may be subject to change and are always to be confirmed by Jantzen Audio Denmark.
Download Kit Sale
Presentations:

All technical questions to troels.gravesen@hotmail.com
All questions regarding purchase of kits, please mail Jantzen Audio at contact@jantzen-audio.com
CROSSOVER-LAYOUT
BACK TO INDEX
Check this out before start making crossovers:
http://www.troelsgravesen.dk/tips.htm#CONSTRUCTION_OF_CROSSOVERS
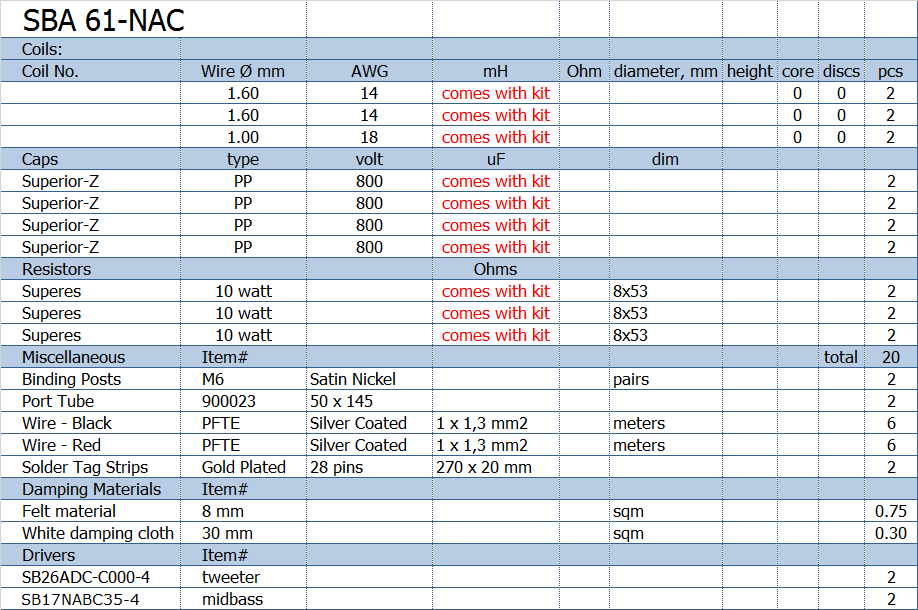
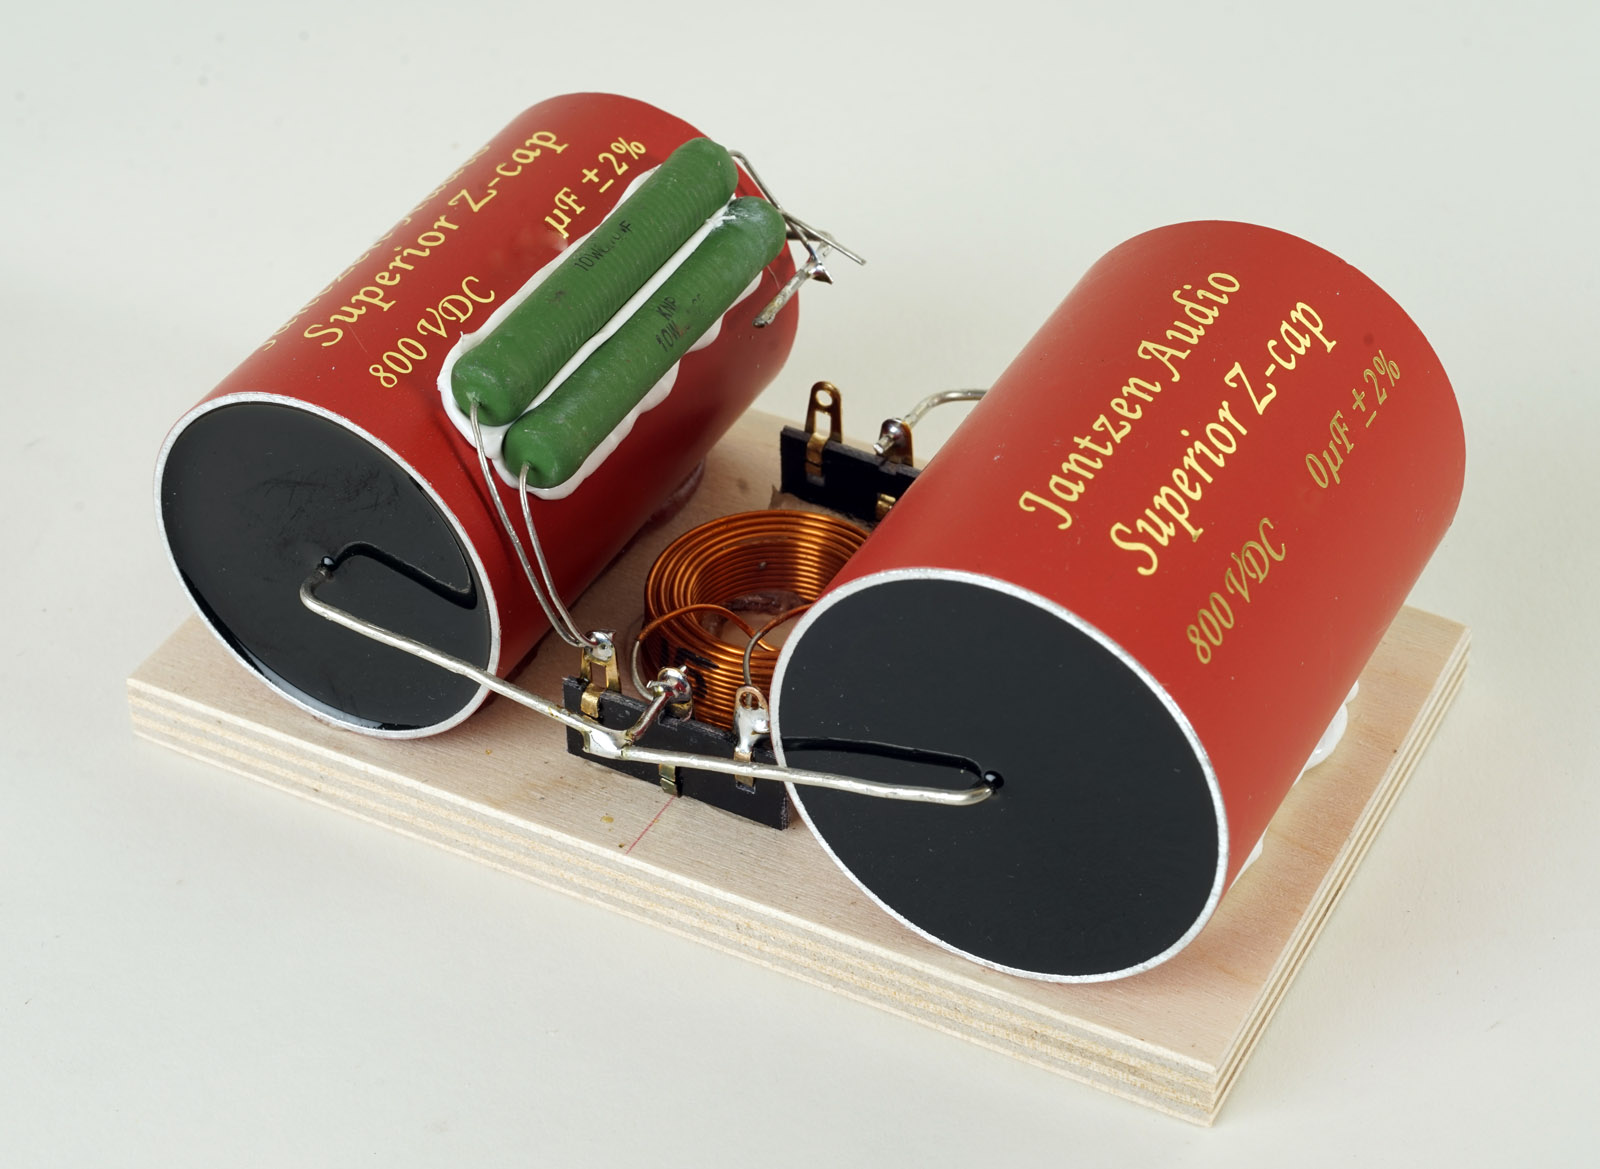
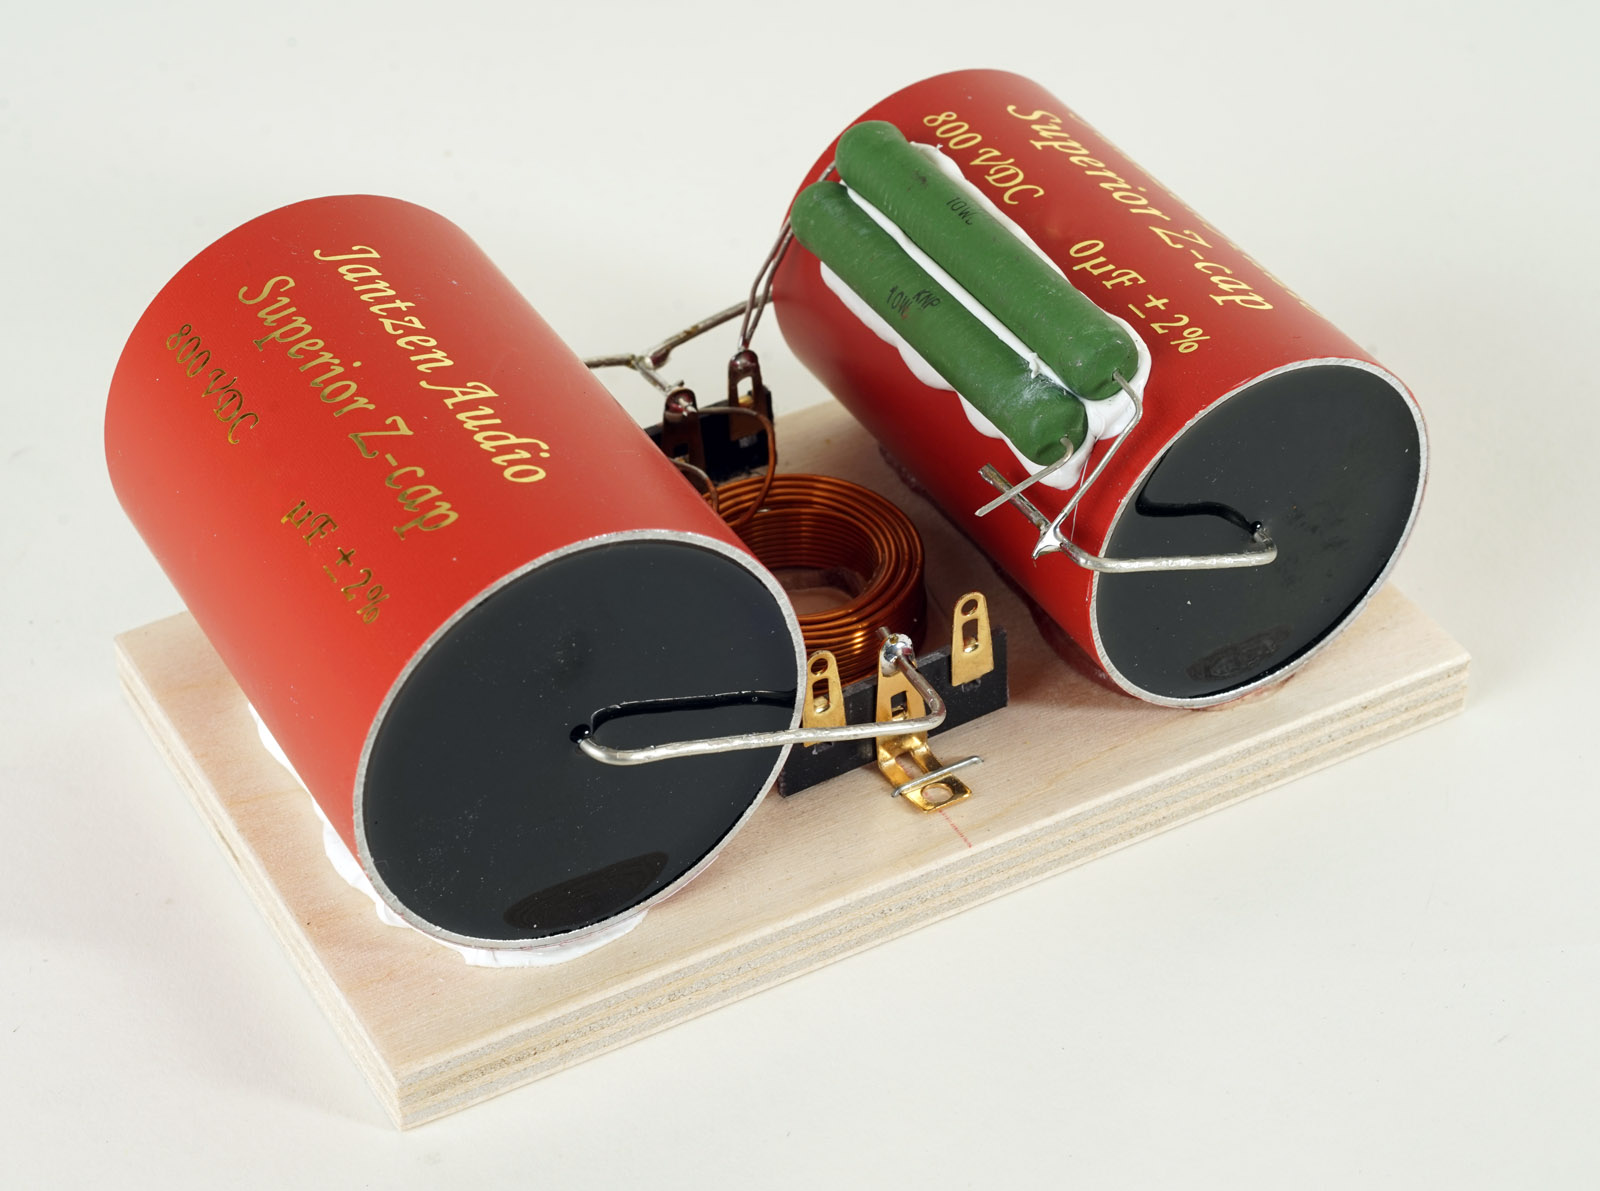
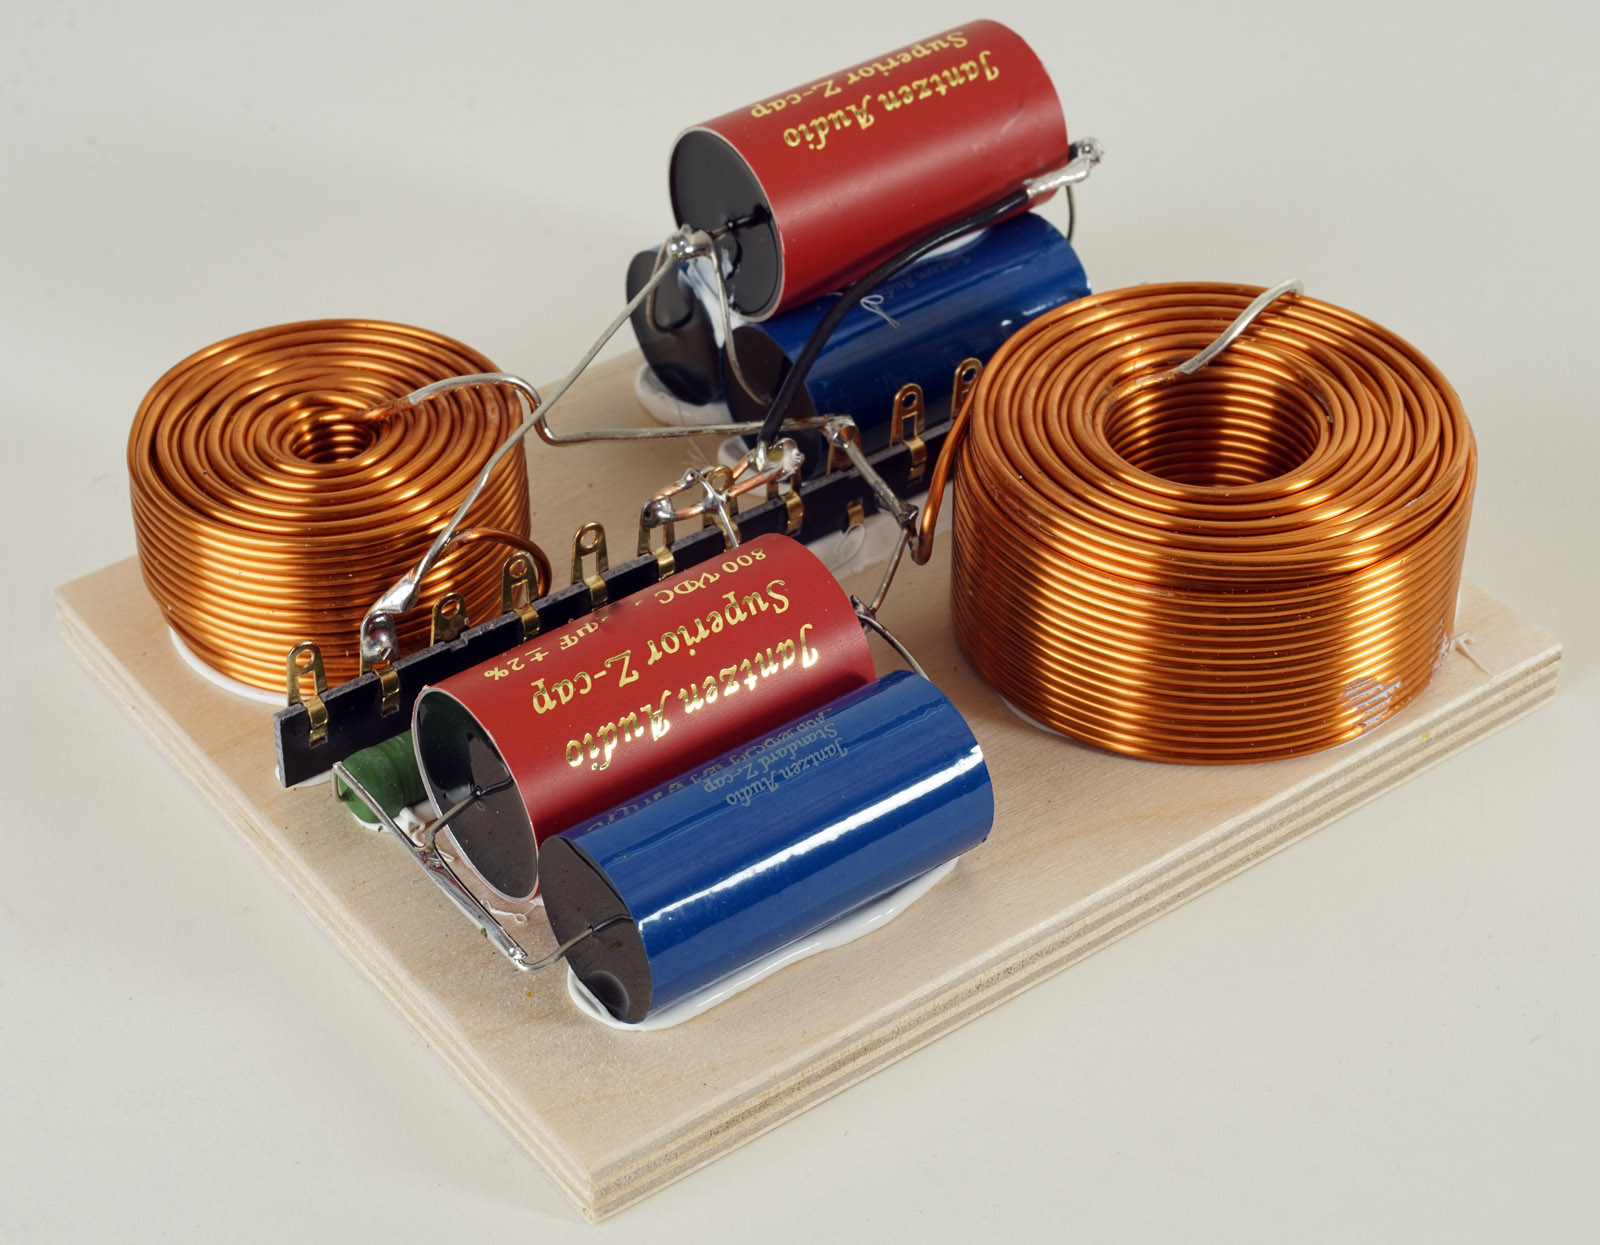
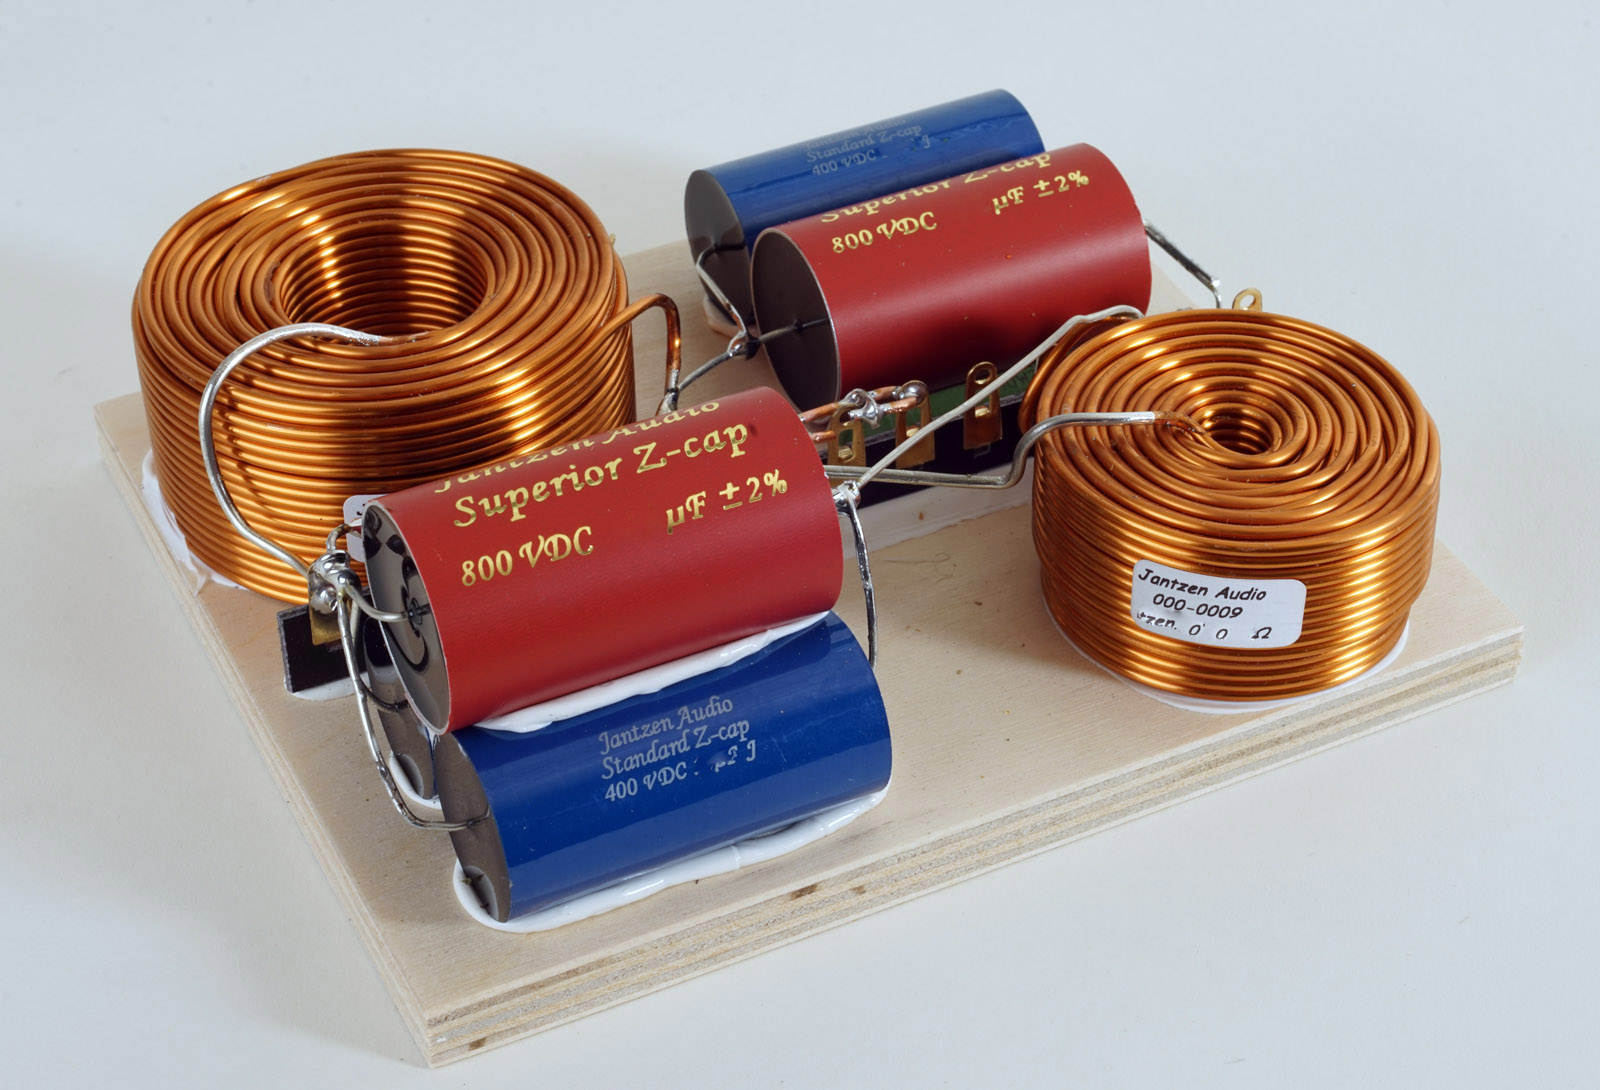
Level 1 components
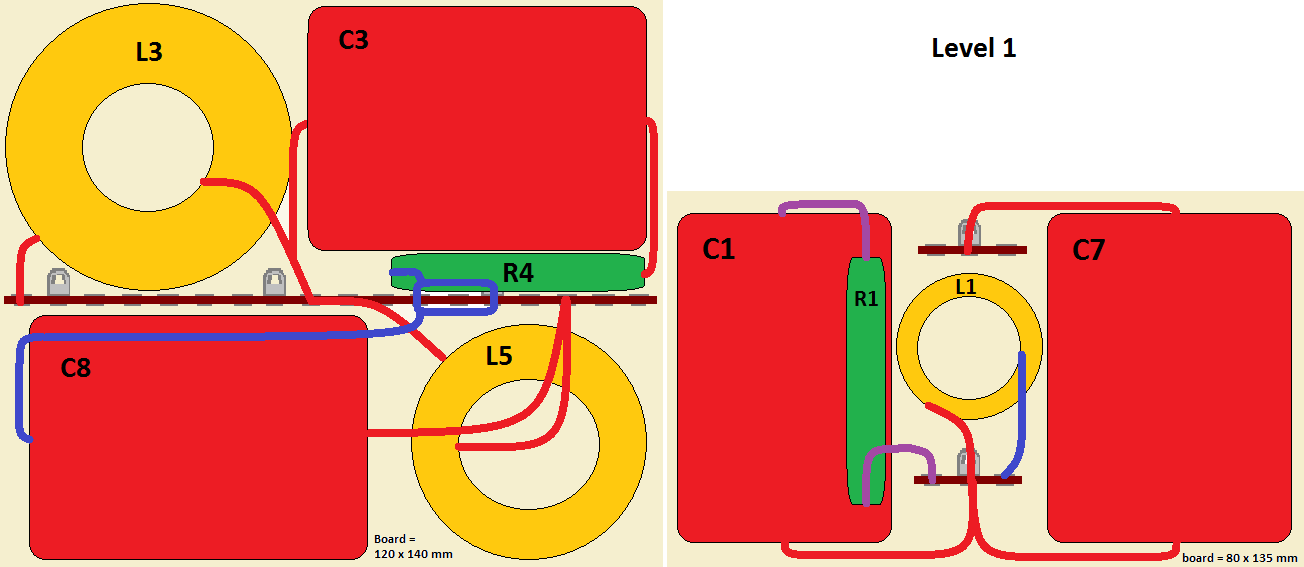
Click image to view large
Level 1, all Superior-Z caps.
In level 2, two of the caps in the bass section are combined from a mix
of STANDARD-Z and Superior-Z.
Wiring
Speaker wiring. Both drivers connected with positive polarity.

Click image to view large

Click image to view large
Click image to view large
Click image to view large
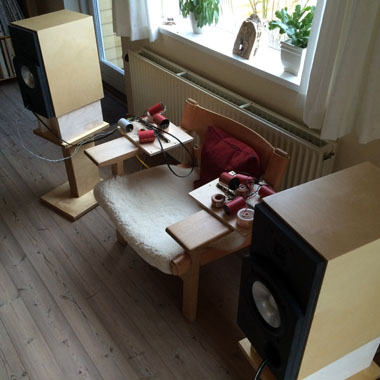
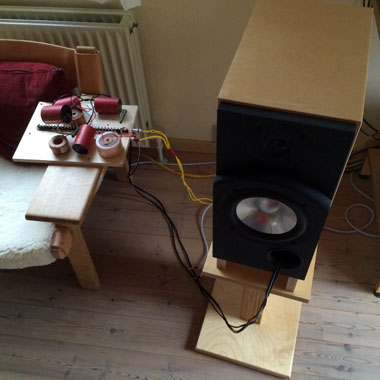
Taking any new speaker construction to the living room for further crossover fine-tuning is mandatory. And bless my wife she doesn't mind crossovers on the armrest a couple of weeks. For small speaker the exercise also includes the "OK, here we go again, gotta get used to no bass"-thinking. Not so with the 61AL! Decent bass filled the room and despite nowhere near the ATS4, the 61AL did decent bass, plus it had some extra features capturing further attention. Listening to small speakers not delivering substantial bass response tends to focus our attention to the midrange/treble. We can get almost obsessed with midrange detail and treble balance. In that sense it's much harder to make a small speaker than a large 3- or 4-way. Improve the bass and midrange improves is a common statement - and obviously the midrange doesn't get better, but having decent bass changes our perception of the midrange.
OK, make some stands of 60 cm height to bring the speakers into a comfortable listening height when sitting in your sofa and toe in the speakers slightly and you're ready for listening.
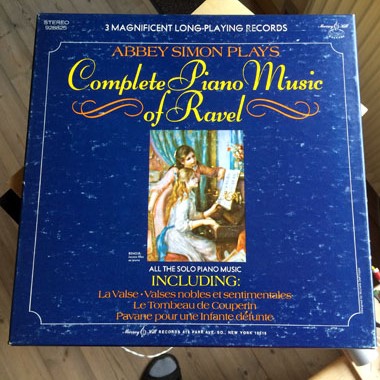
Ravel's piano music is a box set I've
played countless times on my ATS4 and these recordings are not bass heavy
at all (I found the records 2nd hand for 2 USD - vinyl in mint
condition...just have to tell). Well, I was positively surprised! These alu
cones driven by the GlowMaster deliver some extraordinary
transparent sound. Metallic? Please!! Forget it! If your source
material is smooth or harsh, it comes out smooth or harsh - if your gear
is up to it.
This NAC middriver makes me remember the first time I set up my
Jenzen Accuton and had to sit up all night listening to record after
record. The detail and transparency.
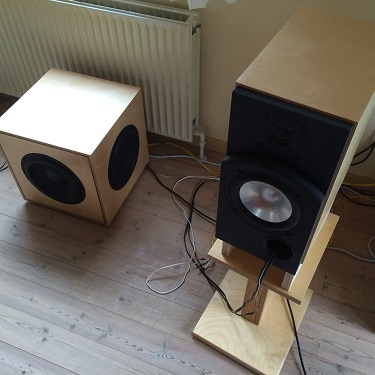
Digging into my jazz collection I added one of my
ScanSpeak
subwoofers and set the crossover to around 60 Hz with minor bass
lift. Sure, the upright bass comes out more solid and articulate. I'd
say a single sub here does well. The SBA-61AL does require some power
despite its 4 Ohm impedance. My 50 wpc GlowMaster has no trouble running
them, but I suggest some healthy 50 wpc as minimum. And your solid state
amps doesn't mind being connected to 4 or 8 Ohm speakers (have this
question quite often). A "4 Ohm" speaker will only draw more current from your
amp for the same volume setting - and play louder. For tube amps it's
more tricky and we have to try 4 and 8 Ohms taps to find what is best. 4
Ohms speakers do not necessarily demand the 4 Ohm secondary transformer
tap. Speakers are by no means linear devices.
Diana Krall 45 rpm (yes, sorry, this is one of my reference
recordings). The 45 rpm version took away a lot of the sibilance
sometimes heard on these otherwise magnificent recordings. On the
SBA-61AL as smooth as ever.
You may object to my use of super-caps in abundance, although I did
compromise on the bass section. Sorry, friends! If you want to extract all these drivers can
do, there's no way around it. Standard PP caps are crap and smear detail
and make a massed presentation that may - if you're lucky - be fairly
smooth on the ear (ear-friendly) but never reveal the detail and
transparency
super-caps can do. Now, level 2 will deliver most of it and to be
fair, I had to search for recordings where I could actually hear
some difference between level 1 and 2 (acapella male vocal, strangely
enough), so level 2 is my recommendation. If you wear belt and
suspenders - or are filthy rich - you need the Full Monty, level 1
crossover.
Mind you also that you can find 25 USD production price drivers in
mega-USD constructions. A good 6" driver is not rocket science. What you
pay for is working hours bringing all the different components together
and making a nice and coherent sound of it - and the cost of getting the
world to know about your product - and selling it. I just again want to
stress that buying very expensive drivers and feeding them through
mediocre crossover components is like fitting a Grand Torino with a 1200
cc engine. We should rather spoil low-cost drivers with state of the art
crossover components and we'll find out what they can do. And these SBA
drivers feature all recent advances in driver technology at a very low
price.

Click image to view large