ScanSpeak Discovery-4
Copyright 2015-2022 © Troels Gravesen
DRIVERS CROSSOVER CABINET MEASUREMENTS SPEAKER-KIT CROSSOVER LAYOUT SOUND FAQ

Click images to view large
I rarely sit in my workshop listening CDs to the end on new speakers during development, but this one made me do. During tests and fine-tuning, I have a range of CDs allowing me to evaluate a range of musical genres, instruments, vocals, etc. Later I bring the speakers to our living room for further fine-tuning, mostly treble balance - and to hear them from better front end gear. My ambition to launch a speaker delivering a significant soundstage from a modest investment seems to come true. Only extravaganza is the Classic midrange, but this driver made such a perfect match to the tweeter, it just had to be.
Prior to this construction, the bass section here was used for another
mid/tweeter and I spent a couple of months fine-tuning
the crossover. The construction was ditched as it couldn't handle
female vocals well enough. It did some classical music, instrumental
jazz and rock very well, but some female vocals just didn't come through
without sibilance and harshness. It seems a lot of female vocals have an
overtone structure that is the litmus test to upper mid/treble integration
and mid-cone break-up nodes and tweeter dome resonances.
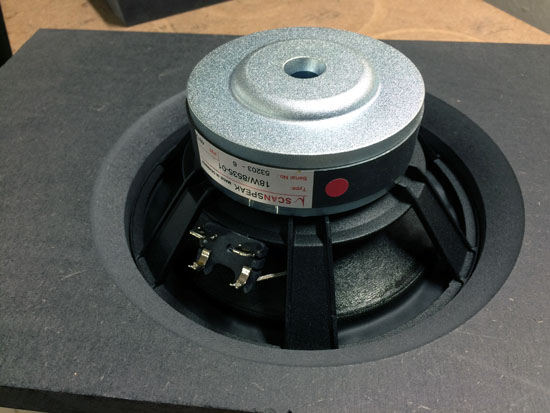
Out of frustration I one day set up the 18W/8535-01 and R2604/833000
tweeter on top of the bass section and in an afternoon I had a speaker
that did all the things I wanted. It does all the troublesome female
vocals I can pull down from the shelves. Amazing! In the beginning I
even had the treble 2 dB too loud, and yes, it was too loud, but without
distress to the ear.
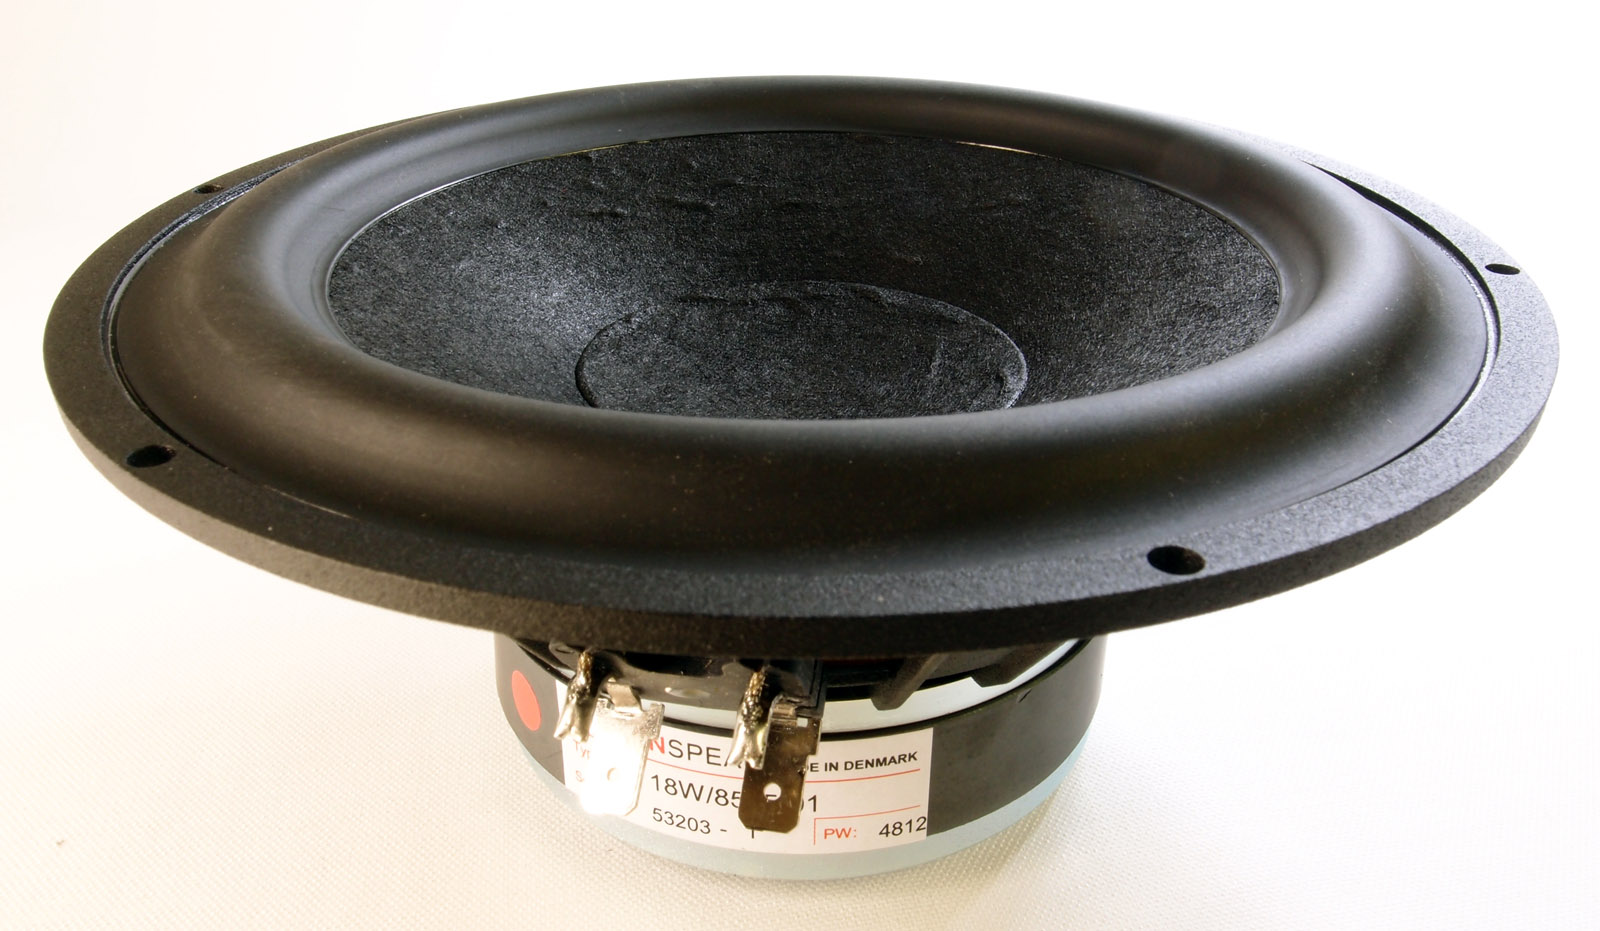
It's been many, many years since I've last time used the 8535-00 driver,
the infamous "2.5 clone", and I ended up hating it. Then came along a client
using the 8535 for midrange and well, actually it did really, really
good. So, the 8535-01 is a slightly optimised version of of 8535-00 and
I've just waited for an opportunity to use it in a new construction.
This is quite a potent system with the "10+8" bass section and my 50 wpc
Einstein amp has no trouble running it to extreme loudness due to a
friendly impedance profile, but don't stick this speaker into corners or
you'll have a bass boom.
The ScanSpeak Discovery series is an option for
modest priced, high quality drivers and already knowing the 22W/8534G00,
this was an obvious choice for the upper bass.
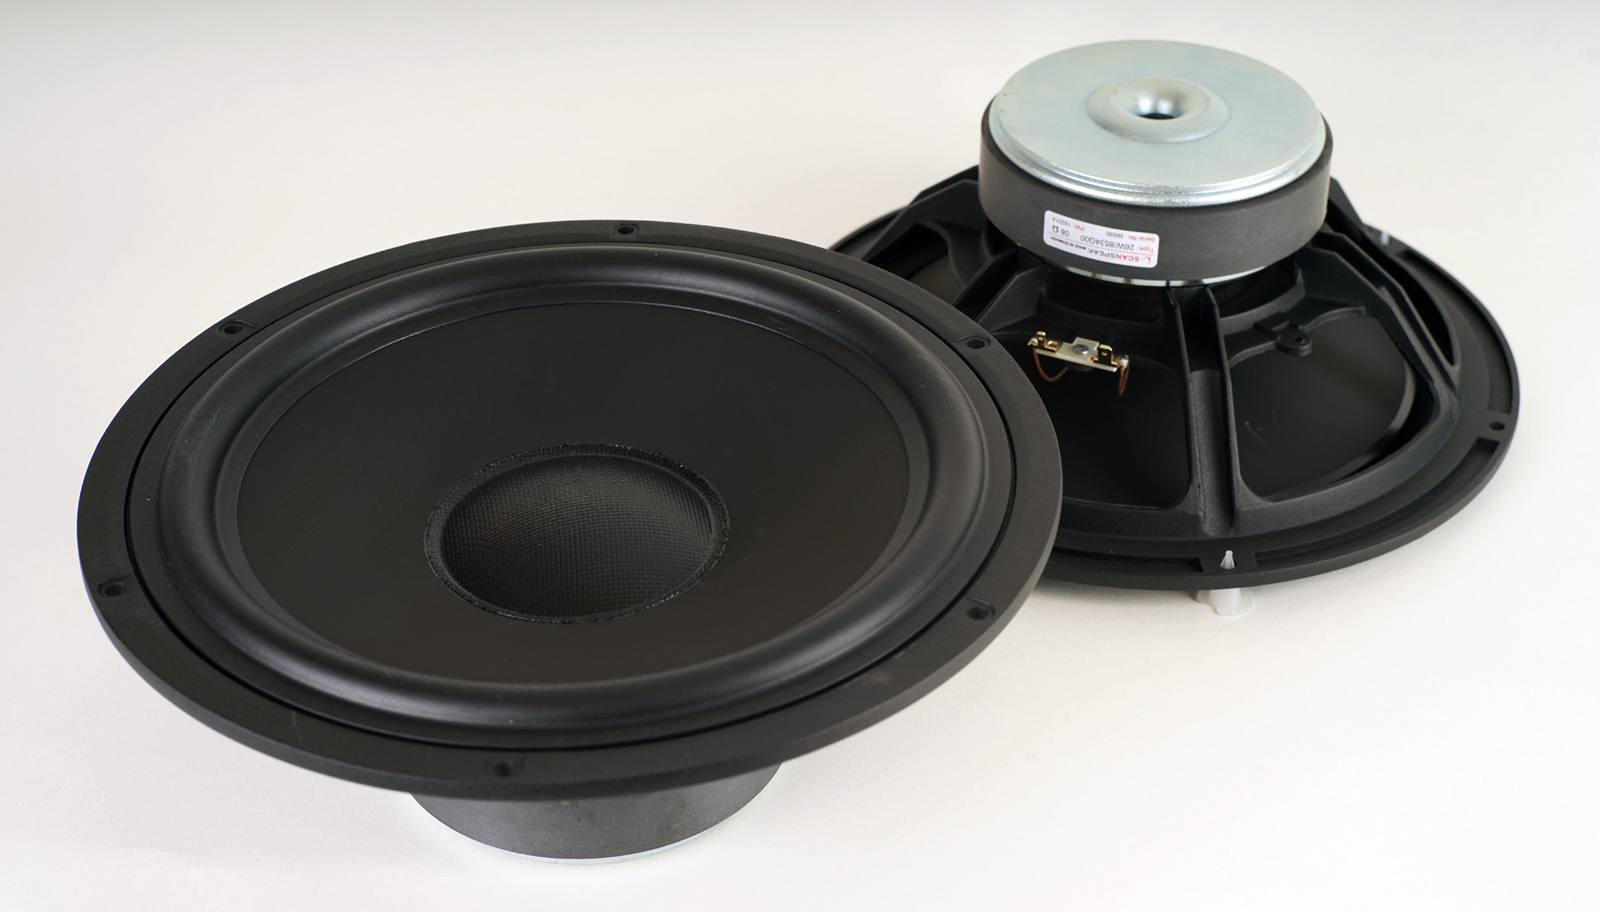
The ScanSpeak Discovery 26W/8534G00 is a really great driver for the
price it appears. A rigid alu cone, working pistonic up to point of
crossover and not least an exceptional high mechanical Q. Sensitivity
around 89 dB, and it's only 88 EUR!
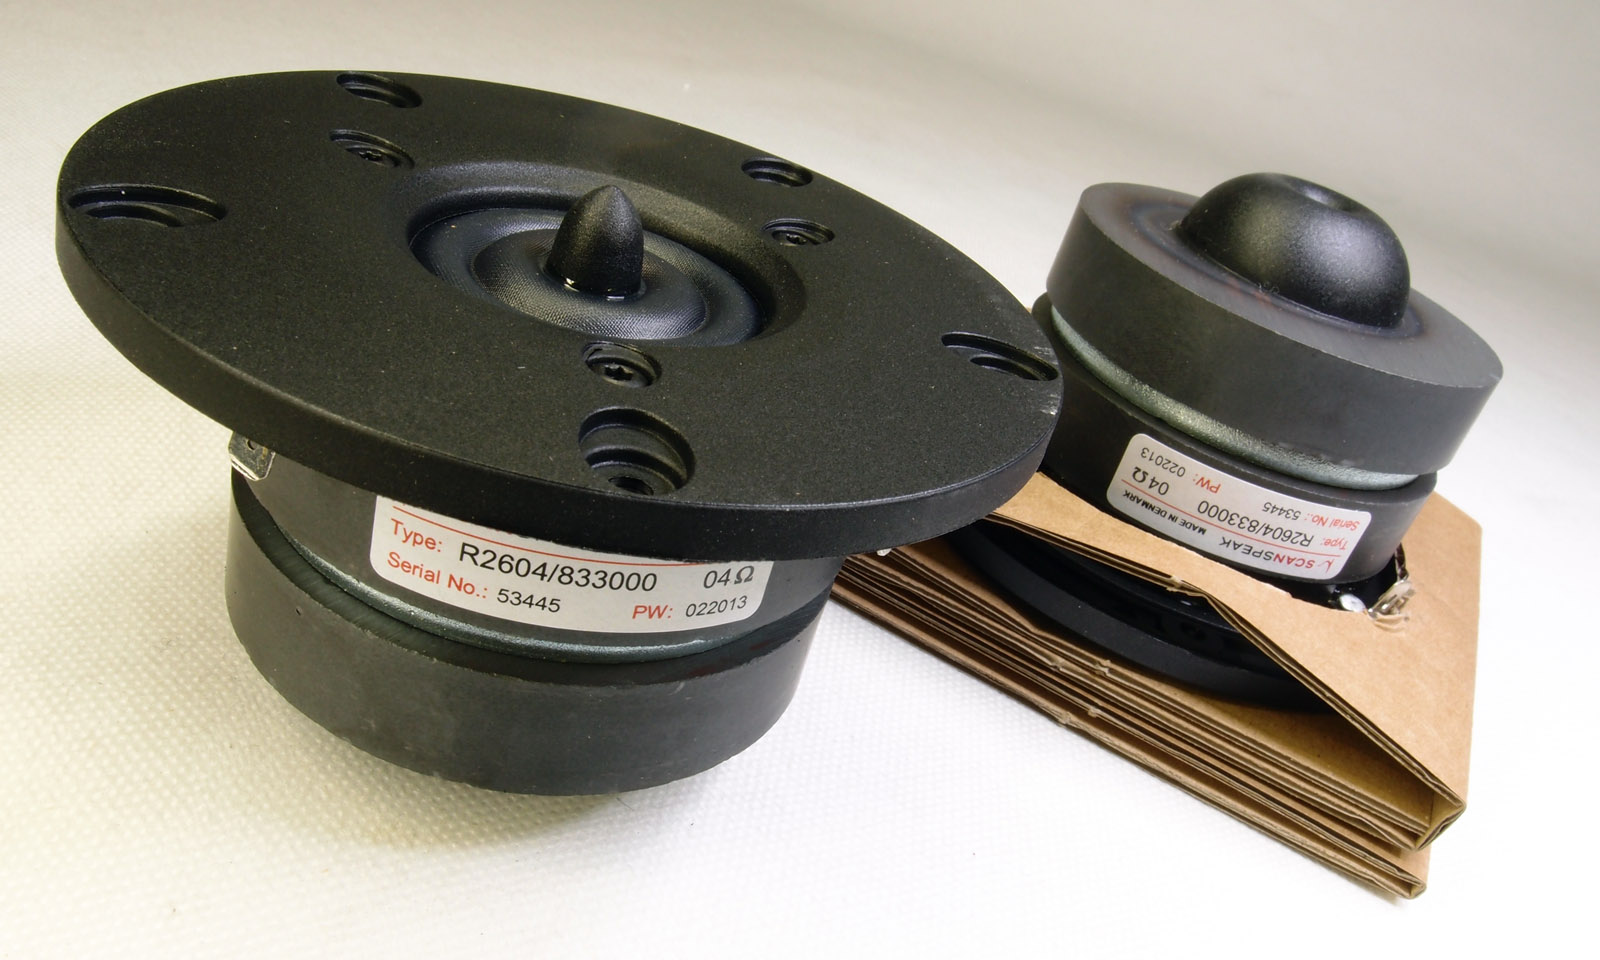
The tweeter here, R2604/833000 made a perfect sounding match to the 8535-01 middriver from an
LR2 filter.
All in all we're talking 790 EUR for all drivers alone (no
crossover). Not too bad for a seriously
potent speaker.
The only "problem" is that the mid-tweeter can cope with the
best of crossover components and we need 88 uF for the midrange! Not
much we can do about it, but a starting point may be to go for standard
PP for the midrange and upgrade later, if budget allows. I still have to
hear even the cheapest driver not benefitting from the best of crossover
components. If the music doesn't come through, how can a speaker
driver deliver?
Basic specifications:
System sensitivity: ~88 dB/2.8V, 1 meter distance.
Impedance: 4 Ohms, 3 Ohms minimum.
Points of crossover: 200 and 2500 Hz, all LR2 topology, time aligned
mid-tweeter.
Power amplifier requirement: Minimum 50 wpc.
Power handling: 150 watts, and please read
here about
power handling, it's not that simple. This speaker can handle a lot of
power, but remember, any burned driver is a misused driver!
http://www.troelsgravesen.dk/tips.htm
http://www.troelsgravesen.dk/tips.htm#CONSTRUCTION_OF_CROSSOVERS
http://www.troelsgravesen.dk/crossovers.htm
http://www.troelsgravesen.dk/LCR-RC.htm
http://www.troelsgravesen.dk/Inverted-Polarity.htm
http://www.troelsgravesen.dk/choices.htm
http://www.troelsgravesen.dk/power-handling.htm
Click images to view large.
Download specs here: R2604/833000 18W/8535-01

Click images to view large.
Download specs here:
22W/8534G00
26W/8534G00

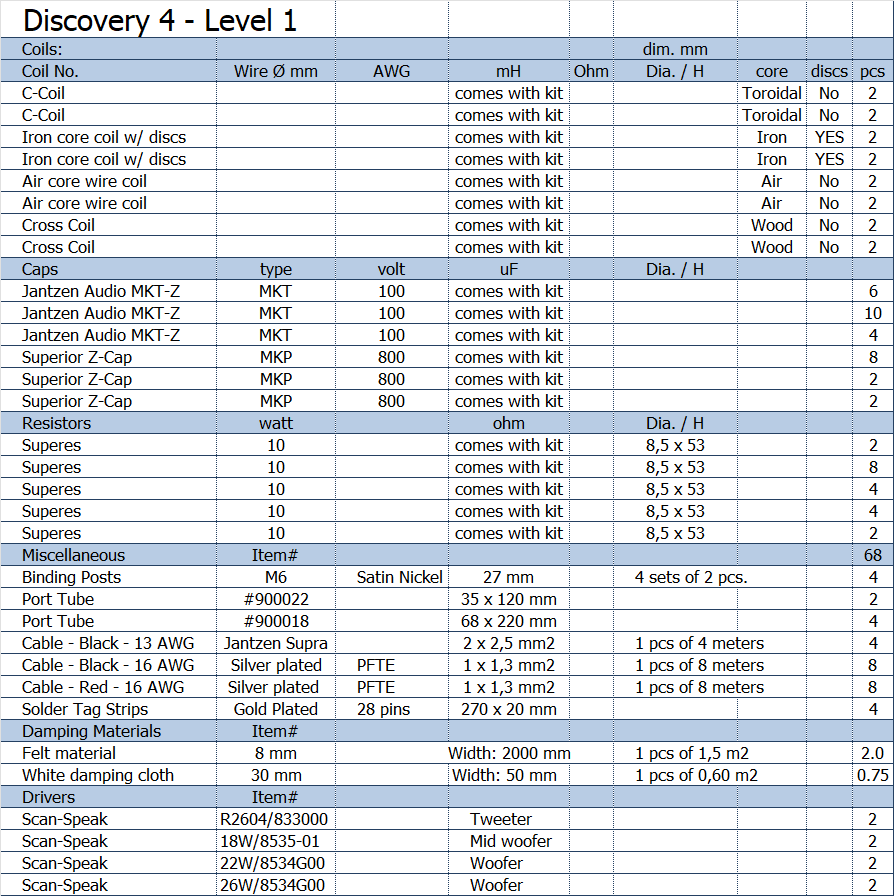
Crossover component values come with the kit
The ”problem” with large 3-way
speakers is that we have a high-pass filter on the midrange driver and
we need a serious amount of uF due to the low point of crossover, in
this case 4 x 22 uF for C2021. These are about half the cost of all
drivers, but the 8535 midrange deserves the best and it’s not like when
we reach a certain driver low-cost level, standard PP caps are just
“good enough”. If budget is limited, fine! We can make the most of it
with low-cost capacitors and it’s not like swapping the 88 uF Superior-Z
caps with STANDARD-Z caps makes it all fall apart. It certainly doesn’t.
I have a double relay arrangement with a switch on a long piece of wire
so I can sit in my sofa and swap between caps for both midrange and
tweeter and it’s really not particularly useful. In a few minutes our
brain is unable to distinguish between the two. It’s highly frustrating!
Our brain kind of has to get used to certain sound (capacitor) and after
some time (days) we may swap to some better caps and realise the more
free-flowing nature of the sound, the ease of listening, the better
resolution, and the more natural timbre. When we sit in front of
speakers and swap components we’re extremely focused, and the big
problem is that we know what
is going on. As soon as we know
something, we’re instantly biased. To keep a totally un-biased mind
is not only a problem in all other aspects of life, but certainly also
in evaluating the quality of something as subtle as the difference
between two crossover components.
I’ve never experienced a driver
that did not benefit from the best quality of crossover components. Even
the cheapest driver will benefit from not having the signal smeared by
lesser performing crossover components.
You can read about super-caps
here, and why
they are so expensive.
Now, in the Seventies it was
common practice to by-pass bi-polar electrolytic caps with 1% film-caps
to improve – in particular – high-frequency quality. I don’t recall if
it really helped, but we did it for the benefit of the doubt. To be
honest I never found any significant improvement from such measures and
I’m highly sceptical when reading about people by-passing even VCaps
(tin foil/Teflon) in amplifier circuits.
Replacing all of the 88 uF
Superior-Z caps with STANDARD-Z caps (9 x 10 uF bank) makes a
difference! It all sounds nice and smooth but not reaching the ease of
musical flow from an all-Superior-Z set-up. Adding 1.0 uF Superior-Z to
the 88 uF STANDARD-Z didn’t make any difference at all. Next I replaced
10 uF STANDARD-Z with
Superior-Z and listened for a while. Not sure it made a difference, but
maybe. Next I replaced 22 uF with Superior-Z and something happened. I
think we need some 20-25% of the total capacity replaced by super-caps
before something significant happens. Having this set-up running for
some days and swapping back to all-Superior-Z, made me decide to launch
this as a second best option. The third is an all STANDARD-Z cap
solution. But keep the
Superior-Z for the tweeter!
Capacitor manufacturers have
tried all sorts of things to improve the standard PP capacitor to make
something in-between the M-Cap standard and the super-caps – and keep
cost down. Narrow caps and long caps, special termination,
high-quality metallised polyprop (German) and there’s no way we
can be sure this all has an impact. The Germans usually make quality
products, but they probably make the machines that make the metallised
polyprop and whether that machine is placed in Germany or Taiwan may not
mean a thing. It may be the same product that comes out. Some
manufacturers claim their caps are very hard wound.. Shouldn’t they all
be? Not that they are, because I’ve experienced caps that were easy to
squeeze at the centre, an indication of potential microphony (the foil
will vibrate when charged and start adding to the signal passing
through). I’ve tried the long caps, the short caps, caps embedded in
cement and put into nice looking metal tubes – all standard PP – and it
really doesn’t turn a standard PP into a
super-cap.
There’s a lot of woodoo in this business and some go to nature and use
bee-wax or some other exotic natural compound to make us all feel good.
Take care and be sceptical.
Click image to view large

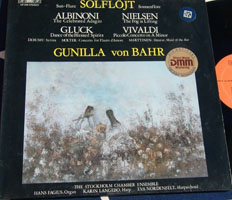

Solo flute by Gunilla von Bahr is an excellent
Swedish BIS recording made on an A-77 Revox tape recorder run at 15
i.p.s. back in '77. If your speakers can cope with the flute, you've
come a long way. The DISC4 does it!
I've started buying a little freshly pressed 45 rpm vinyl from the US.
It costs a fortune with transport, VAT and fees, but it's worth it.
The Percussion Direct is cut while artists are performing! No tape, no
digital storage, direct from the microphones to the lathe.
The dynamics are explosive and the ScanSpeak drivers are up to the
task. The piano comes through with a life size feeling.
Vanessa Fernandez is an excellent recording with a not particular
easy vocal mixing. It's one of these recordings where you wonder if it's
the mixing or your system that may need a little fine-tuning. Not an
easy vocal.
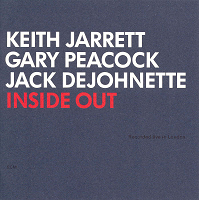
Inside Out by Keith Jarrett is what my wife calls stress-jazz and I only
play it when I'm alone. It demands dynamic speakers and the DISC4
delivers the goodies and the piano comes through very well indeed.
To be honest I'm a bit afraid of telling how good I think these speakers
are. The mid-tweeter integration and synergy between these two drivers
is on par with the ATS4 and tells Be domes aren't the final answer to
good sound. Where they differ is in the flavour of the midrange. The
ATS4's midrange can be a tad more smooth where the 8535 may
deliver even a tad more transparency. The 8535 drivers have
some resemblance to the Accuton 173 middrivers when it comes to
transparency and sonic signature. In the end a matter of taste. The bass
section delivers the same punch and attack as the ATS4 but may not have
the same power handling as the ATS4 bass drivers, but nothing that
matters in a normal living room environment at any reasonable listening
level.
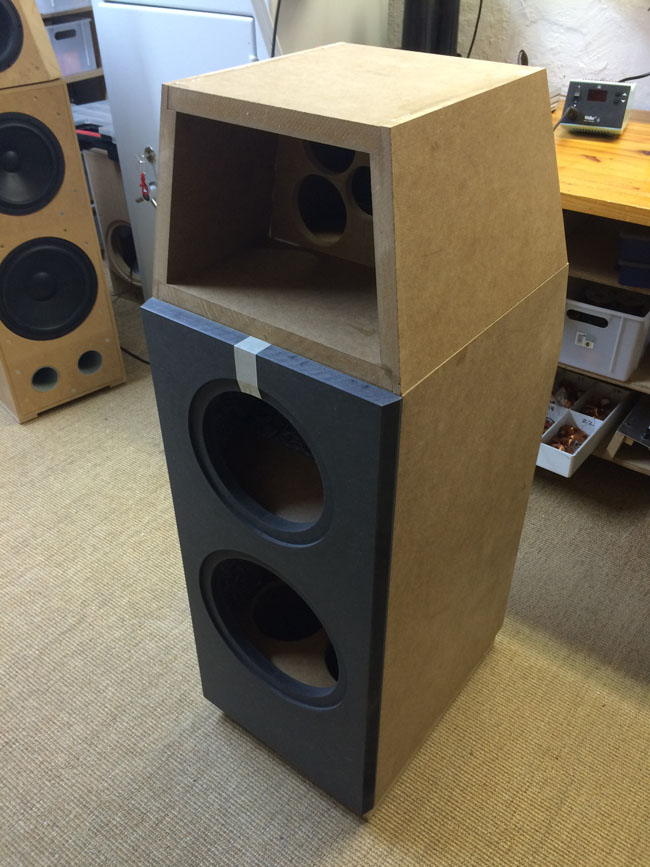
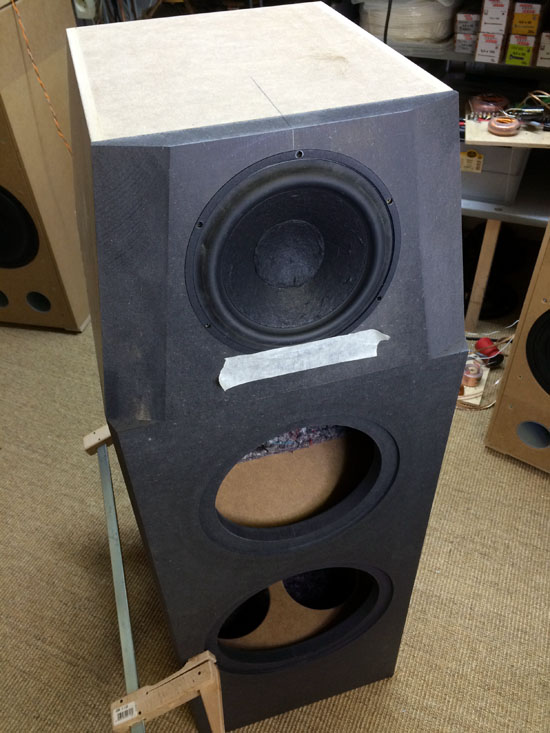
TEST CABINETS

When doing a new project, always make test cabs. We can never know how
drivers perform on our dream cabinet design. Design and acoustics go
hand in hand. In this case it was easy. I had my ATS4 bass test cabs and
didn't even have to make new front panels. For the mid, new cabs had to
be made and the only thing that worried me was what the frequency
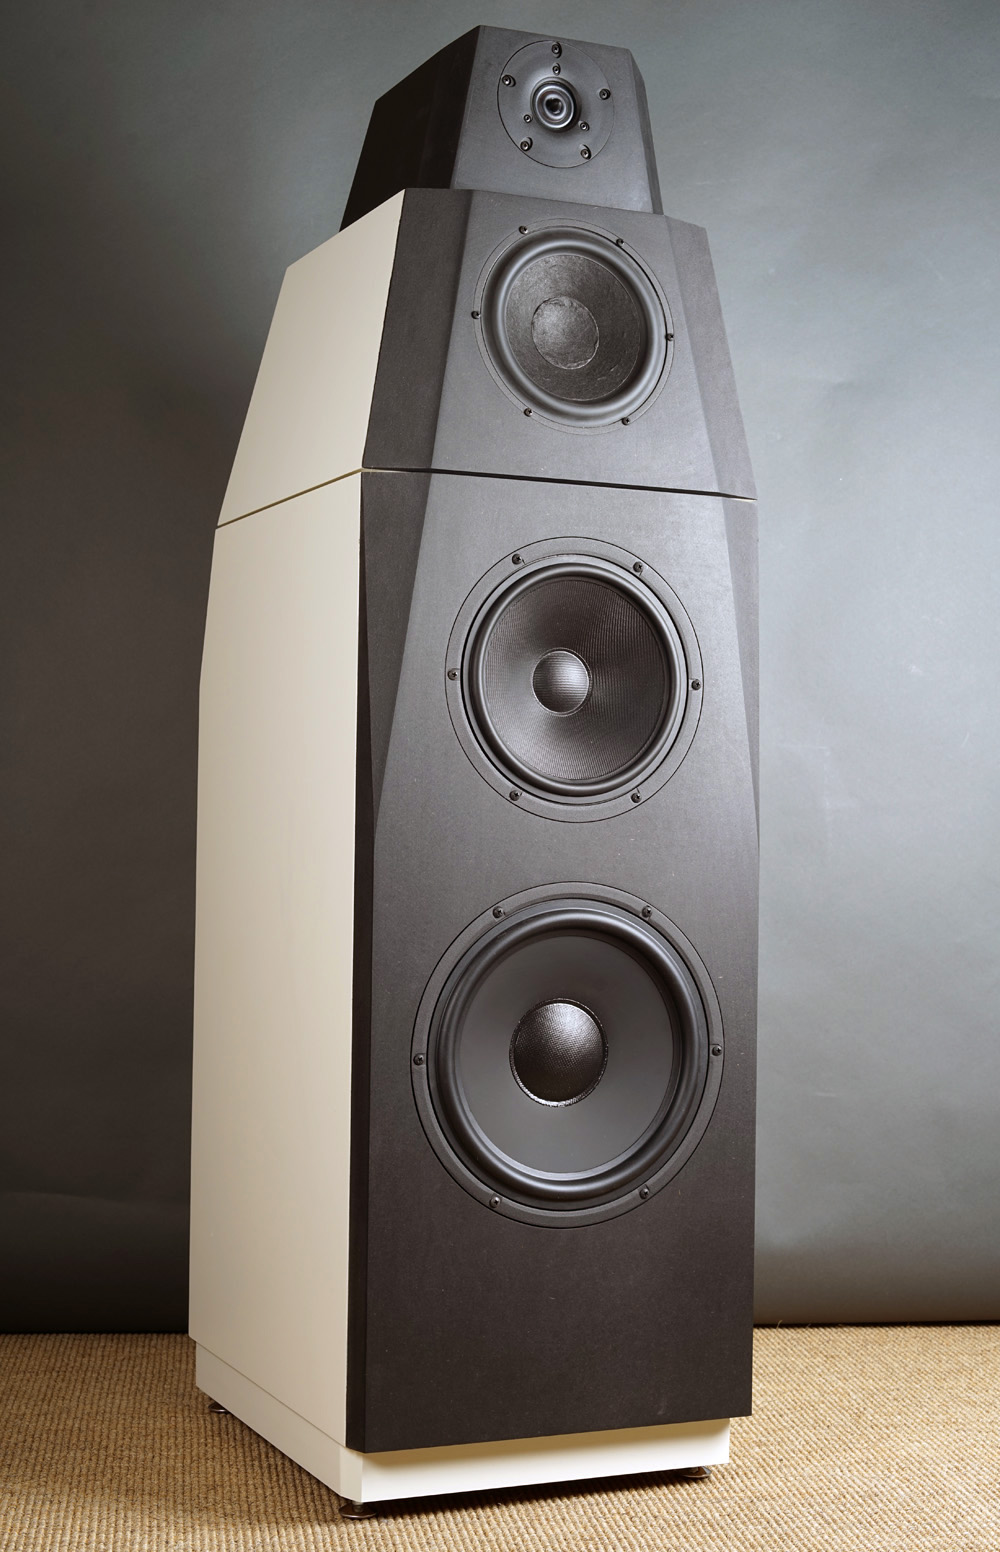
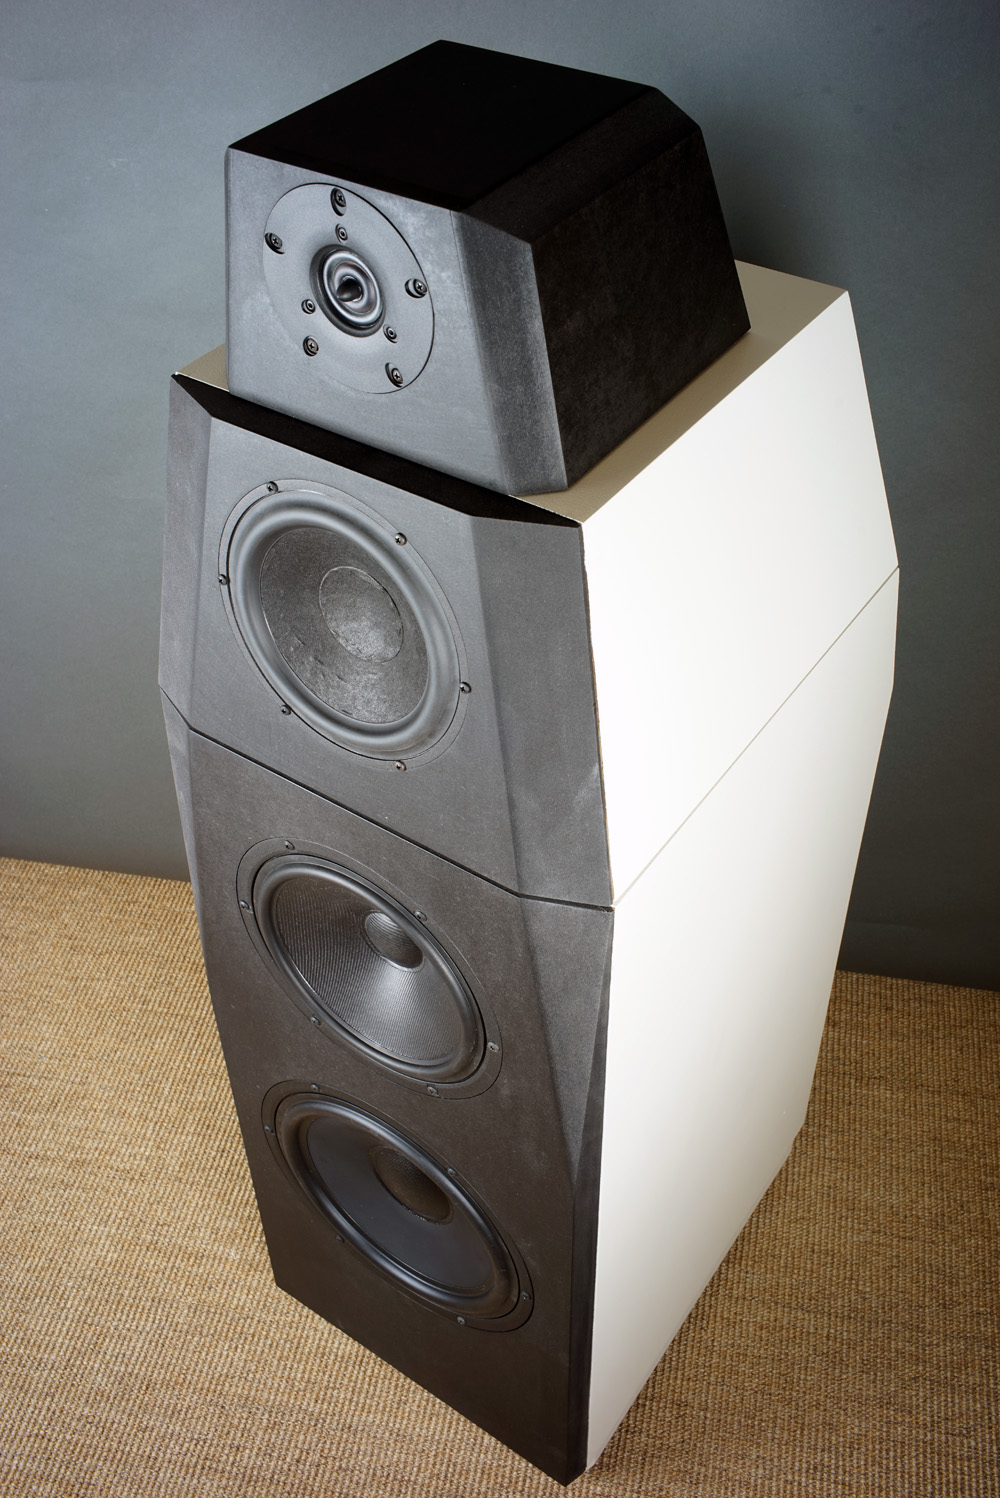
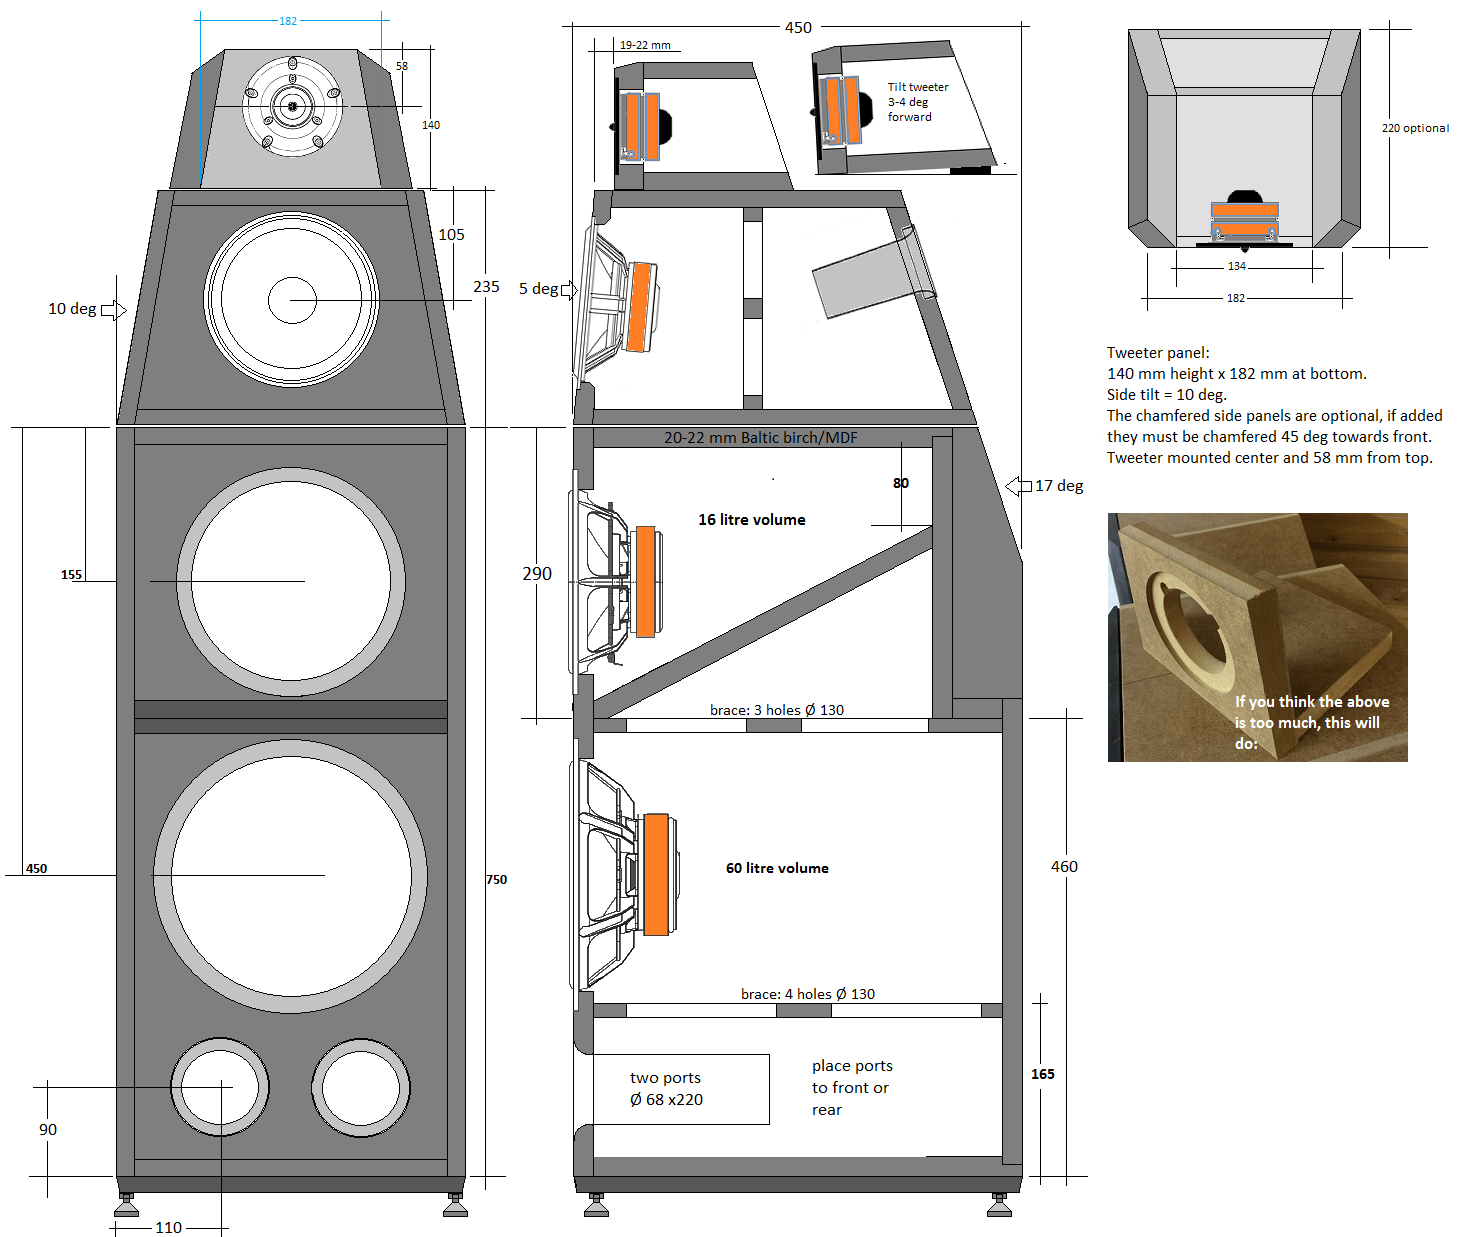
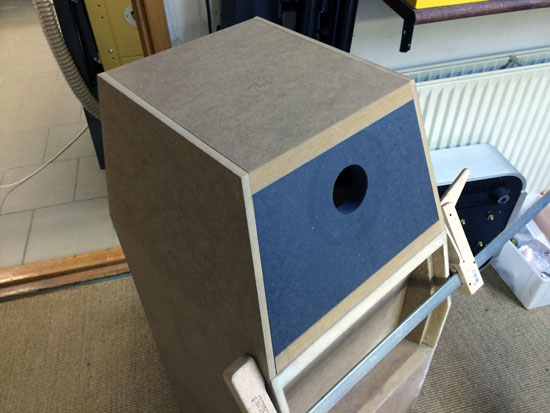
response would be like on my intended truncated pyramid, as the
technical term goes.
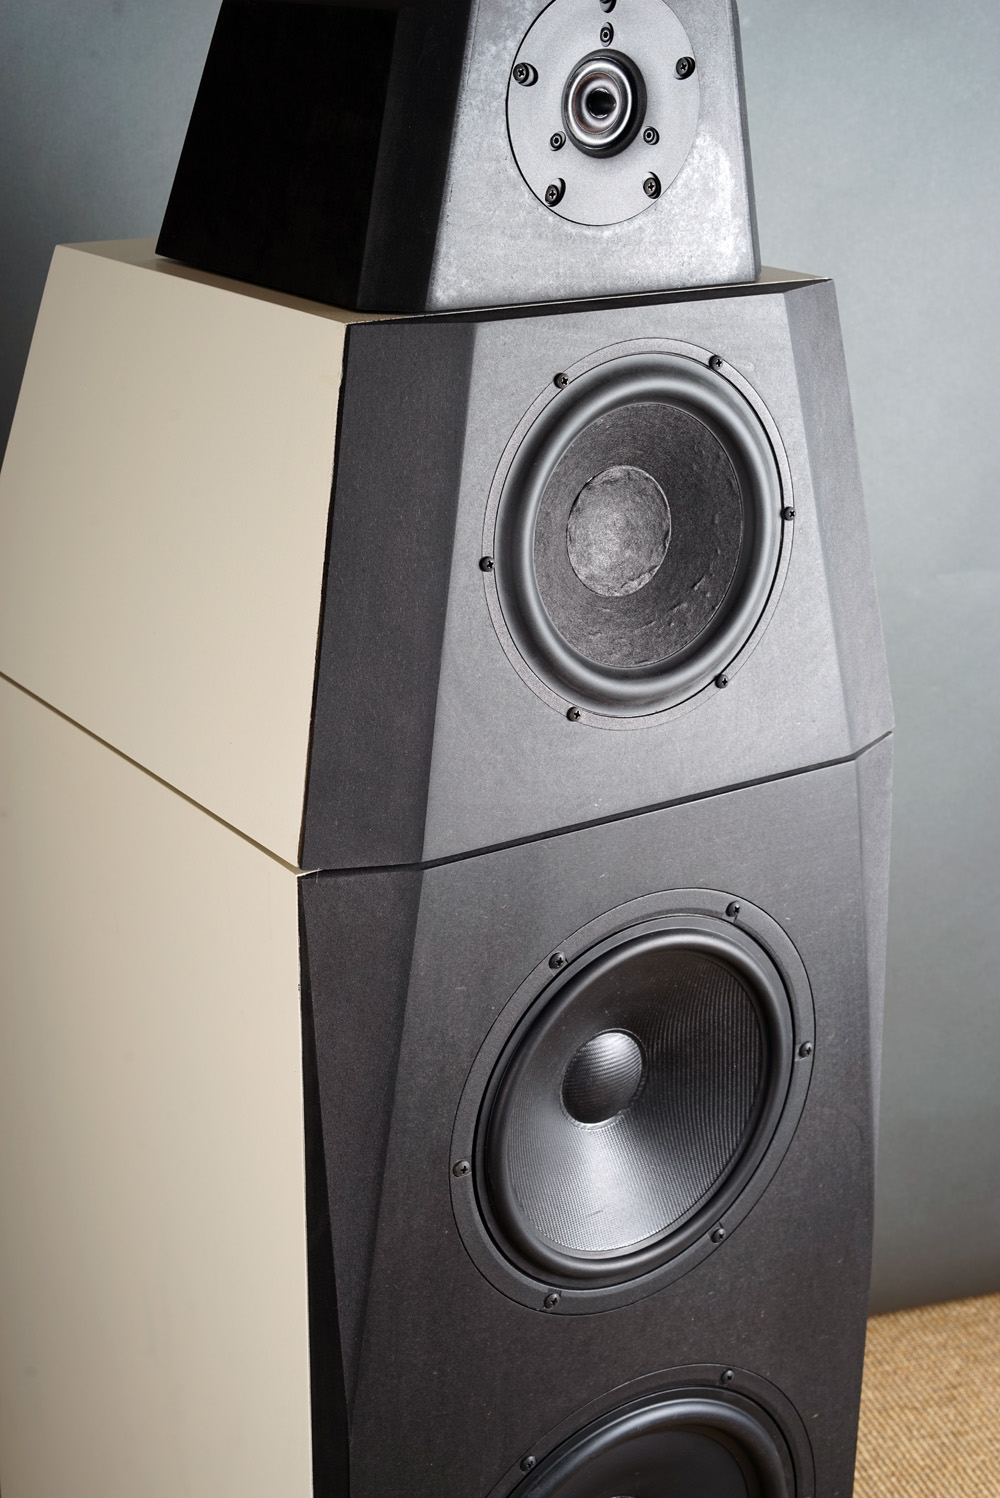
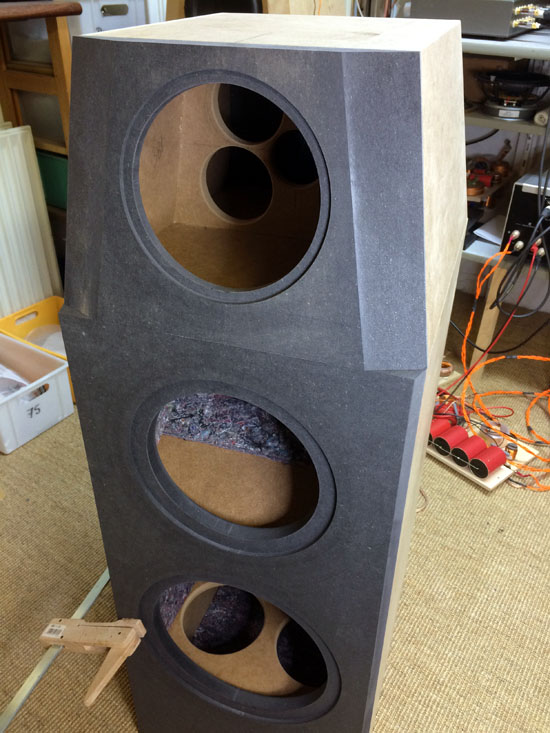
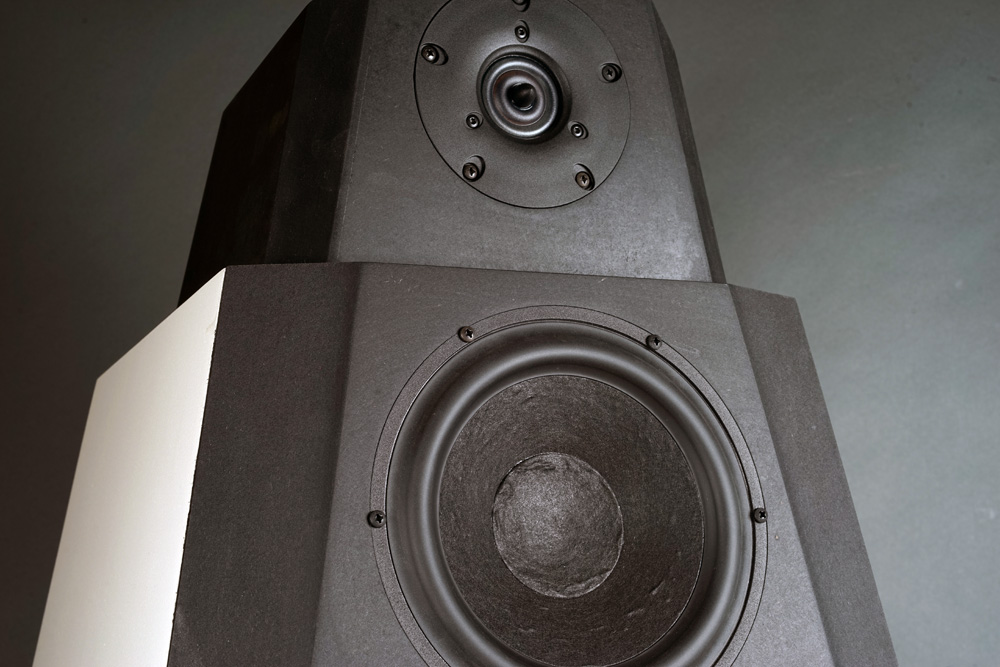
Isolating the mid and tweeter from the bass cabinet is a good thing
(vibration). The front of my pyramid is tilted 5° and the rear 17°.,
this to reduce standing waves between front and rear. The side panels
are tilted 10 deg.
I'm really
exited about the performance of the Discovery bass drivers. Frequency
response is excellent, even from the 10" alu driver. I have high
expectations.
Final CABINETS
BACK TO INDEX
Click image to view large
FAQ:
Yes, these are all the drawings available.
Yes, you can place the bass port on either front or rear panel.
No, you cannot use any other driver than those specified. And no, don't
use the D2604/833300 tweeter, the R2604/833000 is to my ears a match in
heaven!
The fronts and tweeter cab are made from black MDF (really HDF), given
one oil rub.
The cabs are painted with water based paint, gloss 25. Applied with a
roller. Warm cream colour.
BACK TO INDEX
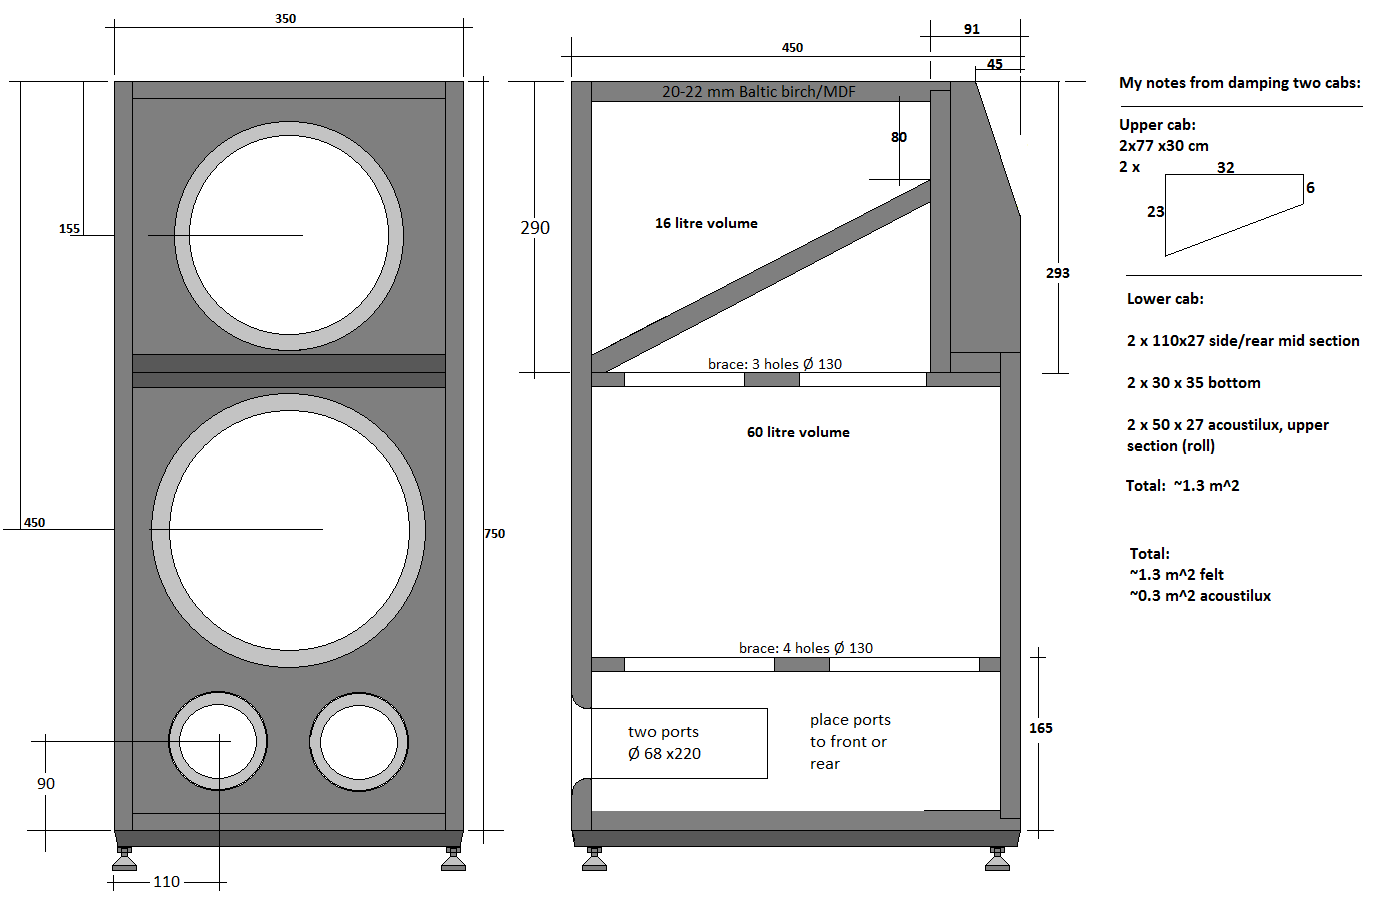
The cabs can be made from 22 mm MDF throughout.
As always, keep front
panel dimensions, drivers' placement and cabinet volumes. What's behind
the drivers can be modified to your taste.
My upper cabs have some chamfering with some continuation on bass
cabinets, but it is optional. You can leave it out if this proves too
troublesome and it won't impact frequency response noticeable.
Chamfering of mid front panel towards tweeter must be done according to
drawing (20 deg). Tweeter front panel must be kept exactly to
specifications.
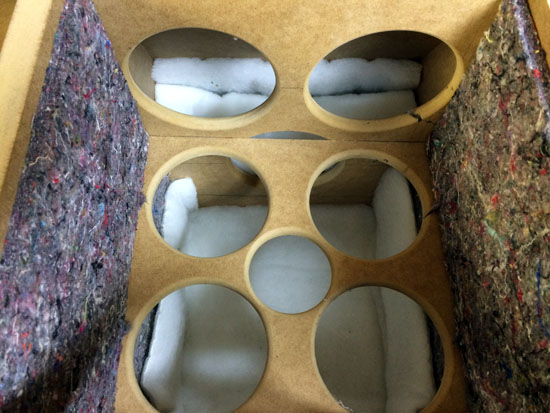
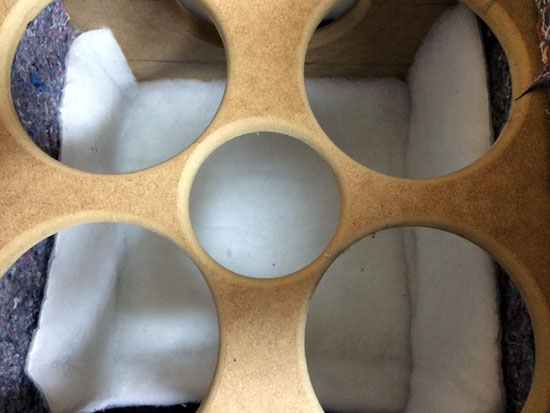
All internal panels are damped with 8 mm felt material as suggested in
parts' list. Behind the 10" bass driver on rear panel I placed two
layers of 30 mm acoustilux and top of same cabinet was loosely filled
with the same acoustilux.
8" bass cab is having a roll of acoustilux placed towards the rear, 60 x
30 cm.
Add acoustilux to all internal panels of midcab except bottom.
More bass cab measures below around mid/tweeter crossover placement:
Click image to view large
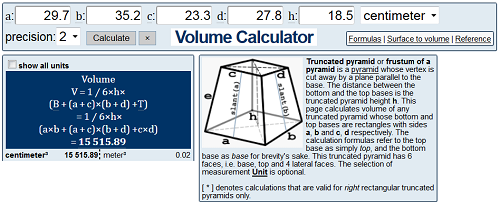
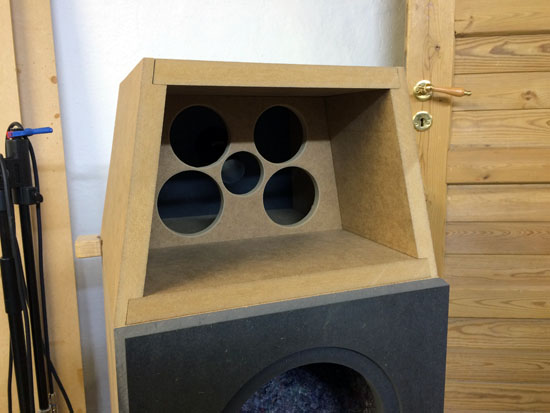
The
volume of the mid-cab is 15.5 litre from 22 mm MDF,
minus bracing and driver plus
increase in virtual volume by damping materials.
Let's just say one compensates for the other and stick to 15.5 litre.
The mid cab will have a lightly stuffed vent to make an aperiodic
tuning.
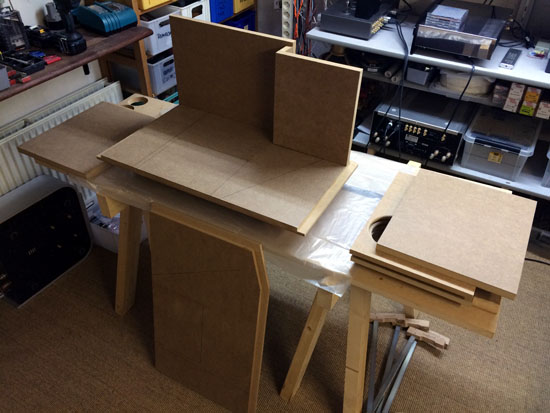
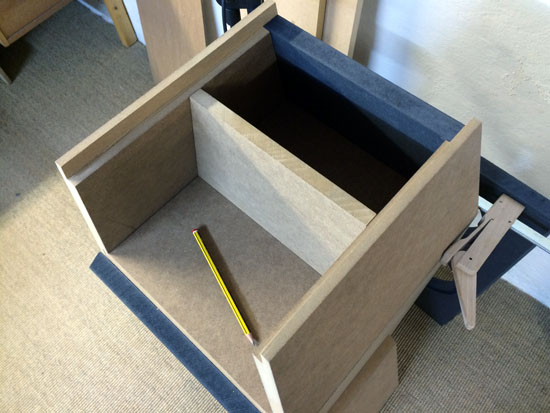
Construction pics
Bass cab

Starting with the bass cabs, this is pretty straight forward.
You do not have to make the rebates I made, but it makes assembling
easier.
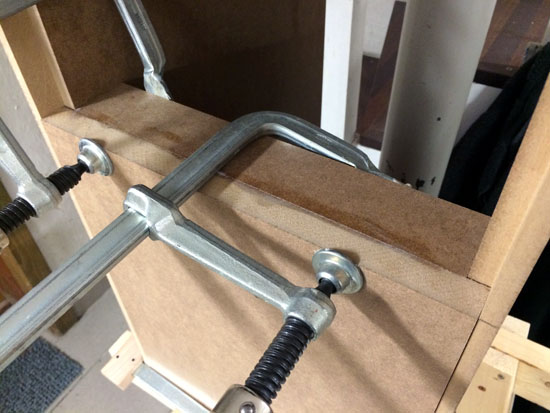

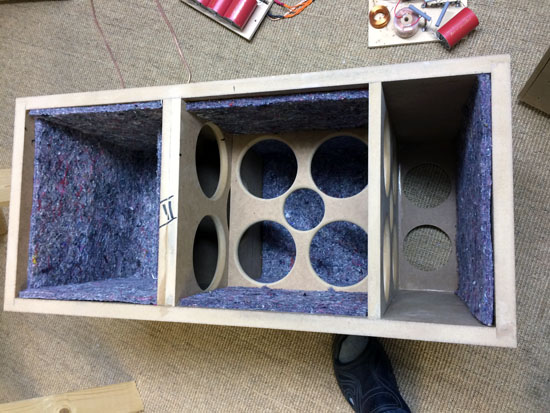
To the right the bracings before routing the holes.

Checking out internal panels and bracings before routing holes.

After an hour of routing (right).

Final check before any gluing.
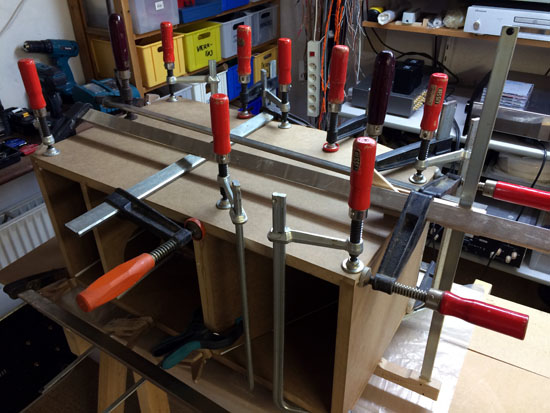
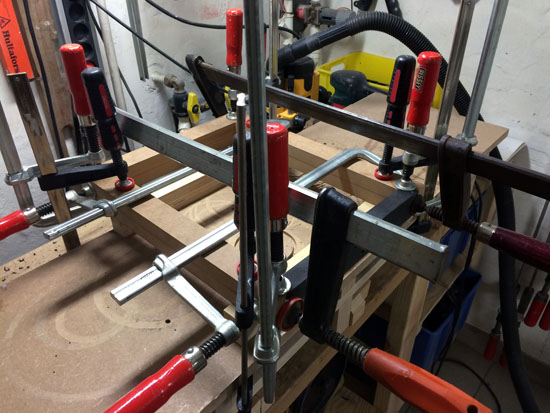
Gluing takes careful preparation because time is short.
In fact all
should be done in less than 10 minutes before the glue settles.
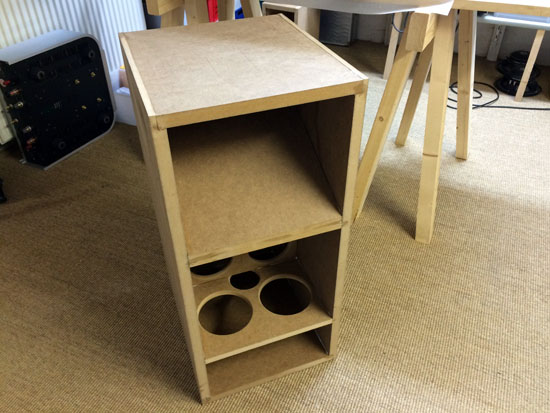
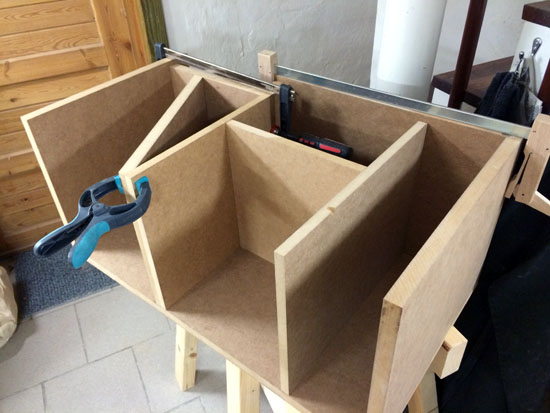
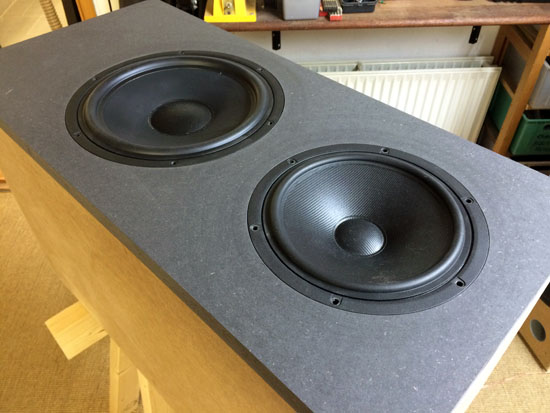
The finished basic bass cabs after some sanding. Now time for the front
panels.
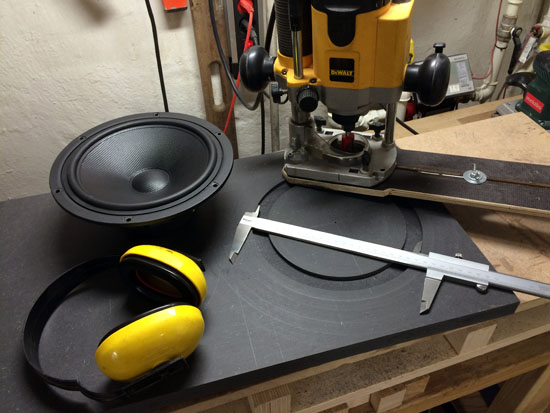
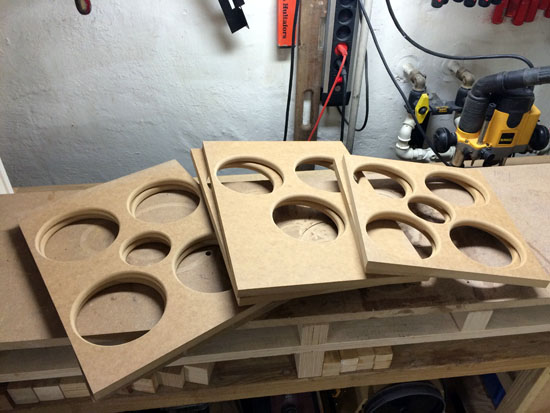
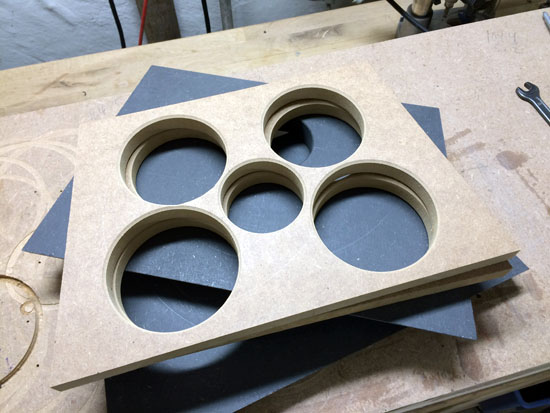
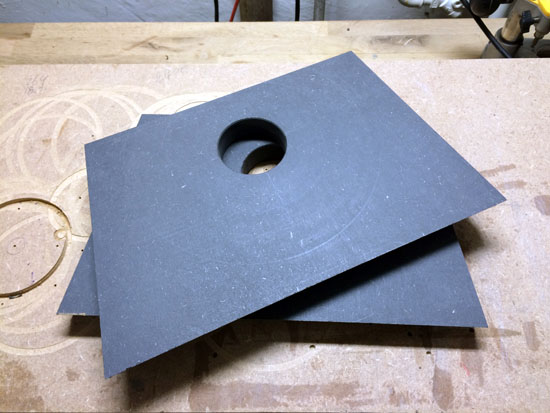
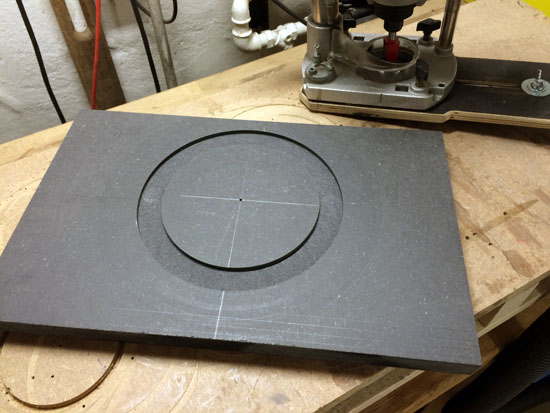
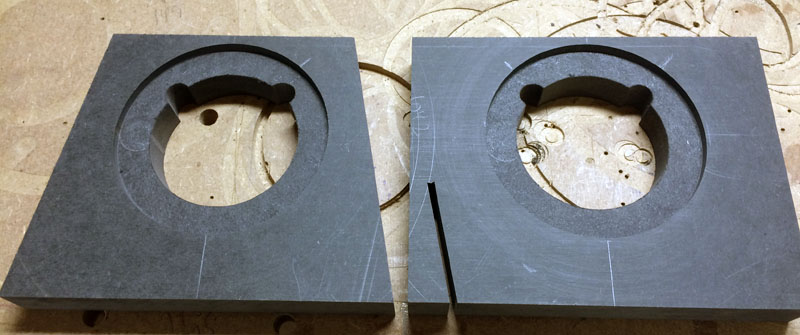
Measure diameter of driver and start making the rebate slightly too
little. Use e.g. 20 mm router bit.
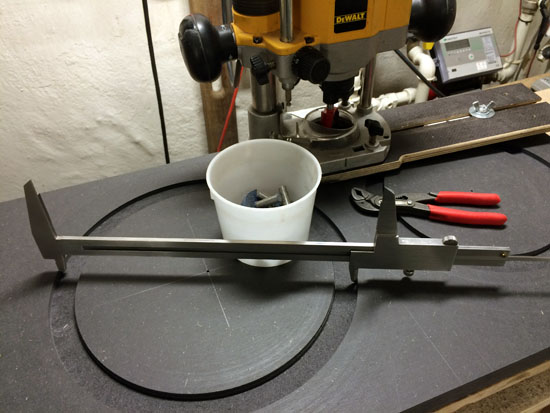
Expand until you have some + 0.2 mm diameter. Check with caliber.
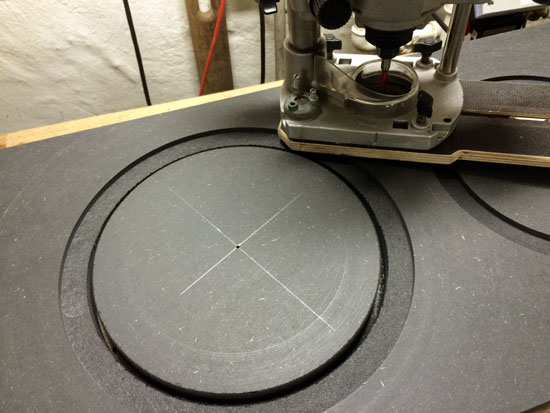
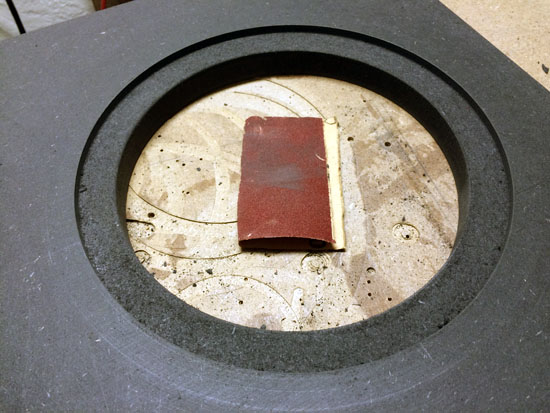
Use small (6 mm) router for the cut-through. Smooth edges with
sandpaper.

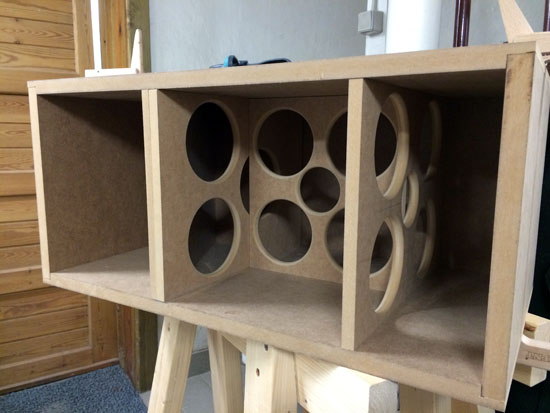
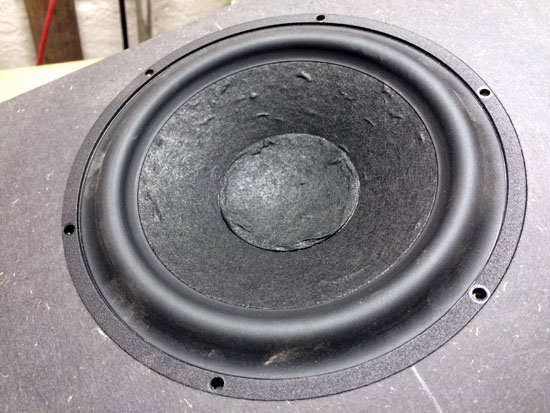
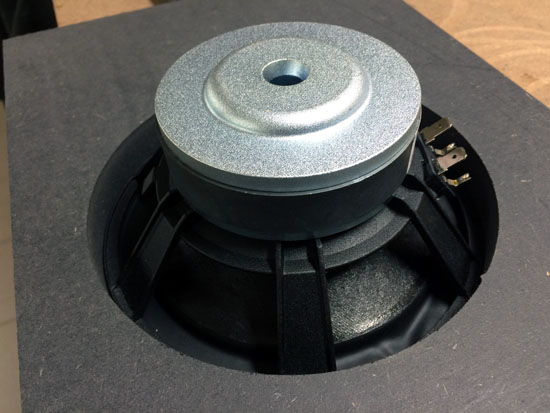
Driver check. Decided to use two vents on the rear. No big deal. You can
place vent to the front or rear.

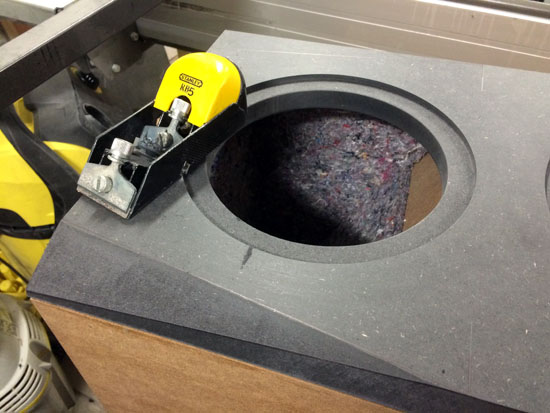
Bass cab front panel chamfering. Planer and sandpaper, 5 minutes per
side.
I cut to the lower end of upper bass.
Chamfering bass cab front panel is optional. No change to performance if
you don't.

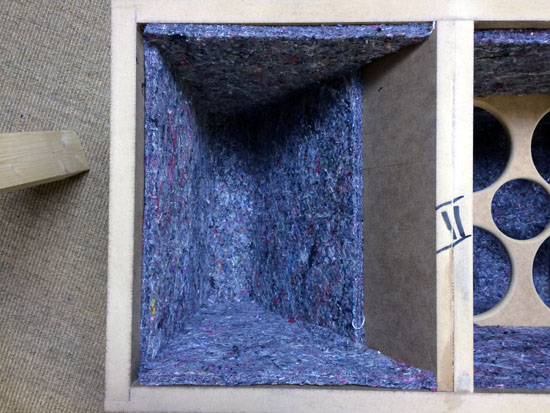
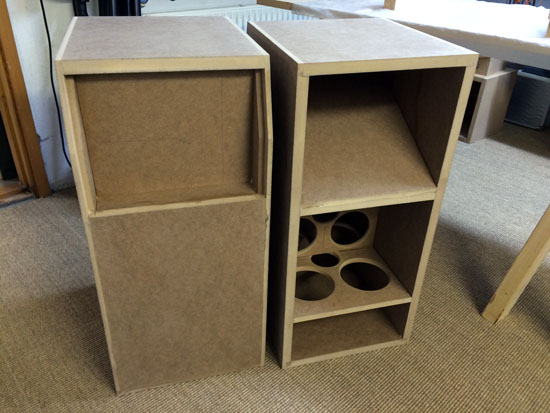
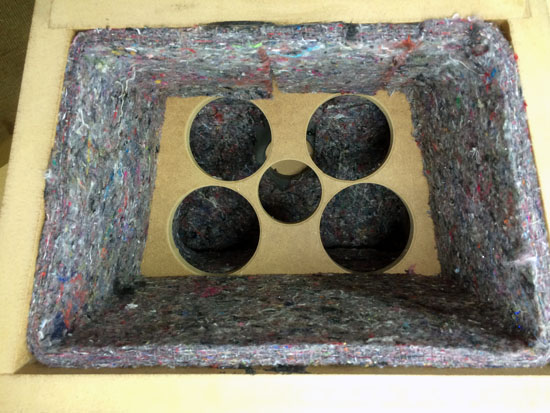
Add 8 mm felt to all internal panels of 22W compartment (right image).
Add felt to rear and sides of middle section (left image)

Add felt to bottom panel.
Add a roll of acoustilux to upper 26W compartment (27 x 50 cm)
Add acoustilux to rear and inner side panels behind 26W driver.
Add a 28 x 50 cm piece of acoustilux to he upper bass compartment.
That's all for the bass section.
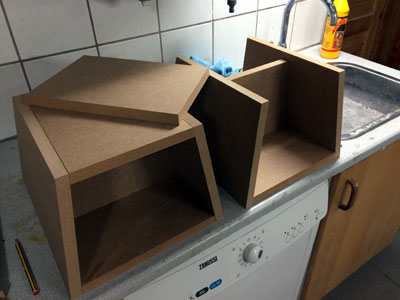
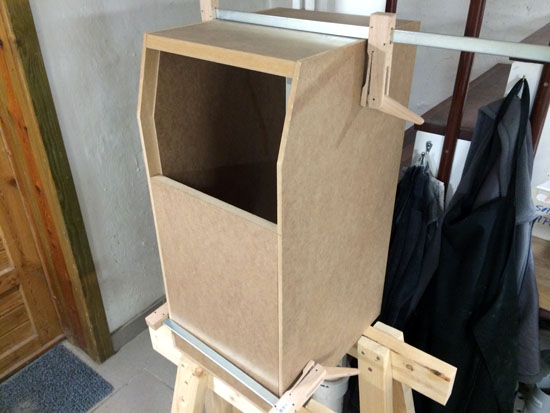
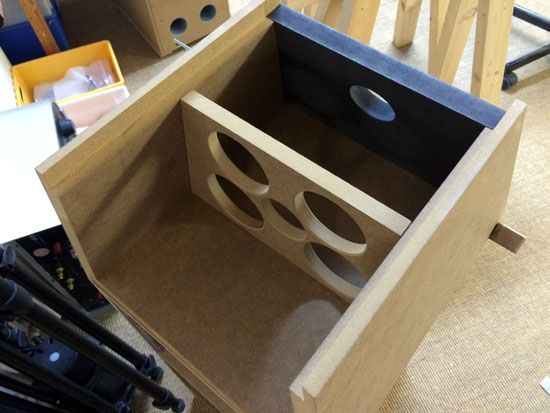
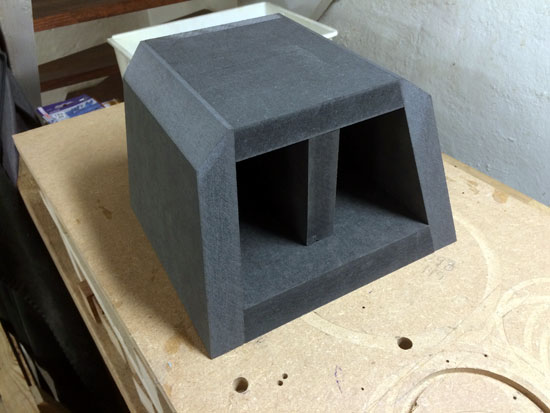
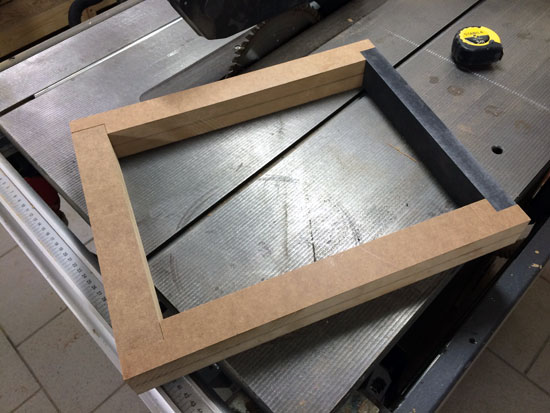
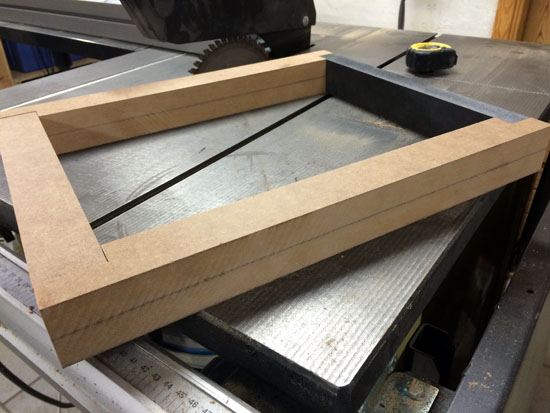
Midrange cab
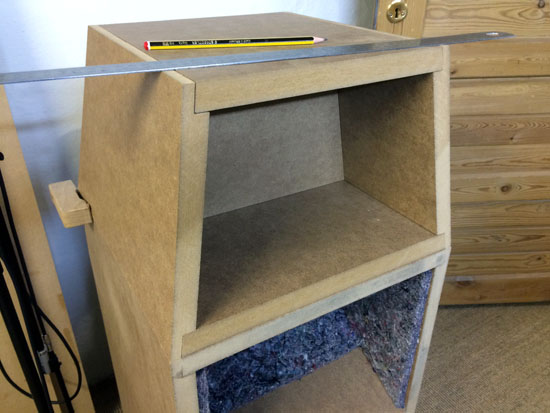
Again, rebated are not mandatory, but helps enormously when gluing a
truncated pyramid.
Rear panel and bracing in place, just need some holes for vent and
ventilation.
The midcab will have a small vent, lightly stuffed with foam to make an
aperiodic tuning.
All ready for gluing.
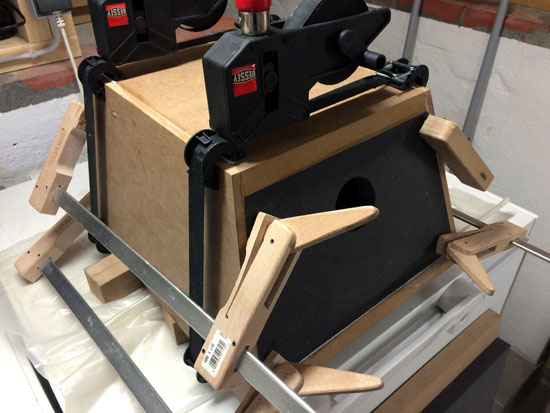
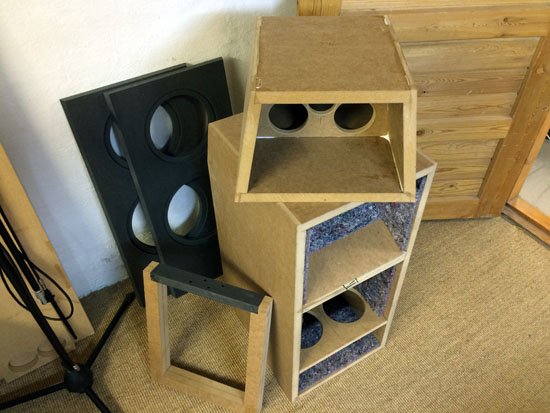
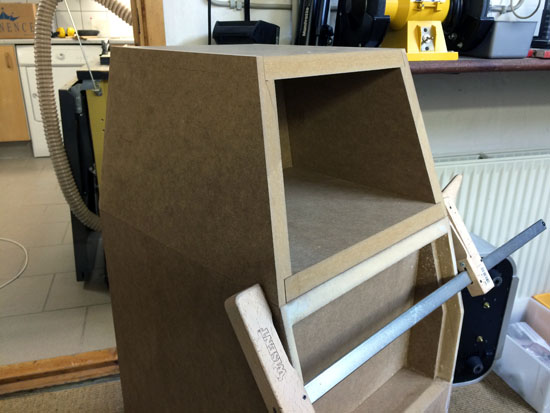
Shaping up! Ready for mid front panel.
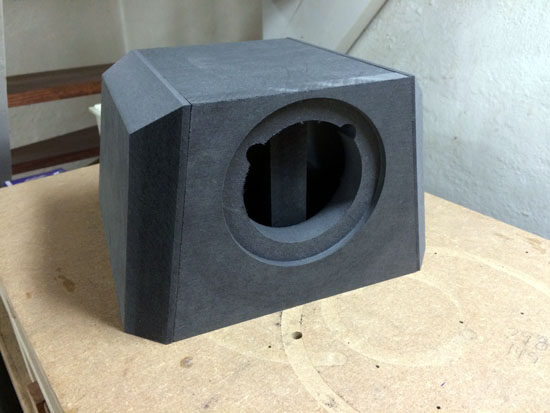
Mid-cab front panel. Rather nice fit!
Do the routing before cutting sides to have as large a panel as possible
(better support for router).
As can be seen the driver hole needs chamfering. Go down 45 deg. some 12
mm. That's enough.
The front panel is chamfered at 50 mm width and 19 mm depth.
Now, the good news is that you don't have to do this.
You can leave the panel flat if you want to, it does very little to the
1-2 kHz range and it's inaudible.
The bass cab front panel is facetted towards the midrange front panel.
You can leave this out also.
Mid cabinet damping.
Add felt to all internal panels of mid cab.
Add a strip of 12 x 40 cm acoustilux to rear compartment.
Add acoustilux to bottom and sides of front compartment.
Roll a piece of 12 x 30 cm acoustilux and stuff the port to make the
aperiodic tuning.
That's all.
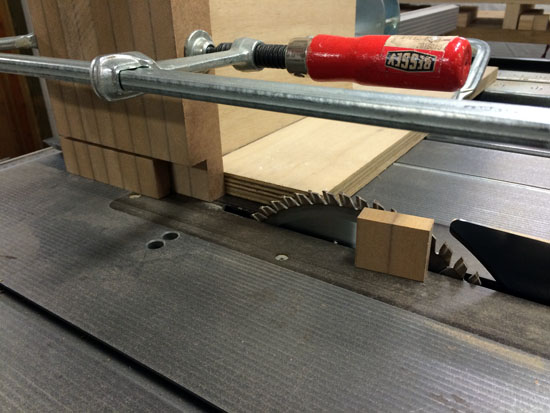
Tweeter cab
This is what happens when you don't think before cutting! Another ½ hour
of work.
Tweeter cabs ready for gluing. The vertical piece of MDF is just for
support during photo shoot.
Now, you don't have to to all this cutting, the front panel - exactly to
dimension - and a support bar is all that's needed.
The 45 deg chamfering of front panel does not add to the baffle size.
Base
Obviously your base arrangement can be made to your liking and no need
to follow my design here.
I used 22 mm to the rear to allow binding posts here for bi-wiring.
Height is 44 mm and allows bass crossover to be placed here.
Feet will further increase height by ~20 mm.
Dimensions are 330 x 430 mm.
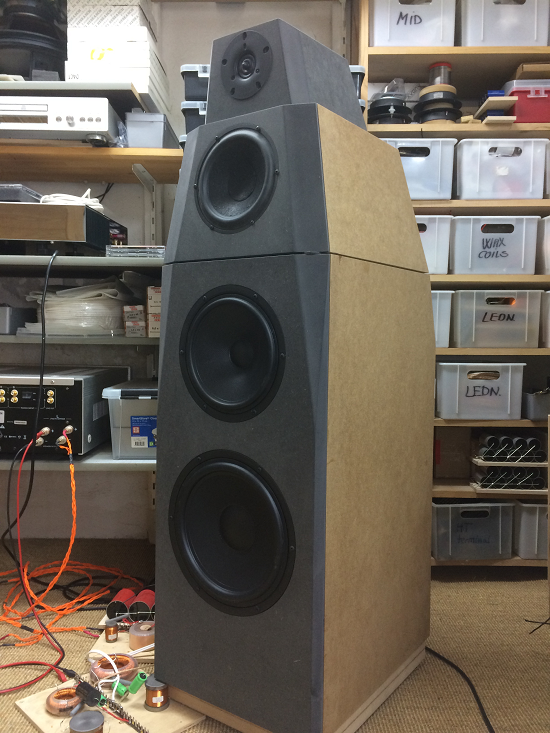
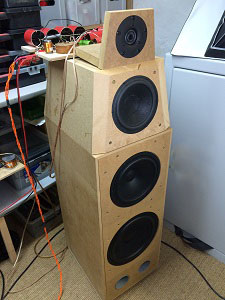
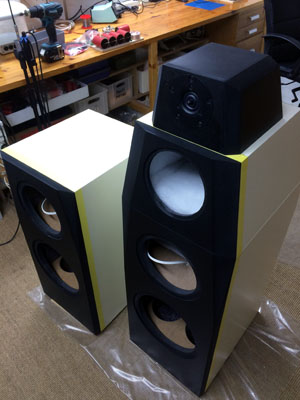
Final test in real cabs. Hmm... sounds even better!
And implementing the final crossovers will - as always - improve sound
even further. Can't wait.
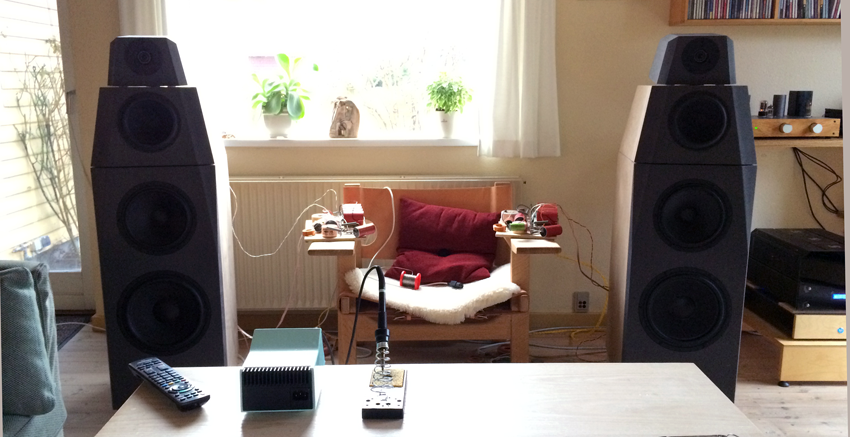
Final crossover fine-tuning in our living room, here in some strong
winter backlight.

Paint and oil for the finished cabinets.
A few comments on MEASUREMENTS before you start
interpreting all the readings below.
First of all, if we think measurements will tell us how a speaker
sounds, we're wrong. The perception of sound is way too subjective to be
reflected in any measurements we can perform. A loudspeaker system is
meant to give us a satisfying idea of an acoustic event and for some
people a pair of 5 USD ear-plugs are enough, others spend 200 kUSD on a
truly full-range pair of speakers - and the latter may not be happier
than the former.
Measurements may give us an idea of tonal balance of a system, i.e. too
much or too little energy in certain areas. Measurements may tell us
about bass extension if far-field measurements are merged with
near-field measurements. In addition to this, ports may contribute to
bass extension. Most of us diy'ers do not have access to an anechoic
room for full-range measurements from 20-20000 Hz.
What cannot be seen is what kind of bass performance we get in a given
room. Bass performance is highly dependent on in-room placement of your
speaker and the same speaker can be boomy in one place and lean in
another. Actual SPL level at 1 meter distance and 2.8V input is useful
for en estimate of system sensitivity and combined with the impedance
profile may give an idea of how powerful an amplifier is needed to drive
the speaker to adequate levels.
What measurements do not tell is the very sound of the speaker unless
displaying serious linear distortion. The level of transparency, the
ability to resolve micro-details, the "speed" of the bass, etc., cannot
be derived from these data. Distortion measurements rarely tell much
unless seriously bad, and most modern drivers display low distortion
within their specified operating range.
Many people put way too much into these graphs and my comments here are
only meant as warning against over-interpretation. There are more to
good sound than what can be extracted from a few graphs. Every graph
needs interpretation in terms of what it means sonically and how it
impacts our choice of mating drivers, cabinet and crossover design.
What measurements certainly do not tell is the sonic signature of the
drivers, because cones made from polyprop, alu, Kevlar, paper, glass
fiber, carbon fiber, magnesium, ceramics or even diamonds all have their
way of colouring the sound.
Above/left: SPL @ 2.8V/1meter from upper bass. Smooth and easy. To the
right same thing from lower bass. Despite being an alu cone driver
break-up occurs above 2 kHz - and the peaks are modest. These are easy
drivers.
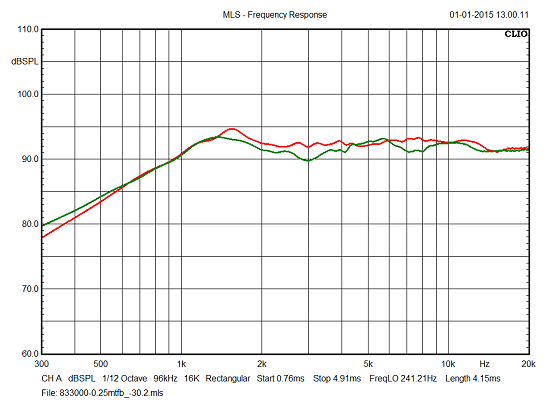
To the left six different tweeter baffle shapes and tweeter placements.
As can be seen, the tweeter baffle is not just a tweeter baffle.
To the right worst (green) and best (red). It pays off doing a little
work rather than adjusting in the crossover.
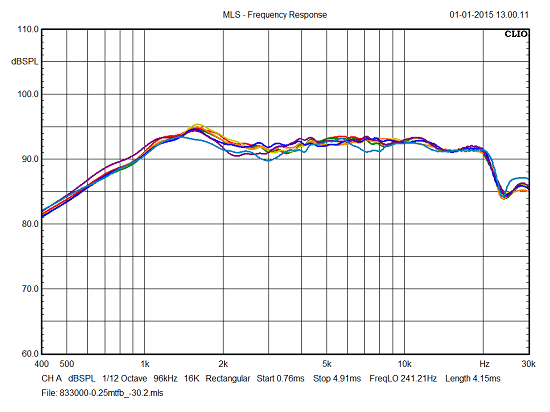
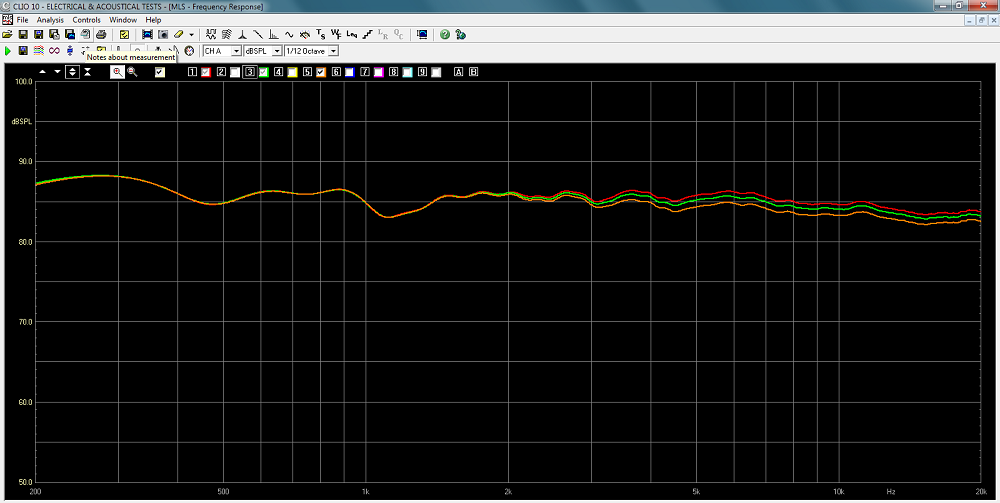
Some basic screen shots from measurements:

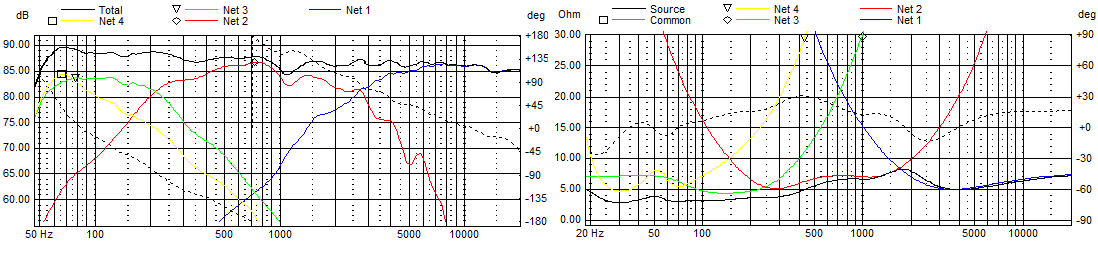
Frequency response @ 1 meter, 2.8V. Point of cossover between mid and
tweeter is 2500 Hz.
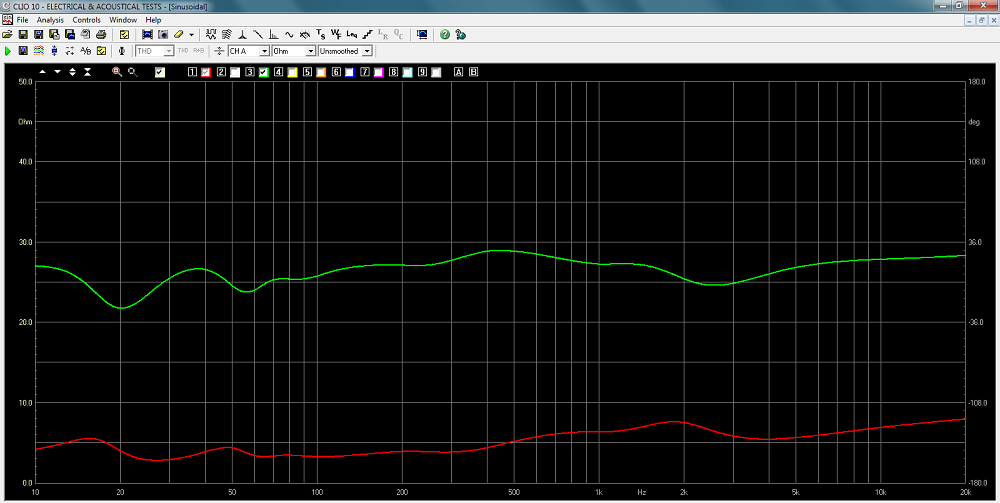
A remarkable flat impedance profile! Minimum is 3 Ohms
Tweeter attenuation from R1011 = 2R2, 2R7 and 3R3 respectively. The kit
comes with 2R2 and 2R7.
Crossover components' values to come with the kit.
There are 2 levels of crossover quality, where midrange series
capacitors are gradually replaced by STANDARD-Z caps.
You can buy the kit with or without the drivers - or some of the drivers
if you already have some.
All questions regarding purchase of kits, please mail Jantzen Audio at
contact@jantzen-audio.com
All kit and component prices may be subject to change and are always to be confirmed by Jantzen Audio Denmark.
Download Sales Presentations:
![]()
All technical questions to troels.gravesen@hotmail.com
CROSSOVER-LAYOUT
BACK TO INDEX
Check this out before start making crossovers:
http://www.troelsgravesen.dk/tips.htm#CONSTRUCTION_OF_CROSSOVERS
Click images to view large
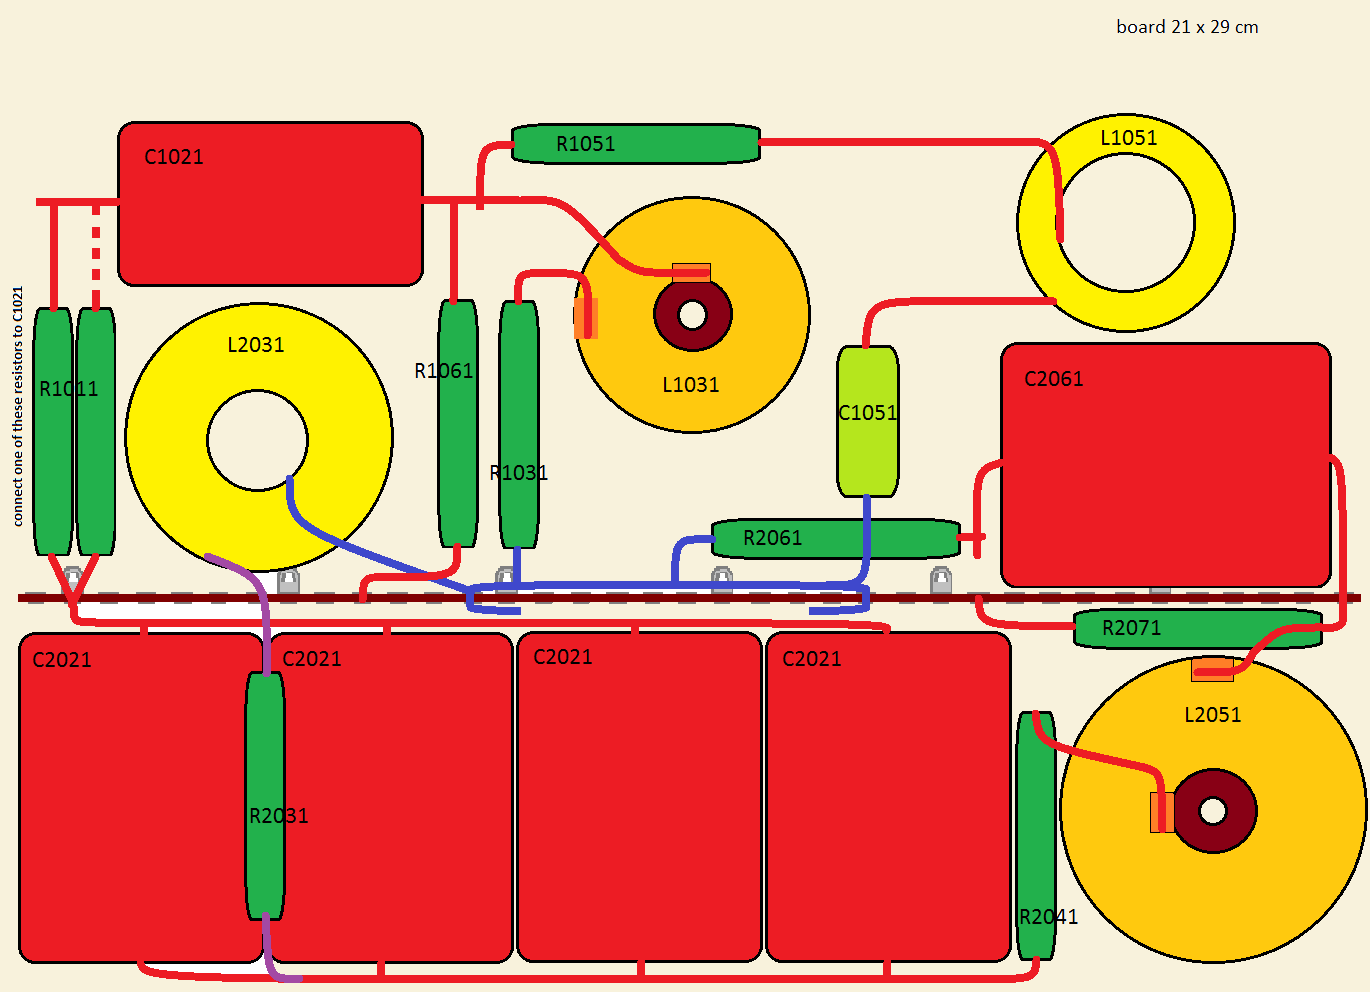
Level 1
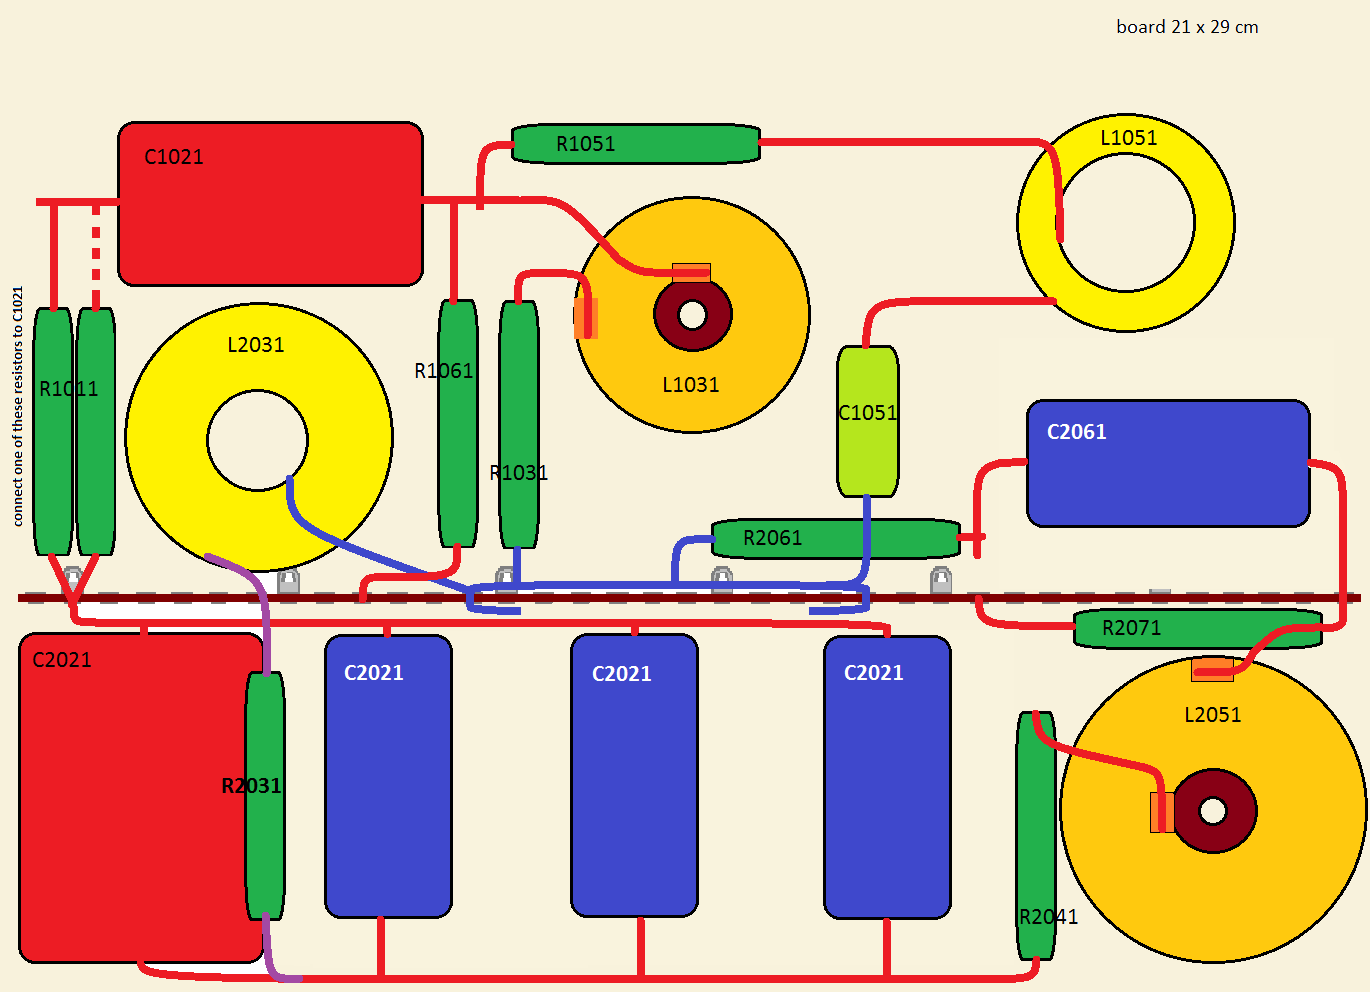
Level 2

Bass section:
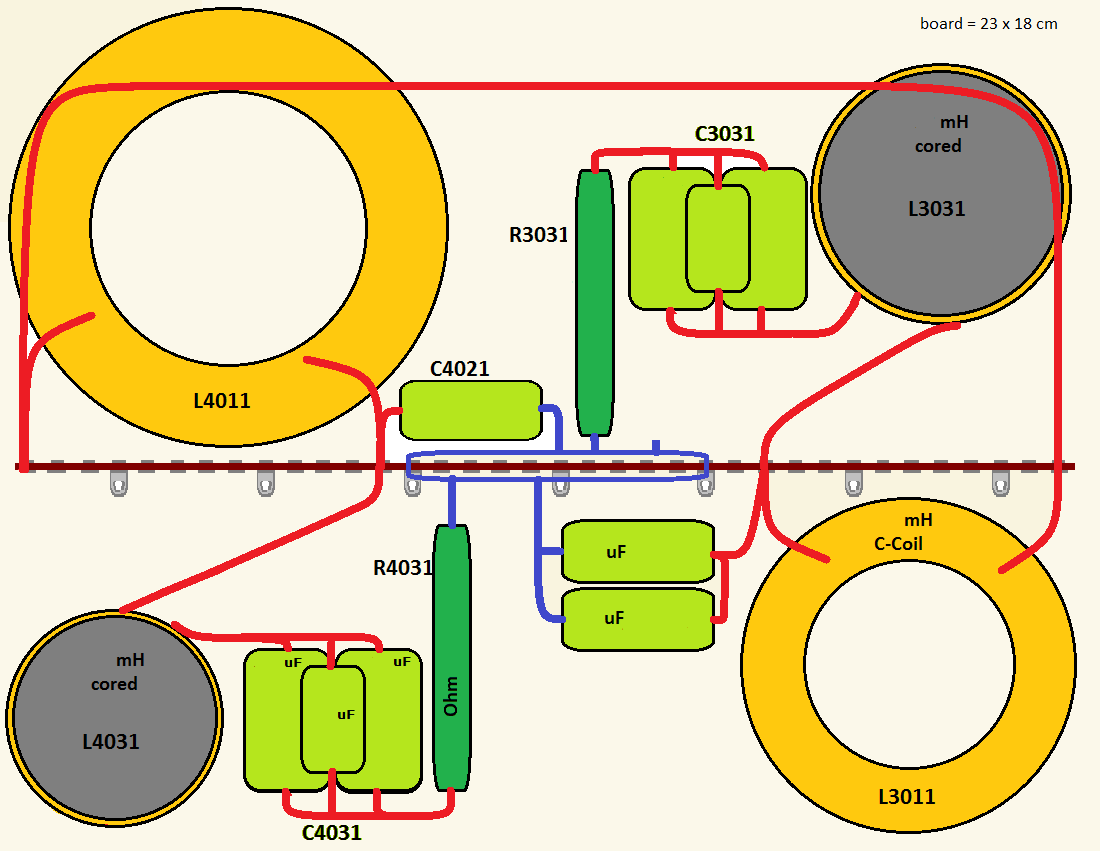
Click image to view large
The bass section is placed at the bottom outside he cabinet, same as seen here (ATS4).
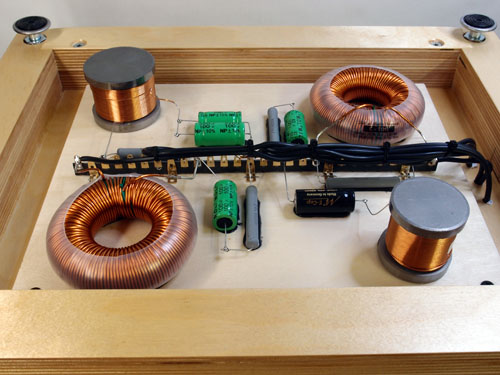
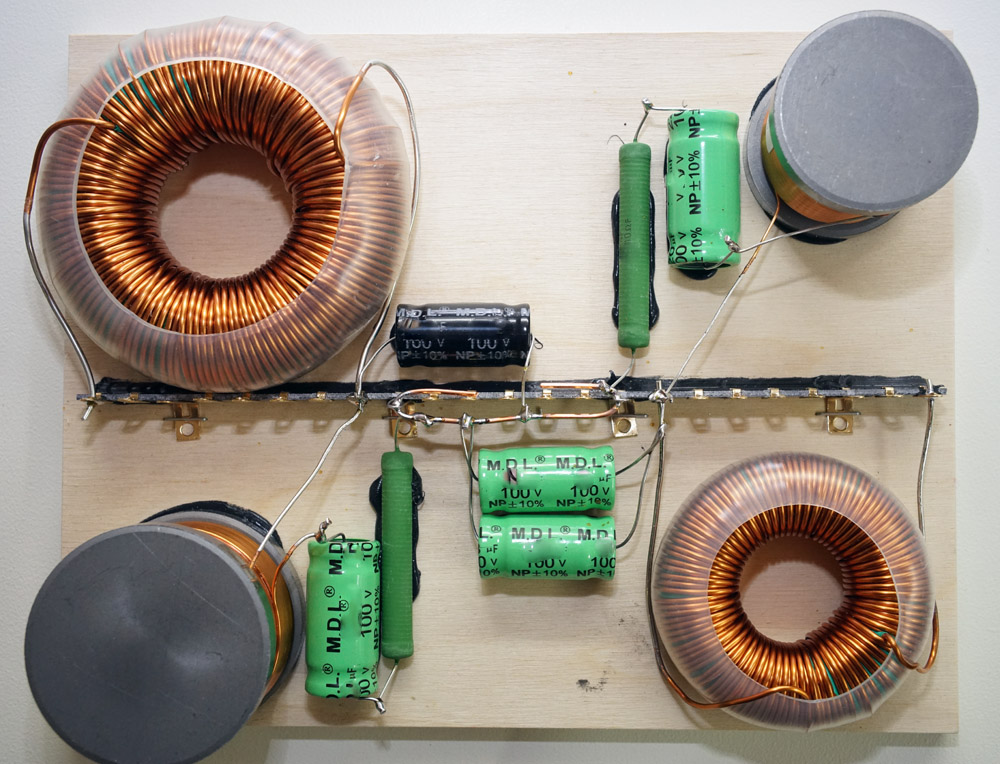
All former electrolytics here are now
replaced by
Jantzen Audio MKT-Z caps.
These a bigger than the
electrolytics, but there is plenty of room on the bass board.
Bass section wiring:
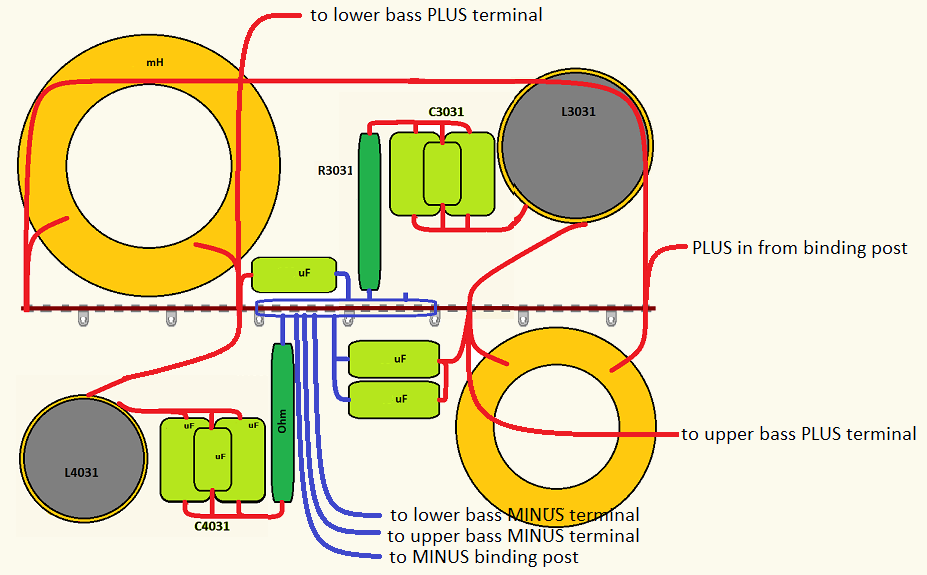
Bass section layout. Use the Supra cable for the bass drivers.
The crossover was made before the new smooth foil electrolytic caps were
introduced. Check drawing for correct layout.
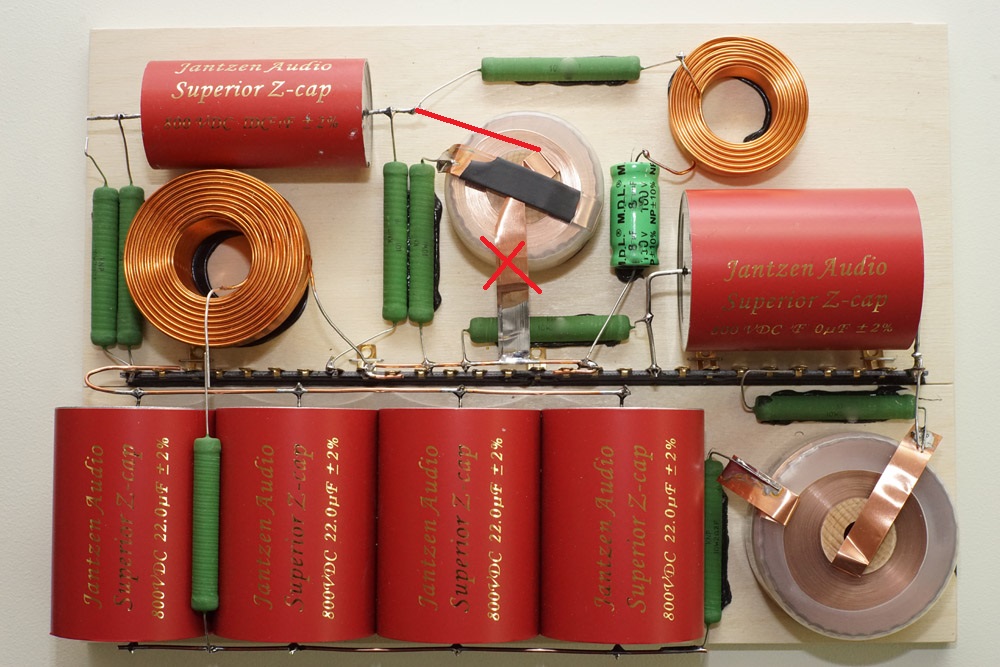
Mid-tweeter layout. Pay notice to wiring error on photo, sorry!
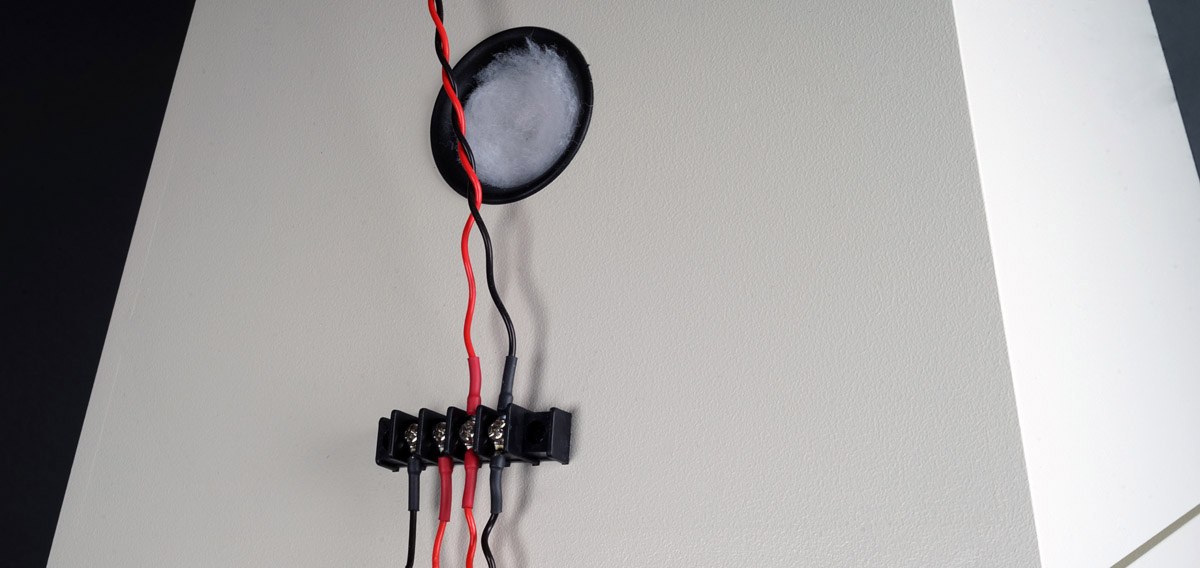
Terminal bar for connecting middriver. I also use this for connecting
the tweeter, although you can pull a straight wire from crossover to
tweeter.
Remember to connect the middriver with inverted polarity! You can do
this at the crossover, here at the terminal bar or at the driver
terminals.
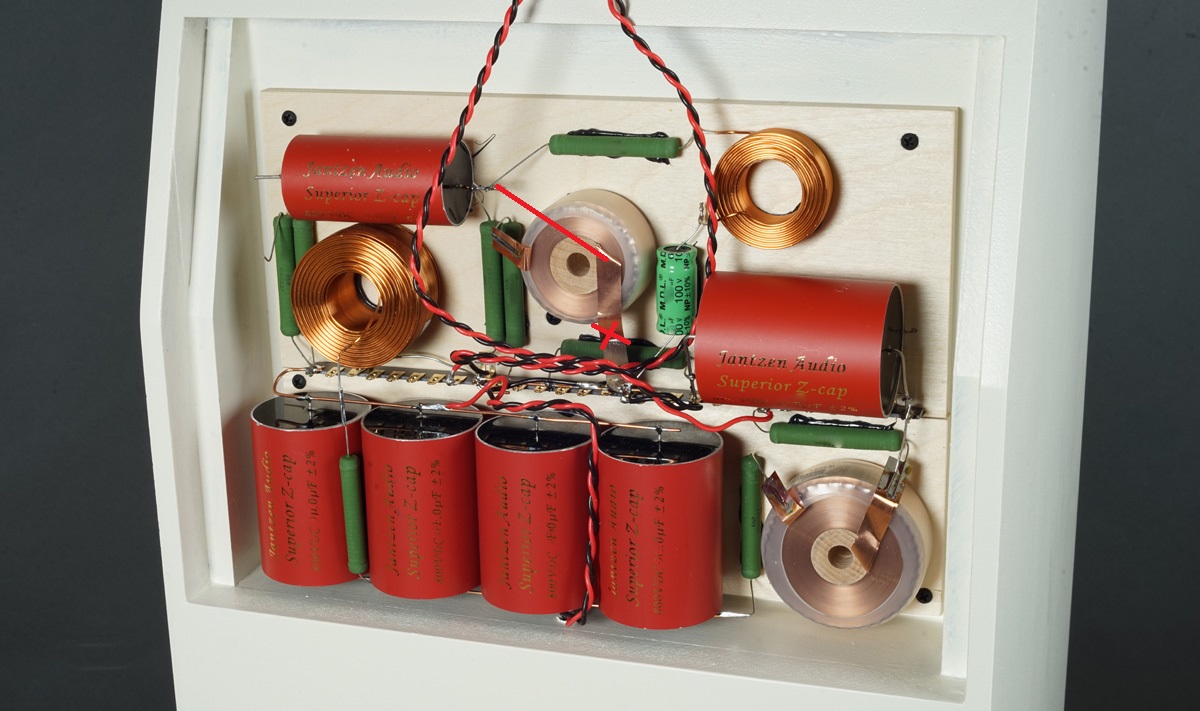
Mid-tweeter crossover to be covered by thin panel. Pay notice to wiring
error! L1031+R1031 is connect to C1021 and ground.