DIY Loudspeakers: HOME INDEX UPDATES RESPONSE WHAT'S NEW
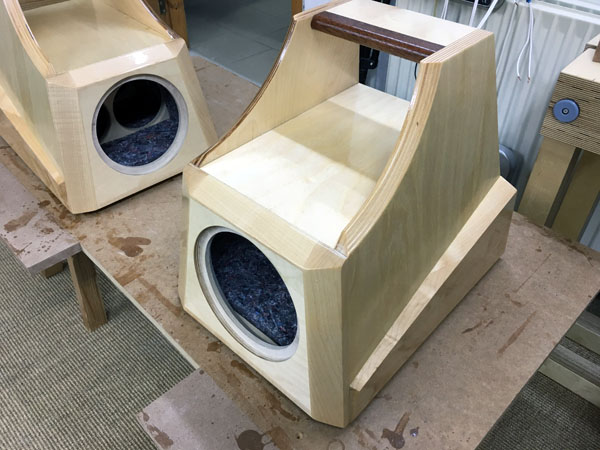
Ellipticor-4
Copyright 2022 © Troels Gravesen
Go to on this page:
DRIVERS
CROSSOVER
CABINET
MEASUREMENTS
SPEAKER-KIT
CROSSOVER LAYOUT
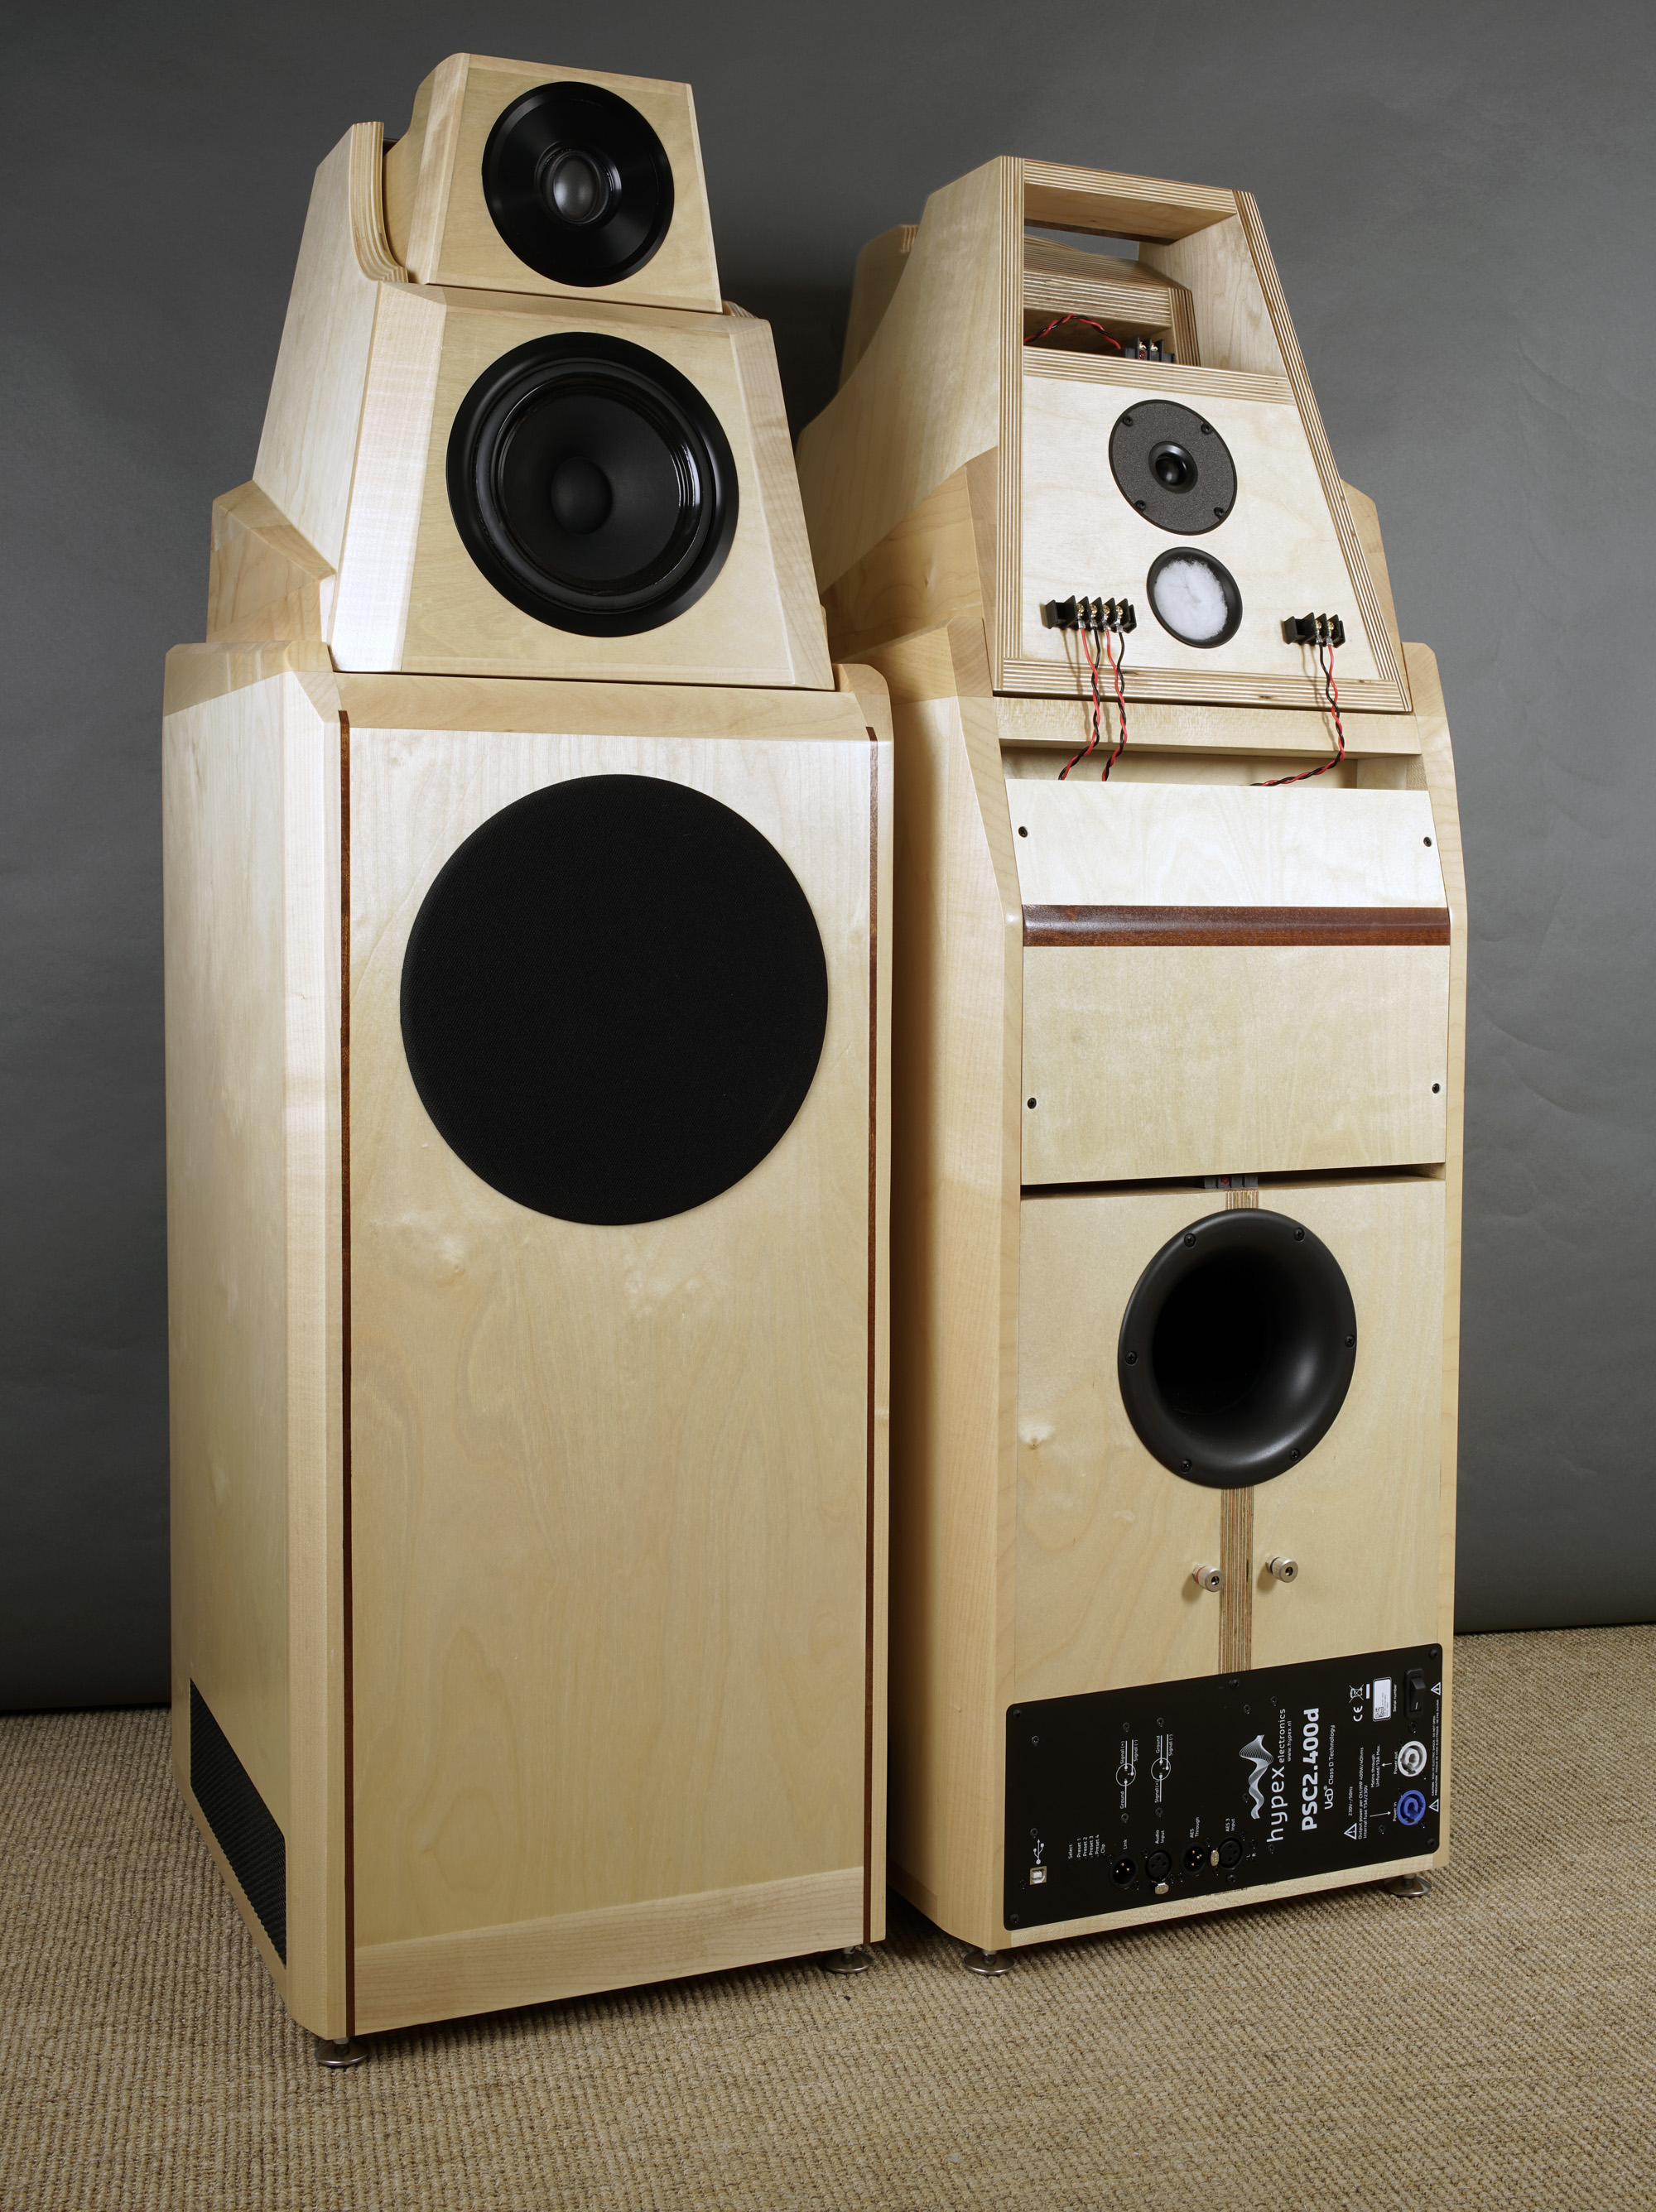
Ever since the launch of Ellipticor-1, I've been waiting to set up these two drivers in a larger system and hear what they can really do. Despite the phenomenal dynamic headroom, there are limits to how much air a 6" driver can move. Size matters.
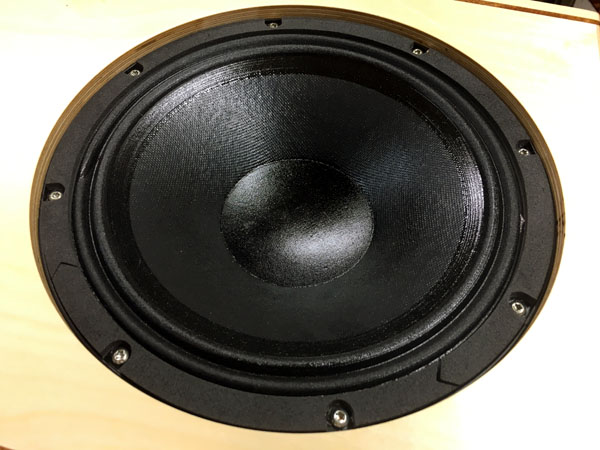
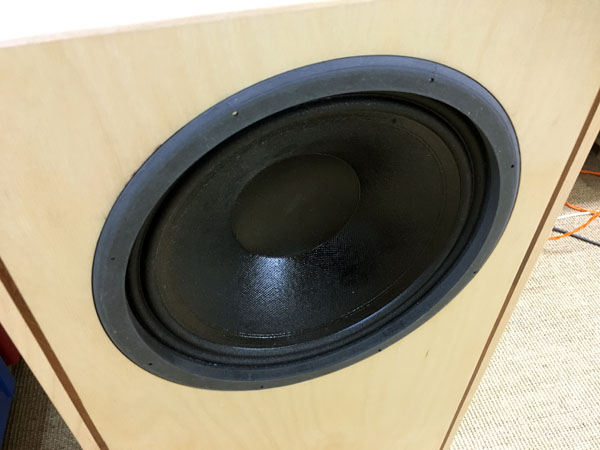
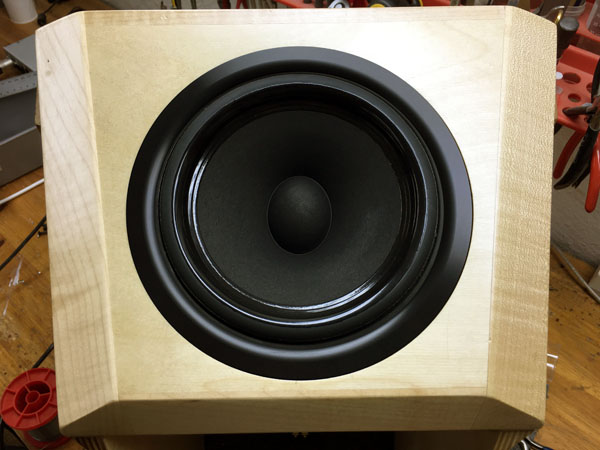
My ATS4-HE prototype bass bins have been in the attic since launch and suitable for a wide range of four-way systems, only waiting for the right midrange-tweeter combinations. The cabs were taken to my workshop for an overhaul and fitted with 12" BMS bass driver, the Hypex PSC2.400d plate-amp/DSP, and the new kid on the block is the 18 Sound 10NW650 10" bass driver. A powerful high-efficiency midbass driver delivering 96 dB and very suitable for handling the 80-200 Hz range. The 10NW650 has been used as a midrange driver in a larger system with a 18" bass driver and did really well up to 1300 Hz target point of crossover, but it was really bought for supplementing the 12" BMS bass driver, and it does extremely well here. It delivers the dry punch of a closed system combined with the deep bass of the 12" BMS. You may object to the look of the 10NW650, but do you want good sound or good looks? Add a front grille or make a ring from black MDF to cover the gasket rim like the Ellipticors. It may not have the expensive "hifi" look of the AT 10C77, but the 10NW650 does just as well for one-forth of the price and you badly need the money for the best capacitors available. And it actually has a slightly larger radiating area compared to 10C77.
In all honesty I had not expected a serious competitor to my ATS4-HE reference. Maybe naive, but this speaker is at least on par with the ATS4-HE. Same sensitivity, same dynamic bass - for obvious reasons. What I had not expected was the ScanSpeak guys to come up with two radical new drivers supplementing each other so well. The Ellipticor-1 gave a good hunch of what's to come, but this 4-way set-up exceeded my expectations by a comfortable margin, or maybe I should say uncomfortable - because these drivers mean work!
Ear-friendly is a dubious term. It may be taken for being forgiving on
troublesome recordings. The Ell-4 is anything but forgiving, but I can't
help thinking ear-friendly. The mid-tweeter integration works
particularly well here, and not just because we have a perfect LR2
profile far beyond point of crossover, but - I think - these two drivers
just make a remarkable couple. We can have "the best" of midranges and
tweeters in the world, but to make a coherent sound, each supplementing the other in the
best possible way, is up to trial'n error. Sometimes we can have
excellent sound from low-cost drivers due to good compatibility and good
crossover design. We can't tell from specs - and
we can't even tell from experience. Each combination must be tried and
evaluated from various baffle and crossover designs.
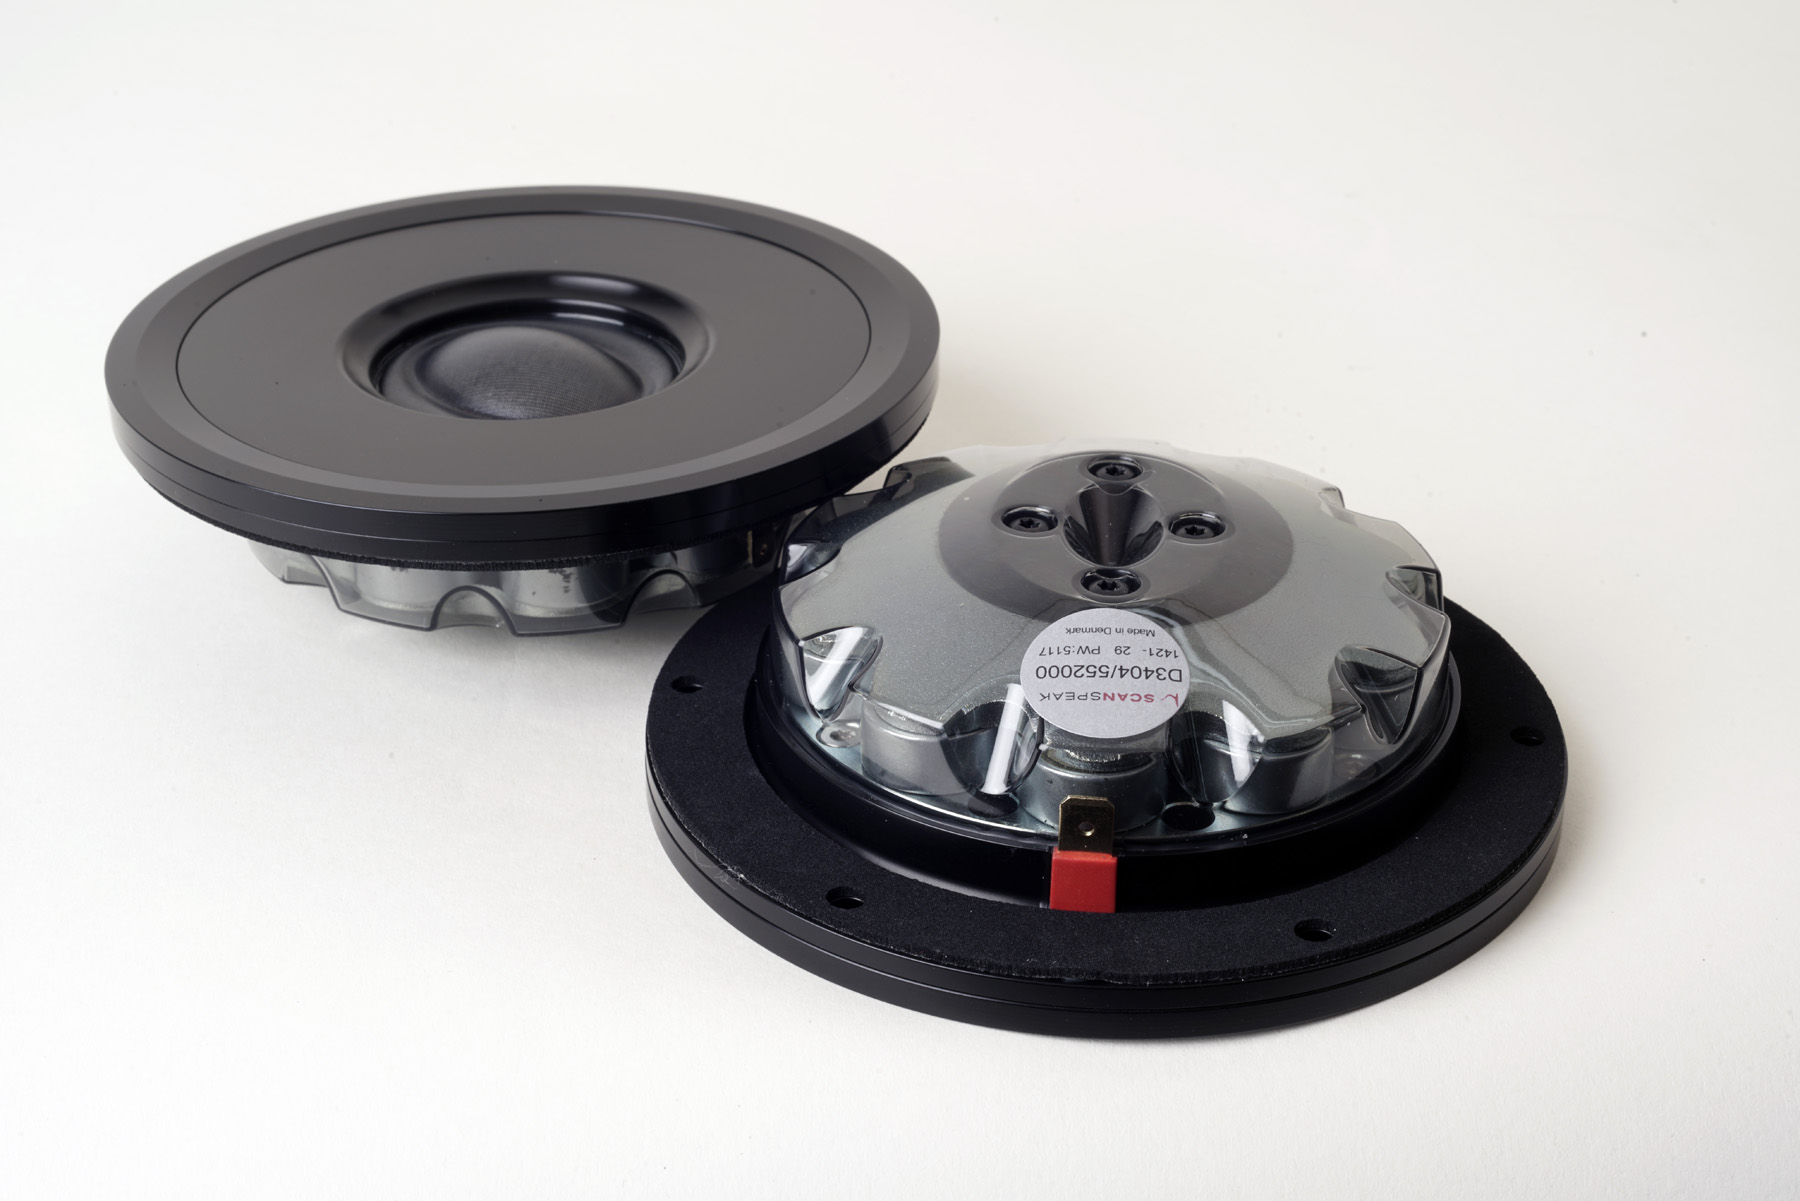
Should
you think Be domes is the final answer to good treble, try D3404. The
D3404 delivers the resolution of good compression drivers when it comes
to e.g. cymbals and the ability to reproduce the sound of
applause from a live audience, the latter often heard as smeared noise.
I've never heard better treble from any dome, regardless of diaphragm
material. And I'm aware this is also a result of the integration of
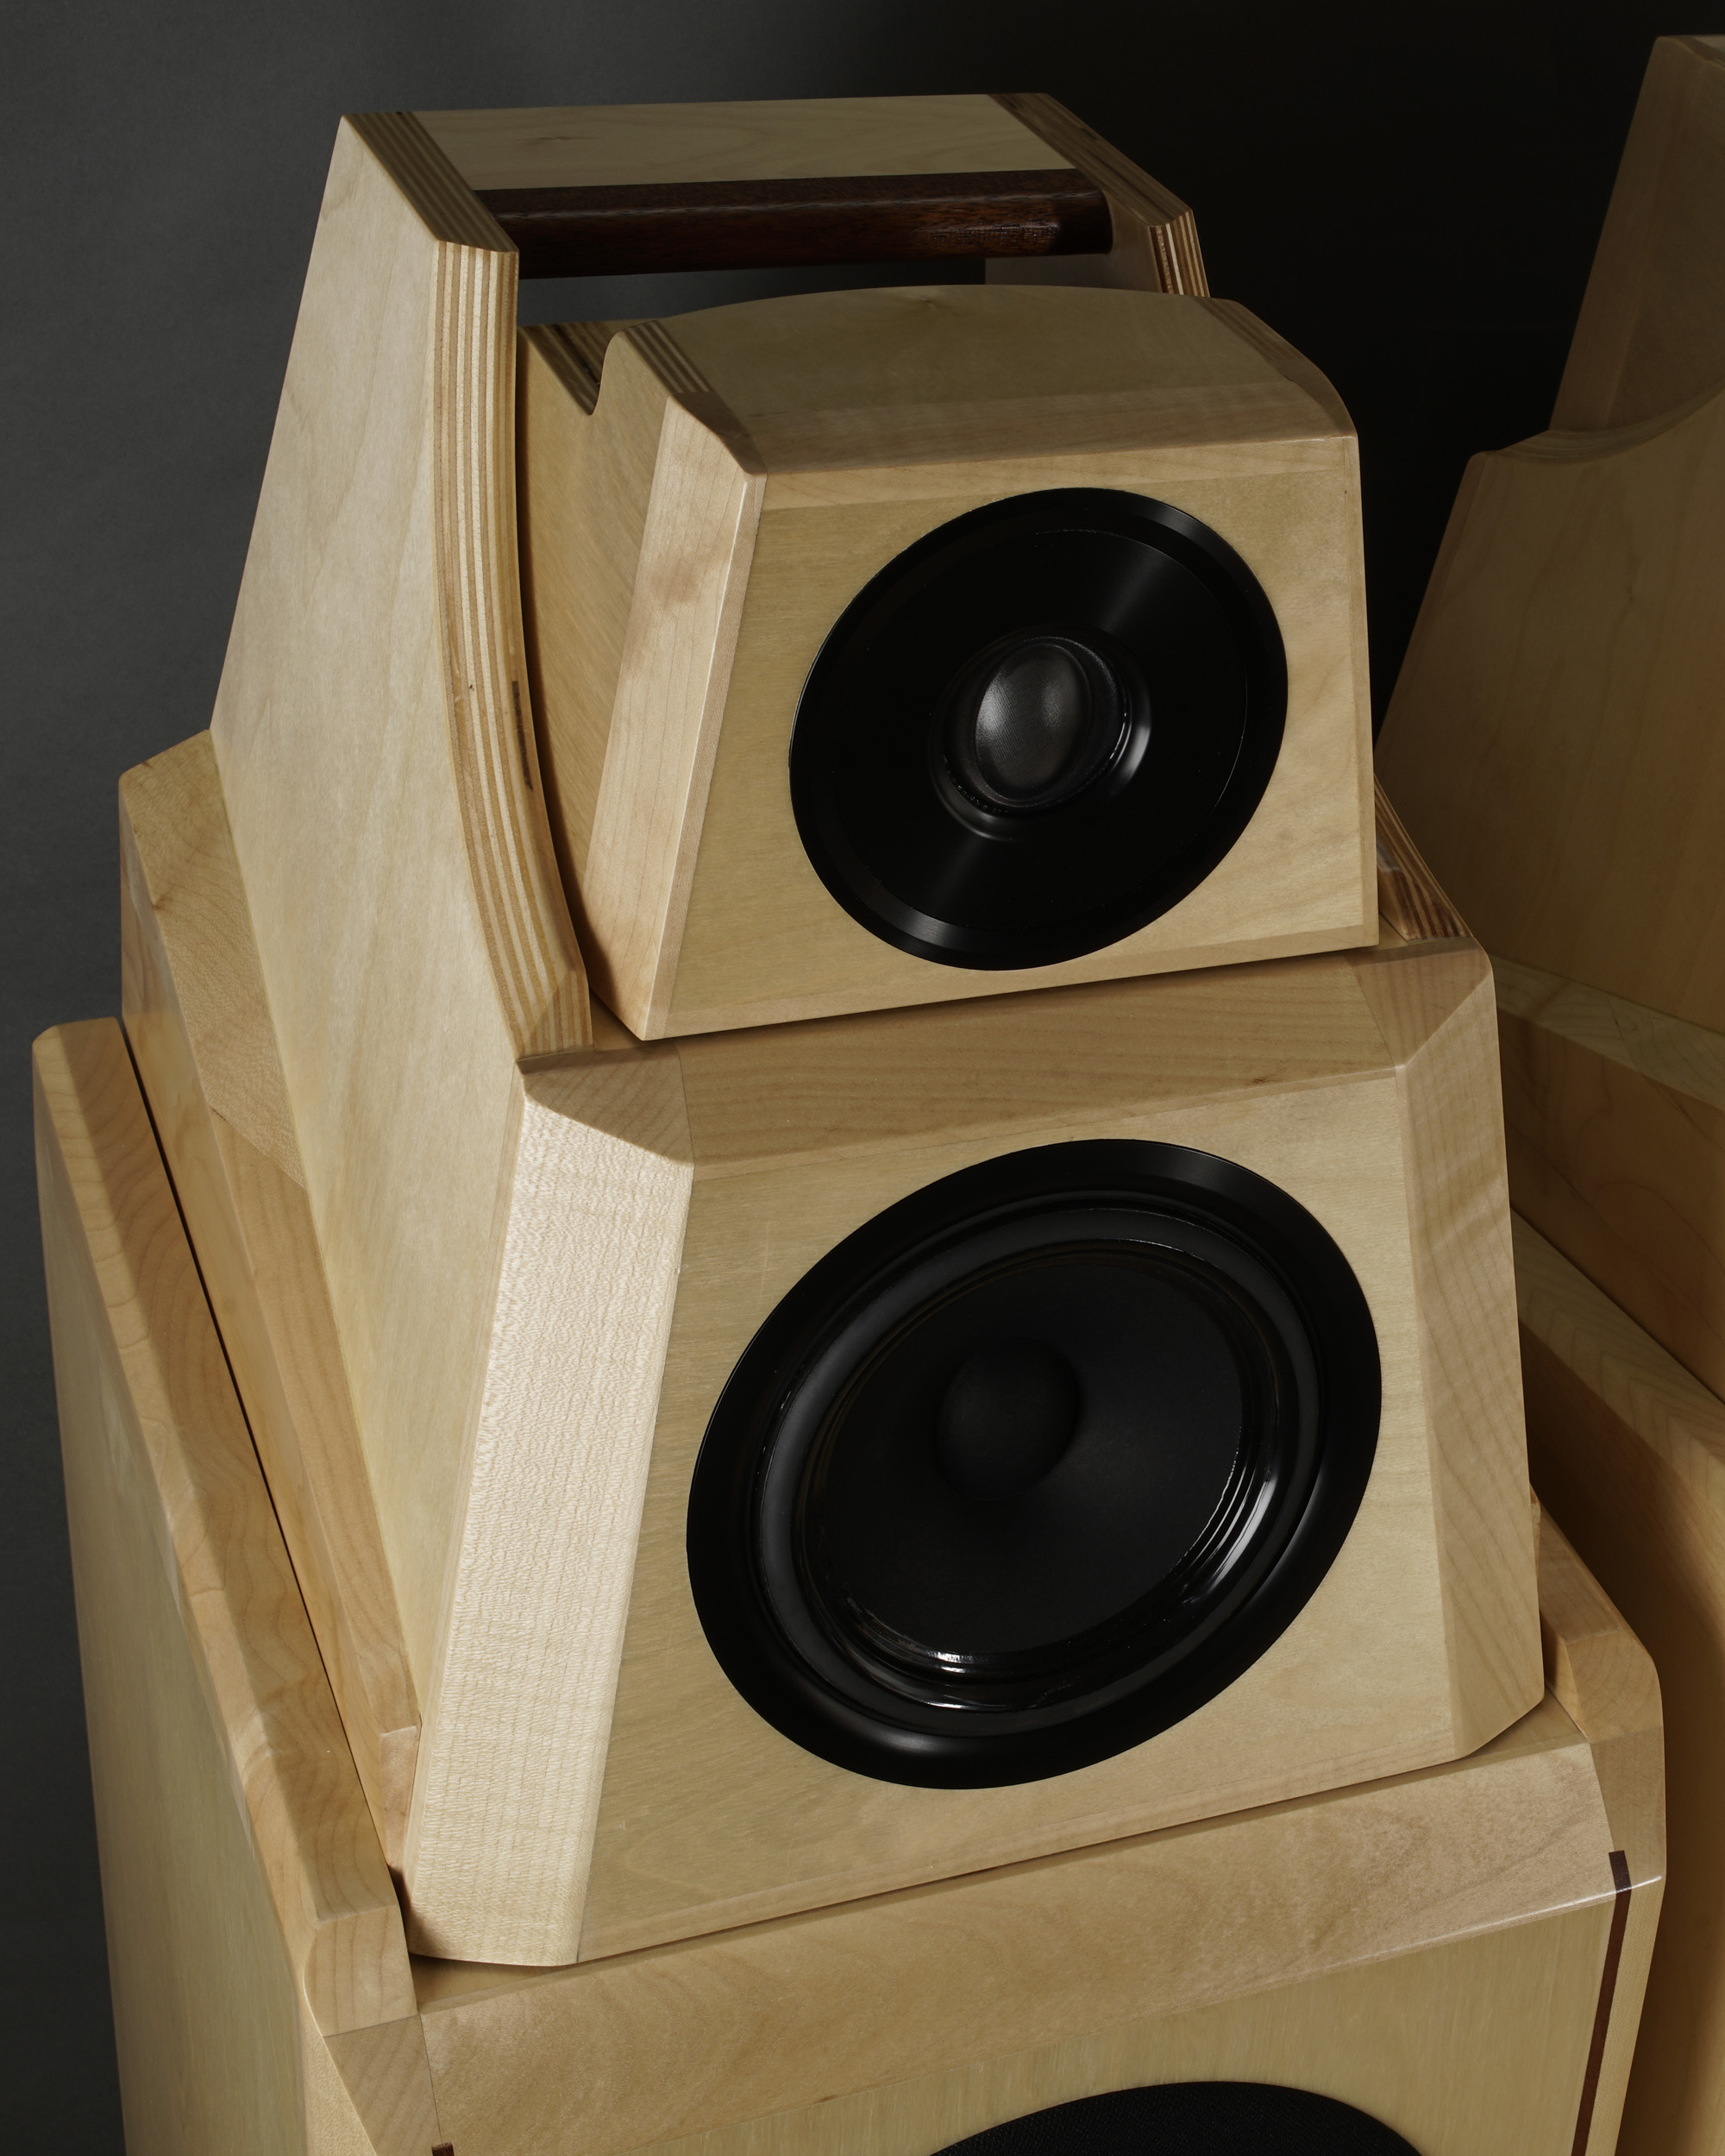
mid-tweeter as the 18WE handles the lower part of the treble range.
I've been talking about far-field ambience in my comments to phono-stages, pre-amps and power amplifiers. Obviously the same issue goes with associated speakers and crossovers and their ability to deliver resolution and not smearing details. In a 6+1" set-up my main suspicion has been leaning towards the tweeter's ability of not smearing detail, but the 18WE has made me consider the two drivers equally important, because this 6" driver does things.
Do the ATS4-HE and Ell-4 sound the same? They do not, and I cannot tell you how they differ, because what I hear is not what you will hear. Please do not try to engage me in any decision making.
As always: Any change to front panel design and
drivers' placement and you need a new crossover and I can't help. Please
read here:
http://www.troelsgravesen.dk/crossovers.htm
Basics:
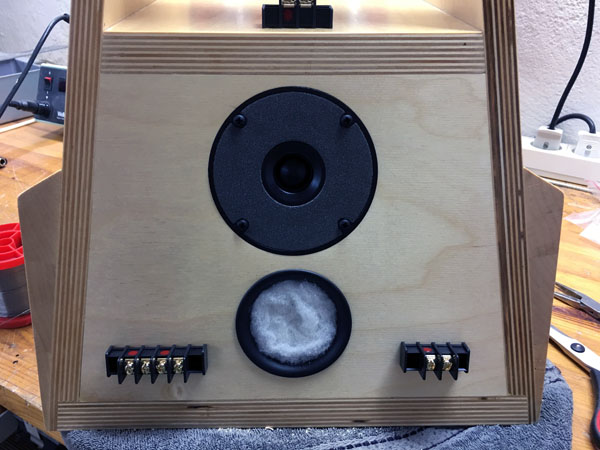
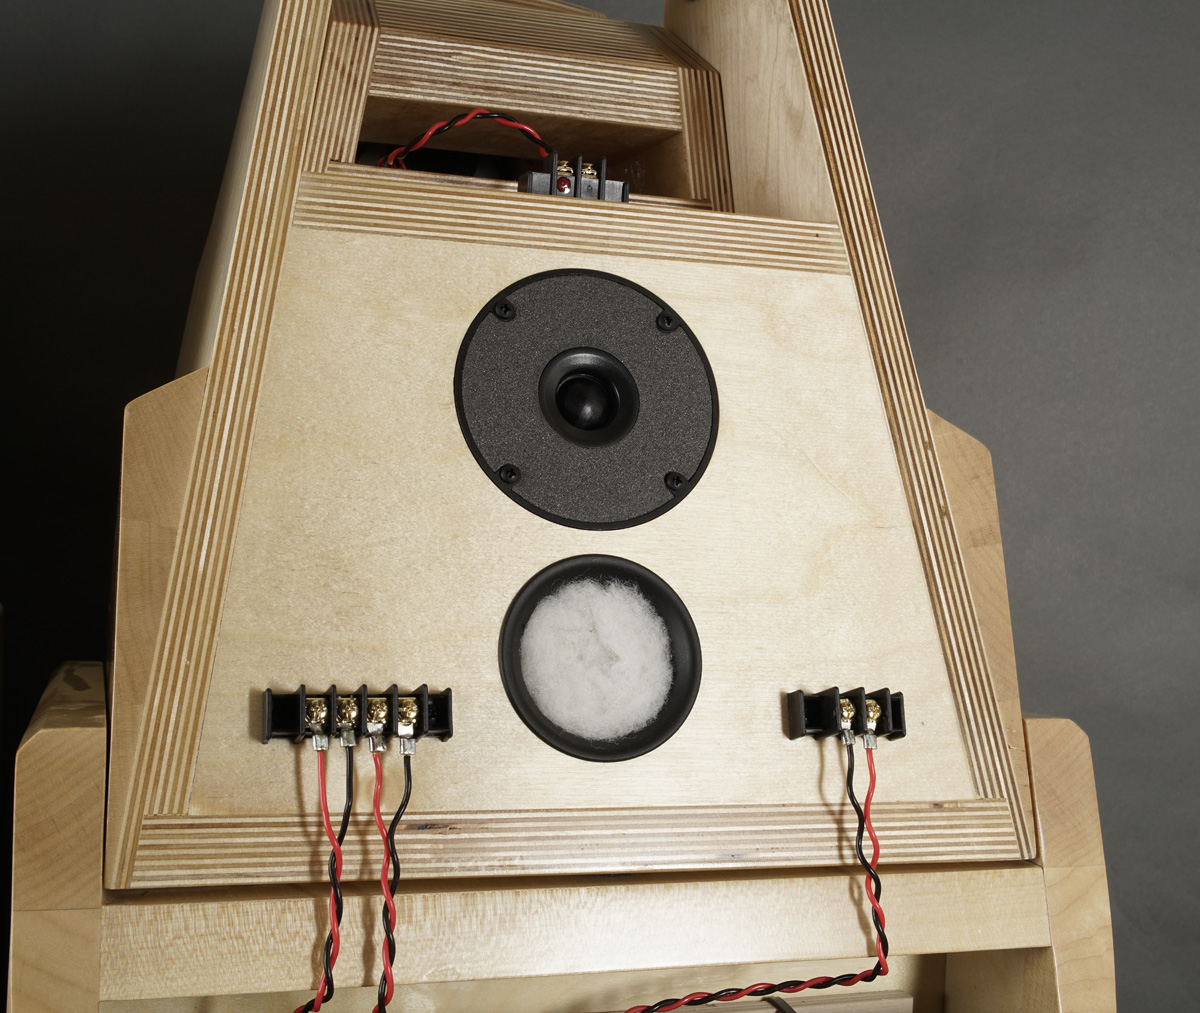
4-way speaker from 12" bass, 10" upper bass, 6" midrange +
34 mm dome tweeter.
System sensitivity: 92 dB/2.8V/1 meter.
Impedance: 8 Ohms, minimum 5.6 Ohms at 500 Hz.
Point of crossover: 80 Hz, 220 Hz and 2500 Hz.
Power requirement: 20+ watts/channel.
Power handling:
A lot! But please
also read this:
http://www.troelsgravesen.dk/power-handling.htm,
and remember any burned driver is a misused driver.
Useful links (Please
follow all links before e-mailing!):
http://www.troelsgravesen.dk/tips.htm
http://www.troelsgravesen.dk/tips.htm#CONSTRUCTION_OF_CROSSOVERS
http://www.troelsgravesen.dk/crossovers.htm
http://www.troelsgravesen.dk/LCR-RC.htm
http://www.troelsgravesen.dk/Inverted-Polarity.htm
http://www.troelsgravesen.dk/choices.htm
http://www.troelsgravesen.dk/power-handling.htm
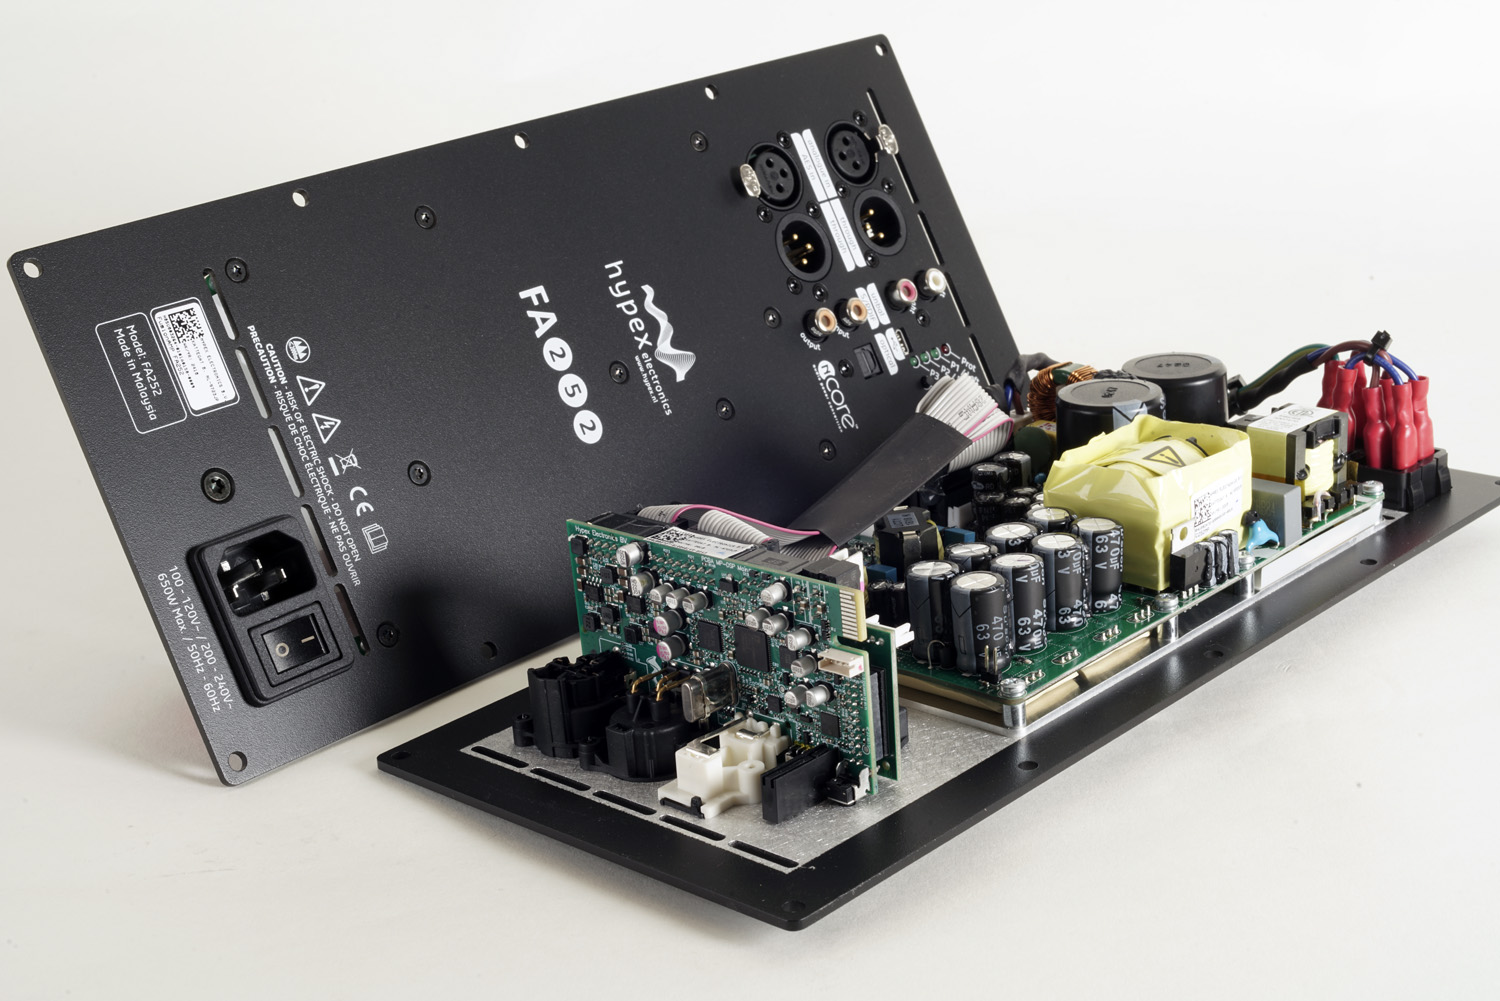
Info on Hypex FUSION FA252 module:
http://www.troelsgravesen.dk/Hypex-FUSION_FA252.htm
Click images to view large
Download specs here:
ScanSpeak:
D3404/552000 4 Ohm
ScanSpeak
18WE/8542T00, 8 Ohm
18 SOUND:
10NW650 8 Ohm
BMS:
12N630 8 Ohm
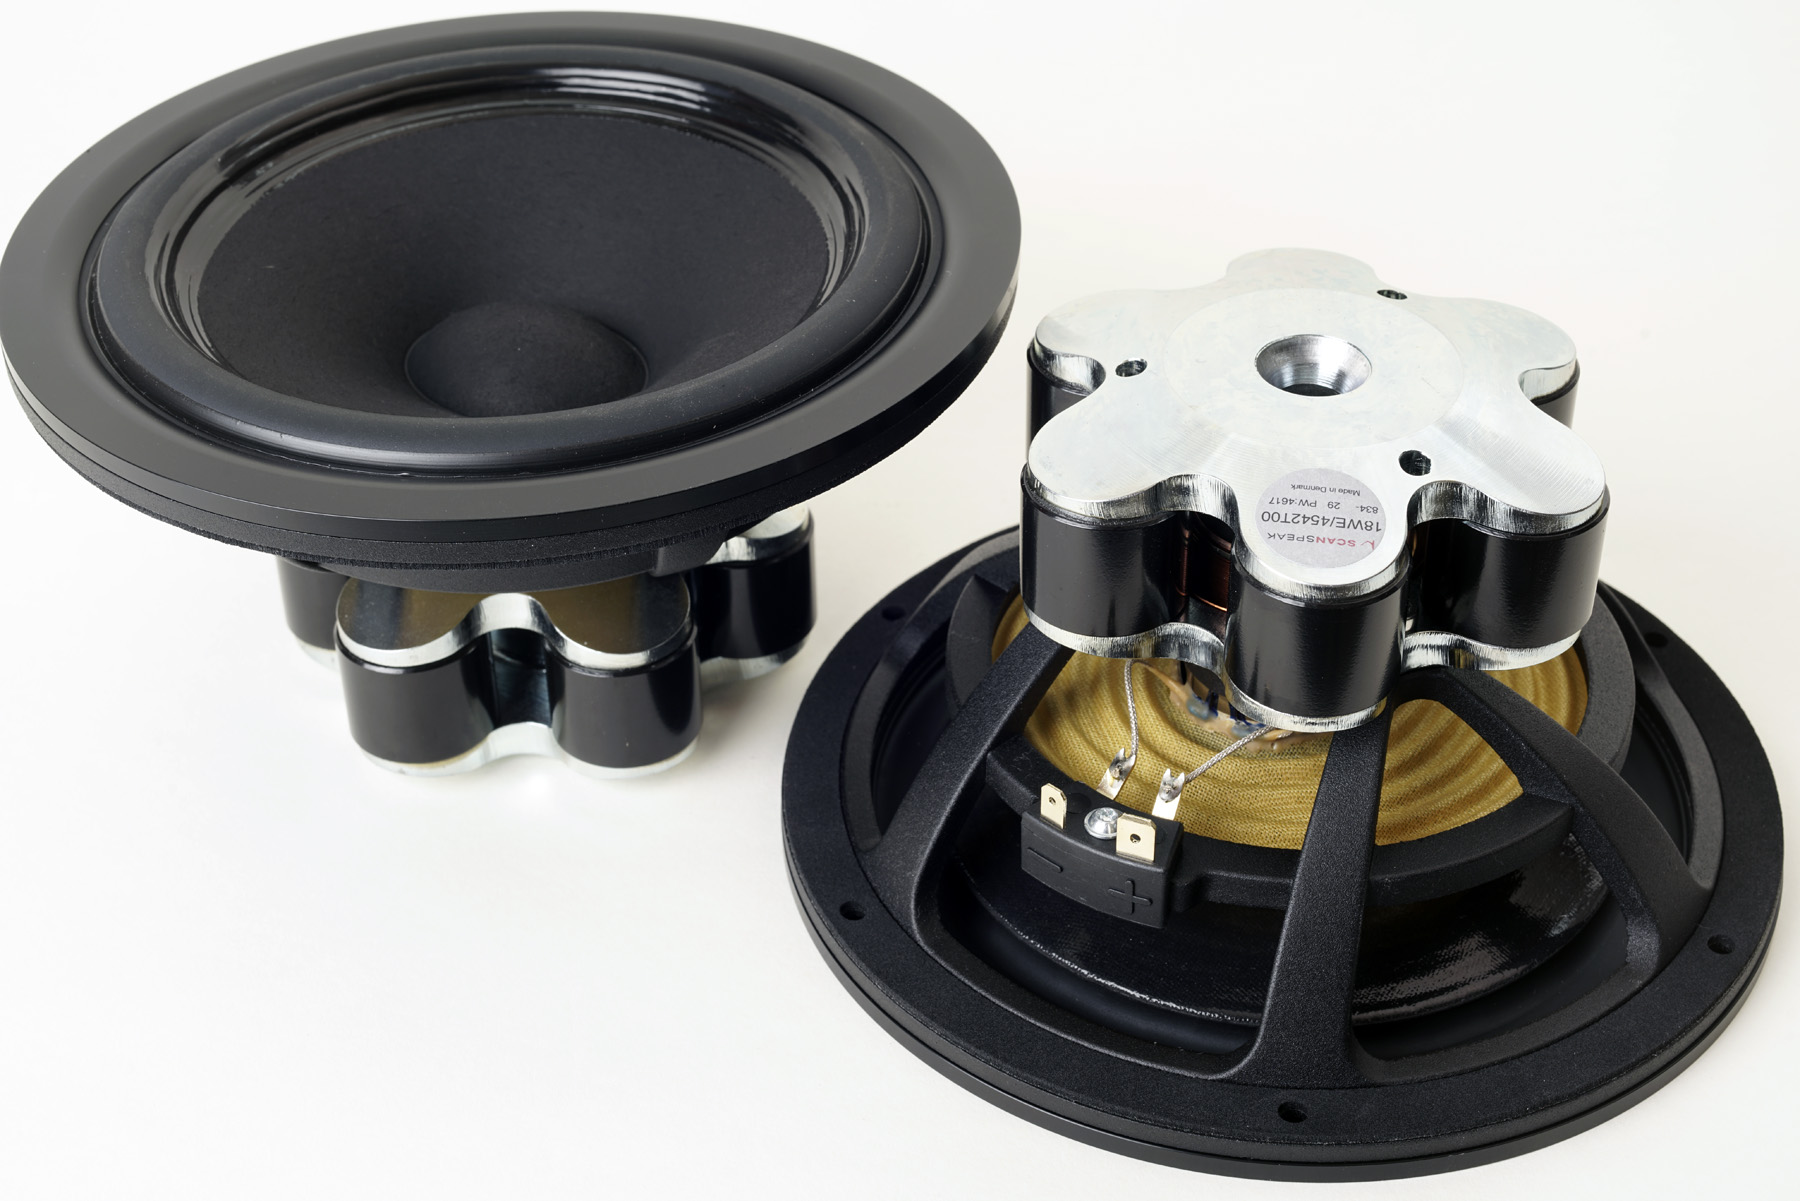
The 18WE above is the 4 Ohm version. The speaker here features the 8 Ohm
version, 18WE/8542T00.

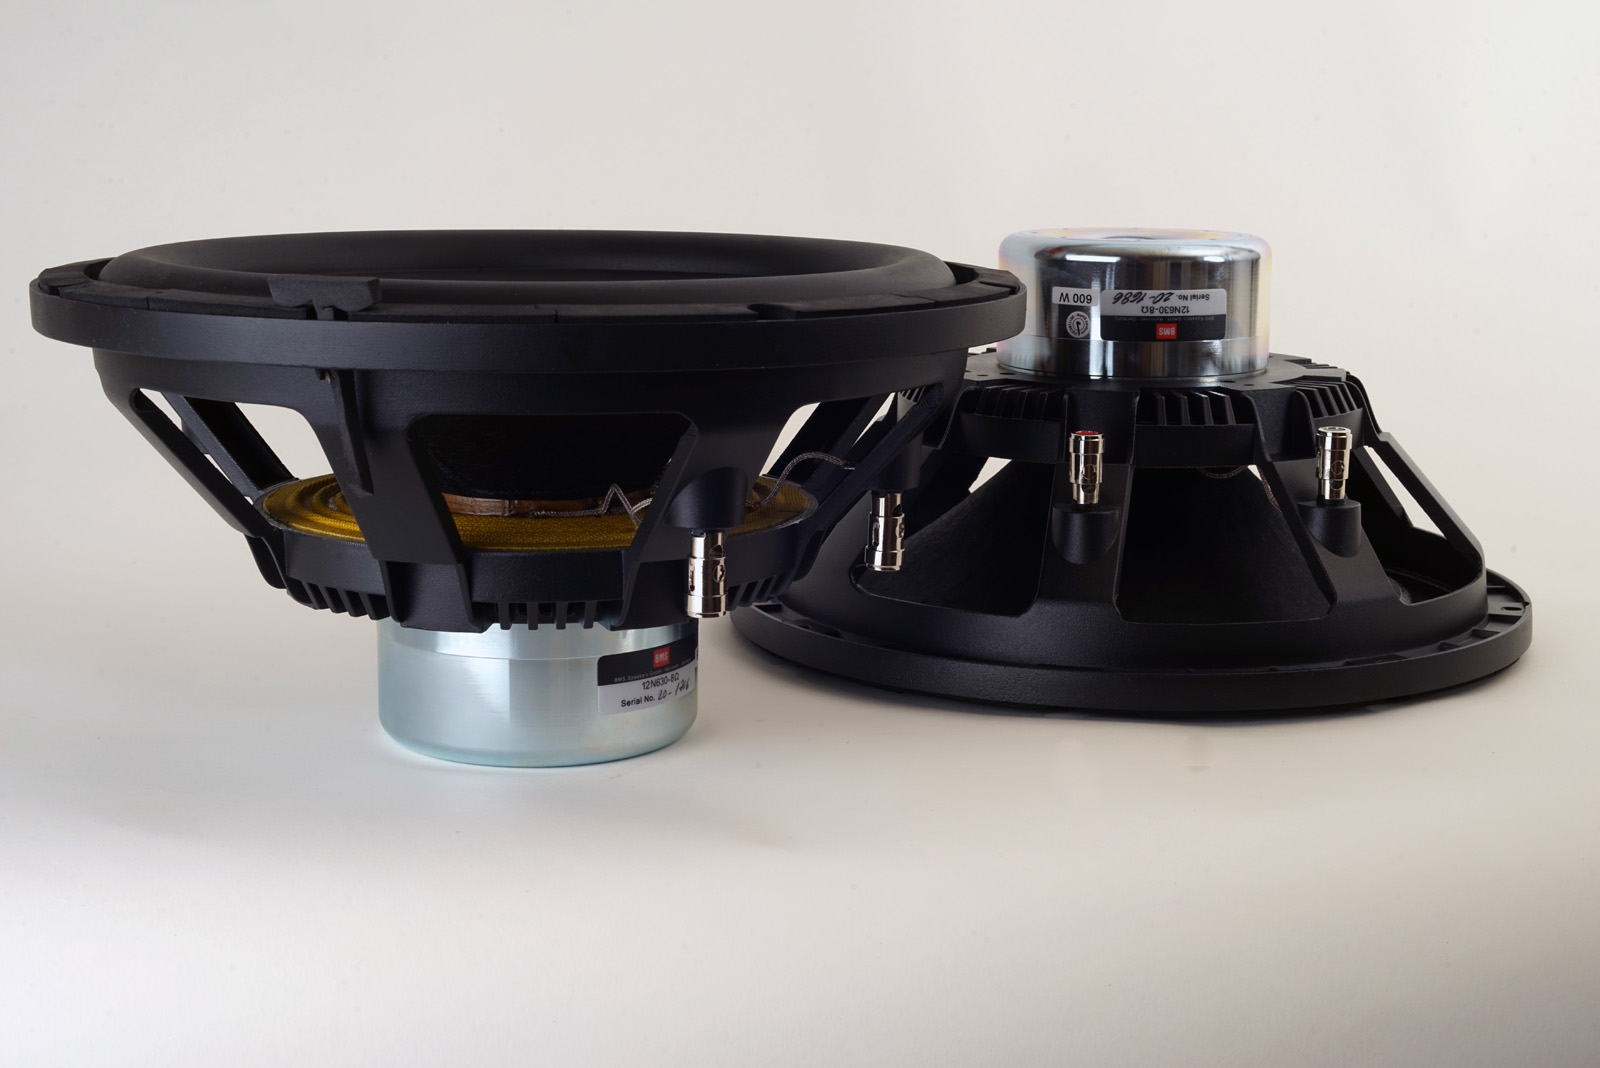
18 Sound 10NW650 and BMS 12N630.
Click images to view large

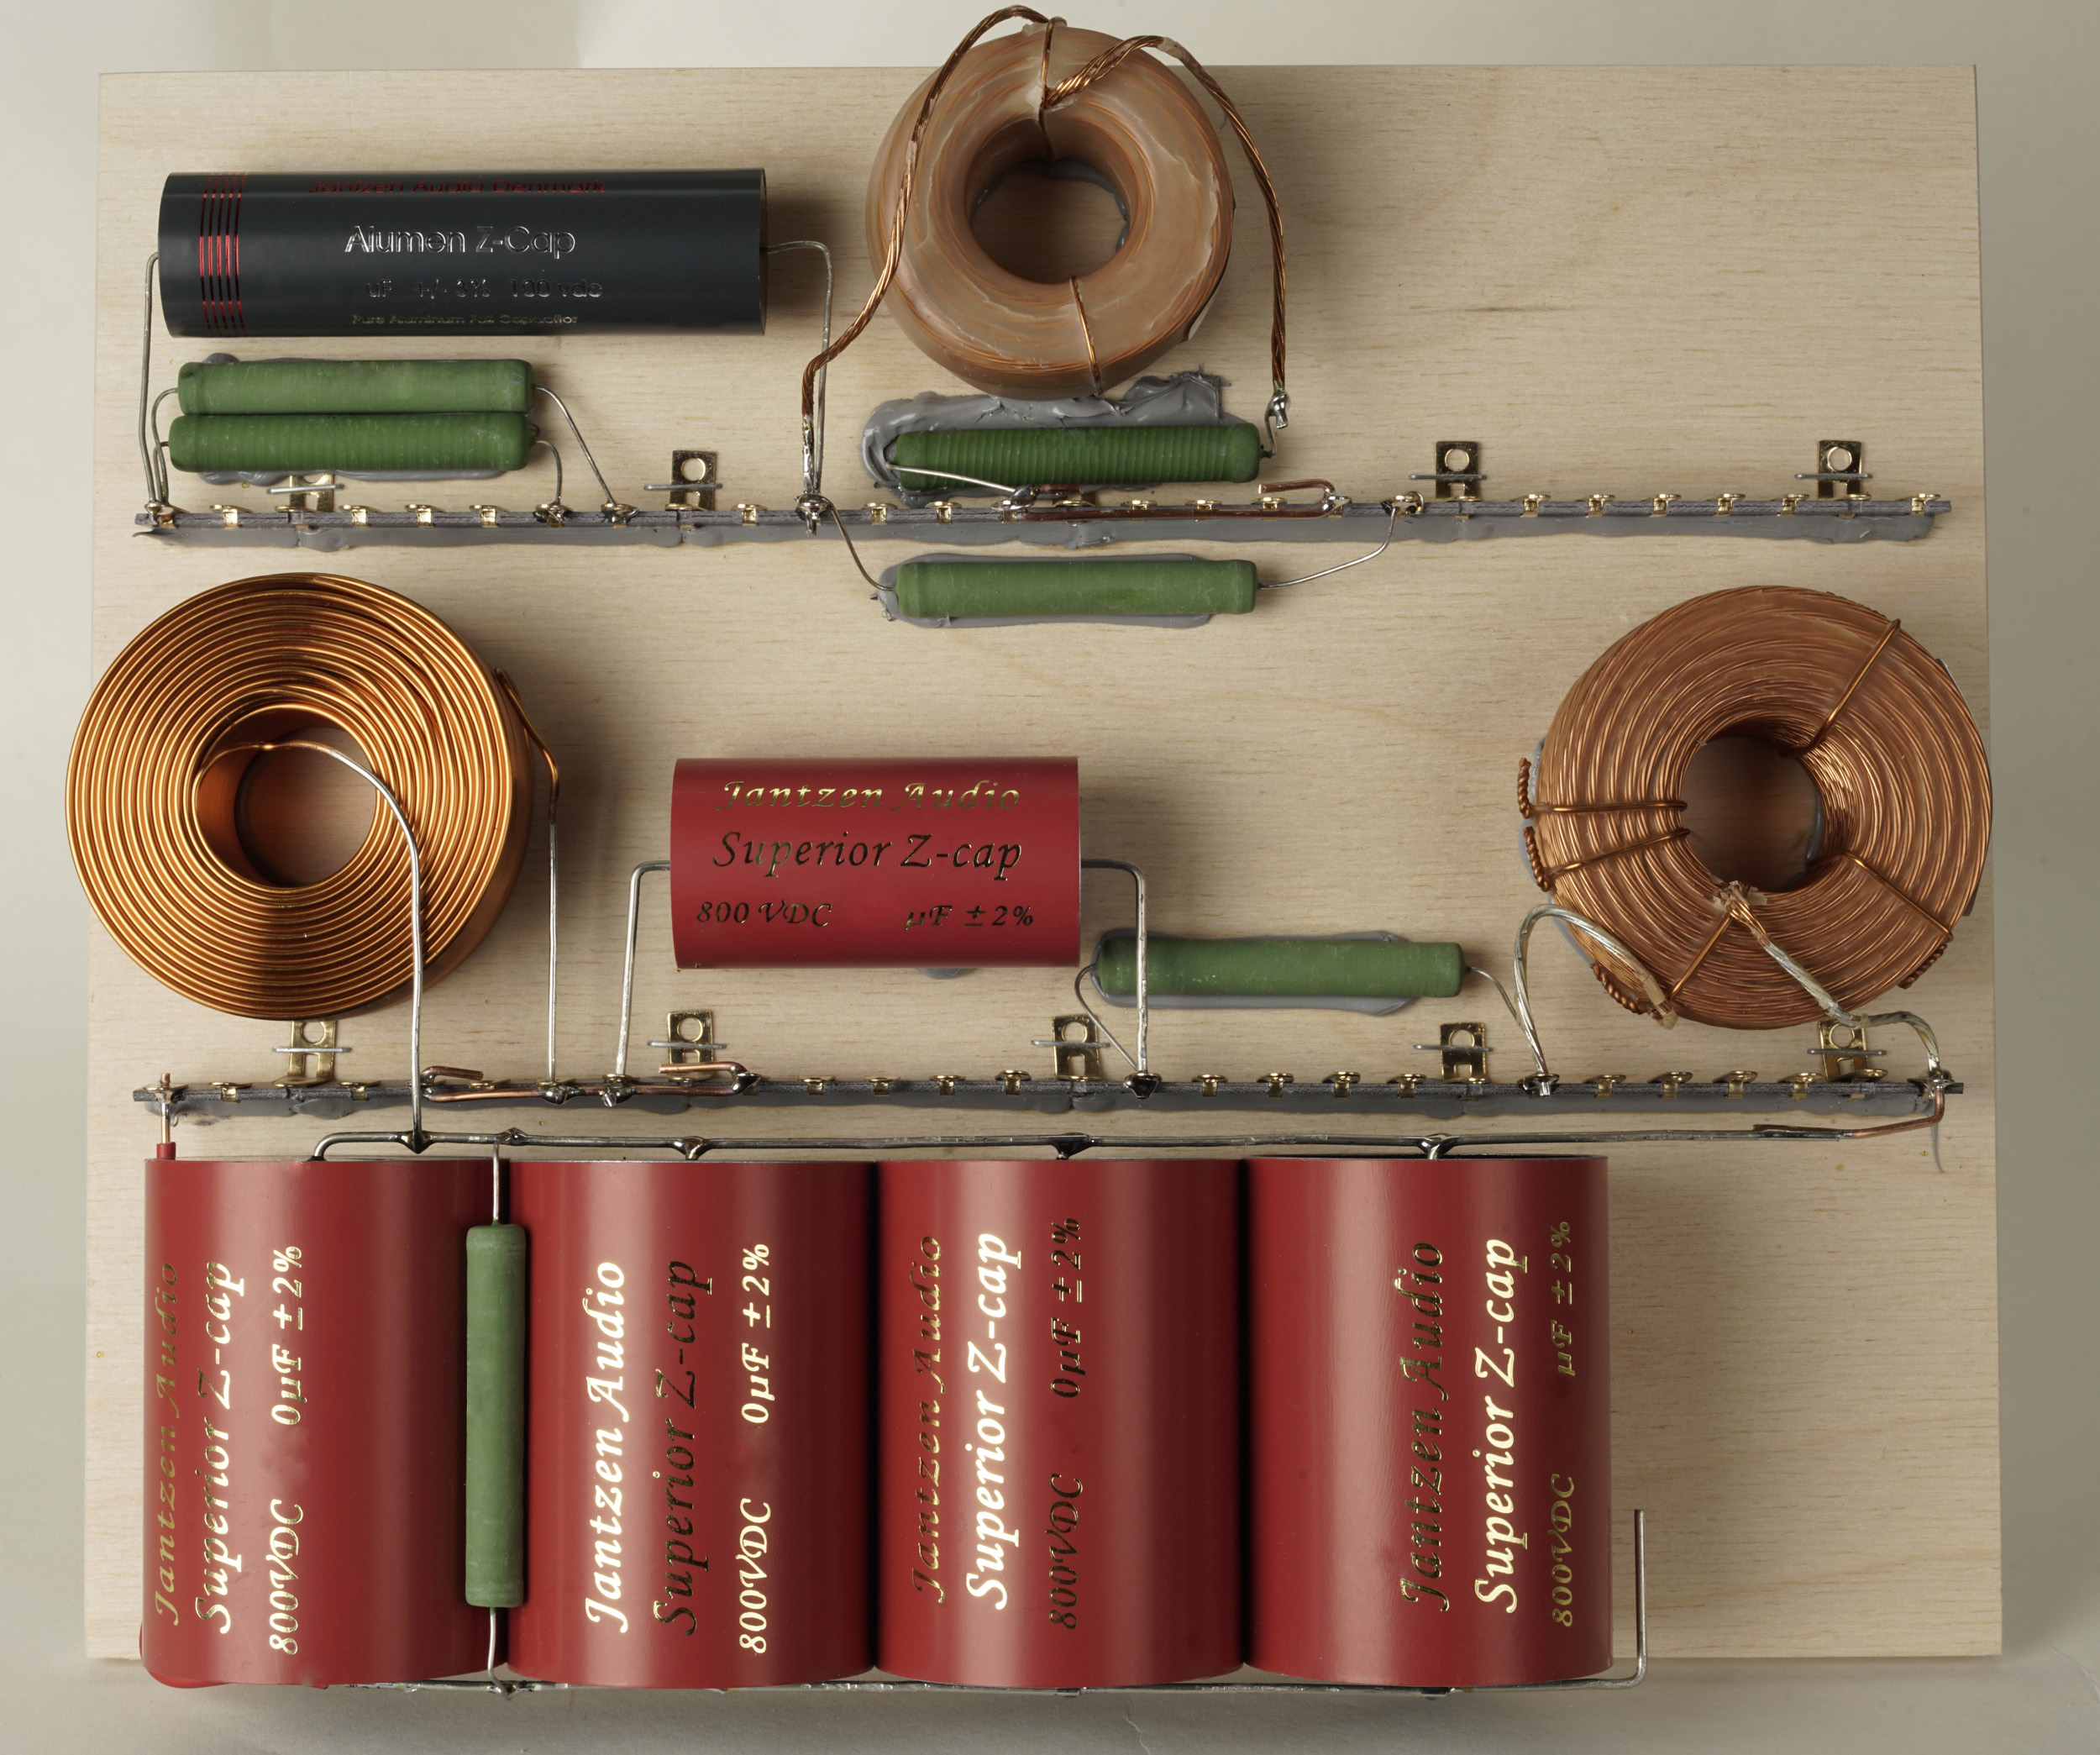
Above the very simple 2nd order passive crossover for the midrange and tweeter. Thanks to drivers' inherent frequency response and careful design of baffles, we can get along with as little as this. The low-pass filters for the 10" and 12" bass drivers i given by the Hypex module and the program comes on a memory stick from purchase of the kit from Jantzen Audio.
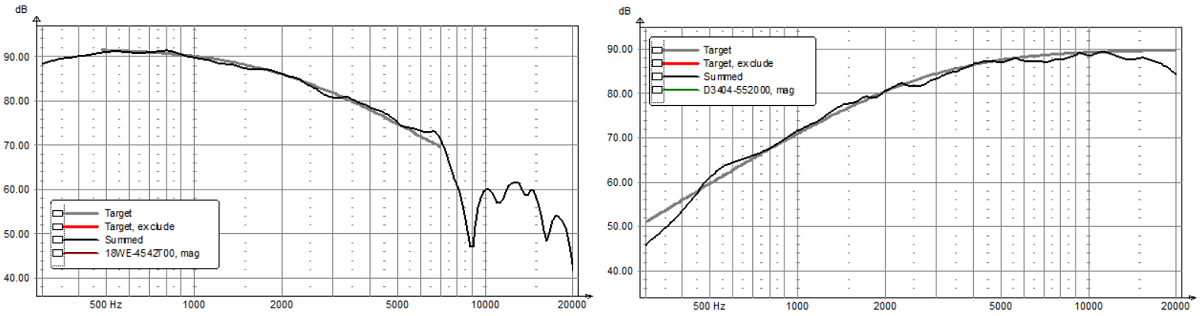
Above the drivers' response up against target LR2. Doesn't get much
better.
HYPEX FA252 MODULE
BACK TO INDEX

Click images to view large
Go to FA252 page for further instruction.
The program for the Ellipticor-4/FA252 comes
on a memory stick with the kit from Jantzen Audio.
Transfer the file to the folder "FilterData" in My Documents.
Driven in balanced mode from my preamp, the
FA252 makes 28, 26 and 24 dB gain from preset 1-2-3 respectively.
This should match most power amplifiers driving the MT section.
The FUSION FA252 gain can be set to match almost anything. Click link
above.
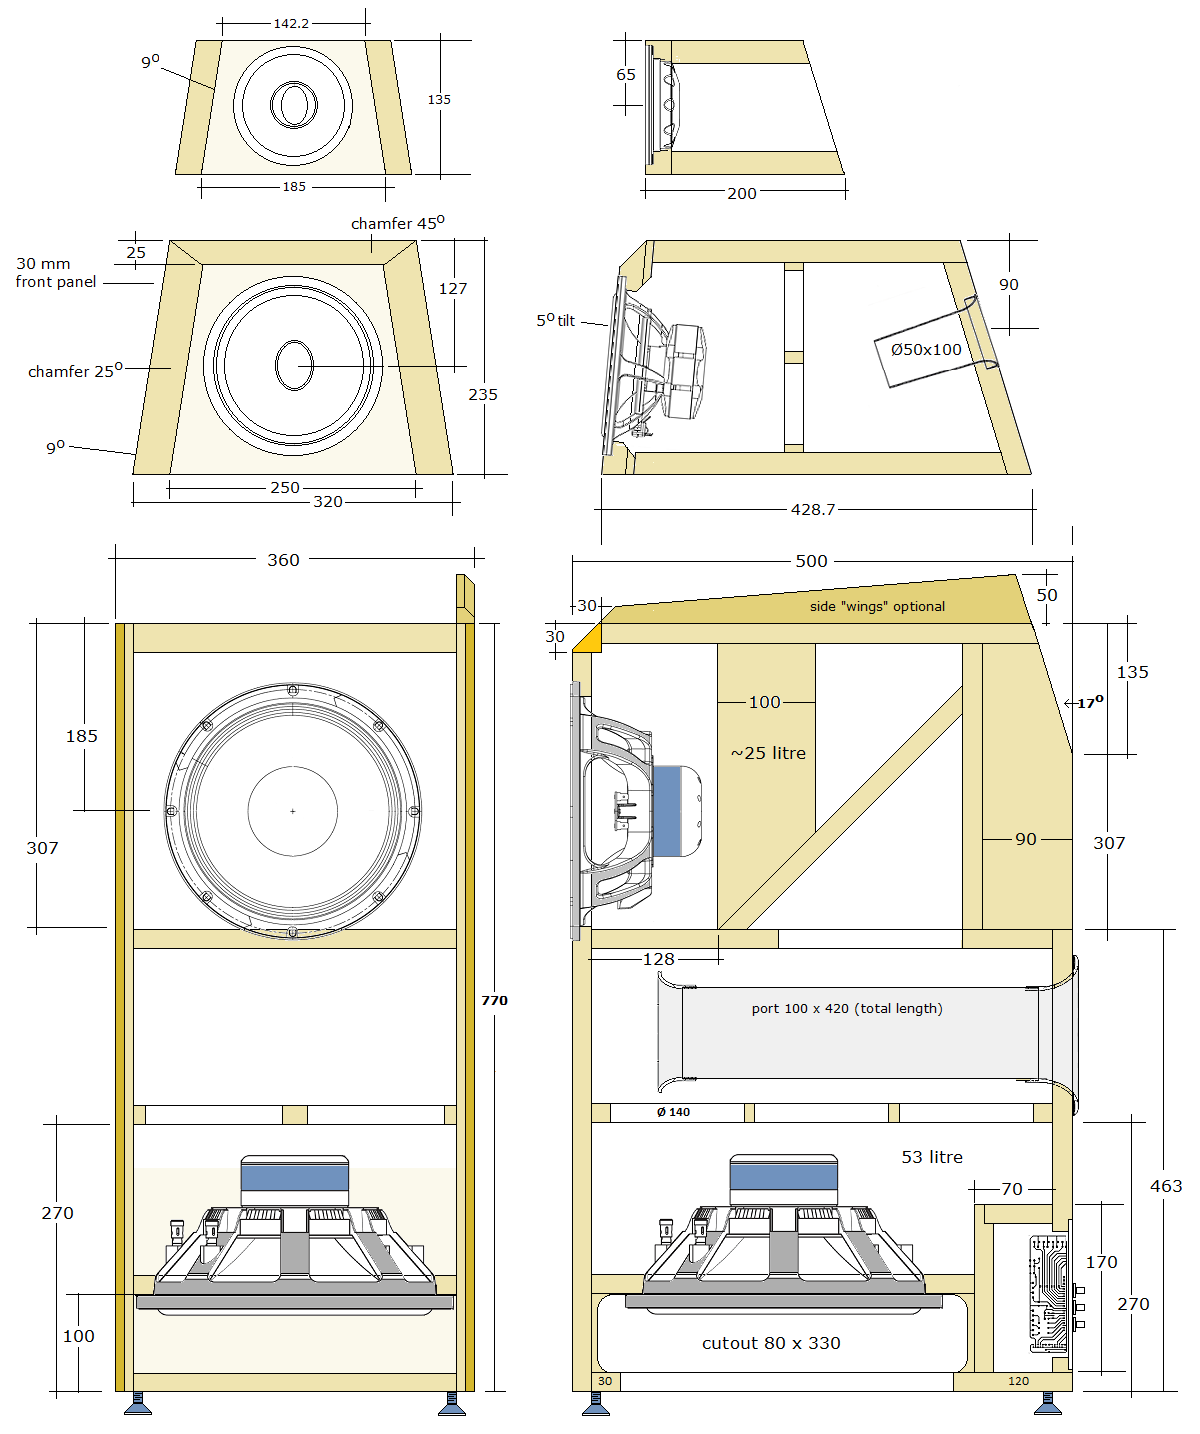
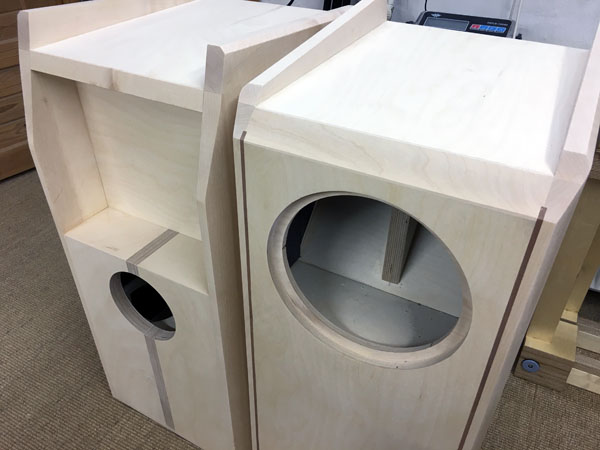
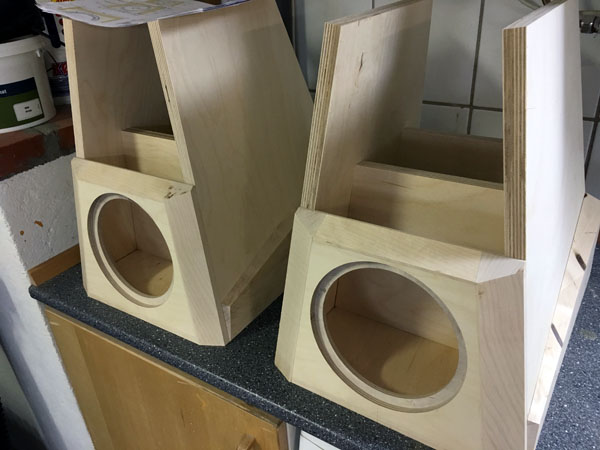
Cabinets to be made from 20 mm Baltic birch or similar materials. Only
the mid-cab front panel is made from 30 mm laminate. It can be reduced
to 25 mm to facilitate the chamfering. The volume of the midrange
cabinet is approx. 15 litres. +/- 1 litre works fine. Not critical.
Cabinet damping: Please look the ATS4-HE for guidance.
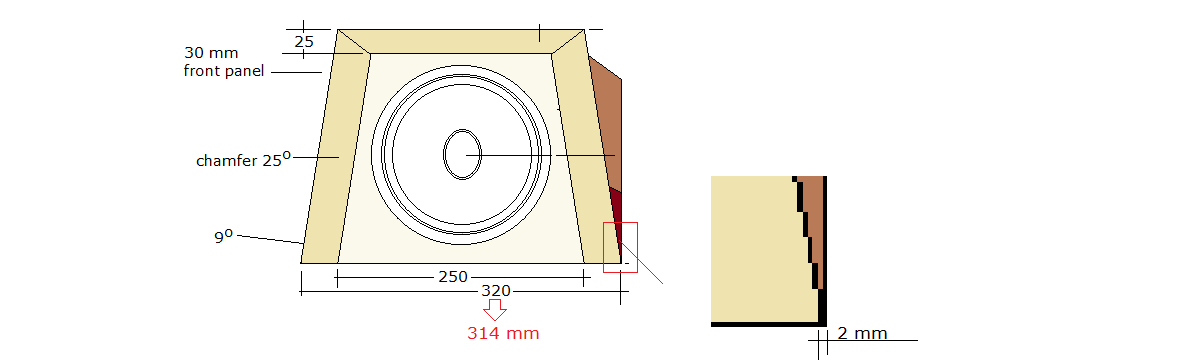
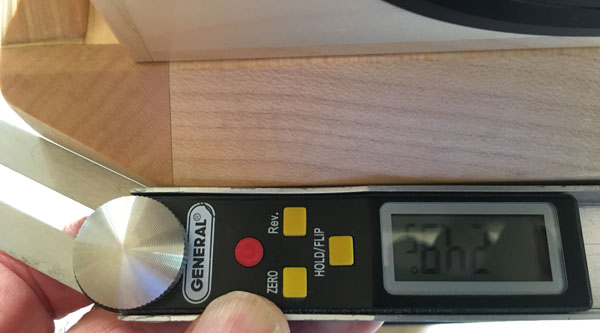
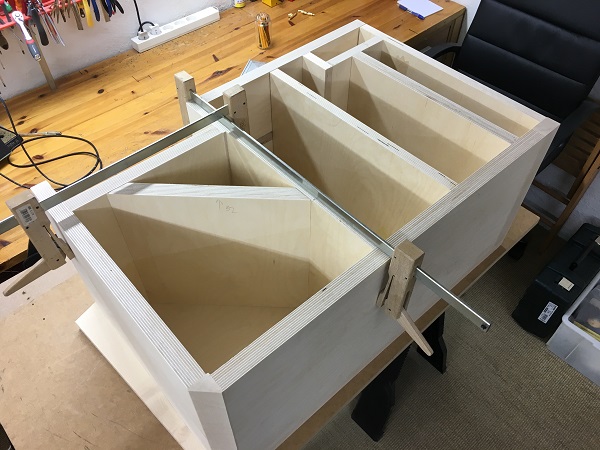
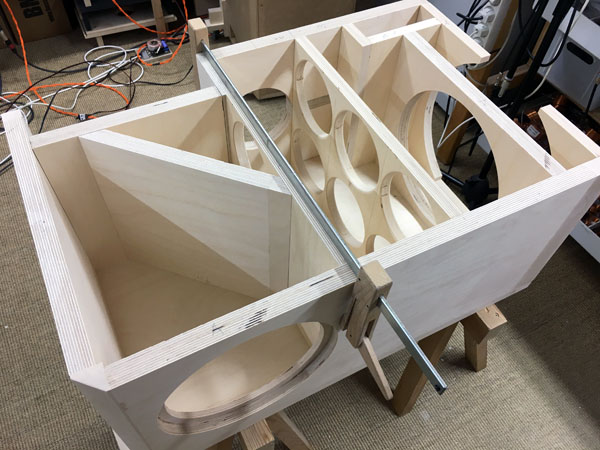
A few comments on the mid cab. If you choose to add the side bars like the ATS4-HE and others, I suggest reducing the overall width of the mid-cab to 314 mm and having the side bars 2 mm at the bottom. It's very tricky to make then less than 2 mm. Stick to the 9 deg. tilt of the mid-cab sides. The slightly reduced width doesn't impact performance. You need to have some 1 mm clearance between mid-cab and bass cab extensions. This assumes you have the extended side panels of the bass cabinet like the ATS4-HE. If you do not have these you can increase the mid-cab side bars to fit the width of the bass cab, depending on the thickness of the panels you use here.
The chamfering degrees refer to the table saw setting with the front
panel vertical.
44-46 deg. for the top is fine and 24-26 deg. for the sides.
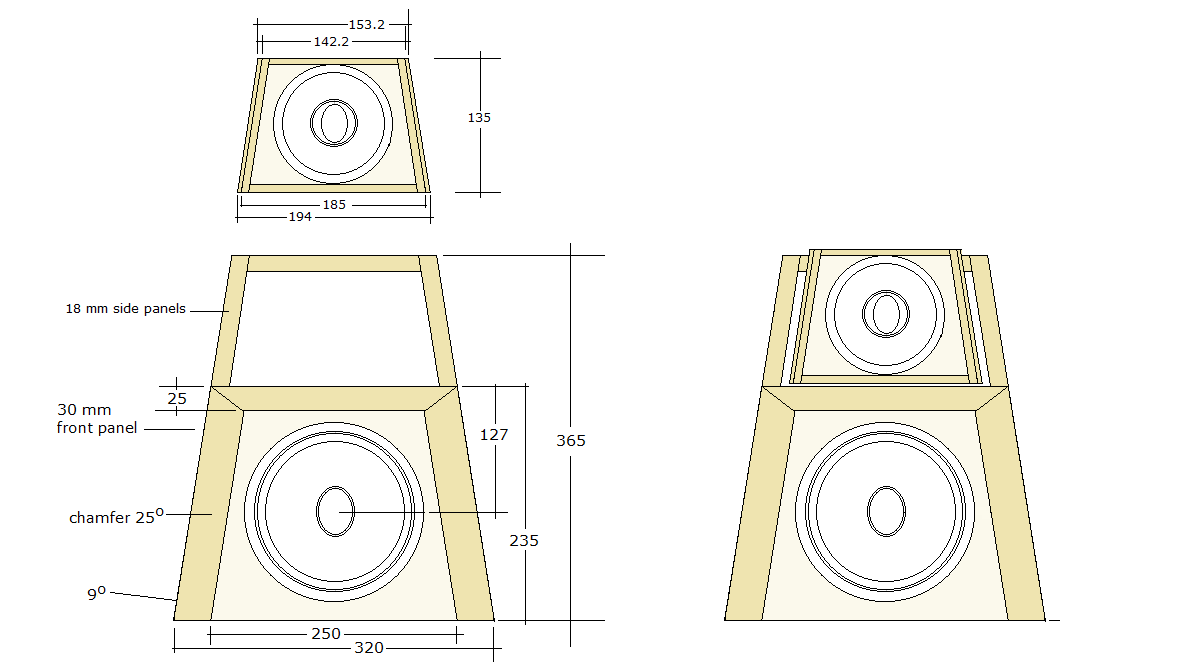
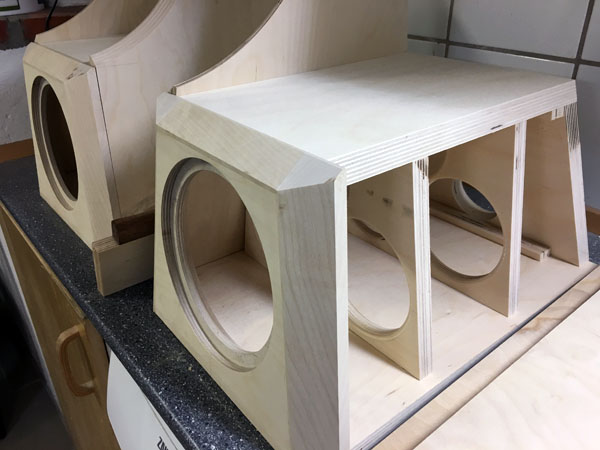
Above the more advanced mid-tweeter cabinets. I strongly suggest using
18 mm material for the mid-cab side panels. This mostly from an
aesthetic point of view. I tried 15 and 20 mm and one looks too thin and
the other too thick. The curvature of the upper part of the side panels
can been seen from the
Illuminator-4 notes.
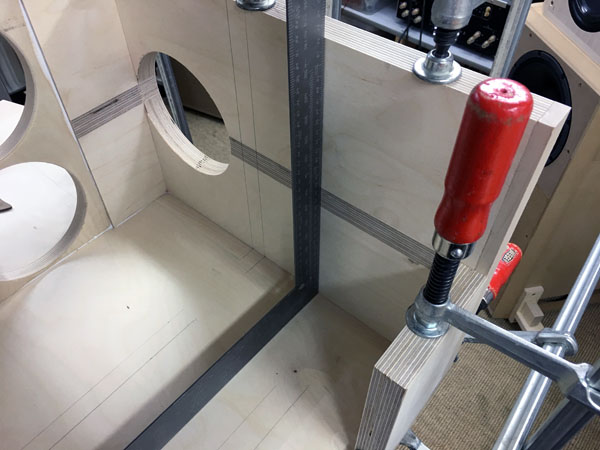
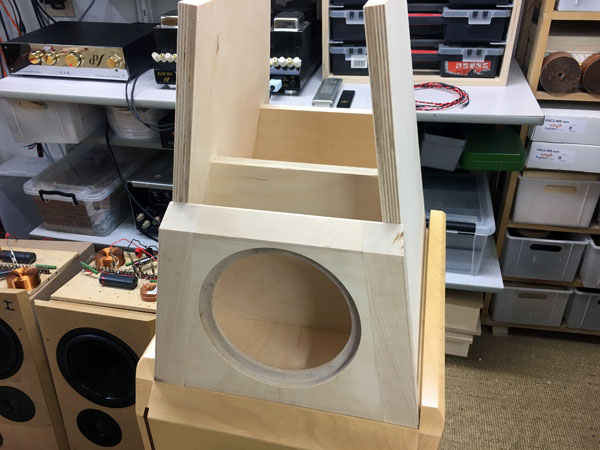
The critical dimensions for the tweeter housing are these: 185 mm (base
width), 142.2 (top width) mm and 135 mm (height). The depth of the
chamfering is less important as long as they are more than 45 deg. See
images below.
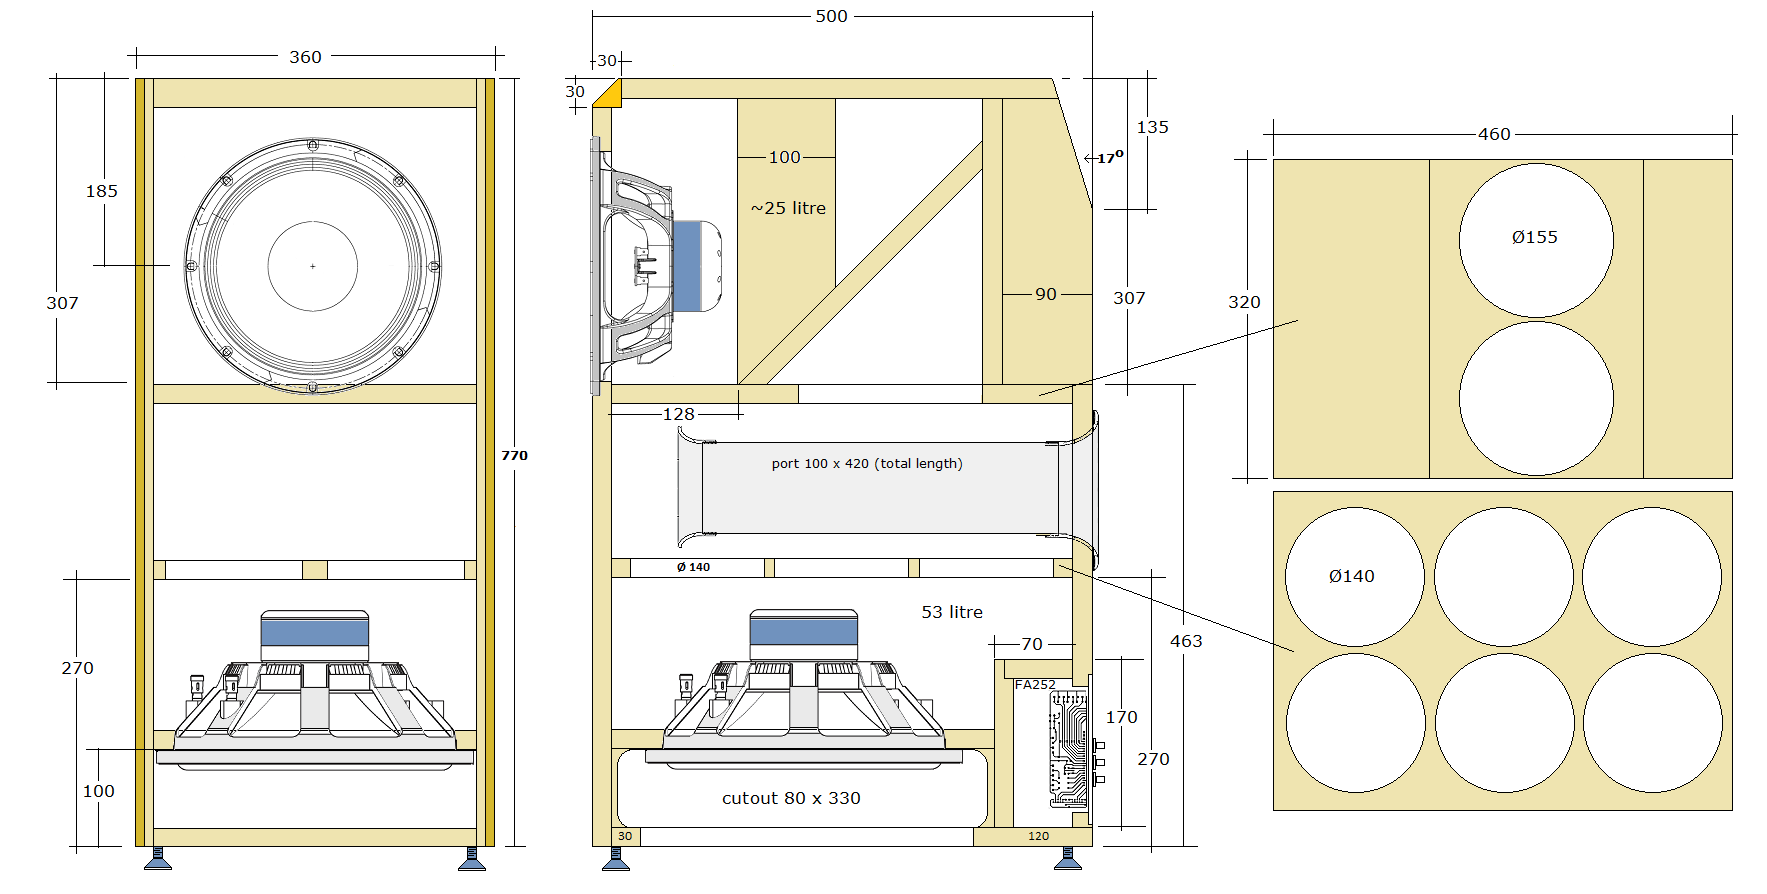
More bass cab details. Click image to view large.

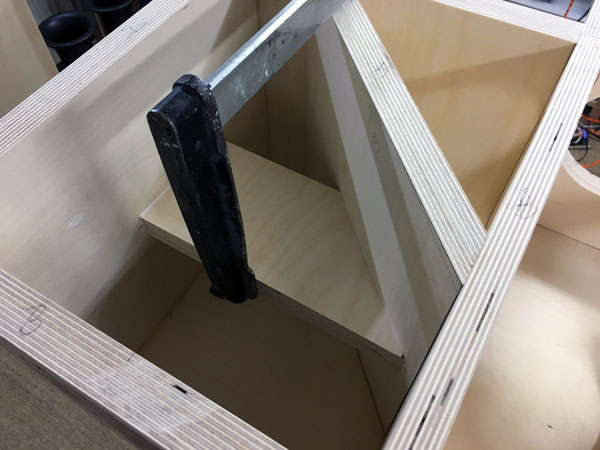
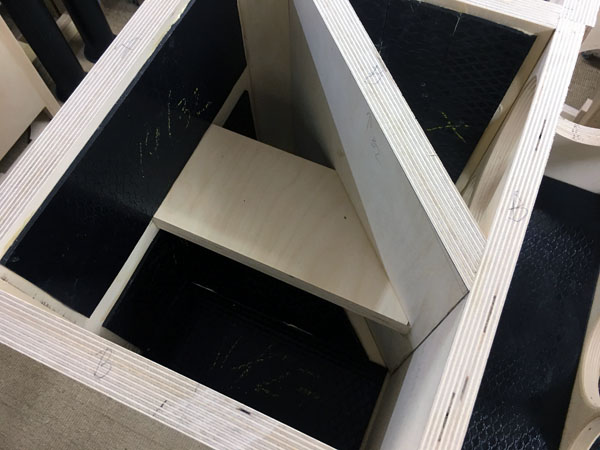
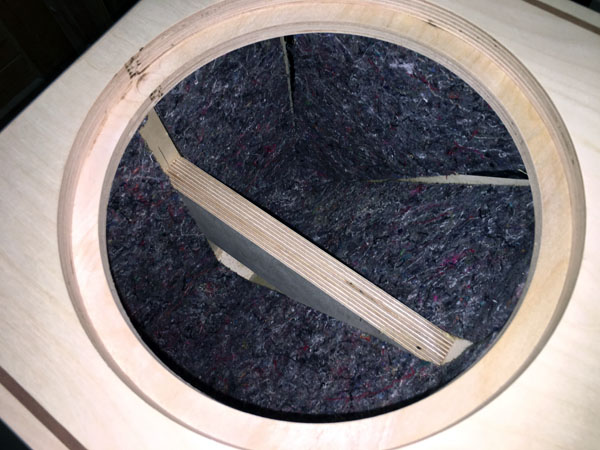
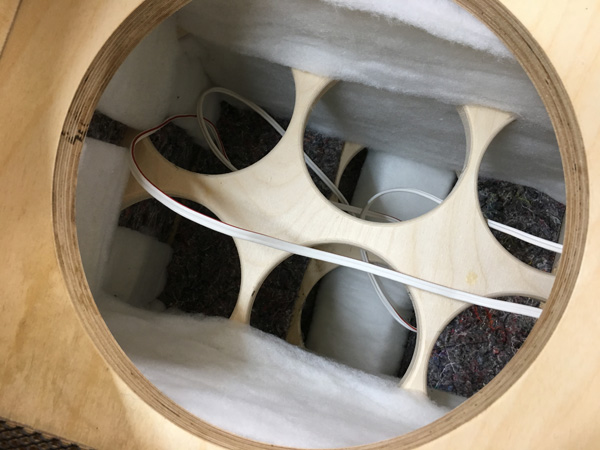
Bracing for midrange cabinet. Place in middle of cabinet. The mid-cab
port is stuffed with a roll of 10 x 20 cm acoustilux to make an
aperiodic tuning.
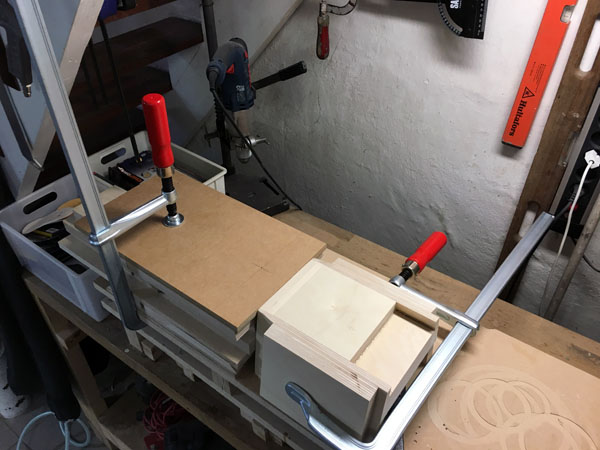
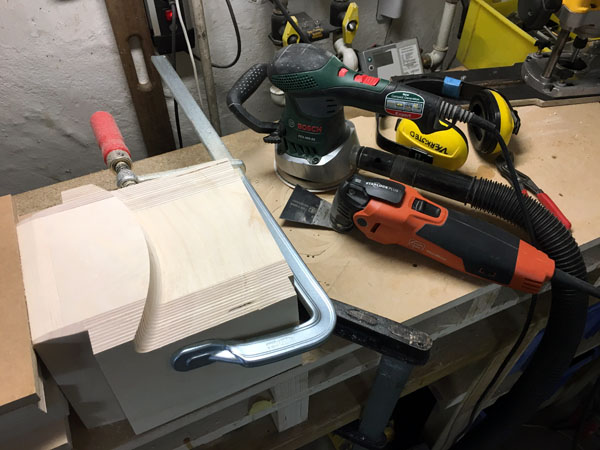
Workshop images
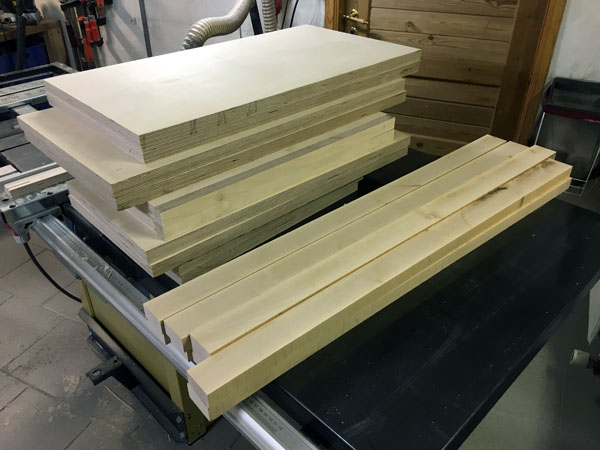
Cuts piling up for the bass cabinet. As before, maple fillets.
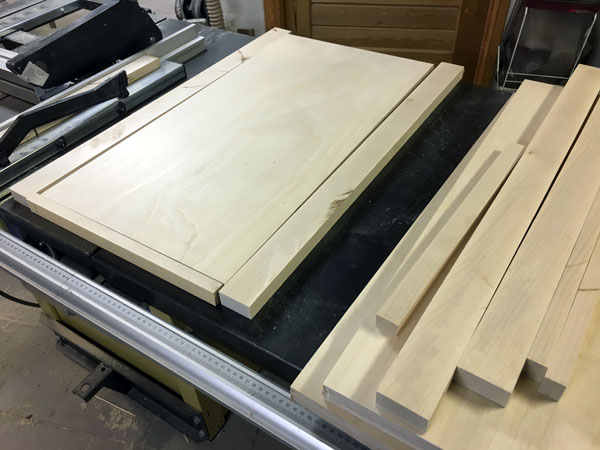
Having some 27 mm Baltic birch left from
The Loudspeaker, I decided to mostly use this for the bass cabs.
This extends the width to 374 mm.
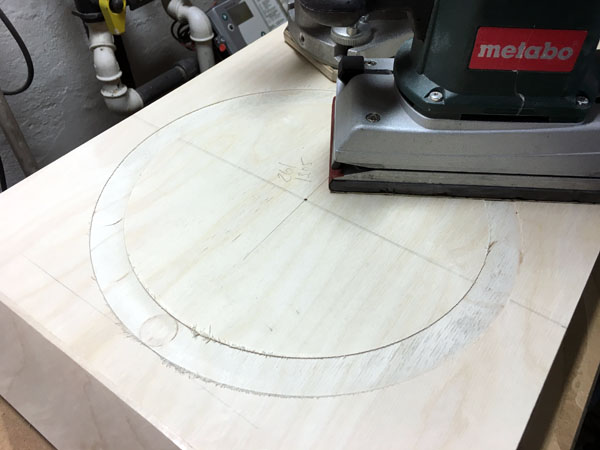
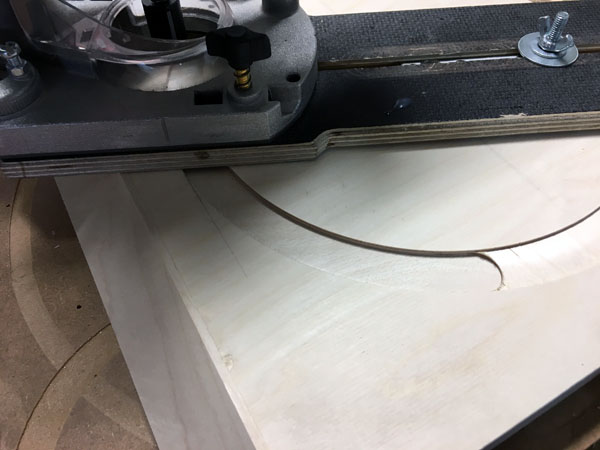
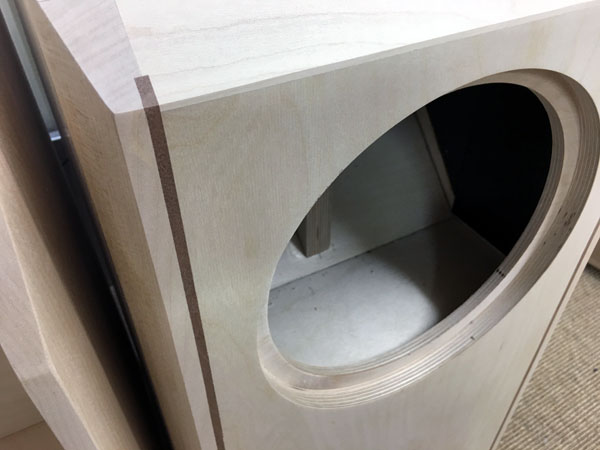
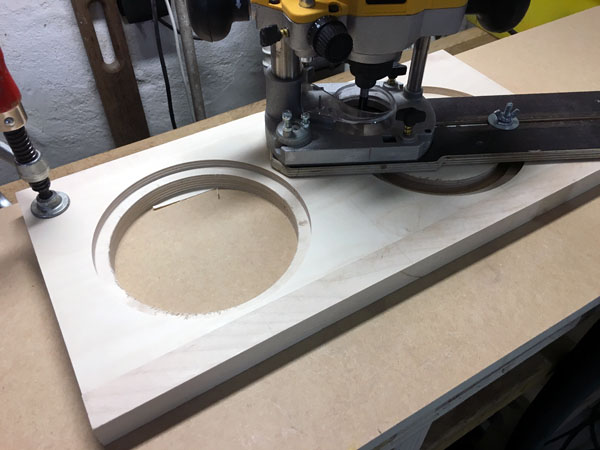
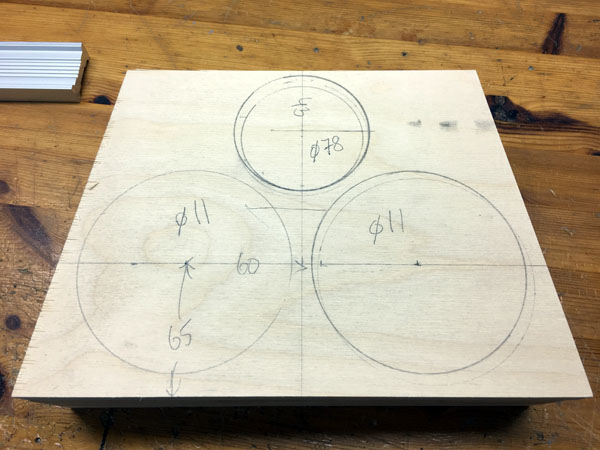
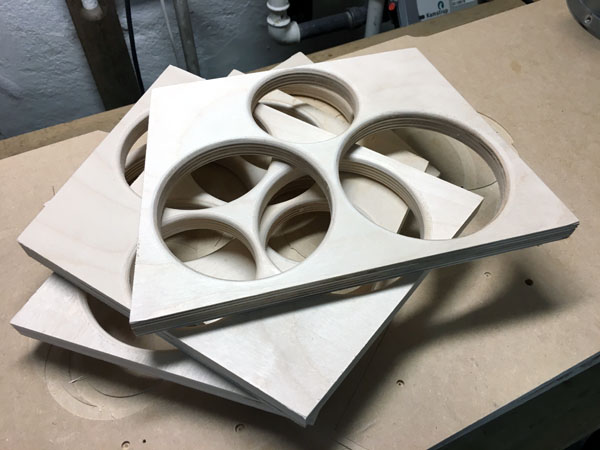
Routing for drivers in Baltic birch is trouble. Start lowering the
router 0.1-0.2 mm and rotate the router slowly.
Sand the panel before proceeding. Next you can start lowering the router
~1 mm per rotation.
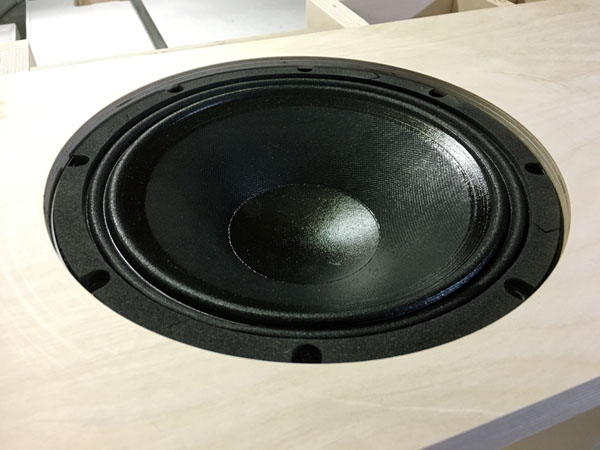
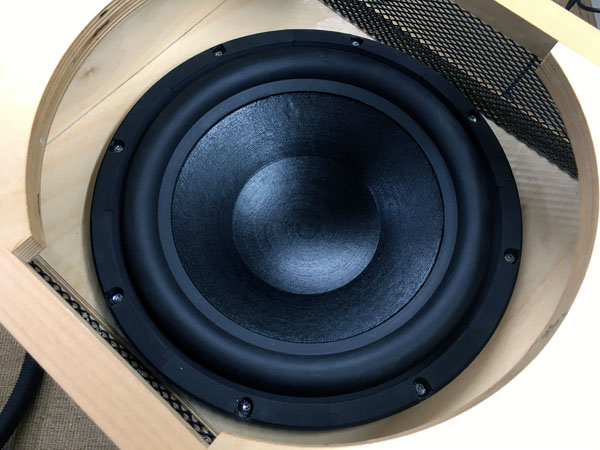
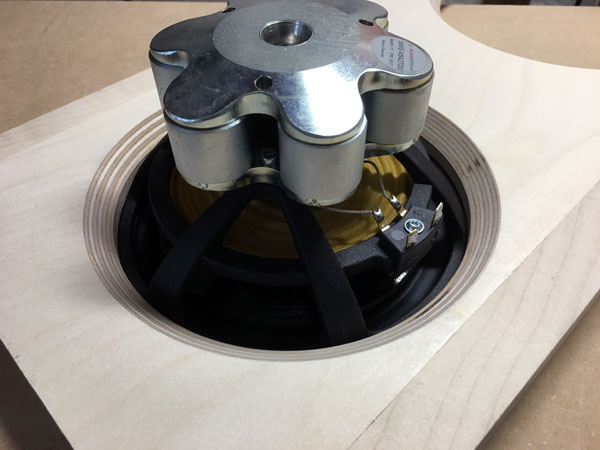
Left: The 10N650 is given some 6 mm extra, allowing a front grille of
~10 mm thickness. With the front panel being 27 mm thick, there's still
some 11 mm left for mounting screws. More than enough for bass driver
with 8 mounting screws.
Right:
All holes in bracings made incl. hole for port and front bass driver. Someone asked if I
really make the holes in the braces with the router, and yes I do.
It takes about 60-90 sec. to make one hole. To me the easiest and
quickest way.
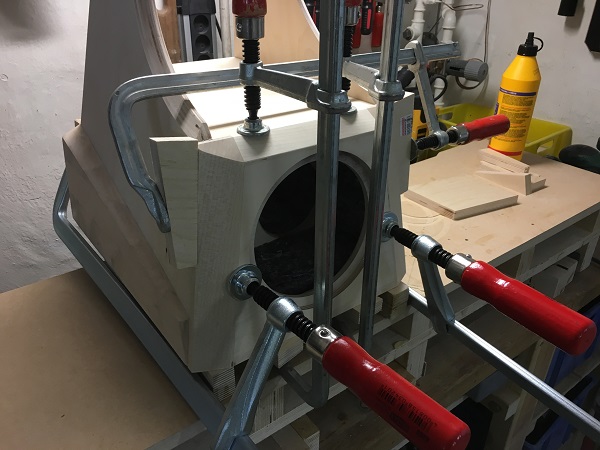
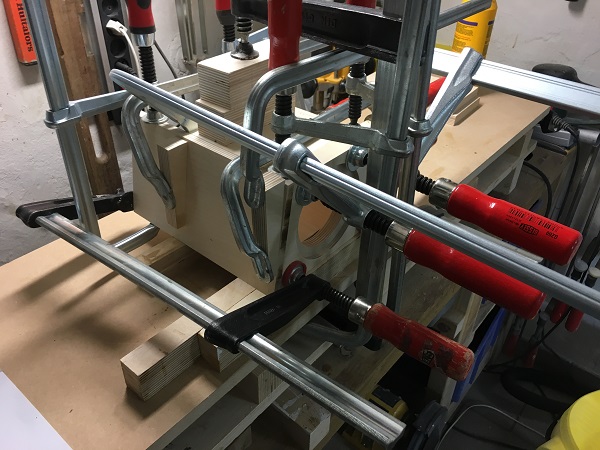
Left: Gluing in sections, make absolutely sure panels are 90 deg. Right:
Gluing top support brace.
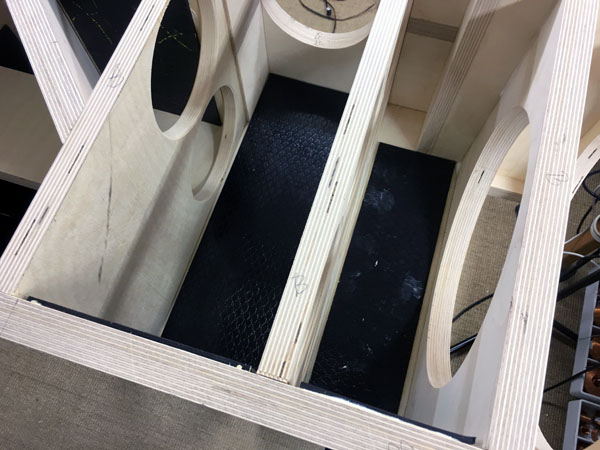
Above and below the bitumen pads.
The bitumen pads are optional and must be added to your order.
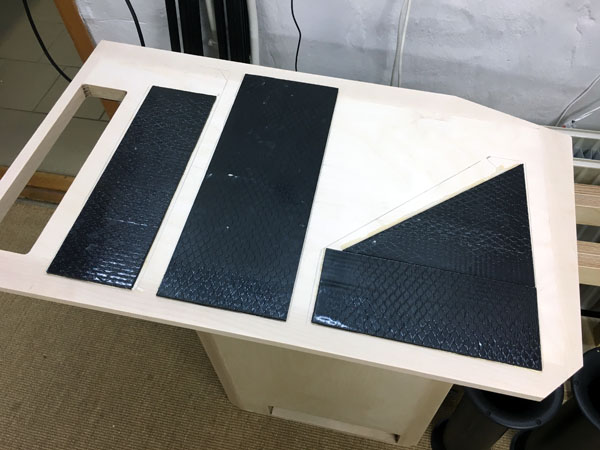
Bitumen pads hardly necessary with 27 mm panels, but doesn't take long,
so her we go.
I used 5 sheets 50x50 cm for the bass cabs.
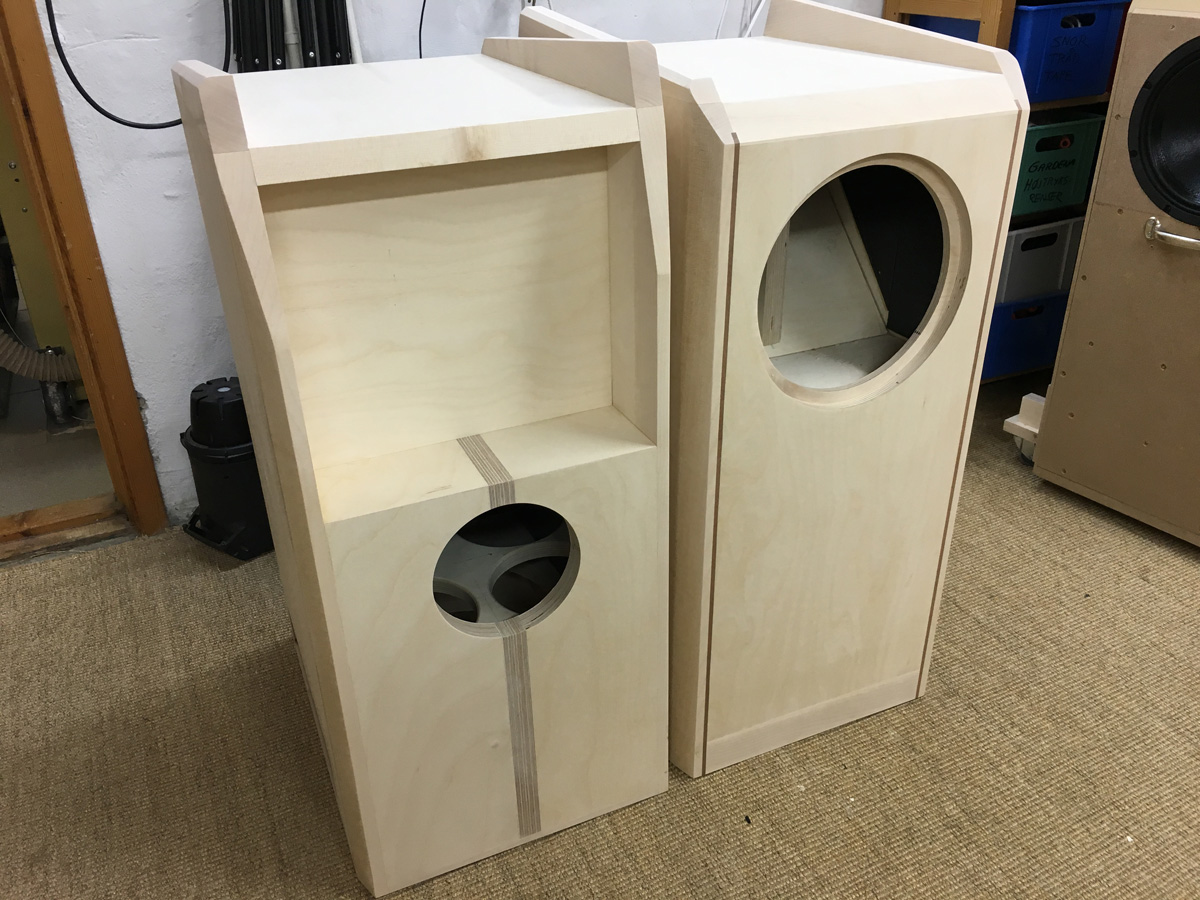
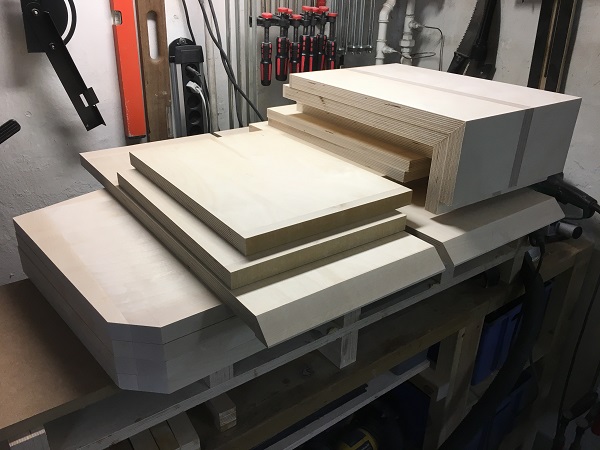
Bass cabs ready for sanding and lacquer.
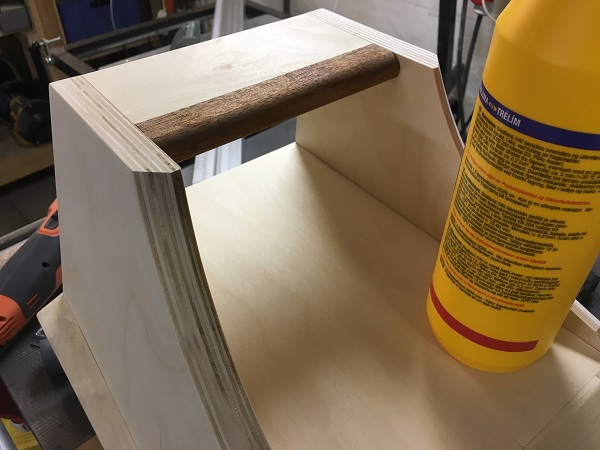
A 5 mm strip of mahogany was inserted on front.
The chamfering of the side panel fillets and insertion of mahogany
fillets are meant to slim the visual appearance of the bass cabinet -
and it works. The maple fillets are 27 x 50 mm and chamfering to the
middle and 40 mm depth. It has no impact on speaker performance but is
crucial in making the cabinets look more elegant.

Damping of bass cabinet. 8 mm felt on all internal panels.
I use
vinyl glue to adhere the felt to the smooth bitumen pads.
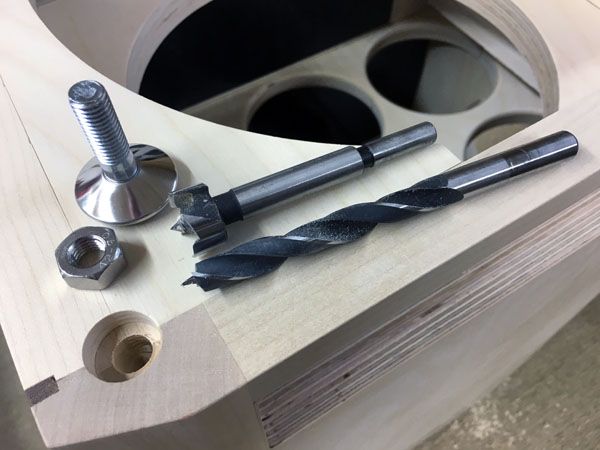
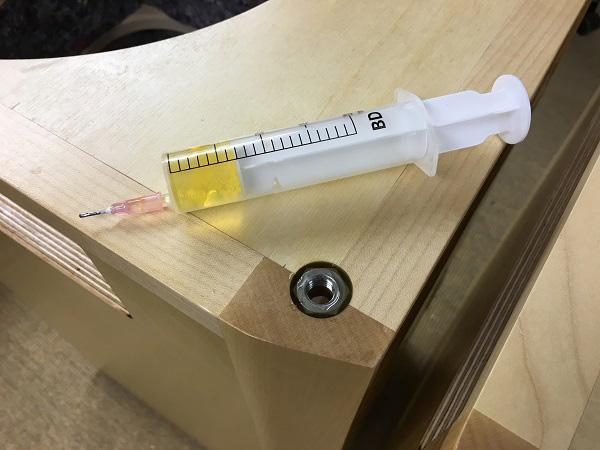
Preparing for the adjustable feet. The bolt is fastened with epoxy glue.
Fill a syringe with epoxy and inject around nut.
I use WEST/SYSTEM 104 epoxy, mix 5+1, rather thin when mixed. Use large,
short and blunt needle to
inject.
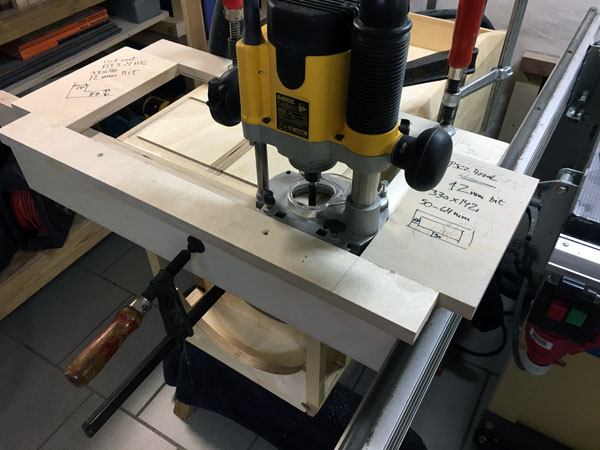
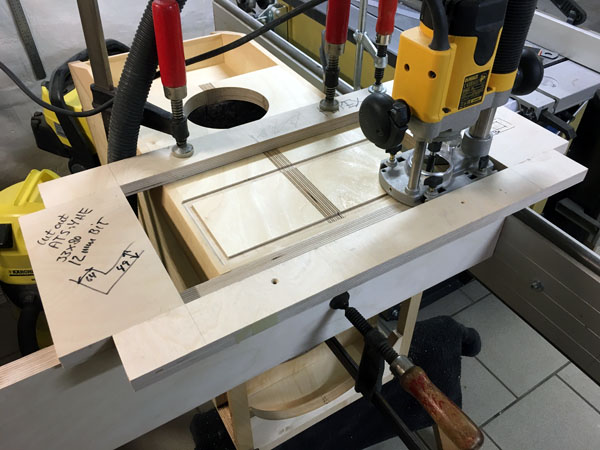
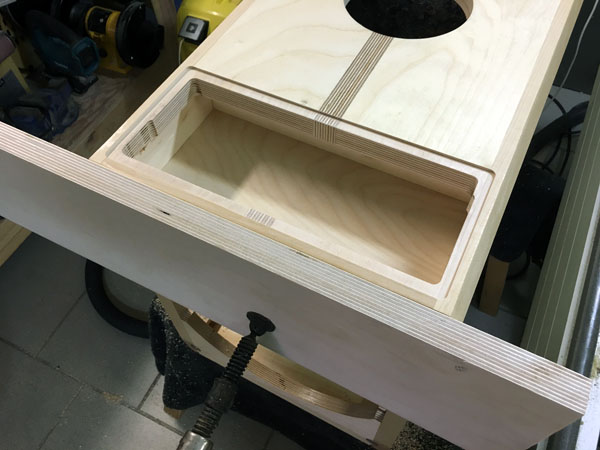
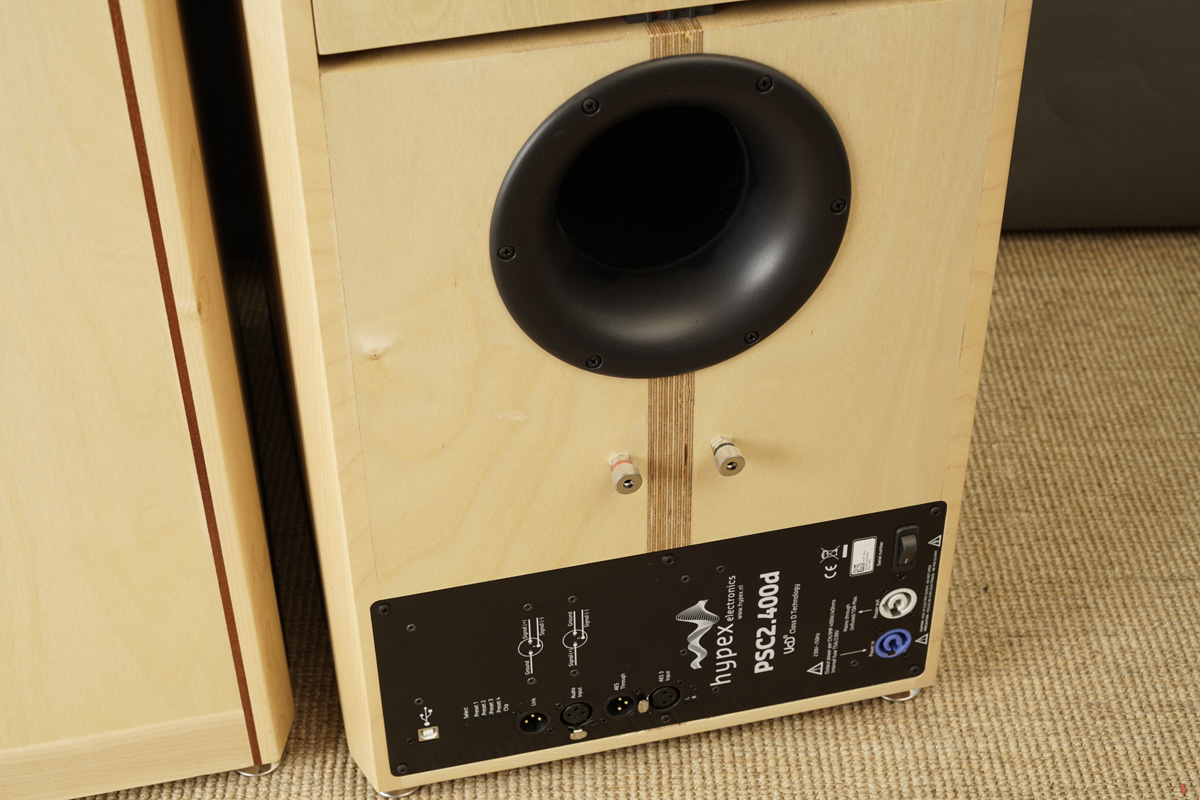
Routing for the Hypex module, 330 x 142 mm. It doesn't have to be flush
mounted but it looks nice.
Make a frame that with a 12 mm router bit matches exactly the width and
height of the module. Route 2.7 mm deep.
Add 10 mm fillets to the frame and route all the way through.
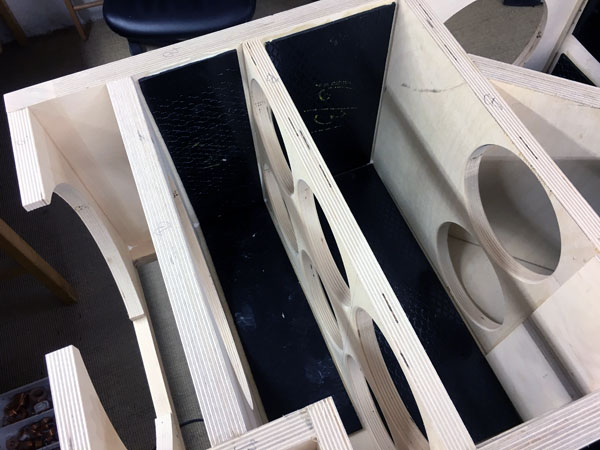
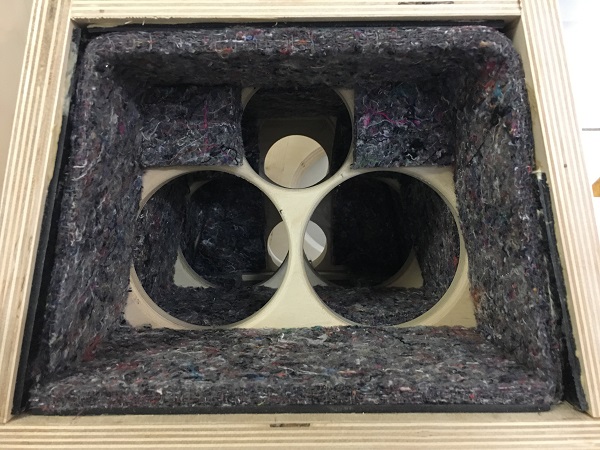
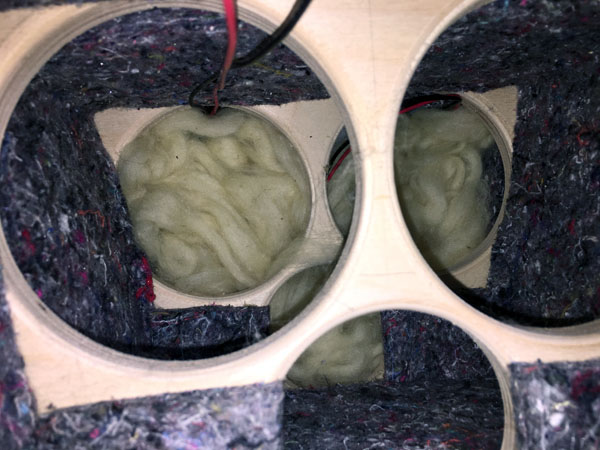
To the right acoustilux damping. Roll one sheet 30 x 50 cm and place in
upper triangular cavity. Line sides and front with acoustilux.

Add 2 pcs 35 x 50 cm acoustilux til the upper bass cabinet. 18 Sound
bass driver in place with room for front grille.
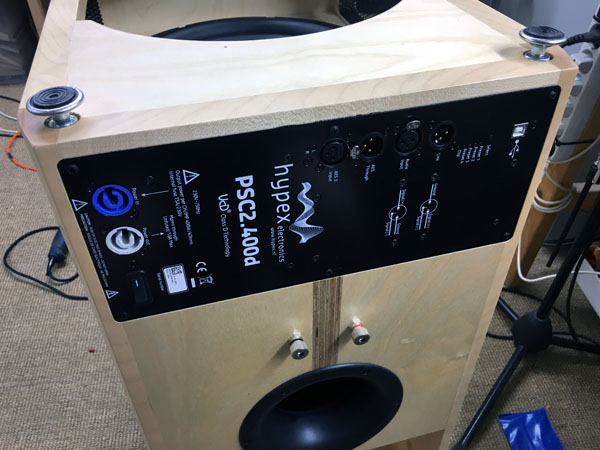
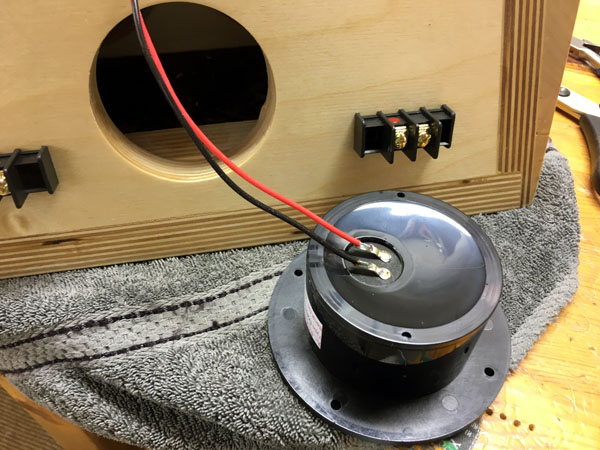
BMS bass and Hypex module in place. Basically bass cabinet finished.
PSC2.400d now replaced by FUSION FA252. Read
here.
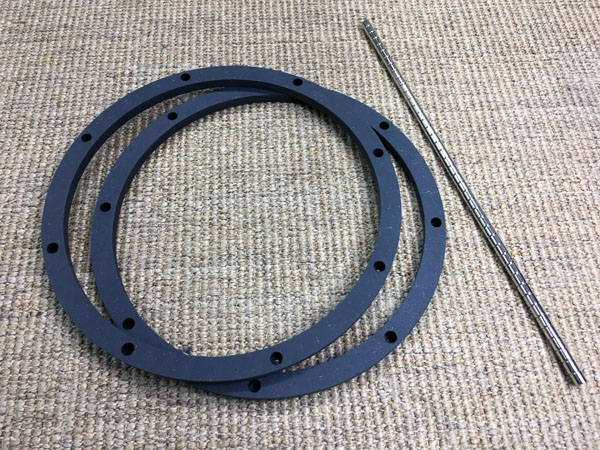
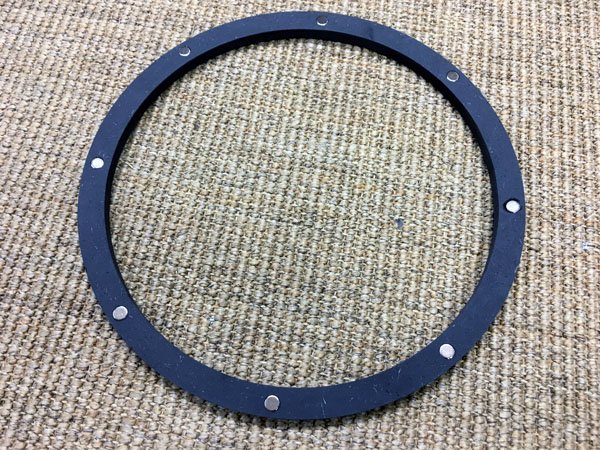
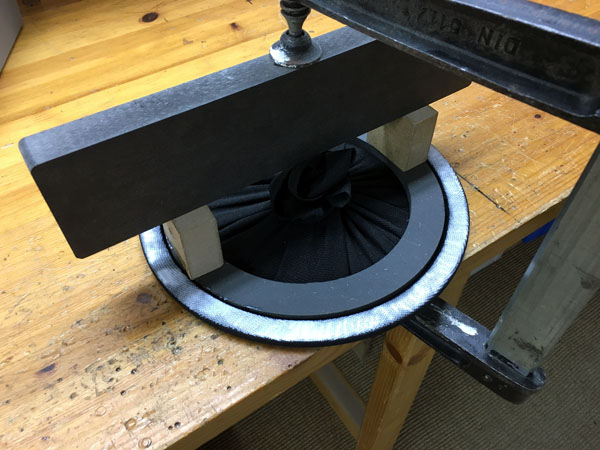
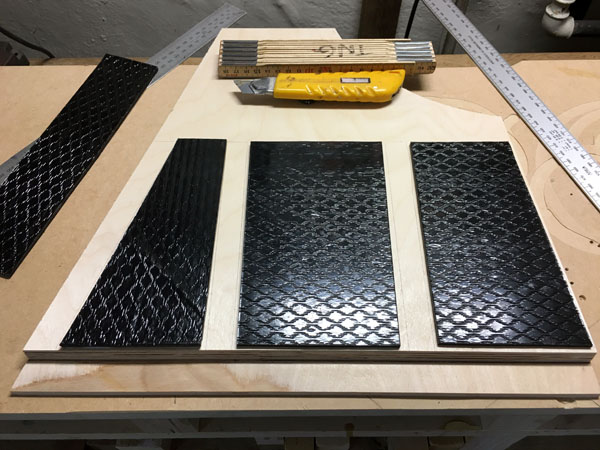
Above and below: Making the front grill for the 10" bass driver. The 10NW650 rebate left some 6-7 mm space for the front grill. I made two rings from 10 mm MDF, rounded the outer rim and made holes for 8 x 8 mm neodymium magnets holding on to speaker screws. The MDF rings have some 1.5 mm reduced radius compared to the rebate to make room for the fabric. As can be seen the rings fit into the rebate much like the Ellipticor cover rings, and you could use spray lacquer and leave it like this if you want to see the driver. Here I wanted a grill and made another ring some 3 mm reduced diameter of the inner circle, allowing me to pull the fabric in place and fasten it with a clamp. The rear side was added a generous layer of PVA glue and left for some hours to dry.
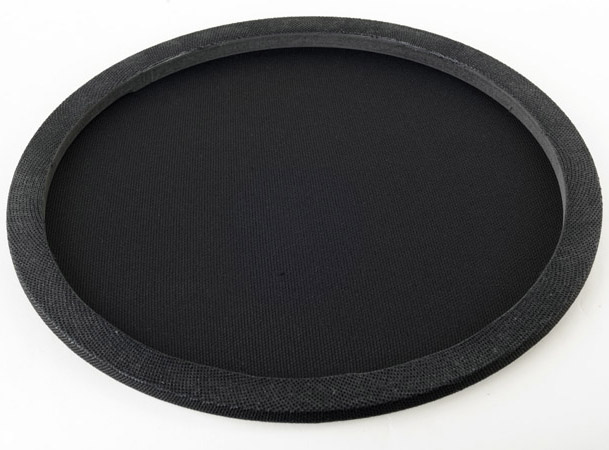
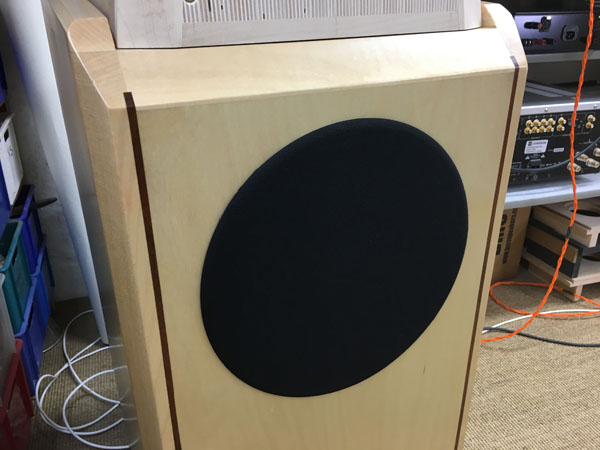
Finished grill in place.
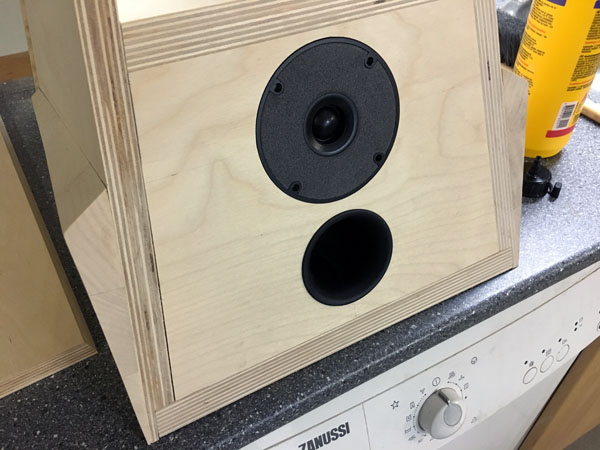
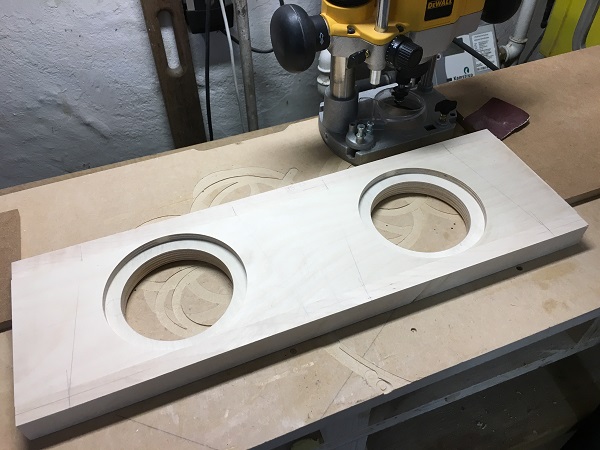
Routing for the 18WE drivers.
June 1018 by now, it's summer, it's unusually hot, World Cup in foodball
plus lots of outdoor activities, so woodwork is slow, but from time to
time, panels for the midrange cabinet are shaping up.
I want the mid-cab as sturdy as possible, hence double bracing.
Bracings done and time for
bitumen pads.
The bitumen pads are optional and must be added to your order.

I usually do not use screws for cabinets, but these pyramid mid-cabs are
an exception. Adding pressure to the structure usually squeezes out the
bottom panel - logically. Thus, six screws hold the bottom panel firm and
everything else can be added pressure during final gluing.

Adding the top brace is the icing of the cake! Finally ready for sanding
and lacquer.
All internal panels are damped with 8 mm felt material fastened with
the same glue I use for
bitumen pads.
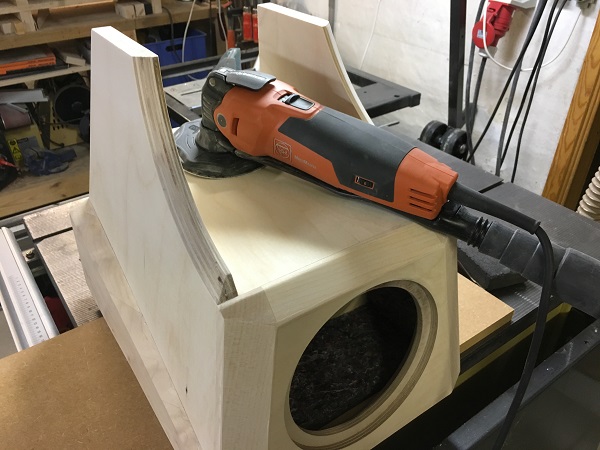
BTW: This Fein tool is a marvel. Sands and cuts in places we wouldn't
dream of.
To the right an experiment with a ScanSpeak D2010/8511 tweeter mounted
on the rear panel. I had a client asking
for a rear firing tweeter and I think it did something good. More
airiness, but we'll see once the construction is finished and I've made a
suitable crossover. I shortened the port to 80 mm to allow low
placement. Same stuffing, only a roll of 80 x 200 mm acoustilux.
After a couple of months experimenting with the rear tweeter on and off,
I'm not totally in favour of this tweeter. It ads some airiness to the
soundstage but also blurs the precision of the treble. Mostly I leave it
off. The crossover is simple, 2.2 uF and 0.1 mH to ground. Opposite
polarity to the front tweeter - although this is really hard to hear,
same polarity or opposite polarity. Try it out.
Time to start making the tweeter cabs. Gluing cabs all in one takes
quite a few clamps!
Please check
Illuminator-4 for pics on how I make the tweeter cabs. No need to
repeat all images here.
Left: Mid cabs 2nd coat of lacquer. Right: Speed-curing on a hot
summer's day.
Usually the
1st coat has to dry for 48 hours to allow sanding with grade 180
before the final 2nd coat.
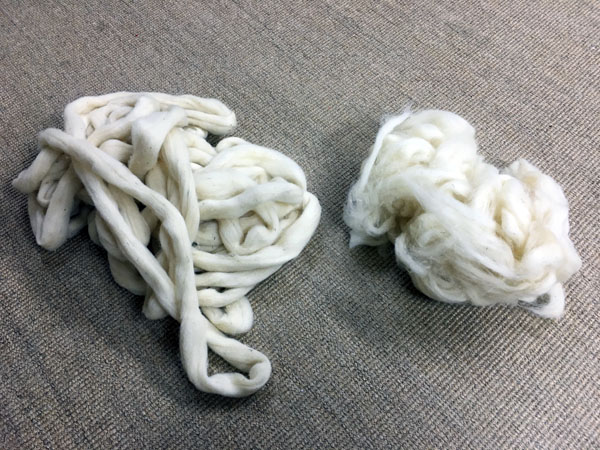
Rear section was filled with wool, around 4 meters of the material seen
to the left. You can use acoustilux as well.

Middle and front section added acoustilux. Rear firing tweeter ready for
mounting.
Rear panel finished - and 18WE driver mounted. The port stuffed with a
roll of 80 x 200 mm acoustilux.
A few comments on MEASUREMENTS before you
start interpreting all the readings below.
First of all, if we think measurements will
tell us how a speaker sounds, we're wrong. The perception of sound is
way too subjective to be reflected in any measurements we can perform. A
loudspeaker system is meant to give us a satisfying idea of an acoustic
event and for some people a pair of 5 USD ear-plugs are enough, others
spend 200 kUSD on a truly full-range pair of speakers - and the latter
may not be happier than the former.
Measurements may give us an idea of tonal balance of a system, i.e. too
much or too little energy in certain areas, although dispersion
characteristics play a vital role here. A two-way 7+1 and a three-way
7+4+1 may display similar horizontal dispersion, yet sound very
different. Measurements may tell us about bass extension if far-field
measurements are merged with near-field measurements. In addition to
this, ports may contribute to bass extension. Most of we diy'ers do not
have access to an anechoic room for full-range measurements from
20-20000 Hz.
What cannot be seen is what kind of bass performance we get in a given
room. Bass performance is highly dependent on in-room placement of your
speaker and the same speaker can be boomy in one place and lean in
another. Actual SPL level at 1 meter distance and 2.8V input is useful
for en estimate of system sensitivity and combined with the impedance
profile may give an idea of how powerful an amplifier is needed to drive
the speaker to adequate levels.
What measurements do not tell is the very sound of the speaker unless
displaying serious linear distortion. The level of transparency, the
ability to resolve micro-details, the "speed" of the bass, etc., cannot
be derived from these data. Distortion measurements rarely tell much
unless seriously bad, and most modern drivers display low distortion
within their specified operating range.
Many people put way too much into these graphs and my comments here are
only meant as warning against over-interpretation. There are more to
good sound than what can be extracted from a few graphs. Every graph
needs interpretation in terms of what it means sonically and how it
impacts our choice of mating drivers, cabinet and crossover design.
What measurements certainly do not tell is the sonic signature of the
speaker, because speaker cones made from polypropylene, aluminum,
Kevlar, paper, glass fiber, carbon fiber, magnesium, ceramics or even
diamonds all have their way of adding spices to the stew. Nor do
measurements tell what impact the quality of the crossover components
add to the sound, from state of the art components to the cheapest of
coils and caps, they all measure the same if values are correct, yet
sound very different.
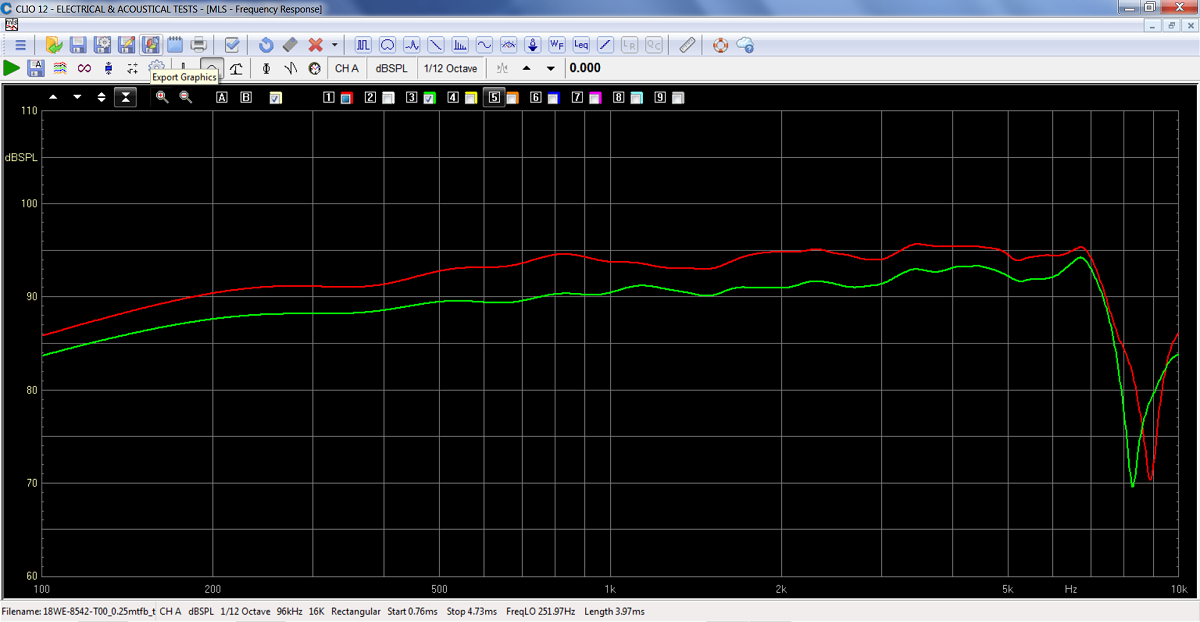
Above the frequency response of the 4 Ohm and
8 Ohm versions of the 18WE driver. No crossover attached.
Green = 8 Ohm version. Honestly, it does not get better than this!
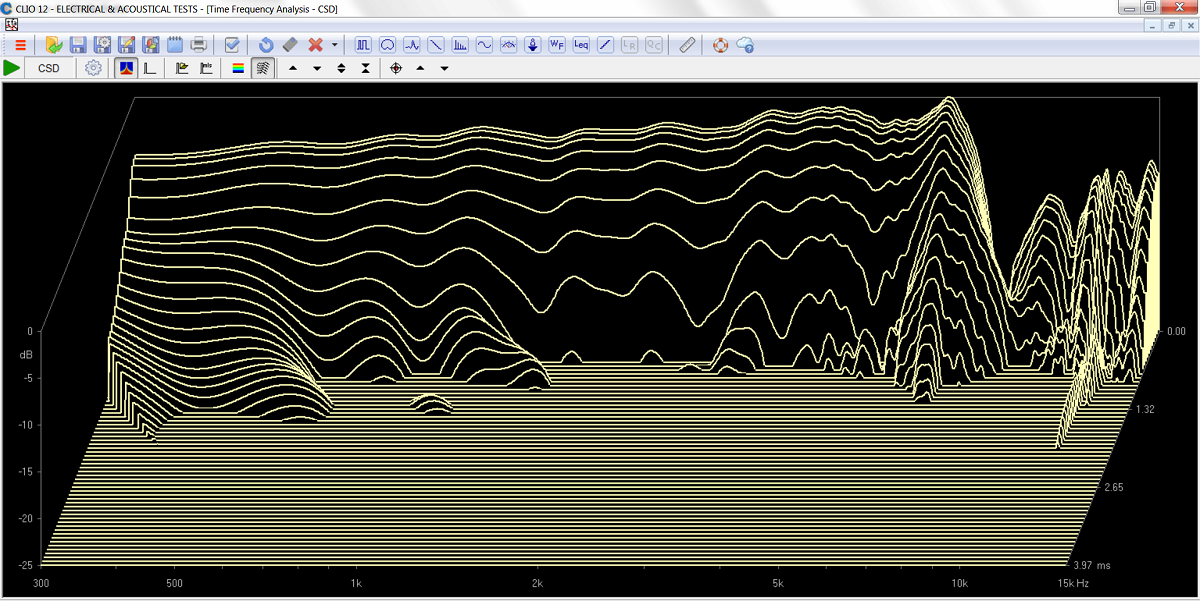
Above the 18WE waterfall plot.
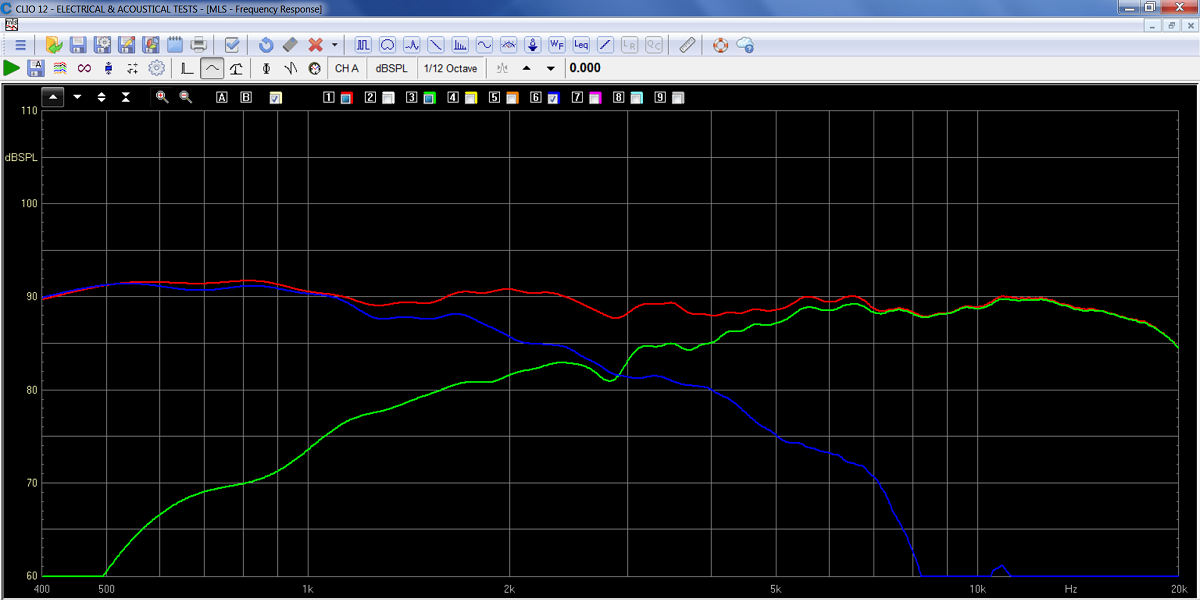
SPL of midrange and tweeter. Looks like a 1st order filter, but it
actually is a 2nd order LR.
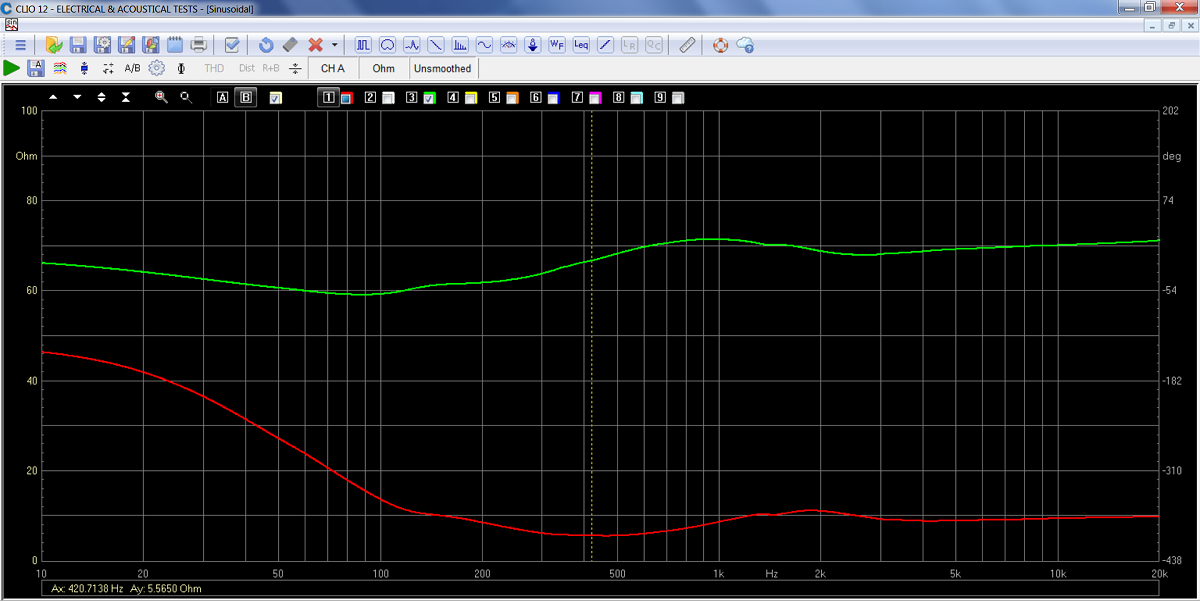
Impedance (red) of mid-tweeter section. Minimum 5.6 Ohm @ 420 Hz. Green
= electrical phase.

The bitumen pads are optional and
must be added to your order.
18 Sound and BMS drivers available from LEAN,
UK. Very reliable source.
http://www.lean-business.co.uk/eshop/bms-12n630-12-600-watt-neodymium-speaker-8-ohm-p-2566.html
http://www.lean-business.co.uk/eshop/18-sound-10nw650-300-watt-8ohm-10-lf-neodymium-loudspeaker-p-2112.html
All kit and component prices may be subject to change and are always to be confirmed by Jantzen Audio Denmark.
Download Kit
Sale Presentations:

All technical questions to troels.gravesen@hotmail.com
All questions regarding purchase of kits, please mail Jantzen Audio at contact@jantzen-audio.com
CROSSOVER-LAYOUT
BACK TO INDEX
Check this out before start making crossovers:
http://www.troelsgravesen.dk/tips.htm#CONSTRUCTION_OF_CROSSOVERS
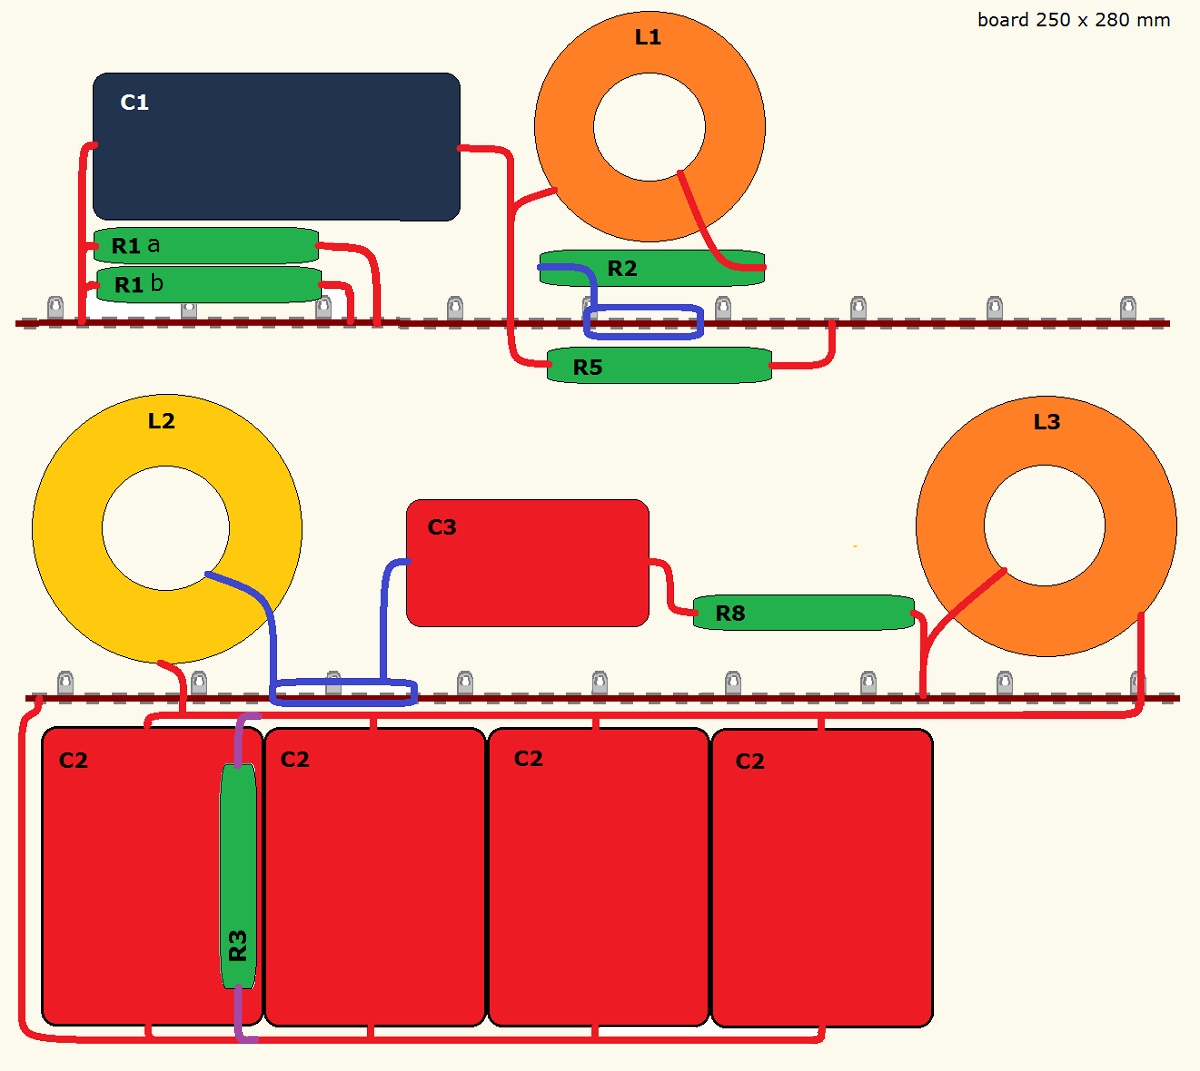
Click image to view large
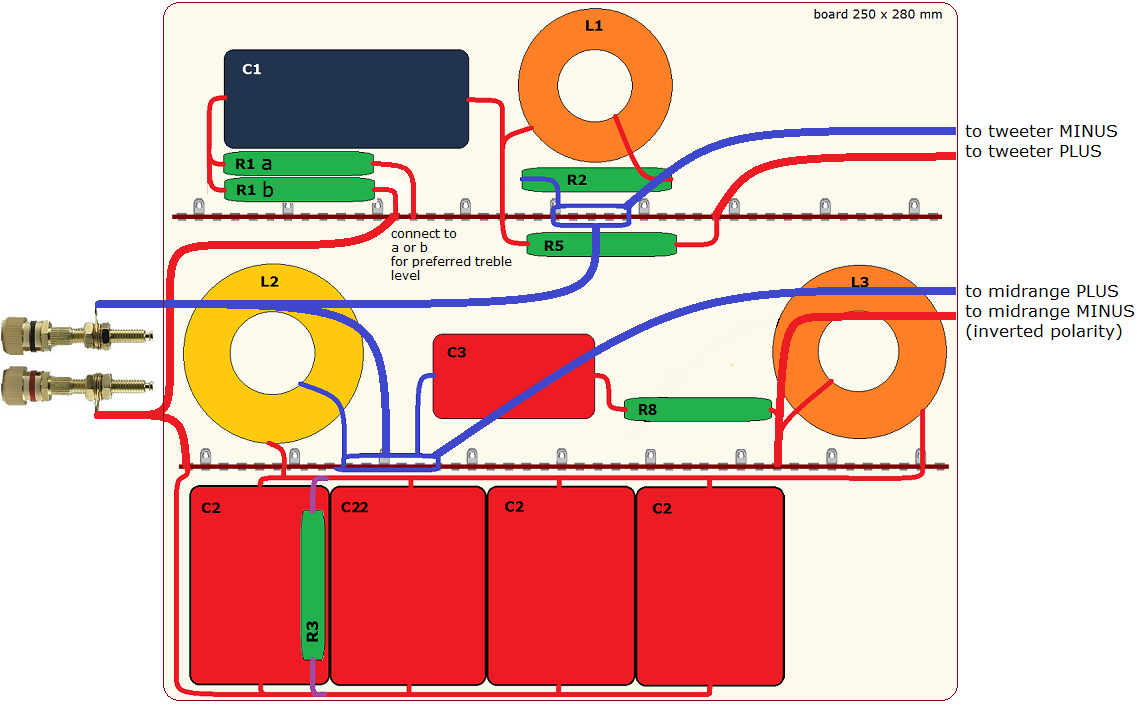
SPEAKER WIRING

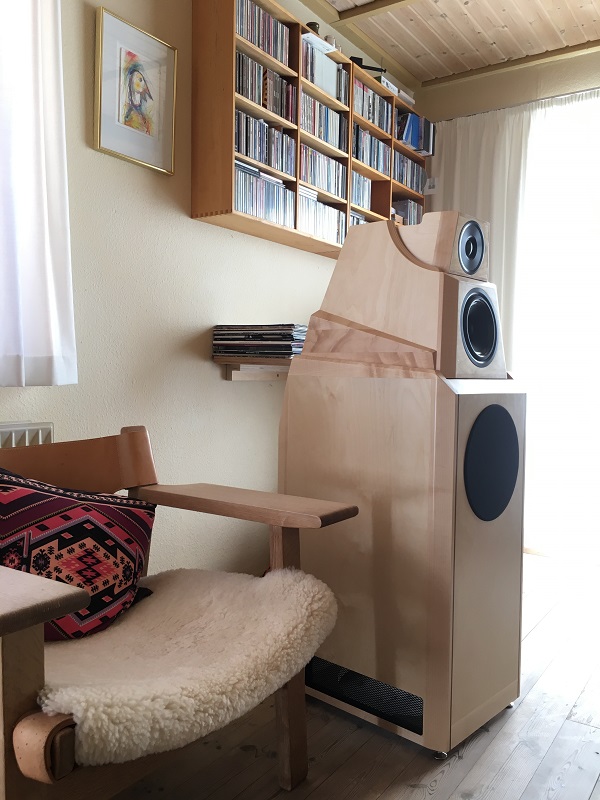
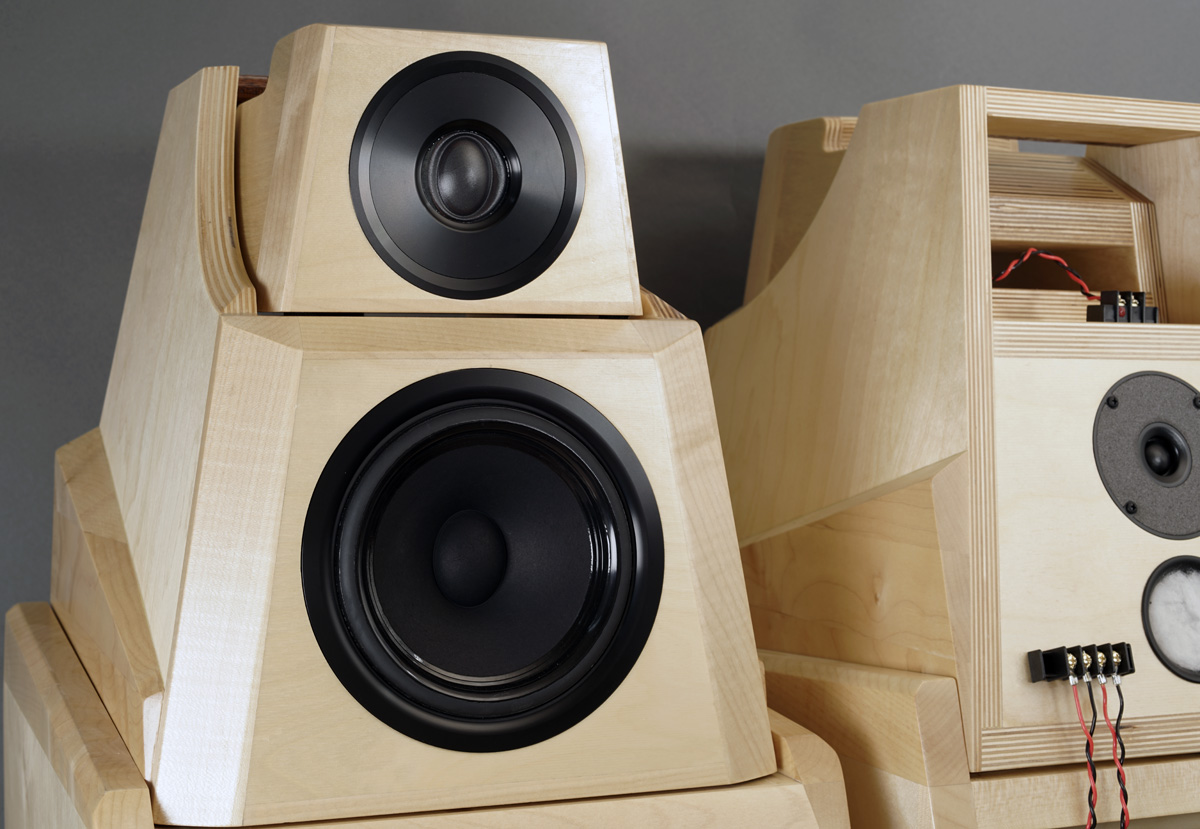
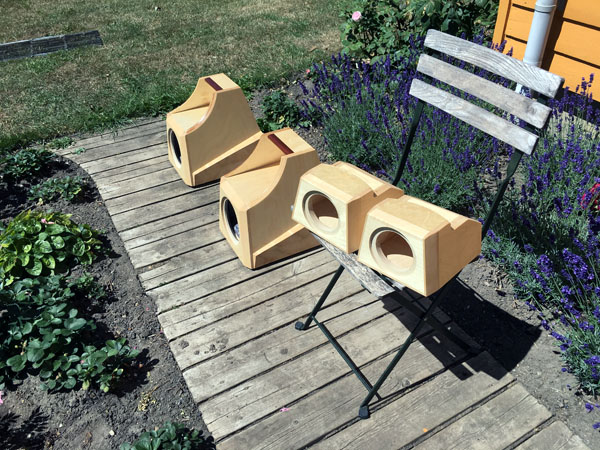
Living room set-up in strong afternoon backlight.